Page 3 of 10 FirstFirst 12345678 ... LastLast
Results 21 to 30 of 96

Thread: Battlestar Galactica Mod

  1. #21
    Modding the World, One Case at a Time Boddaker's Avatar
    Join Date
    Jun 2005
    Location
    Northern CA
    Posts
    818

    Default Re: Battlestar Galactica Mod

    Thanks guys! An entire ship would take way too much time. Time that could be better spent modding! :p

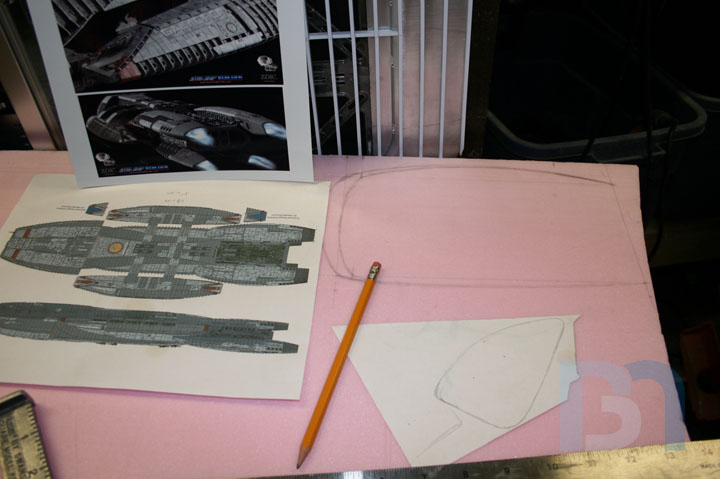
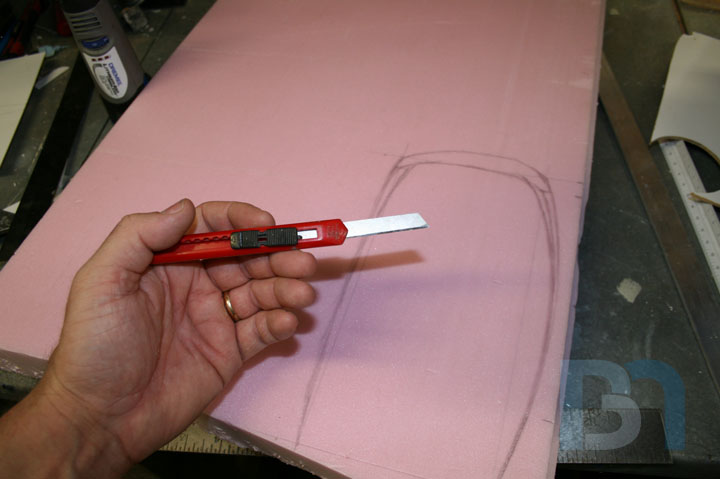
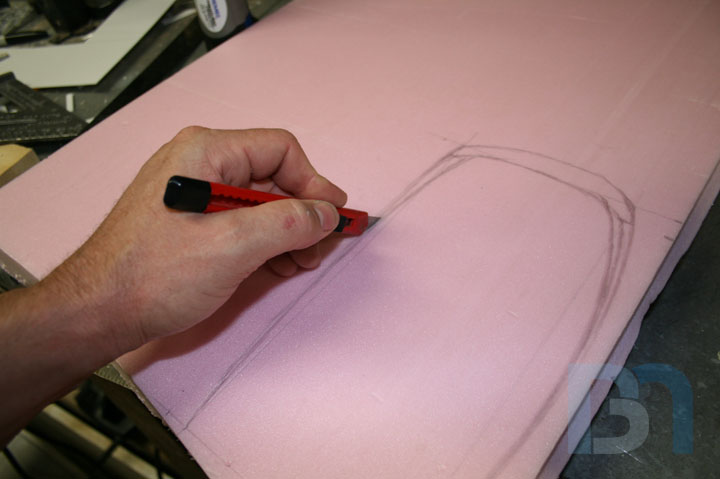
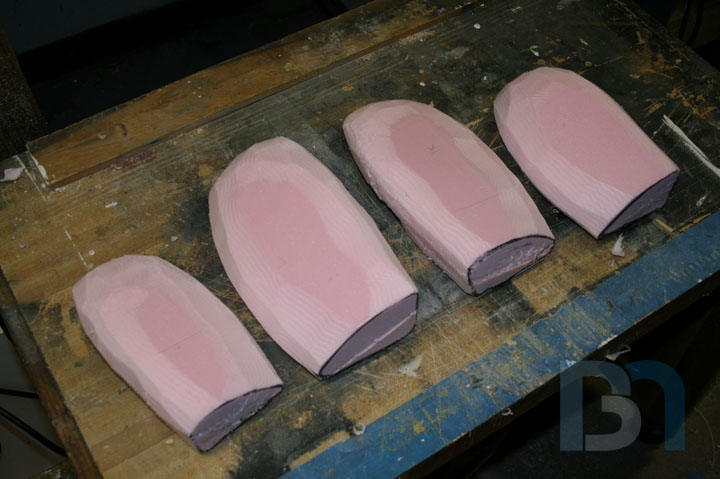
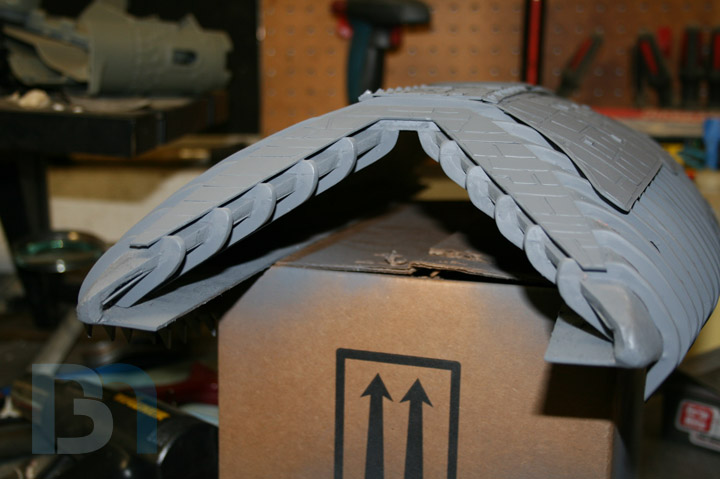
    Yes, the majority of this log so far has been "mere" model making. But I have a lot of things planned for the rest of the case that I cannot wait to get to.

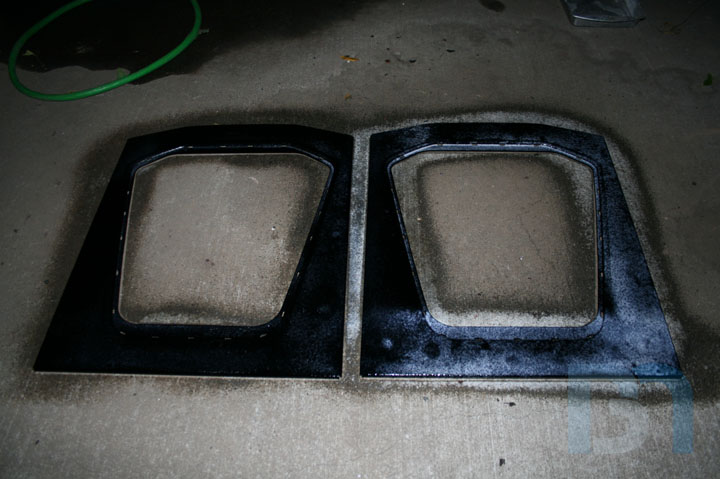
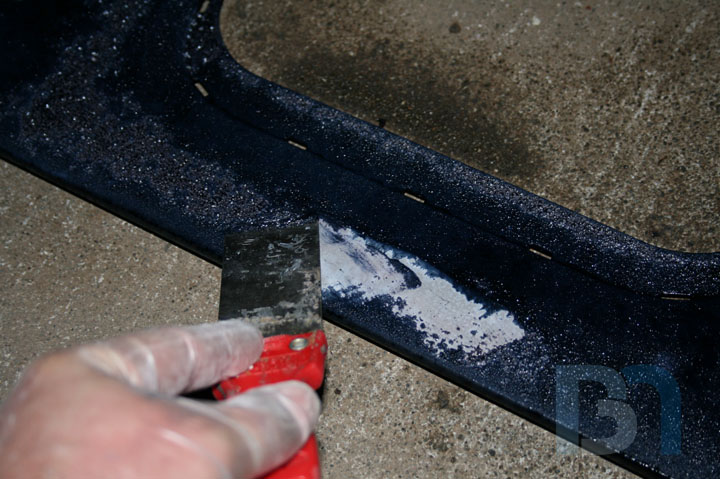
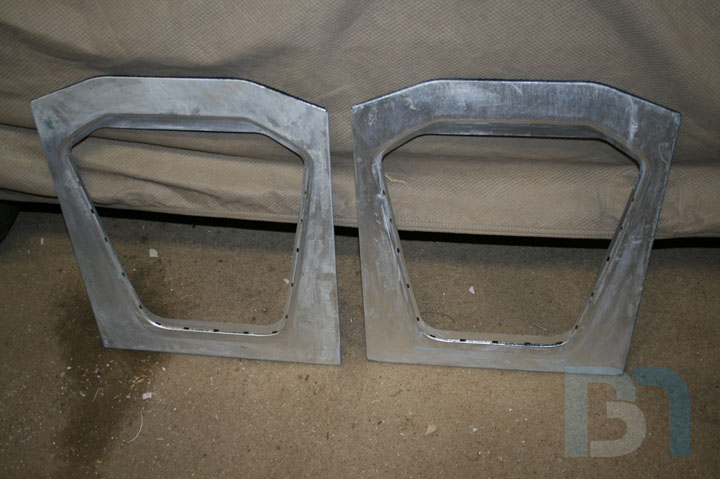
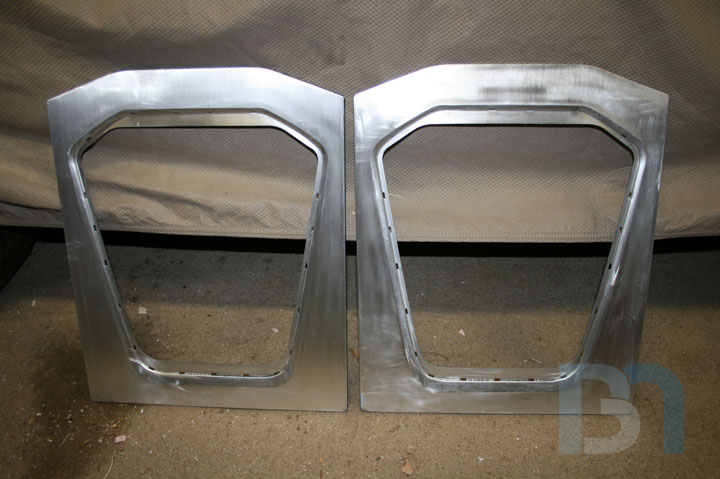
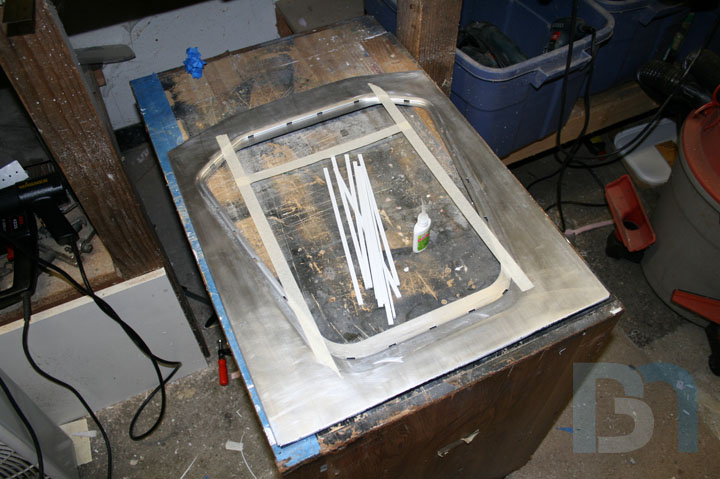
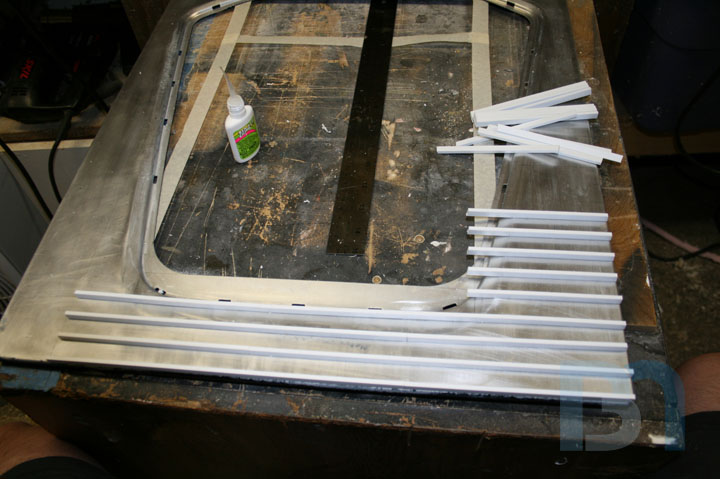
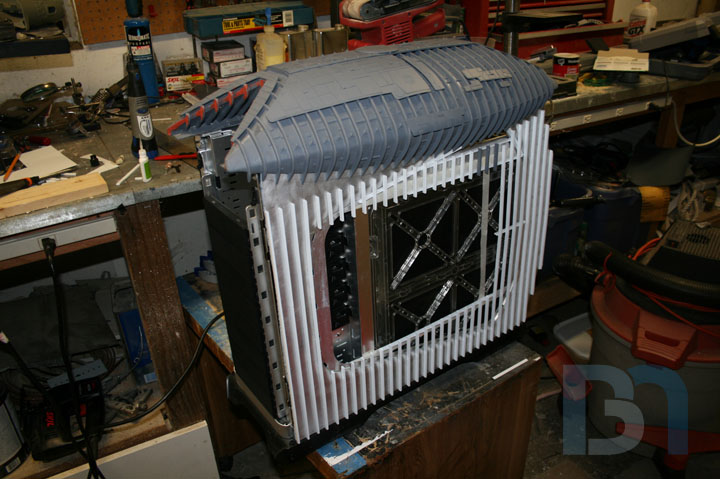
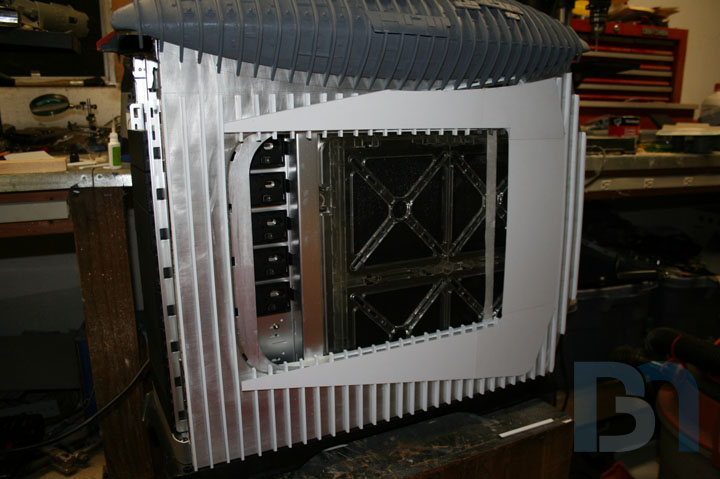
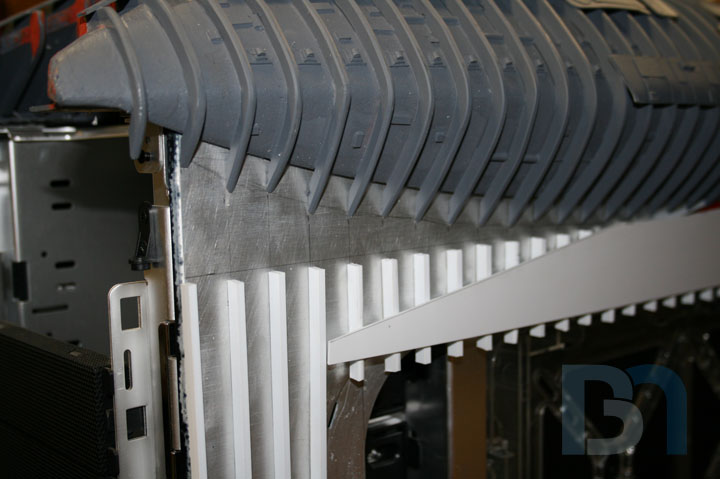
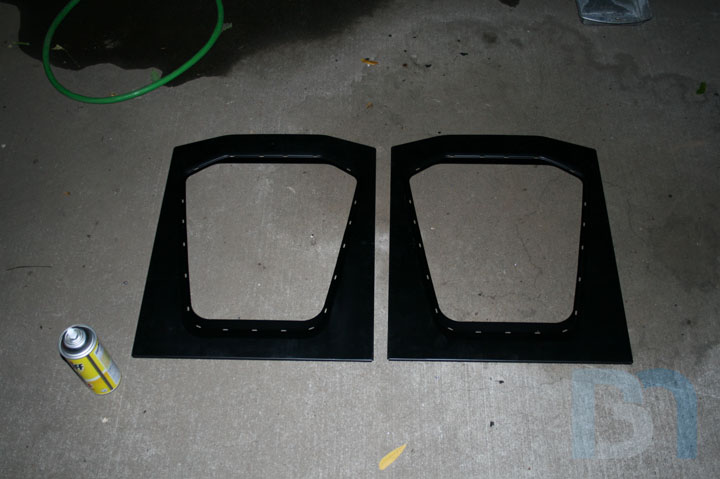
    btw, is there a good (and safe) way to remove anodizing from aluminum panels? I plan on gluing more ribs to the side panels and then painting them, and the glue doesn't stick well to the coated surface. I have heard that oven cleaner works, but I haven't tried it.
    Honey Roasted Peanuts Ingredients: Salt; Artificial honey roasting agents; Pressed peanut sweepings.

  2. #22
    Modding the World, One Case at a Time Boddaker's Avatar
    Join Date
    Jun 2005
    Location
    Northern CA
    Posts
    818

    Default Re: Battlestar Galactica Mod

    Working on the ends now, and into the interior of the landing bay. I am attempting to continue
    the ribs around the edge of the opening and down the inner panel, as seen here in this reference pic.


    I start by cutting the triangular panels to shape and gluing them in.


    Then I can perform additional gratuitous styrene stick heat manipulation.


    Since I need to perform the same manipulation on a number of unsuspecting styrene sticks,
    I decided to make a quick jig. I traced the first stick's profile onto a piece of wood.


    Routed it out,


    Checked for fit,


    Then routed some more so a straight stick could be set in place.


    Voila! Instant SSHM Jig, where the bend is the same each time.


    Now it's just a matter of measuring and marking for the position of each bend.


    This is why I left the cross beams in place before. I wasn't sure where to cut them.


    Now that I have these pieces in place, I can lop them off.


    Rounded off and sanded down.


    After a small application of bondo at the seams, I did some sanding and a quick shot of primer to see where I'm at.


    Looks like there's a bit more work to be done here before the joints are no longer visible. Then its on to the other end!

    Honey Roasted Peanuts Ingredients: Salt; Artificial honey roasting agents; Pressed peanut sweepings.

  3. #23
    Modding the World, One Case at a Time Boddaker's Avatar
    Join Date
    Jun 2005
    Location
    Northern CA
    Posts
    818

    Default Re: Battlestar Galactica Mod

    Well, I didn't get as much done on BSG as I had planned over the weekend (hanging kitchen cabinets apparently takes a long time!), but I did finally get to move on to other parts of the case!
    I pretty much finished up the landing bay, and set that aside to work on some other things, like the side panels. I tried the oven cleaner trick to remove the anodizing, and it worked flawlessly! I have pics, and will post them up later this evening.

    I also did some preliminary work on the front panel as well, but there's really nothing to show there, just measuring and planning.
    Honey Roasted Peanuts Ingredients: Salt; Artificial honey roasting agents; Pressed peanut sweepings.

  4. #24
    Modding the World, One Case at a Time Boddaker's Avatar
    Join Date
    Jun 2005
    Location
    Northern CA
    Posts
    818

    Default Re: Battlestar Galactica Mod

    Thanks Remy! I'm flattered to hear that. Maybe the mods agree? lol

    Anyway:
    Woohoo! Starting a different part of the case!!
    The next part of the case that will get the ol' rib/armor treatment is the side panels.
    Not nearly as painstaking as the landing bay was, thanks to the panels being nice and flat,
    and that vast expanse of beautiful nothingness right in the middle! lol

    Anyhoo, after asking around about what the best way to remove anodizing from aluminum,
    I ended up with basically two answers: Oven cleaner, and basic sanding. So I figured I would
    test the former, and if it didn't work out, I would settle for the latter.

    So here are the panels ready to be stripped.


    After a quick spray, the oven cleaner immediately starts bubbling and fuming.
    (Good thing I was wearing gloves, a face mask and was outside. )


    I had read that when using oven cleaner, to let it sit at least 45 minutes before the
    anodize begins to fall off. In my case, just 15 minutes was enough to do the job!
    My guess is that the 45 minutes refers to pieces that are "hard Anodized", which penetrates
    deeper into the aluminum and thusly takes longer to remove. The anodizing on the
    Stacker is apparently really light and doesn't take much coercing before coming off.


    Here are the panels after a thorough rinsing.


    And here are the panels after a light sanding to remove any missed spots.


    Now that I have a nice and clean aluminum panel to work with, I can lay out my armor and
    start cutting! This armor shape delineates the rectangular window in the middle, with the
    peripheral areas of the panel getting more ribbing (nooooooo!)


    The use of the oven cleaner saved me hours of sanding, and I will apply this method of removal
    to the other parts of the case as well.

    Honey Roasted Peanuts Ingredients: Salt; Artificial honey roasting agents; Pressed peanut sweepings.

  5. #25
    Modding the World, One Case at a Time Boddaker's Avatar
    Join Date
    Jun 2005
    Location
    Northern CA
    Posts
    818

    Default Re: Battlestar Galactica Mod

    Quote Originally Posted by The boy 4rm oz View Post
    They look so cool like that, will you paint them or leave them as they are. They would look cool if you left em.
    The side panels will be painted due to all the styrene ribbing and armor that will be applied. Though it seems kinda silly to have a nice bare aluminum panel and then paint it with metallic aluminum paint! lol
    Honey Roasted Peanuts Ingredients: Salt; Artificial honey roasting agents; Pressed peanut sweepings.

  6. #26
    Modding the World, One Case at a Time Boddaker's Avatar
    Join Date
    Jun 2005
    Location
    Northern CA
    Posts
    818

    Default Re: Battlestar Galactica Mod

    Quote Originally Posted by TheGreatSatan View Post
    I agree! +Rep from me too! Nice website too.
    Thx TGS!

    (Drew gets what's left of that thanks since he was lazy and just copied him. :p )

    Ok progress!

    More ribbing done. Compared to the landing bay, this was a breeze! Just a few measurements,
    and some logistics to work out and I was cuttin' and gluin'!

    I used some masking tape to give myself some guidelines, and line out the window area.


    Working my way across the bottom.


    The top needed some extra thought, and how it would meet up with the landing bay.
    So a quick test fit was in order.


    More test fitting.


    Yet more test fitting, this time with the armor panel. You can see I had to cut a bit away at the back.
    I will add another armor piece to the landing bay to match it.


    A close up of the top front. I kept this area clean of ribbing because in order to remove the panel,
    it will slide back and out from under the landing bay. So any ribbing would be in the way here.
    Rather than hide this area, I'm going to do some creative detailing to make it look like a well-used
    portion of the ship. Wear marks, scrapes and the like will enhance the overall look and feel.


    Moving right along now! I just might get the side panels taken care of over the weekend. That would be nice.
    Honey Roasted Peanuts Ingredients: Salt; Artificial honey roasting agents; Pressed peanut sweepings.

  7. #27
    Modding the World, One Case at a Time Boddaker's Avatar
    Join Date
    Jun 2005
    Location
    Northern CA
    Posts
    818

    Default Re: Battlestar Galactica Mod

    made some decent progress on the engine pods.

    Studying the ref pics and figuring where the pods would go on the case, I determined the size & shape,
    and drew the outline onto the foam.


    This foam is 1 1/2" thick. I use this long-bladed knife to cut through it.


    Making several cuts, my last pass is utilizing the whole blade.


    The large pods at the back are 2 1/2" wide, so I have to double up on the foam to get that thickness.


    Here's roughly where they will go.


    Had to make four total. Two being mirror images of the other two.


    Now its time to carve the foam to the correct curvy shape. I drew the shape of the nozzle
    onto the end to give me a starting point.


    Here are all four pods after the first round of carving.


    And here they are after round 2, using the orbital sander to smooth them out.


    I glued the pods temporarily to a 2x4 so I could easily maneuver around them while I spread the plasti-paste.
    Got the first one covered. Here you can see the stuff is already setting up. Can't do more than one at a time,
    but I didn't have enough mixed up to do more than one anyway. ;-)


    Thats where I'm at so far. I will try to get back in there later tonight and do the remaining 3. Once I get them all sanded down smooth, I can demold and fit them to the case.

    Honey Roasted Peanuts Ingredients: Salt; Artificial honey roasting agents; Pressed peanut sweepings.

  8. #28
    Modding the World, One Case at a Time Boddaker's Avatar
    Join Date
    Jun 2005
    Location
    Northern CA
    Posts
    818

    Default Re: Battlestar Galactica Mod

    Quote Originally Posted by Remy View Post
    Once again, with the faom and plasti-paste. You make it look SO easy. Where do you get the foam amd the paste, and what's the cost of that stuff? Great work.

    Remy
    hehe I bought a gallon of the stuff from Smooth-on.com and I need to use it or else it will expire. It's $50, but you can get a trial size for like $35 or something.

    The foam is your basic sheet of Owens Corning insulation foam from Lowes.
    Honey Roasted Peanuts Ingredients: Salt; Artificial honey roasting agents; Pressed peanut sweepings.

  9. #29
    Modding the World, One Case at a Time Boddaker's Avatar
    Join Date
    Jun 2005
    Location
    Northern CA
    Posts
    818

    Default Re: Battlestar Galactica Mod

    it's been a long week of sanding, filling, sanding, and more sanding, but I think all that effort
    was worth it. have a look!

    Here's a shot of the last pod getting coated with the resin.


    big jump in the timeline here, this is after many hours of sanding, bondo filling, and more sanding.


    A close up of one of the larger pods. You can see the sanding scratches the 80grit sandpaper left.
    I used 80grit to get the basic smooth shape down, then i went back over everything with the orbital
    sander and 120grit to sand out those scratches.


    Close up of the back end. Here you can see the thickness of the plastic. There are some thin areas,
    but for the most part I got a pretty consistent layer all around. I will beef up any thin areas with
    bondo from the inside.


    Cut off the 2x4, and foam removed.


    Close up of the back end.


    Close up of the under side.


    And of course I had to throw them on the case to see how they fit, after hitting them with some primer.


    I still gotta clean them up around the edges, and notch them so they fit better around the back
    of the side panels. Then they will sit better and not stick out so far out the back.

    Honey Roasted Peanuts Ingredients: Salt; Artificial honey roasting agents; Pressed peanut sweepings.

  10. #30
    Modding the World, One Case at a Time Boddaker's Avatar
    Join Date
    Jun 2005
    Location
    Northern CA
    Posts
    818

    Default Re: Battlestar Galactica Mod

    This last week was a hectic one for me, so I didn't get as much done as I had hoped. But I at least got the pods fitted to the case better.
    Here are a few shots:


    You can see the cardboard template I made at the bottom of the last shot for notching the pods so they fit over the back of the side panels.
    The right side was a bitch because I had to work around all the ribs. Thankfully, I hadn't gotten all the ribs on the left panel yet, so
    those pods went on much easier.

    Doesn't seem like much, but hey- some progress is better than no progress right? If all goes better this week,
    I may be able to button up the side panels by the weekend.

    Honey Roasted Peanuts Ingredients: Salt; Artificial honey roasting agents; Pressed peanut sweepings.

Posting Permissions

  • You may not post new threads
  • You may not post replies
  • You may not post attachments
  • You may not edit your posts
  •