Page 5 of 10 FirstFirst 12345678910 LastLast
Results 41 to 50 of 96

Thread: Battlestar Galactica Mod

  1. #41
    Modding the World, One Case at a Time Boddaker's Avatar
    Join Date
    Jun 2005
    Location
    Northern CA
    Posts
    818

    Default Re: Battlestar Galactica Mod

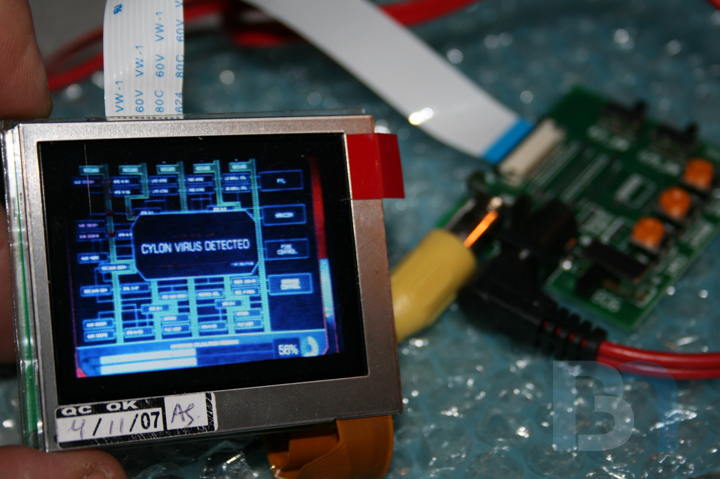
    I have a 22" 3d monitor from iZ3D as my main monitor. The 17" on the side will be dedicated solely to playing BSG episodes, and the front three 2.5" screens will be the data graphical displays. Now for video cards, I will be running 3 cards: two eVGA 8800GTS cards and one e-Geforce 6200 PCI card. The two 8800's will run the main 22" monitor, and the 6200 will run the rest (17" via DVI, 2.5" via s-video split to three composite outputs).
    Honey Roasted Peanuts Ingredients: Salt; Artificial honey roasting agents; Pressed peanut sweepings.

  2. #42
    Modding the World, One Case at a Time Boddaker's Avatar
    Join Date
    Jun 2005
    Location
    Northern CA
    Posts
    818

    Default Re: Battlestar Galactica Mod

    Haha that would be cool, I'll have to look into that.

    So I found a screen shot of the video display cluster on the Galactica's bridge:


    That got me itchin to see what these little screens can do. So I hooked up my eVGA Geforce 6200 pci card to make
    sure i could get a signal out to the lcd's. Here's a test shot:


    I will be making up a fully animated graphic sequence that will mimick the actual effects on the show.
    Should come out looking pretty accurate.
    Honey Roasted Peanuts Ingredients: Salt; Artificial honey roasting agents; Pressed peanut sweepings.

  3. #43
    Modding the World, One Case at a Time Boddaker's Avatar
    Join Date
    Jun 2005
    Location
    Northern CA
    Posts
    818

    Default Re: Battlestar Galactica Mod

    Thanks floriske.nl and everyone!

    HOLY CRAP AN UPDATE!!
    It's been over a week since I've been able to get any significant work done on this thing. What with halloween and kid stuff, and waiting on parts, there hasn't really been anything to post about.

    But tonight I got the three 2.5" LCD's mounted on the case, along with their controller boards.
    To hold the controllers, I made this 3-tiered styrene base that will mount behind the screens.
    This is so the power and composite cables will clear the board next to it.


    Here they are mounted to the base.


    After doing a test fit on the front panel, I had to make a little adjustment to the third tier so it would fit.
    I drilled and tapped holes in the screen's mounting base, then drilled through the controller base
    and the front panel frame and screwed it all together from the back.


    with the controllers in place...


    ... and with the front panel back on the case, and LCD screens in.


    View from the inside.


    I will make some top caps to cover up the opening, and the gold ribbon cable. The white ribbon cable
    will be disguised as conduit or something more appropriate.

    I hope to get the two dummy screens made up this weekend, and then maybe I can start work on the lower BSG insignia.
    Honey Roasted Peanuts Ingredients: Salt; Artificial honey roasting agents; Pressed peanut sweepings.

  4. #44
    Modding the World, One Case at a Time Boddaker's Avatar
    Join Date
    Jun 2005
    Location
    Northern CA
    Posts
    818

    Default Re: Battlestar Galactica Mod

    Ok, so I didn't get anything posted until now. But here's what I got accomplished over the past week. More LCD screen goodness! Check it out:

    Started on the small dummy screens that will go underneath the three live ones. I cut some pieces
    from some 1/4" scrap I had, roughed them up a bit, and glued them together.


    Then I proceeded to make the styrene bezels. Cut the faceplate, and glued the sides on.


    Then I glued the "screens" in, and drilled the hole for the led.


    I skinned the back with more styrene, giving it that LCD panel look.


    Next came the arduous task of figuring out how the mounting bracket would go. I must have gone
    through at least 3 iterations before settling on a design I was happy with. I ended up making two pieces.
    One flat aluminum bar to connect both screens...


    ...And one vertical piece cut from C channel to mount to the rest of the LCD bracketry.


    I decided to forego the use of any screws to secure the screens to the brackets, opting to just use some styrene rod.


    After cutting the rod to fit the profile of the screens, I glued them down, holding the bracket in place.


    After some filling and sanding, here's what I got: Back side...


    ...And front side. All masked and ready for primer.


    The whole LCD cluster primed.


    I thought I had some flat black paint somewhere, but I couldn't find any. So I will have to pick some up tomorrow.
    Doesn't seem like much for a week's worth of work! Then again, my weeks have been so hectic,
    my modding time has been pretty much nil. So I am thankful I got this much done.
    Honey Roasted Peanuts Ingredients: Salt; Artificial honey roasting agents; Pressed peanut sweepings.

  5. #45
    Modding the World, One Case at a Time Boddaker's Avatar
    Join Date
    Jun 2005
    Location
    Northern CA
    Posts
    818

    Default Re: Battlestar Galactica Mod

    OPTICAL DRIVE

    I got a chance to actually do some modding over the holiday weekend.
    After getting the LCD cluster roughed in, I started on the optical drive portion of the front panel.
    I will be using a slot-loading dvd drive, mounted vertically behind the BSG logo insignia. Once finished,
    you will be able to see the disc turning through the insignia.

    So to start, I removed the top cover of the drive.


    Here's a shot of a disc inserted half way.


    Taking the top cover out to the garage, I used a CD as a template and scored a line around it to mark my cut.


    ..and proceeded to cut out the window.


    I also had to cut out the center and save it because it plays a role in disc alignment.
    The blue is a piece of plexi I cut to size and taped up. It will be glued to the top of the windowed cover.


    Setting that aside, I started making the mounting brackets.


    Here I am using a spare drive for positioning the brackets onto the front panel frame.
    Wouldn't want to get any rogue metal shavings in the windowed drive's mechanisms.


    After marking the optimum position, I drilled the holes and secured the brackets with pop rivets.


    The drive in place.


    The base for the insignia over the drive. It's just sitting on there for now.


    Here's the rest of the insignia. Thanks to Brian at Moddersmart for getting all these pieces laser
    etched and cut for me. 
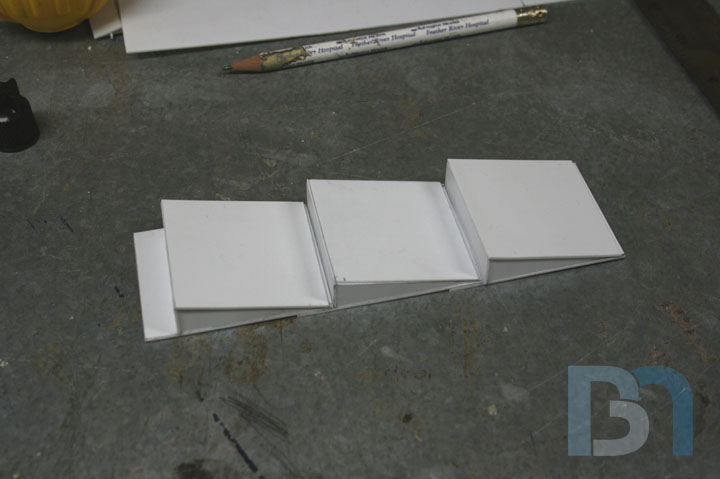
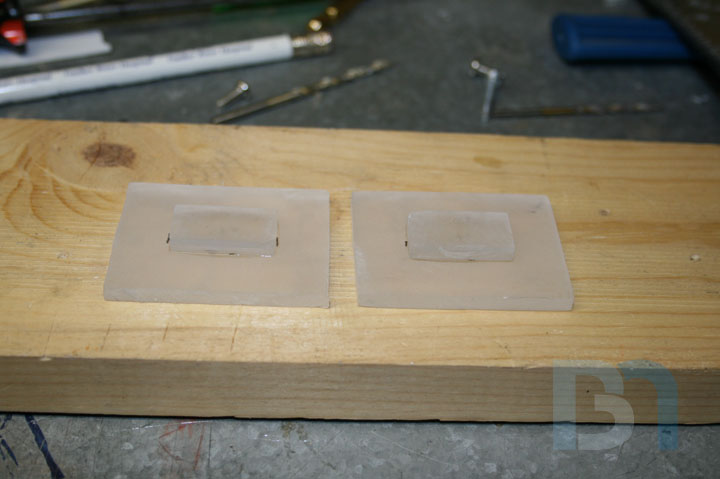
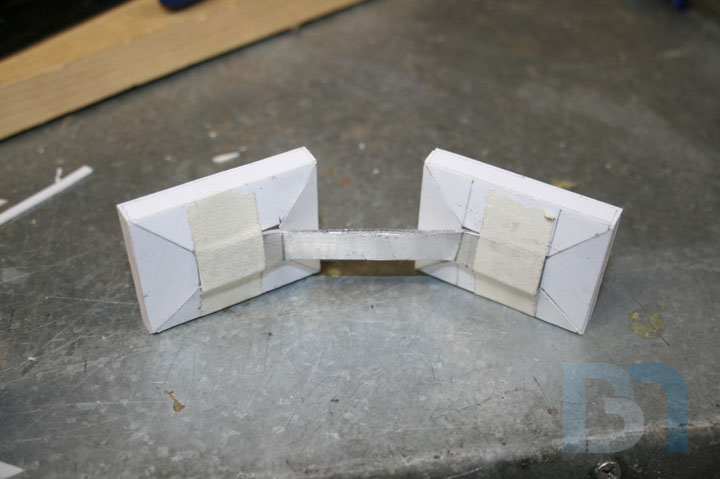
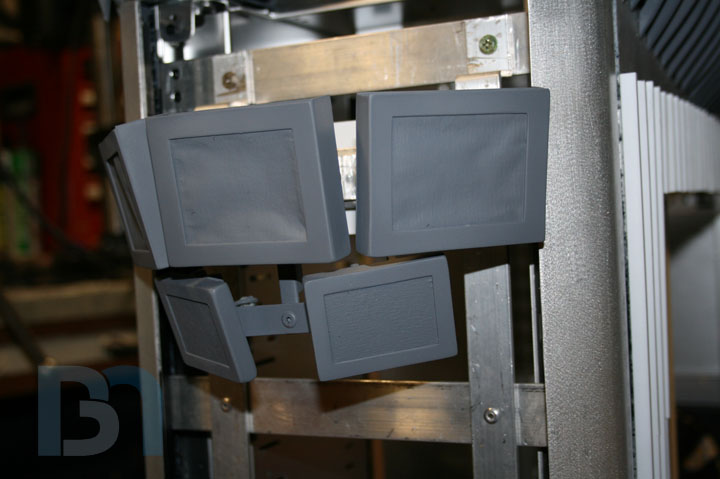
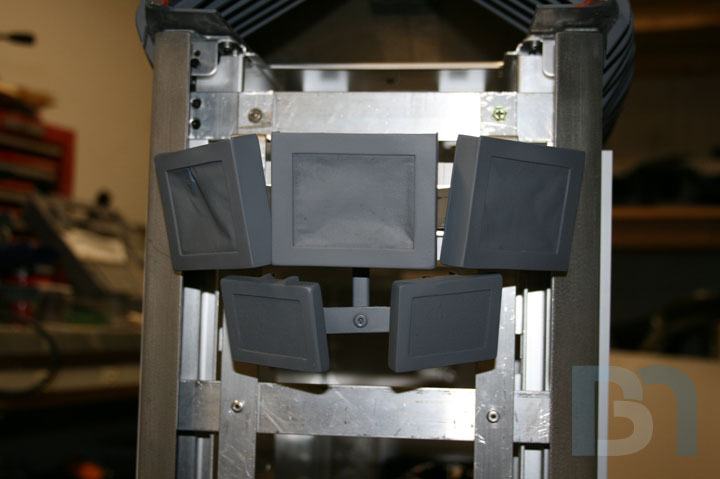
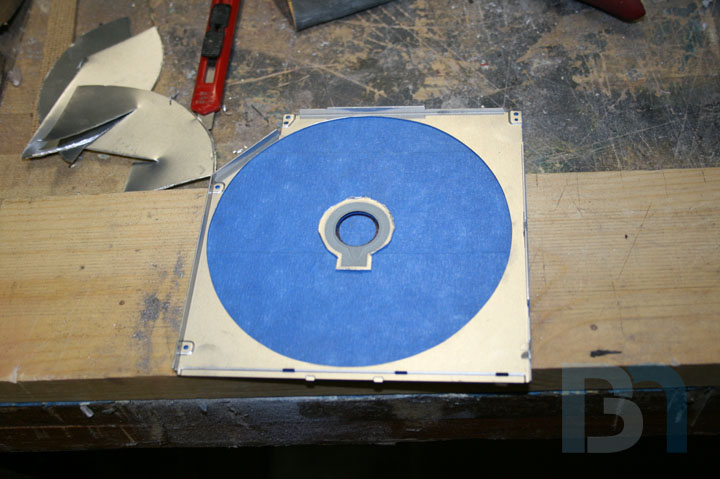
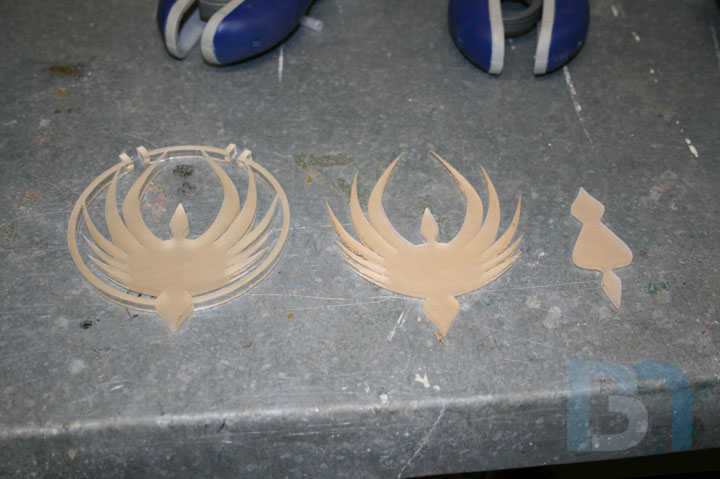
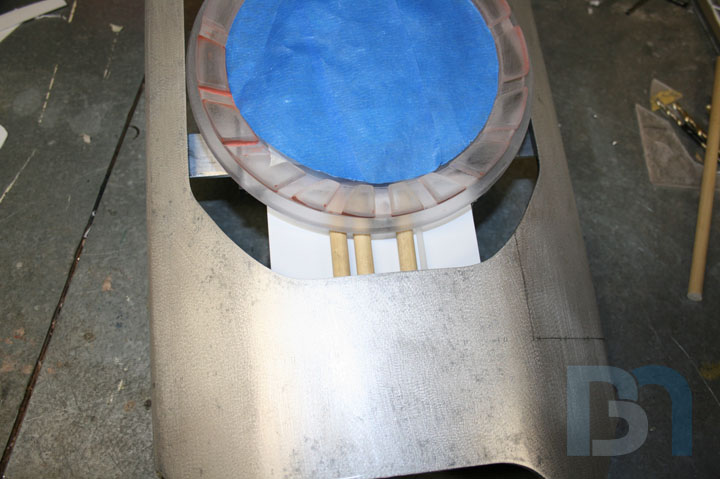
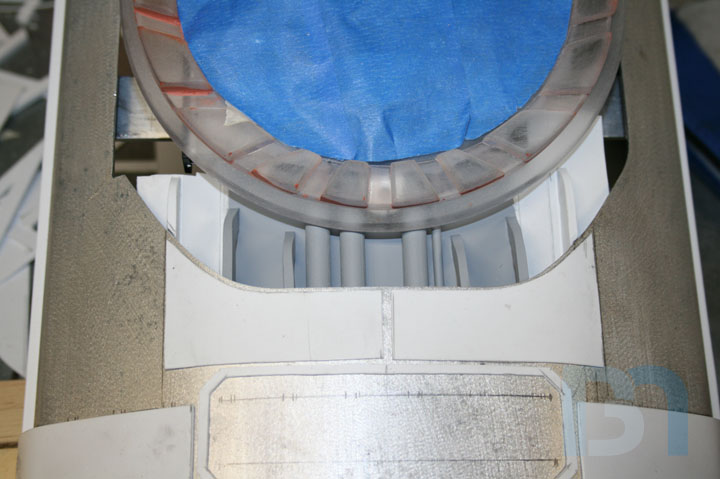
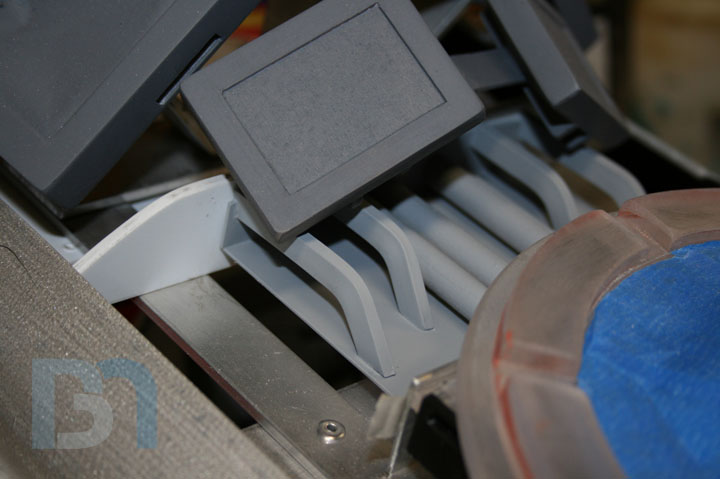
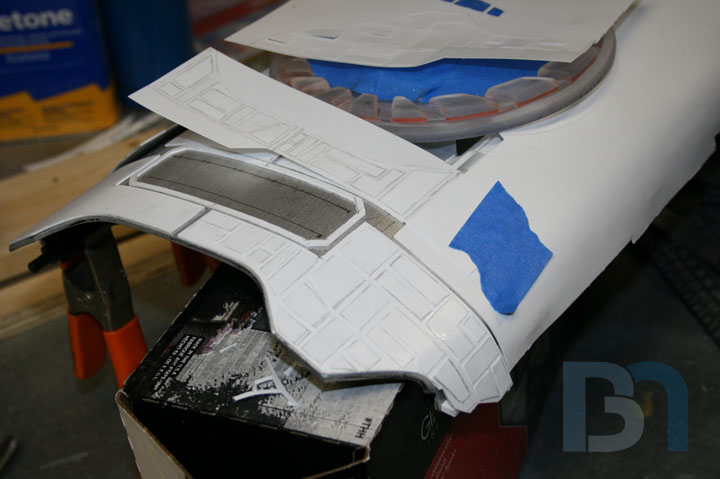
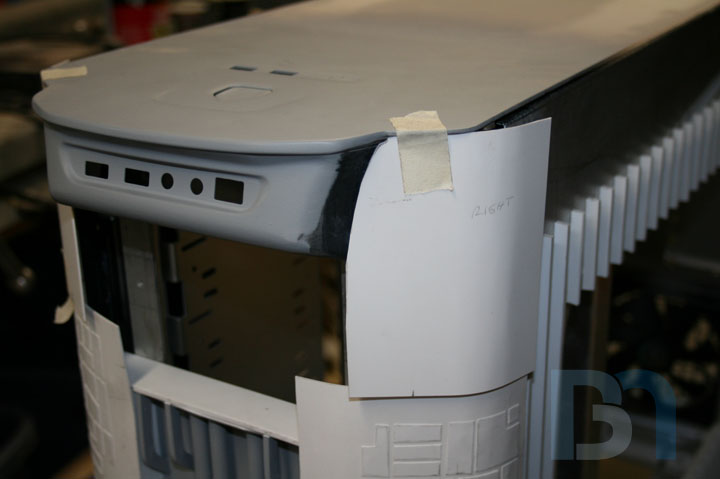
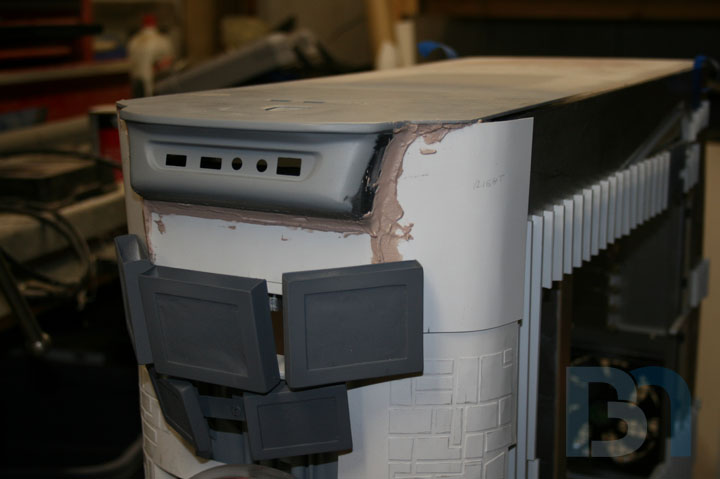
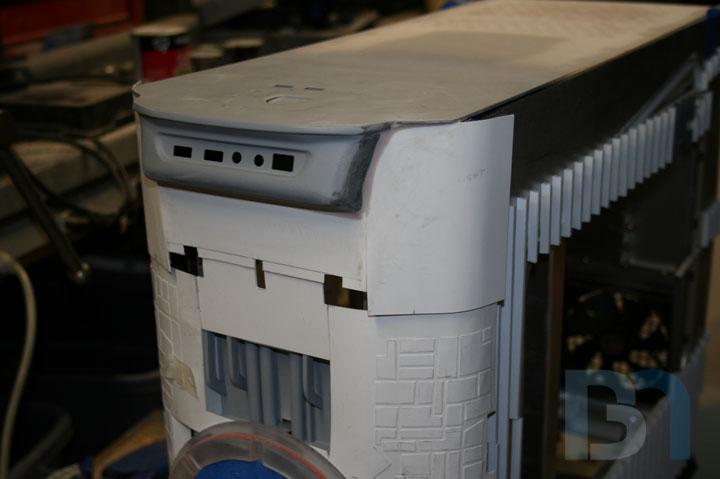
Basically, in order to get a 3 dimensional look, I had him cut several layers
    so I could build the height up. Some parts will be painted, like the center winged figure and the outer
    edge pieces. Then the background will be kept clear so you can see the drive in behind.


    Here's a side shot showing the slot loading drive face.


    I'd like to get some red led's in there that light up when a disc is inserted. Probably just re-route
    the drive's activity led or something.
    I still have a lot of work to do on those insignia pieces, rounding the edges and gluing them down.
    And it needs its own mounting bracketry too, cause I want to keep it separate from the optical drive.
    After that I can start on the ribbing/armoring phase of the front panel. That will fill in all the areas
    around the LCD cluster and insignia. Should look pretty hot when done!

    Honey Roasted Peanuts Ingredients: Salt; Artificial honey roasting agents; Pressed peanut sweepings.

  6. #46
    Modding the World, One Case at a Time Boddaker's Avatar
    Join Date
    Jun 2005
    Location
    Northern CA
    Posts
    818

    Default Re: Battlestar Galactica Mod

    Ok update time! Work on the insignia and optical drive continues...

    I managed to round the corners of all the little edge pieces and get them glued down to the etched ring.


    The center consists of three pieces to be layered for that 3 dimensional look.


    Here they are stacked up.


    I added a secondary bracket that will hold the insignia in place over the optical drive.


    Here's a shot of the inside of the assembled cover with the clear plexi (blue masking tape is on the other side of the plexi).


    And here is the assembled drive mounted with the tape removed.


    The whole insignia together. Center piece is not glued on yet.


    Insignia on top of the windowed optical drive.


    The insignia won't stay totally clear. I will be painting everything but the background in the center.
    The leds that will light up the drive will be inset behind the center piece hidden from sight. Should
    light up the drive internals quite well, and give a nice back-lit effect as well. I just gotta figure out
    how to run the wires and integrate a small switch to activate them when the disc is inserted.

    Honey Roasted Peanuts Ingredients: Salt; Artificial honey roasting agents; Pressed peanut sweepings.

  7. #47
    Modding the World, One Case at a Time Boddaker's Avatar
    Join Date
    Jun 2005
    Location
    Northern CA
    Posts
    818

    Default Re: Battlestar Galactica Mod

    Got a bunch of work done over the weekend!

    Worked on the I/O panel and pwr/reset buttons. I basically re-used the Stacker's pwr/reset button housing,
    and the I/O panel right below it. I'm pretty much putting them in the same location as they were stock,
    just formed to the case and landing bay.
    Here's the pwr/reset panel mocked up with the landing bay.


    And here's the rough position of the lower IO panel.


    Taking a sheet of plexi, I drew out my cut lines using the actual pieces.


    I cut just on the other side of the lines...


    ...And trim to fit.


    Once it was glued in place, I scuffed the whole thing with my orbital.


    Then threw on the bondo.


    Sanded it down and sprayed a coat of primer to see where I was at. Almost there!


    I bondo'ed the bottom side as well, then added the IO panel.


    Trimmed the plexi to fit, and added a touch of filler.


    Another coat of primer, and it's looking pretty good.


    Here it is on the case with the landing bay.


    That's where I'm at. The whole assembly will be removable along with the landing bay. The lower IO panel
    covers up the screws that secure the front lcd/optical assembly on. I dont want to paint myself into a corner,
    so I gotta keep in mind how this case will come apart.
    I'll probably secure both the landing bay and the floor/IO panel/pwr-reset panel to the top of the case with
    four bolts, one at each corner. That's what I'll be doing next (tonight if I can get back in the garage!).

    Honey Roasted Peanuts Ingredients: Salt; Artificial honey roasting agents; Pressed peanut sweepings.

  8. #48
    Modding the World, One Case at a Time Boddaker's Avatar
    Join Date
    Jun 2005
    Location
    Northern CA
    Posts
    818

    Default Re: Battlestar Galactica Mod

    Well, I almost got the front panel finished over the weekend, but as always, I come up with more
    ideas and have no choice but to act on them (I swear it will be my undoing!). In the process of
    filling in the areas around the insignia, lcd cluster, and IO panel, I felt the need to add more detail
    elements (why break precedent, right?) These details will give more depth to the front panel,
    which will be consistent with the side panels and landing bay.

    So I started making a box with styrene, and threw in some wood dowels and acrylic rod for good measure.


    This box will be located just under the insignia and dvd drive.


    From the front, it looks like a bunch of conduit running up through the panel. It will get the rib treatment
    and more styrene to cover up the left and right sides.


    Just below that, the BSG ligature will be placed. I cut a styrene frame to mark its location.


    And here it is roughed in. This was laser cut from 1/8" black acrylic. Thanks again to Brian from ModdersMart!


    Here is a closer shot. I should have put the ruler in the frame for reference, but the entire ligature is only 4" wide.


    Before I permanently glue the lettering down, I wanted to lay down the remaining armor panels.


    So no, the front panel is not done, but it's getting there! If I can restrain myself from making this thing
    more complicated, I might actually finish it this week. lol Stay tuned...
    Honey Roasted Peanuts Ingredients: Salt; Artificial honey roasting agents; Pressed peanut sweepings.

  9. #49
    Modding the World, One Case at a Time Boddaker's Avatar
    Join Date
    Jun 2005
    Location
    Northern CA
    Posts
    818

    Default Re: Battlestar Galactica Mod

    FRONT PANEL ALMOST DONE!!

    I got a bunch of work done on the front panel over the holidays! So without further ado, here are the pics!
    After finishing the bottom conduit box, I began to extend it on both sides to meet up with the curving panel.
    I also added ribs to look like they run vertically underneath the panel and terminate at the insignia.


    Here's a shot looking down into the conduit box. You can see I made it tall enough so the bottom cannot be seen.


    Here is the top conduit box that will go above the insignia. Sorry I didn't realize it was upside down when I took the pic.


    Here it is in its place behind the lcd screens.


    I made a 1/8" styrene bulkhead for it to mount to.


    Once that was in place, the arduous skinning process continued for both sides. A lot of test fitting was necessary
    to get them to fill in the areas with no gaps or overlaps.


    I glued a strip of styrene ribbing down the edges of the front panel to raise the armor up even with the side panels.
    You will see how they go together once I get them on the case for a trial fit.


    Almost completely covered up.


    The second layer of armor paneling goes on, same as before.


    After many hours, here is the result.


    I just have the top section to do, behind the LCD screens, which I will finish up tomorrow.

    Honey Roasted Peanuts Ingredients: Salt; Artificial honey roasting agents; Pressed peanut sweepings.

  10. #50
    Modding the World, One Case at a Time Boddaker's Avatar
    Join Date
    Jun 2005
    Location
    Northern CA
    Posts
    818

    Default Re: Battlestar Galactica Mod

    Thanks TD!

    A bit more work done on the top, between the LCD screens and IO panel. This is taking longer than I anticipated,
    mostly due to the near-freezing temperatures we've had here lately. I was hoping to have all this done days ago.


    I cut the side pieces so they fit around the IO panel.


    Then made another piece to go in between them. Tacked them in place, then used bondo to reinforce the joints.


    This last shot shows the pieces without the screens in place. I also sanded down the joints.


    Still have to add the armor panels, and fit the pieces around the landing bay. Work continues!
    Honey Roasted Peanuts Ingredients: Salt; Artificial honey roasting agents; Pressed peanut sweepings.

Posting Permissions

  • You may not post new threads
  • You may not post replies
  • You may not post attachments
  • You may not edit your posts
  •