Page 9 of 10 FirstFirst ... 45678910 LastLast
Results 81 to 90 of 96

Thread: Battlestar Galactica Mod

  1. #81
    Modding the World, One Case at a Time Boddaker's Avatar
    Join Date
    Jun 2005
    Location
    Northern CA
    Posts
    818

    Default Re: Battlestar Galactica Mod

    Thanks again for the comments!

    Ok, time for an update! I got some goodies in last week, including my Black Ice X-Flow 360 radiator, so I
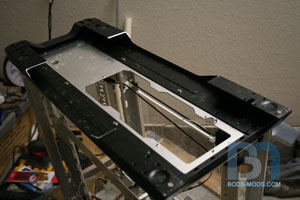
    could do the last bit of hacking on the case (hopefully). I will be mounting the rad under the floor in the base.

    Here is the case upside down, showing how I expanded the existing cutout to match the radiator.


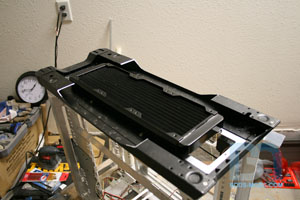
    Here's the rad in place.

    Now I know what your thinking, that I am mounting a 360 rad where a 240 should go due to the shorter opening.
    Well, I have my reasons! I will explain a bit later, and all will be clear as mud.


    So, if any of you eagle eyes noticed, the rad is about as thick as the base is tall. And since putting wheels on this thing
    (or any style of case feet for that matter) is pretty much out of the question, I need to extend the base somehow
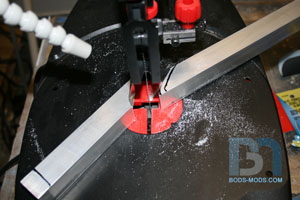
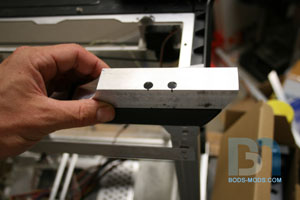
    to give the rad ample airflow underneath. So I got some 1" aluminum box tubing and threw it into the scroll saw.


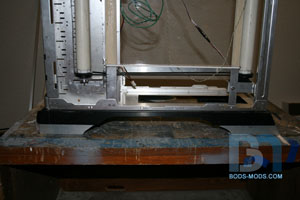
    The resulting piece. I'm matching the base's curves for a nice clean extension. This is the front...


    And this is the rear, with lines drawn where to cut.


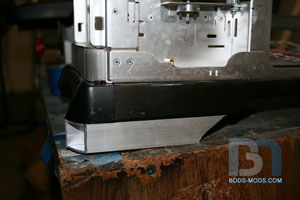
    Here are both front and rear in place for a test fit.


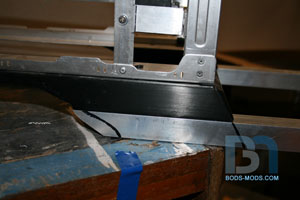
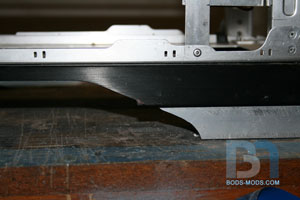
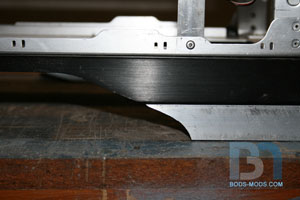
    If you'll notice, the base comes straight down a bit at the very bottom. This will need to be rectified in order to
    continue that angled body line. Before...


    And after.


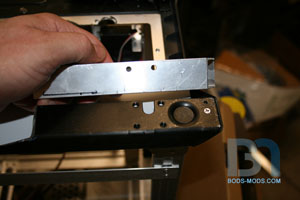
    For mounting, I was able to pick up a few of the existing threaded holes originally meant for the wheels that
    came with the case. So after I marked the hole positions on the bottom, I drilled them out.


    And in order to get the screws in, I drilled out oversized holes on the top. one done, three more to go!


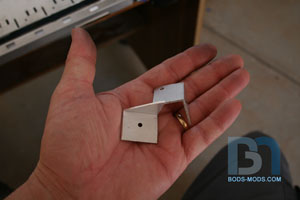
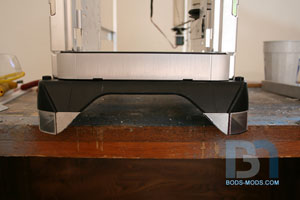
    Once the extensions were mounted, I moved to the front of the base. I need to do something there as well, otherwise it will look funny. So I made a couple pieces out of angle bar...


    ...And mounted them in place. Now the body line below the front bezel continues down to the bottom of the extension.


    I will be finishing up the base tomorrow, so expect another update real soon!

    Honey Roasted Peanuts Ingredients: Salt; Artificial honey roasting agents; Pressed peanut sweepings.

  2. #82
    Modding the World, One Case at a Time Boddaker's Avatar
    Join Date
    Jun 2005
    Location
    Northern CA
    Posts
    818

    Default Re: Battlestar Galactica Mod

    BASE EXTENSION PART 2:

    Having finished the extensions yesterday, I was able to skin the whole thing with styrene today, complete
    with armor paneling. Here I am gluing down the base layer of styrene. I roughed up the metal
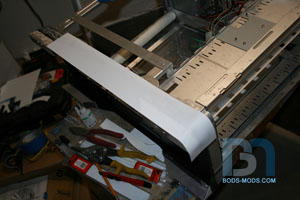
    surface with the dremel, using a cut-off wheel, to make the glue stick better.


    After the glue set up, I trimmed the excess.


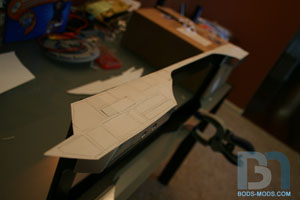
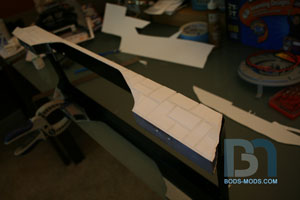
    I then removed the base from the case and brought it inside to apply the armor paneling. I did it just as before:
    sketching out a random pattern, cutting the panels out almost completely, gluing them down, and cutting away the remainder.


    Now I just need to go back and glue all the edges down and this side's done.


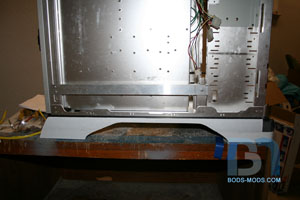
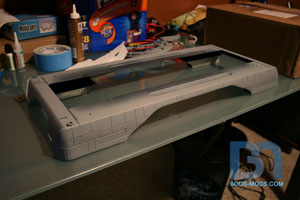
    With both sides done, I shot it with some primer.


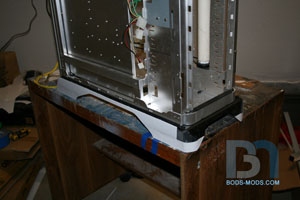
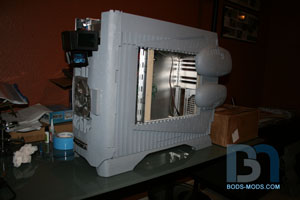
    Stuck it back on the case, and threw on the front and side panels for kicks to see how it looks.


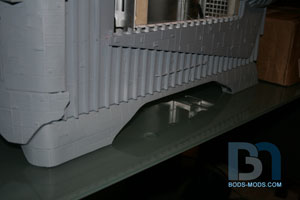
    Pretty good I'd say. At first glance you'd never know it was extended, which was my goal.
    Honey Roasted Peanuts Ingredients: Salt; Artificial honey roasting agents; Pressed peanut sweepings.
  3. #83
    Modding the World, One Case at a Time Boddaker's Avatar
    Join Date
    Jun 2005
    Location
    Northern CA
    Posts
    818

    Default Re: Battlestar Galactica Mod

    Ok, so I was going to start painting last week, but as i began to make preparations, I realized I needed to do
    a few more things before I could begin the paint process. Parts needed a bit more detail added, and the keyboard
    and monitor needed some work as well. Might as well have everything ready so I can paint it all at once.

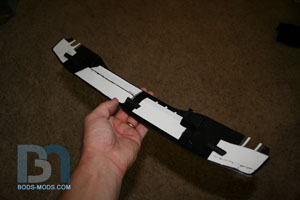
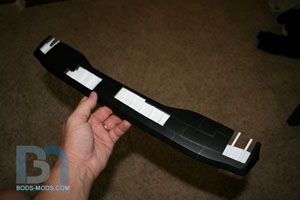
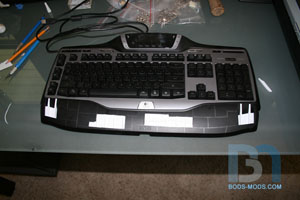
    So the keyboard and monitor got the ol' rib/armor treatment:

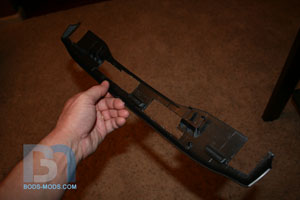
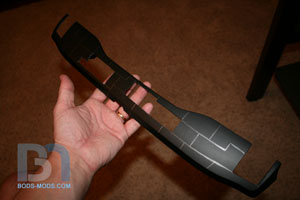
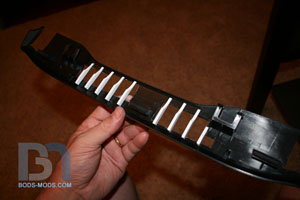
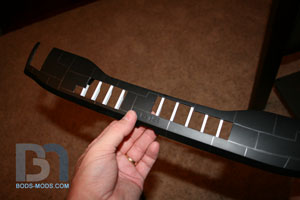
    First I drew some random armor paneling onto the palm rest, and cut out a few portions.


    Then I added the ribbing behind the cutout areas.


    Then I covered the bottom.


    Here it is attached to the keyboard.


    Still gotta add a few more details, and prime.

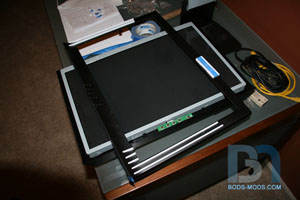
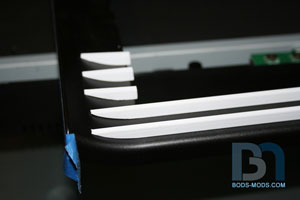
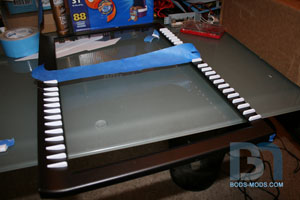
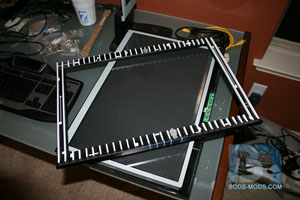
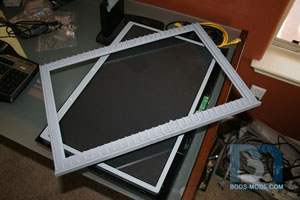
    For my main monitor I'm using an IZ3D 22" widescreen. I removed the front bezel and started adding the ribs.
    These are just on for placement.


    Gluing them down. Using a piece of tape to help keep the top and bottom ribs lined up.


    Ribs done, and some detail pieces added for good measure.


    Primed.


    Now there are just some minor things to finish up before masking and painting everything.
    If I can get the base coat on tonight I will be looking really good.
    Honey Roasted Peanuts Ingredients: Salt; Artificial honey roasting agents; Pressed peanut sweepings.

  4. #84
    Modding the World, One Case at a Time Boddaker's Avatar
    Join Date
    Jun 2005
    Location
    Northern CA
    Posts
    818

    Default Re: Battlestar Galactica Mod

    Here's a quick report of what I did last night. I set out to replace the psu fan with a red led fan. Sounds simple right?
    One would think! It would be quite simple if the psu had a standard 120 mm fan in it, but I quickly found out that the
    Cooler Master 850w modular psu wasn't going to adhere to standards!

    Here is the stock fan I removed from the psu after breaking the great seal of warranty advocacy.


    Here you can see the difference between that fan and a standard 120mm fan. It measured 136mm!


    So what to do? I doubt I could find a 136mm red led fan anywhere, and I can't easily fit the 120mm fan in without
    fashioning some sort of adapter plate. While I was pondering this, I noticed the 136mm fan had pre-drilled
    holes through it at each corner that were suspiciously the same size as a 3mm led.


    Upon further investigation, I found that the holes were the perfect size for a 3mm led!


    So I got to work wiring up some red leds.


    Rounding each corner, connecting them in series.


    Then I got the (not so) bright idea to connect the led wires directly to the fan's 12v source, where its original
    wires are soldered in the center. I thought it would be so clever and stealthy to have it all self contained!


    Well, upon powering it up, the led's were quite dim, and the fan wasn't spinning very fast lol. Here are a
    couple really crappy no-flash shots to try and capture the dimness.


    Because of the lackluster result of my fan modification, I resorted to running the wires externally. I did
    contemplate soldering them directly to one of the many 12v sources within the power supply, but I chickened out,
    thinking I could potentially fry the whole danged thing (my success rating for the evening was less than admirable).

    So there you have it, one of 18 days before Nvision burned and only a black fan with red leds to show for it. lol... (sigh)
    Honey Roasted Peanuts Ingredients: Salt; Artificial honey roasting agents; Pressed peanut sweepings.

  5. #85
    Modding the World, One Case at a Time Boddaker's Avatar
    Join Date
    Jun 2005
    Location
    Northern CA
    Posts
    818

    Default Re: Battlestar Galactica Mod

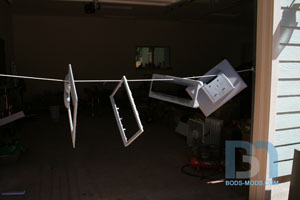
    Started painting over the weekend! Got the base coat down on everything, so the case is finally a uniform color.

    Here's a shot of my makeshift paint booth, which really isn't a booth at all. I just strung a line across my garage opening lol.


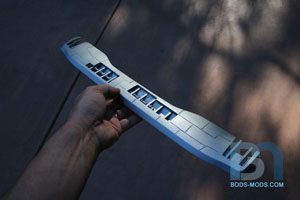
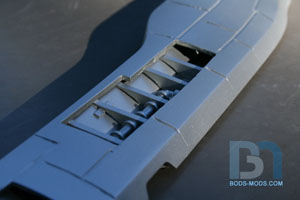
    You can't really tell from the pic, but the paint has a nice sheen to it. Not to shiny, not too dull.


    A closeup shot. Still the pic doesn't do it justice!


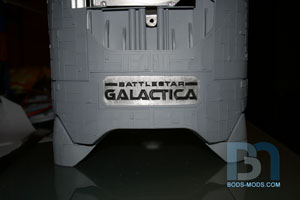
    Once I get it assembled, I will give you a teaser shot. Then I will start adding various shades of gray on
    the individual panels, shadowing, weathering, etc.. Having never done it before, I hope I don't screw it up!
    Honey Roasted Peanuts Ingredients: Salt; Artificial honey roasting agents; Pressed peanut sweepings.

  6. #86
    Modding the World, One Case at a Time Boddaker's Avatar
    Join Date
    Jun 2005
    Location
    Northern CA
    Posts
    818

    Default Re: Battlestar Galactica Mod

    Getting the water cooling components installed. Got a nice package from Moddersmart on Wednesday
    which consisted of the pump, hose, clamps and fittings, and fluid. I will get the cpu block in first thing next week.

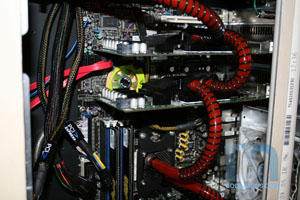
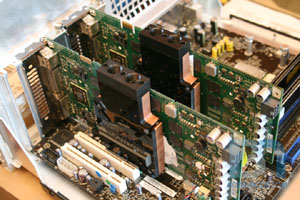
    I permanently mounted the rad and fans on the bottom. The triple rad extends the length of the floor, with
    one end close to the cpu block.


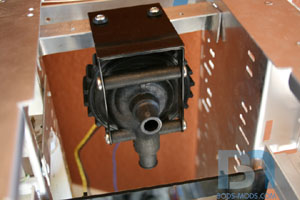
    The other end has the fitting emerging in the hard drive cage area,


    ...which will connect to the pump mounted above.


    Here's a shot of the blast flow GPU blocks. I just have them on for placement right now.
    Waiting to see if I can get the plates. If not, I'll use ram sinks.


    I also worked on assembling the front bezel. But you don't get to see that until later.
    Honey Roasted Peanuts Ingredients: Salt; Artificial honey roasting agents; Pressed peanut sweepings.

  7. #87
    Modding the World, One Case at a Time Boddaker's Avatar
    Join Date
    Jun 2005
    Location
    Northern CA
    Posts
    818

    Default Re: Battlestar Galactica Mod

    Sorry for the lack of updates, but with only one week to go, I've been too busy to worry about posting pics!
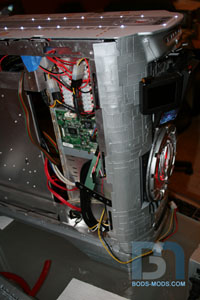
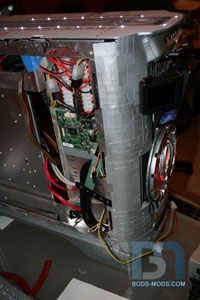
    But here's one to tie you over, a shot from behind the front bezel. Had a bit of wiring to do!


    Had to remount the lcd screens' circuit boards in a different configuration than I originally had them, mostly for clearance purposes.

    Also, having a modular psu really helped as well, as I was able to take one of the 4-pin cables and plug the DVD
    drive in first along with the IDE cable, then string them into the case as I put the front bezel on. Much easier!
    Honey Roasted Peanuts Ingredients: Salt; Artificial honey roasting agents; Pressed peanut sweepings.

  8. #88
    Modding the World, One Case at a Time Boddaker's Avatar
    Join Date
    Jun 2005
    Location
    Northern CA
    Posts
    818

    Default Re: Battlestar Galactica Mod

    Almost there!

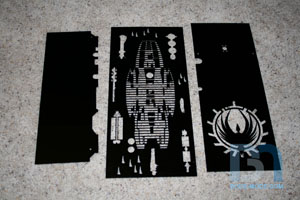
    Here's a shot of the interior panels that Moddersmart cut for me:


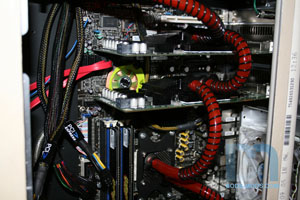
    Getting the wc up and running. Had a couple leaks, on both rad fittings. Wrenched on 'em too hard and
    squished the o-ring out. doh! But I managed to replace them without too much trouble.


    Shot of the left side behind the LCD panel. Distribution blocks for supplying power to the led's and lcd's. What a mess!


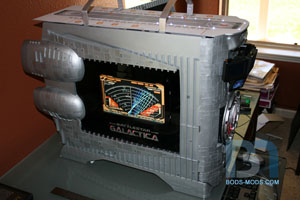
    And a final teaser shot of the lcd panel up and running complete with DRADIS.


    Will get more pics up during the showw. Gotta pack up now!

    Honey Roasted Peanuts Ingredients: Salt; Artificial honey roasting agents; Pressed peanut sweepings.

  9. #89
    Modding the World, One Case at a Time Boddaker's Avatar
    Join Date
    Jun 2005
    Location
    Northern CA
    Posts
    818

    Default Re: Battlestar Galactica Mod

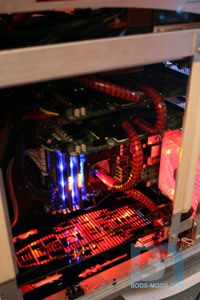
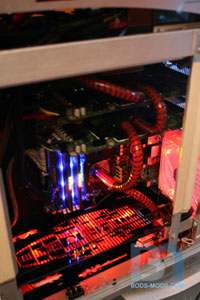
    Well I made it to Nvision! Here are some shots I took after we got the lcd's all working.


    Sry the flash doesn't do it justice. It really looks sweet in low light!

    Honey Roasted Peanuts Ingredients: Salt; Artificial honey roasting agents; Pressed peanut sweepings.

  10. #90
    Modding the World, One Case at a Time Boddaker's Avatar
    Join Date
    Jun 2005
    Location
    Northern CA
    Posts
    818

    Default Re: Battlestar Galactica Mod

    Thanks a ton guys!

    Well, I made it back from Nvision last night around midnight. I will post pics of all the mods a bit later. It was a real great turnout, with about 15-20 mods competing. I got a third place finish. I was hoping for better, but I can't complain. At least I placed and took home some cash ($500), a new EVGA 790i FTW mobo, and GTX 260 vid card.
    Honey Roasted Peanuts Ingredients: Salt; Artificial honey roasting agents; Pressed peanut sweepings.

Posting Permissions

  • You may not post new threads
  • You may not post replies
  • You may not post attachments
  • You may not edit your posts
  •