yeah man this is sweet keep it up


yeah man this is sweet keep it up
Originally Posted by Drum Thumper


Thanks guys.
I have no doubt that I will get it to work. The R&D side of the RepRap project has produced reliable stuff in the past few months. There are over 1000 reprap derived printers out there now and they are all singling that sweet stepper motor tune. I think the second thing I am going to print is the TBCS logo and mail it to Jon or give it away in a contest.
Charles (CJ) Gantt: Coil Gun // Biohazard // Circuits // 3D Printer // CoD MW2 Case // TBCS 4GHz Club
Sites: The Makers WorkBench // CJ Gantt Photography

No. . Kiddin' This is really going to be neat. +Rep
I have seen the homemade cnc machines but never a 3D Printer.
Can't wait to see this bad boy in action.
I was telling a friend about this over lunch today and he pointed out the fact that I could just mount a dremel to it like others are doing and mill out the acrylic parts for the plastic extrusion head. Why this never occurred to me I do not know.
I am bidding on some skate bearings on ebay but I think I might be outbid because my max bid is $4.00 for 8. I am still trying to source a 82 degree counter sink locally. It seems that every where I call thinks a counter sink is a counter sink. a 1 size fits all type deal. I even called a tool and die shop and they thought I was talking about a step drill. McMaster has one but its over prices by a lot.
I hope to cut the x axis rails tonight and the angle support for it. I also need to go buy some jigsaw blades to cut the acrylic. Anyone have some suggestions on what tooth count to get?
Charles (CJ) Gantt: Coil Gun // Biohazard // Circuits // 3D Printer // CoD MW2 Case // TBCS 4GHz Club
Sites: The Makers WorkBench // CJ Gantt Photography
I got the x rails and angle cut last night. Haven't drilled any holes yet because there are inconsistencies in the build constructions on the reprap site. Instead of publishing a simple technical drawing of the hole placements they thought it would be good to dumb it down to the point of printing the hole locations onto a sticker sheet and have you print it out and attach it to the rail then drill. The problem is that the sticker holes have not worked for anyone.
I am going to do this the hard way it looks like. Time to open up autocad and get to work.
Charles (CJ) Gantt: Coil Gun // Biohazard // Circuits // 3D Printer // CoD MW2 Case // TBCS 4GHz Club
Sites: The Makers WorkBench // CJ Gantt Photography
yay for auto cad and yay for reprap.
plus rep to you sir.
badoom tshh!
Will the rapstrap become a miller then afterwards?
more than likely yes I am going to modify it into a cnc mill or router.
Charles (CJ) Gantt: Coil Gun // Biohazard // Circuits // 3D Printer // CoD MW2 Case // TBCS 4GHz Club
Sites: The Makers WorkBench // CJ Gantt Photography
Today was kind of productive. After sorting through all of the documents and photos online of various McWire builds, and none of the measurements seemed to match up from build to build. To further complicate this problem no one seemed to post or have any technical drawing of hole placements, critical measurements, or even non critical measurements. What I did find was drawings meant to be printed on sticker sheet and then placed on the vairous metal components. This left too much room for error for my taste. I finally came to the conclusion that I was going to have to solve this problem once and for all. I will be creating all of the technical drawings as my build progresses.
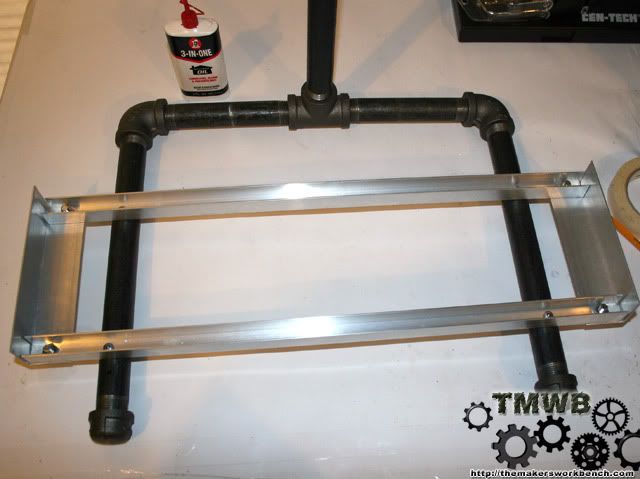
After I got all of that sorted out I decided to get to work and cut some metal. Luckily the measurements for the X stage rails were available and I was able to start there. I didn't get a photo of them being cut because all I own is DSLRs and its hard to hold a dremel with one hand and a 3lb+ camera in the other and take a photo. The rails are cut from the 3/4" x 3/4" aluminum U channel. Cut them both to 21". Make the cuts as square as possible and file the edges to remove sharp burs.
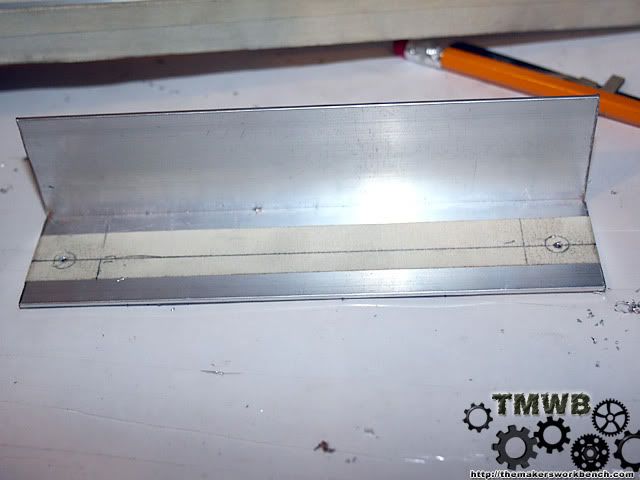
The next things we needed to cut were 2 pieces of the 1 1/2" x 1 1/2" aluminum angle. These should be cut to 6 3/4". Cut these as square as possible. Again file the edges to remove any burrs.
Now that we have them cut lets drill some holes.
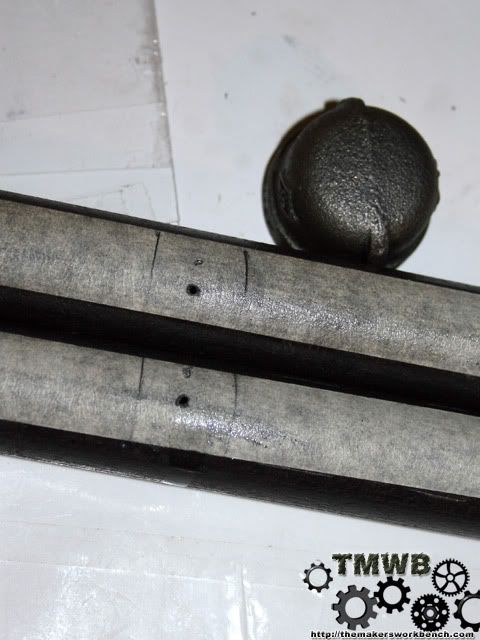
We will start with the 21" rails. Put a piece of tape along the bottom so you have something to mark on. Mark your first 2 holes 3/4 inch from each end. Drill on those marks with a 5/16" bit. I also have the second set of holes marked and pre drilled in this photo. Don't worry about them right now.
\
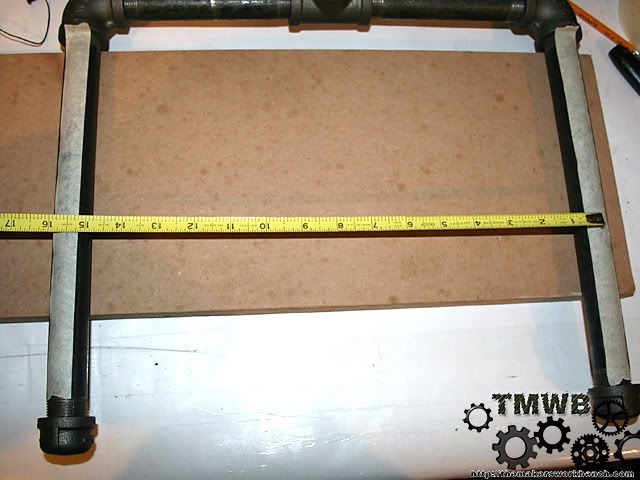
Now lets mark our holes for the screws we will use to attach the rails to the base. We need to center the rails on to the base. To do this we need to measure from the center of each leg of our base.
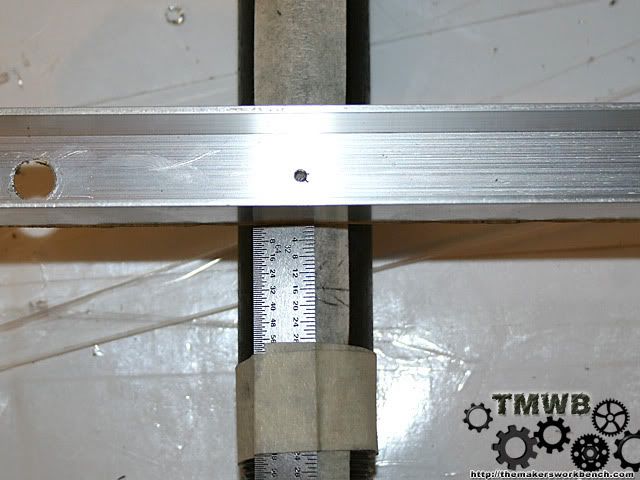
In our case this is 15 1/2". (The photo shows it as 15 3/4 because the taped moved just a bit when I took the photo.) This will vary from every build because of the nature of how far the pipes will thread into each other.
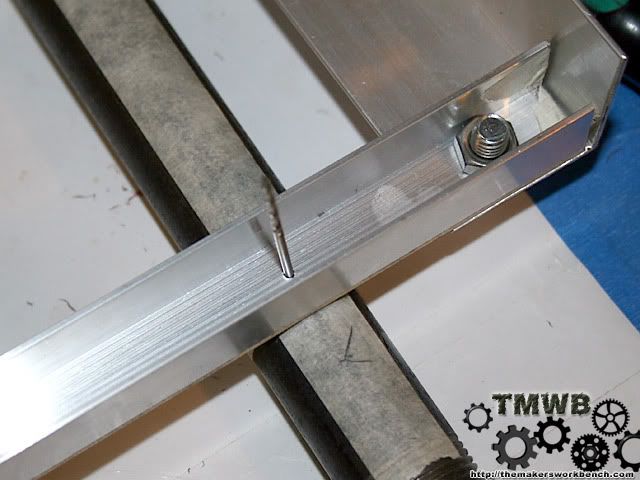
So we know that our rails are 21" long and our base is 15 1/2" wide. This leaves 5 1/2" so we will divide that by 2 and get 2 1/4. So we measure 2 1/4" from our rail ends and mark our holes. It is a good idea to tape the rails together and use a square to mark the line on both rails at once.This will make sure that the holes are in the exact same place on both rails.
Now drill a 5/64" pilot hole. (I chose 5/64" because I have a bag of 40 of them)
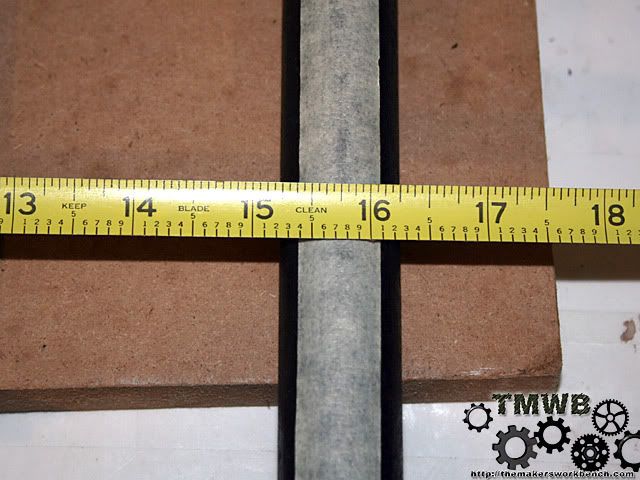
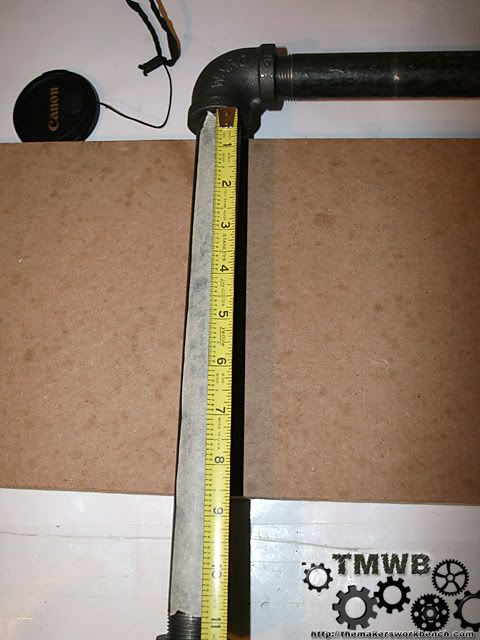
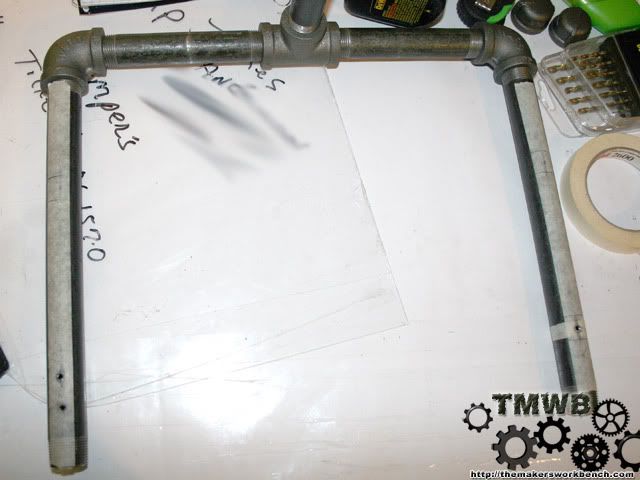
Now we are going to locate the position the rails need to mount onto the base. To do this I made a datum mark. This mark is the same on each side and gives me a solid point of reference so mark my rail locations. Using a tape measure, butt the end of the tape up against the 90degree elbow and mark 10" on your pipe. Do the same on the other side.
Now that we have a point of reference to work off of lets mark the placement of our rails.
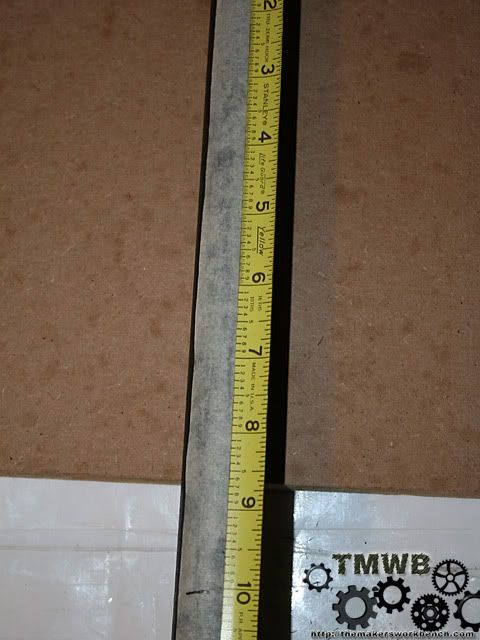
Measure 13/16" off the datum mark place a mark.
Then off that mark measure an additional 5 9/16".
Now drill these hole marks with a pilot hole.
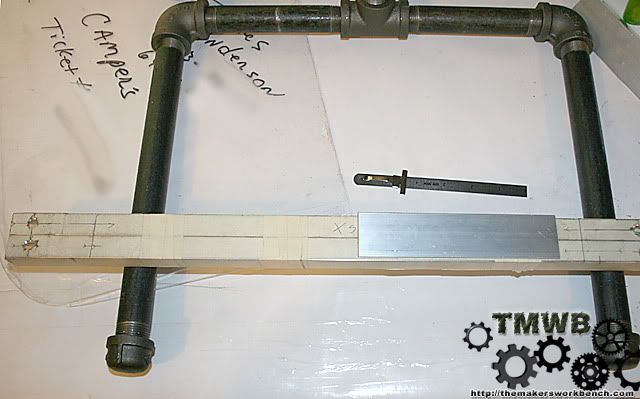
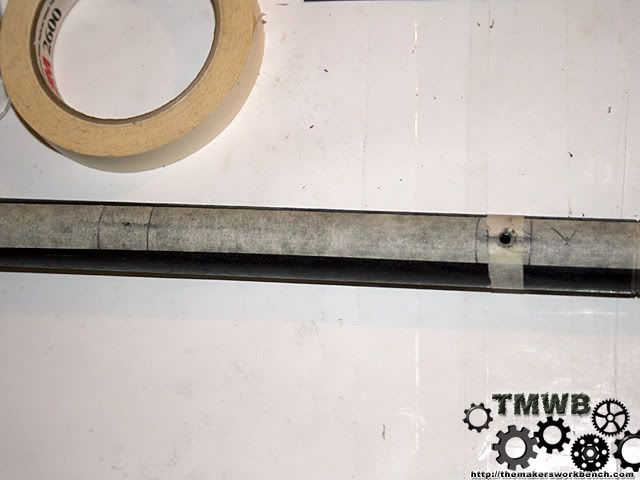
Ok lets make sure that everything lines up. Using the drill bit you drilled the pilot hole with place it in the hole in one of the rails. Ignore the angle on the end.
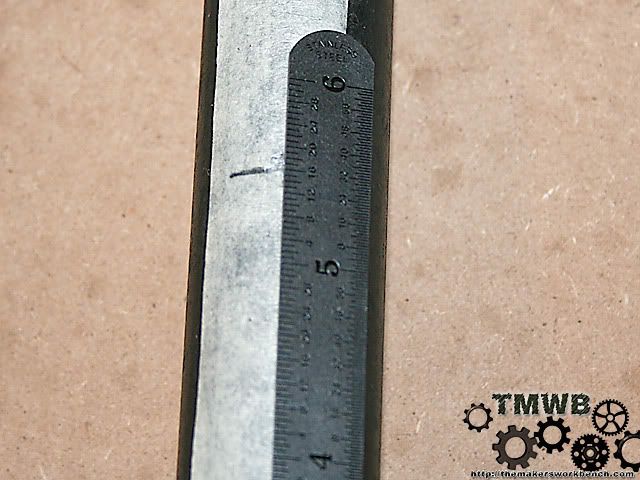
Now line up the other 2 holes. If they match up then great. If they do not match up you have made a mistake some where. (notice my image 2 down from this one.)
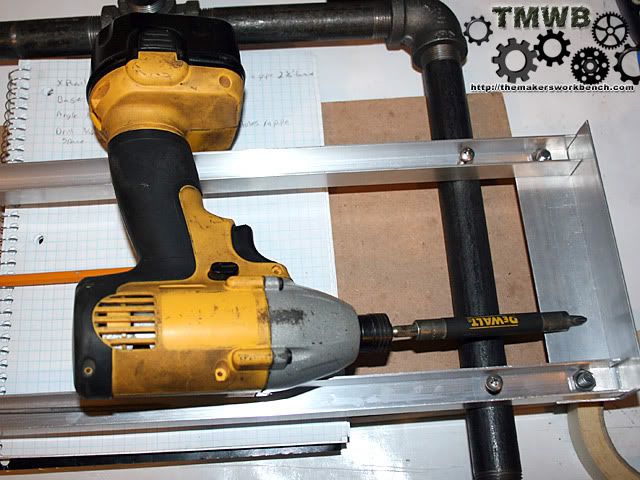
Now drill out the pilot holes with an 11/64" drill bit. This bit size is critical because these are the holes we will be screwing the self tapping 10-24 machine screws into.
Remember to measure twice and cut once or you get to do it all over again. Notice the extra hole at the bottom. I accidentally drilled out my datum mark.
Now drill out the pilot holes in the rails with the same drill bit.
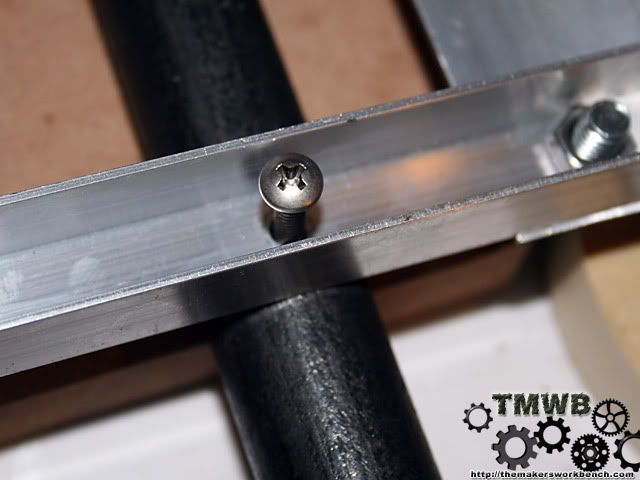
Then you can screw the rail to the base using the 10-24 self tapping machine screws. This will be a little hard to do by hand because the threads of the screws are actually cutting threads into the rails and pipe at the same time. I used my favorite cordless power tool in the world. A Dewalt 18volt cordless impact driver.
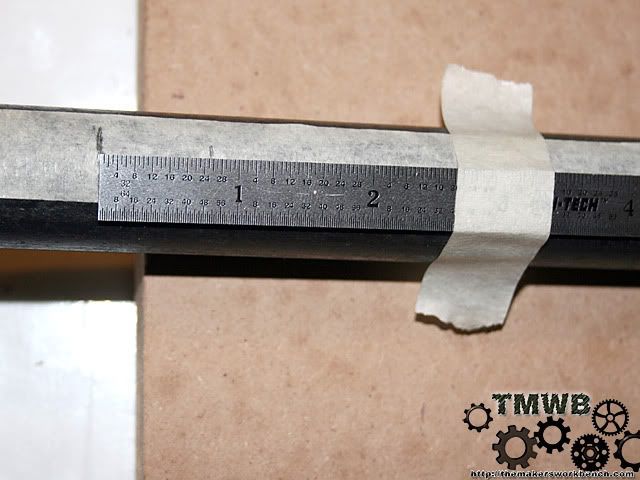
Now lets mark the hole placements in our angle we cut for the ends. Measure 1/2" from the sides and 3/4" from the end. This will give us a flush fit against the rails. Again drill pilot holes with a small bit.
Now drill out those holes with an 5/16 drill bit. Sorry I forgot to take a photo. Will add one later.
Now mount the angle to the ends of the rails using the 5/16" machine screws. (yes I know they are made for a countersunk hole but it doesn't matter that much. If you ordered them from McMaster like I did you got plenty to spare. Place the screw in from the bottom and put the nut inside the rail. Tighten them down and your finished with the x stage rails.
That's all I got to today. I am waiting on the 608 skate bearings to come in before I can continue. Next time we will be cutting and drilling some plexi. You can also follow this build and download all the photos and plans on my new site http://themakersworkbench.com.
Charles (CJ) Gantt: Coil Gun // Biohazard // Circuits // 3D Printer // CoD MW2 Case // TBCS 4GHz Club
Sites: The Makers WorkBench // CJ Gantt Photography

Bravo! Bravo!!
This thing is coming out sweet, btw I finally finished drawing up plans for mine! yay, I got you renders I'll send them to you in e-mail.
It's like JFK announcing the moon mission. He had no expertise in space travel, and no way of knowing if it would work. He just announced "we're going to the moon" and then they made it happen because everyone was on the same page and working towards the same goal. If he had said "well, let's get some people in space, and we'll see how far out we can get, and if I find someone to make a rocket strong enough, we could possibly approach the moon's orbit and maybe land" it wouldn't have happened.
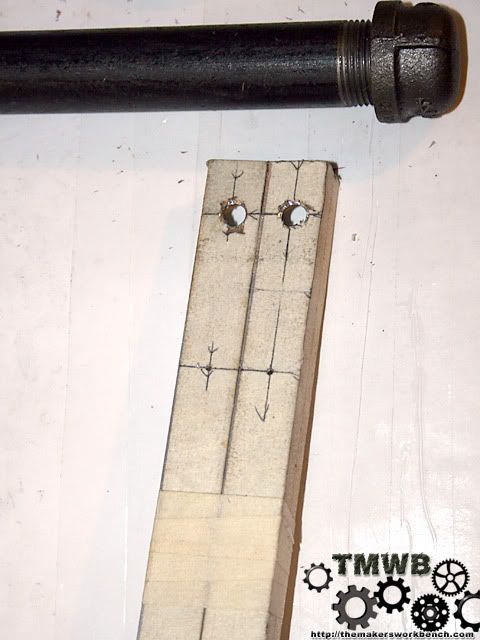
Well I kinda put my foot in my mouth when I said that I would be creating a whole new set of technical drawings for this build. After spending a few hours this morning searching and emailing people for some simple measurements to start from I found nothing. Not 1 single measurement. So I am taking the easy route and printing the drill locations out.
Here is a link to the files on sourceforge if anyone wants to take a look at them.
http://downloads.sourceforge.net/rep...6&big_mirror=0
Charles (CJ) Gantt: Coil Gun // Biohazard // Circuits // 3D Printer // CoD MW2 Case // TBCS 4GHz Club
Sites: The Makers WorkBench // CJ Gantt Photography
 Posting Permissions

 Reply With Quote