Page 11 of 15 FirstFirst ... 6789101112131415 LastLast
Results 101 to 110 of 144

Thread: 1986 Chevy Silverado Shortbed Build-Up (Lots of 800x600 pictures)

  1. #101
    Bottle of Whiskey! altec's Avatar
    Join Date
    Mar 2005
    Location
    Maryland
    Posts
    501

    Default Re: 1986 Chevy Silverado Shortbed Build-Up (Lots of 800x600 pictures)

    Thanks Beta! Nice bike! I've always been a fan of the street fighter style bikes!

    You are correct on the flat black! I plan to do the satin black paint, with spray on black bed liner for the bumpers, and wheels. Top that with black projector head lights, and I'm gonna sand blast the tail lights, and turn signals to give them a satin finish. I don't want to go ricer black tint paint, but still dull them out. The only thing I'm not doing is window tinting. Mainly to keep the fuzz off my tail...

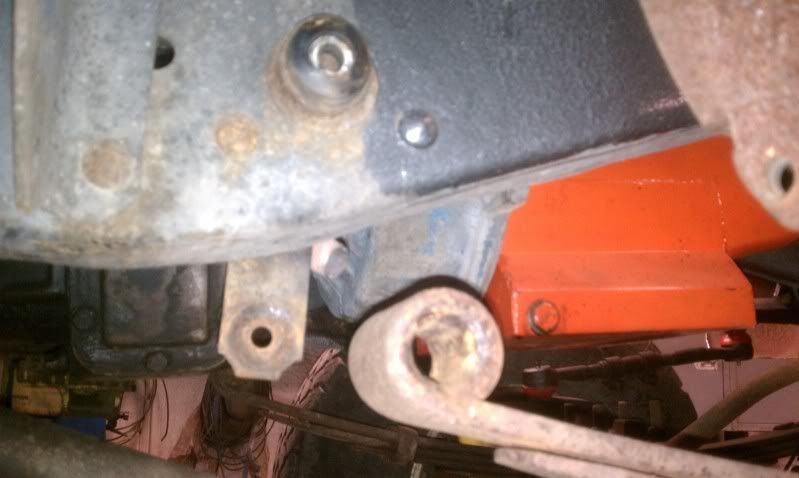
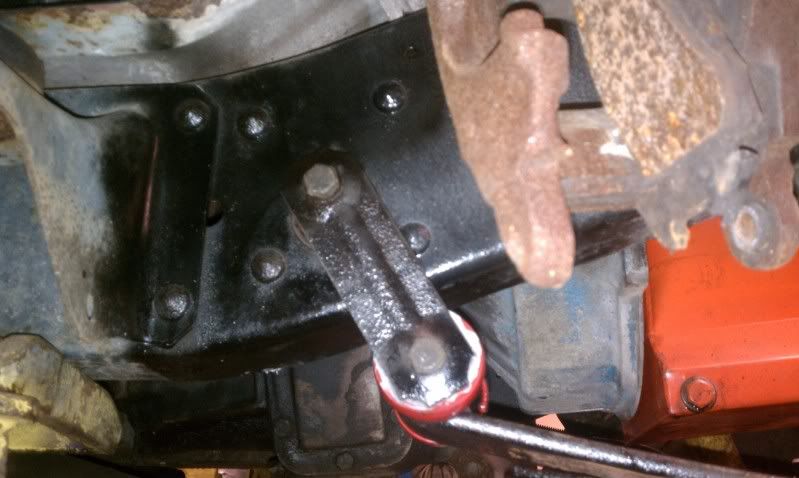
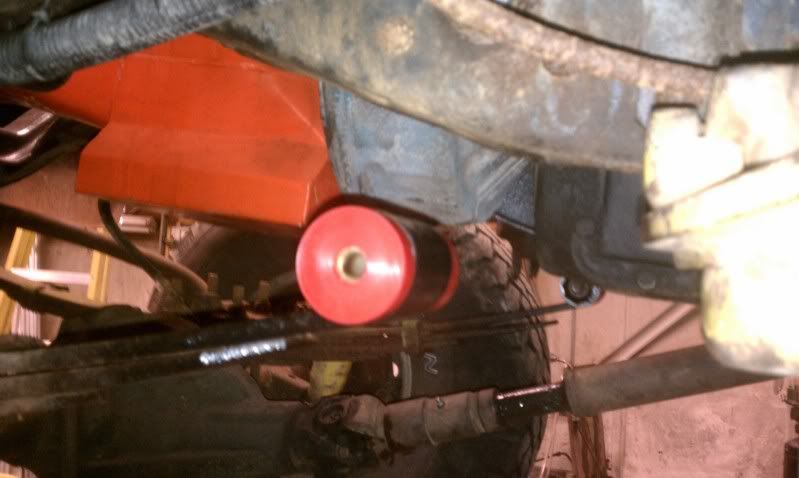
    Put the front-rear bushings in. I decided to leave the shackle bushing factory. Mainly because they looked new.

    I used the same prep method as the front. die grinder with a bur bit to clean the hole, and a wire brush to prep the leaf. The shackles I used a wire wheel to clean, then sprayed them black. Wanted to paint them red, but didn't have any red paint...

    The bushings are lubed with a combination of ZEP 2000, and a silver anti seize lube.


    Nasty...


    Better.


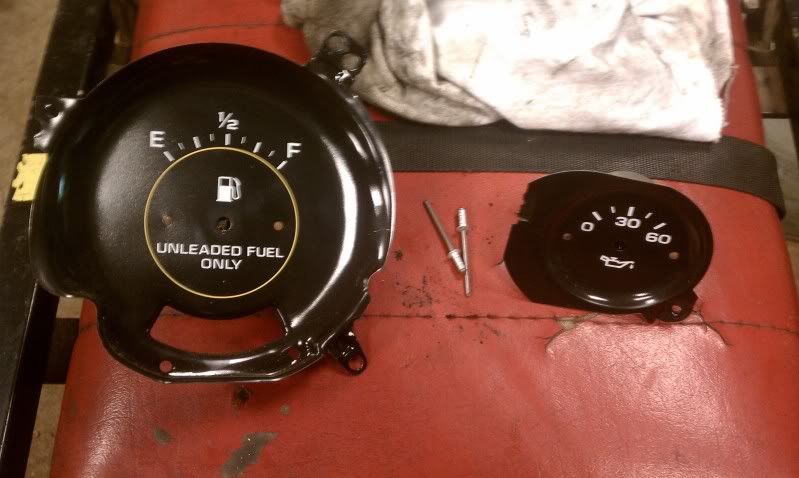
    While I'm at it, here is something I fiddled with on a whim. Anyone who has looked inside a '73-'87 Chevrolet knows they have a HUGE fuel gauge from the factory. And anyone who has done some digging knows that there was a option to have a tachometer in place of the fuel gauge, and relocate the fuel gauge. After you learned this, you quickly realize they are hard to find, and VERY expensive when you do... So I decided to mess with a home brew version of this...

    Thought I'd try and take a oil pressure gauge, and turn it into a fuel gauge...

    Parts Needed

    1x Fuel Gauge
    1x Oil Pressure Gauge (Or gauge of your choice...)
    2x 1/8" Rivets

    Tools Needed
    1x Can of Brake Cleaner
    1x Cotton Rag
    1x Rivet Gun
    1x 1/16" Drill Bit
    1x 1/8" Drill Bit
    1x 3/8" Drill Bit
    1x Drill...
    2x Jewelers Screw Driver

    First thing I did was take a square and made sure the marks on both gauges matched. As far as I can tell, they do. Next I set the needle of the fuel gauge at 1/2 tank and used the two screw drivers to gently pull the needle off. Making sure not to move the needle from the 1/2 position. After this I repeated this process on the oil pressure gauge.


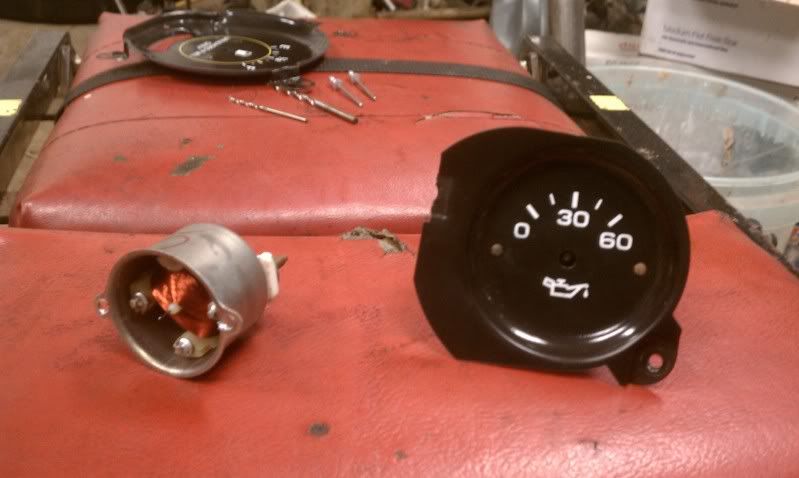
    Next I took the fuel gauge and laid it face down on a cloth. Using the 1/16" drill bit I drill out the old rivets. Then using the 1/8" drill bit I enlarged the holes on the mechanism it self. Followed by the 3/8" drill bit to "bump" the holes to knock off the burs.

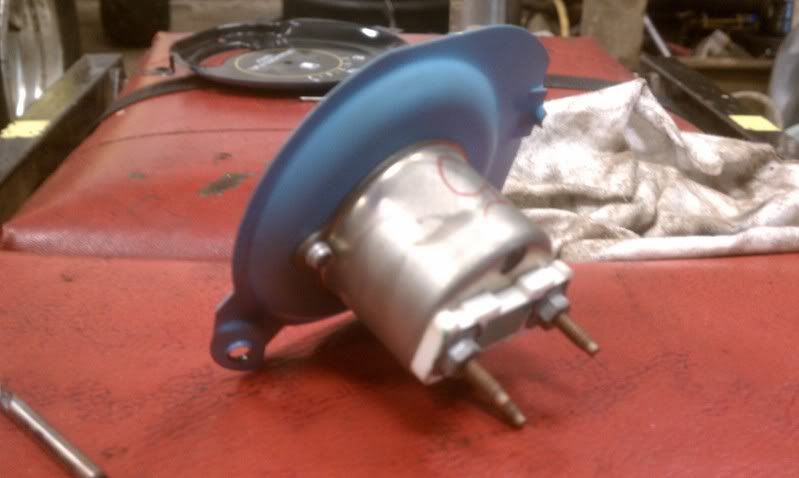
    Fuel Gauge mechanism (left) next to the oil pressure gauge (right).


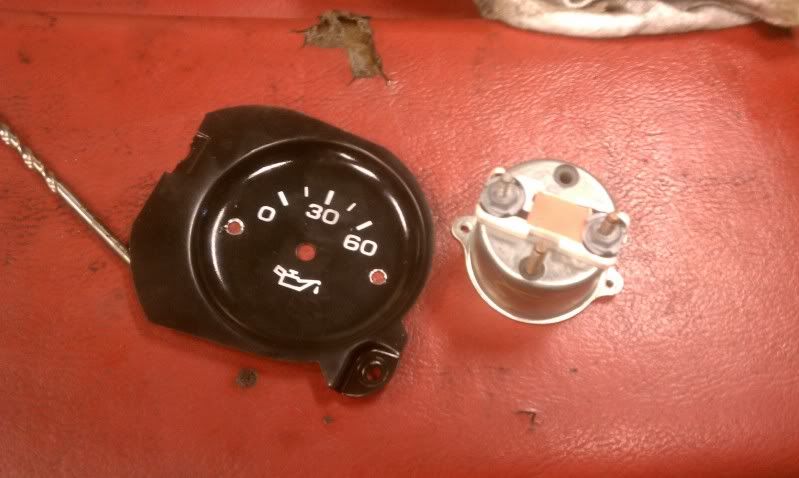
    Repeated the last step on the oil pressure gauge, but instead of enlarging the holes on the mechanism, I enlarged the holes on the gauge face.


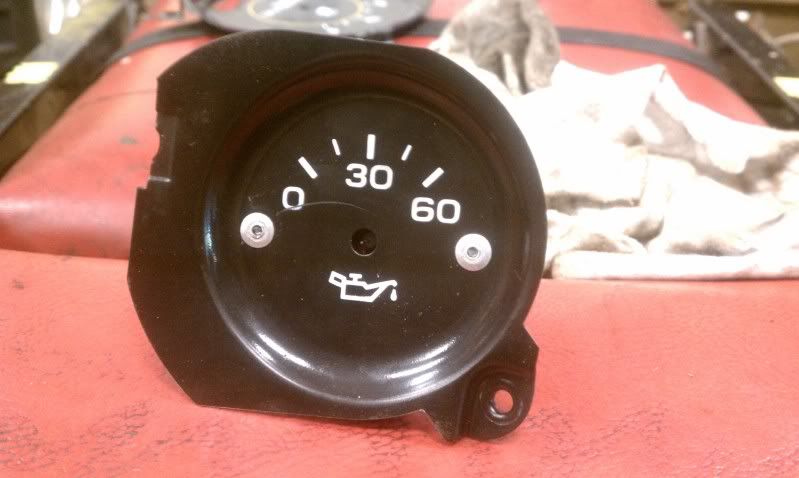
    Taking the fuel gauge mechanism, and the oil pressure gauge face I stuck the rivets through and tightened both the rivets to make sure it is lined up right. The "popped" the rivets.


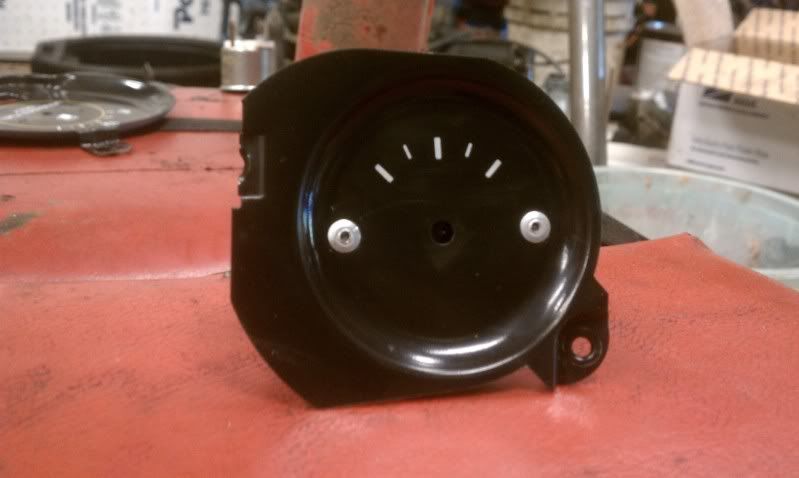
    Now because oil pressure reading aren't going to look right I took some brake cleaner, and a rag to rub the numbers off. At this point you could use water slide decals, or whatever you prefer to add proper fuel level marks.


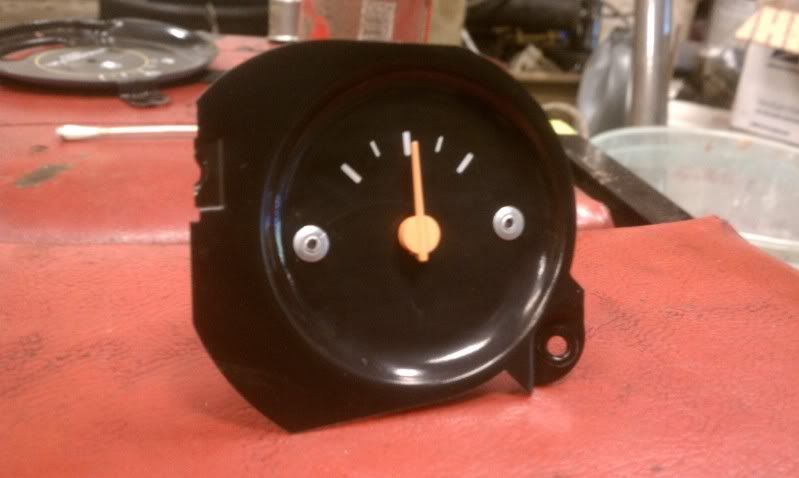
    And finally add the needle from the oil pressure gauge. Making sure to set it at 1/2 liked you pulled the old needle off.


    That is the easy part, now I gotta figure out what to do for a tach...
    Current Projects
    -1979 Jeep DJ5 "Mail Jeep"
    -1981 Chevrolet K10

  2. #102
    Bottle of Whiskey! altec's Avatar
    Join Date
    Mar 2005
    Location
    Maryland
    Posts
    501

    Default Re: 1986 Chevy Silverado Shortbed Build-Up (Lots of 800x600 pictures)

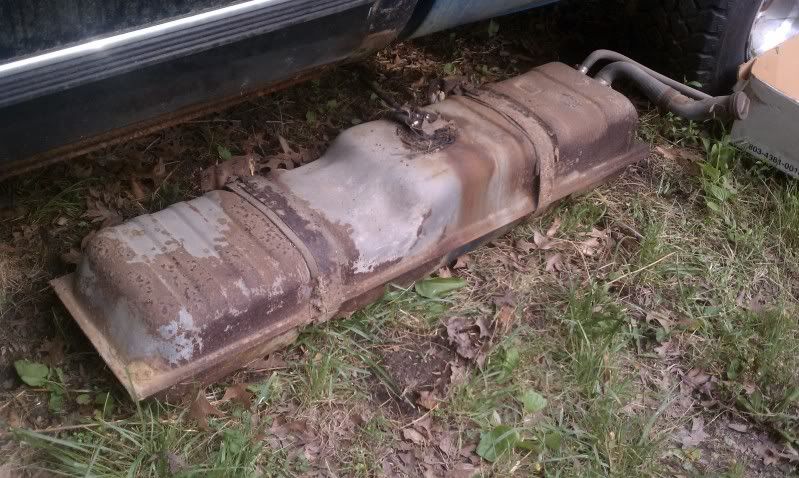
    Fuel tank is out...

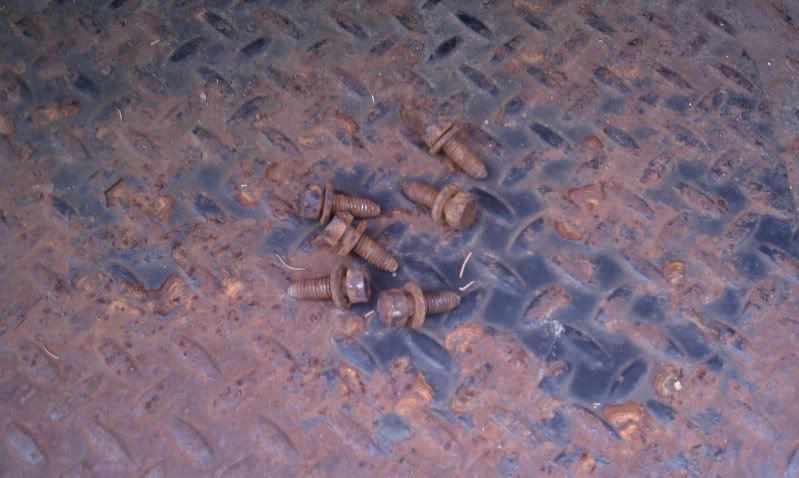
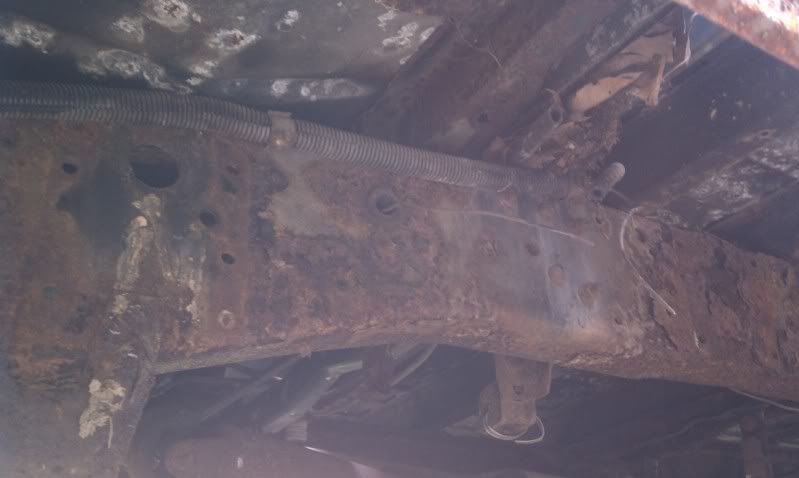
    I got the front bolts out the other day, and the backs out today. Even with potato chip sized chunks of rust coming off the frame the bolts came out easy. Used a 1/2" drive impact with a deep 5/8" socket. I needed to get the old true dual setup out before I could get to the back bolts. Using a sawzall I cut the back hanger, and the front let go at the flange before I could get to it. Rust... I also cut the E-brake cable out for a little more room.


    After the bolts are out it was a simple matter of cutting the old hoses.


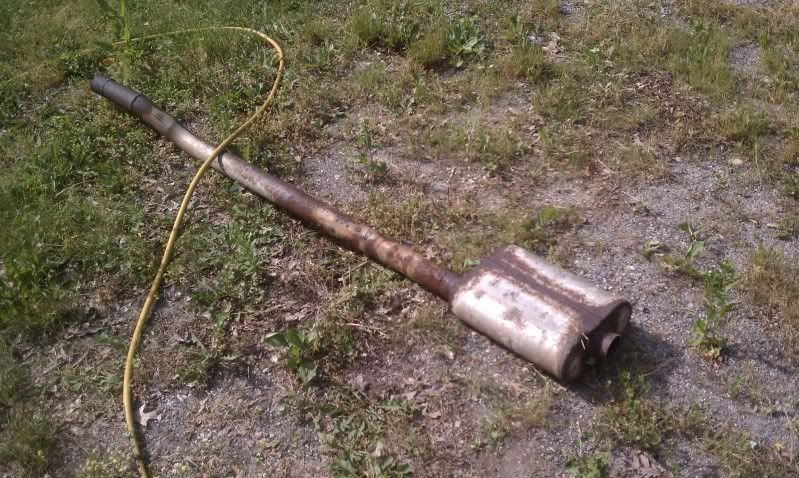
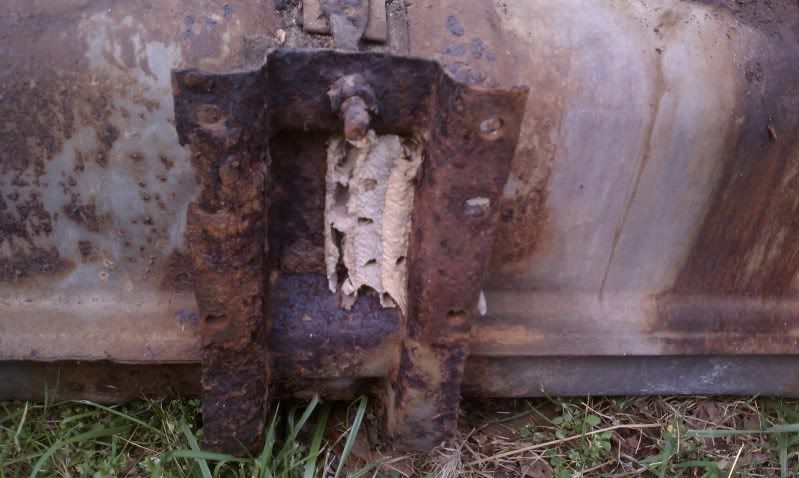
    Old mud dauber nests. Found one in the muffler too...
    Current Projects
    -1979 Jeep DJ5 "Mail Jeep"
    -1981 Chevrolet K10

  3. #103
    Bottle of Whiskey! altec's Avatar
    Join Date
    Mar 2005
    Location
    Maryland
    Posts
    501

    Default Re: 1986 Chevy Silverado Shortbed Build-Up (Lots of 800x600 pictures)

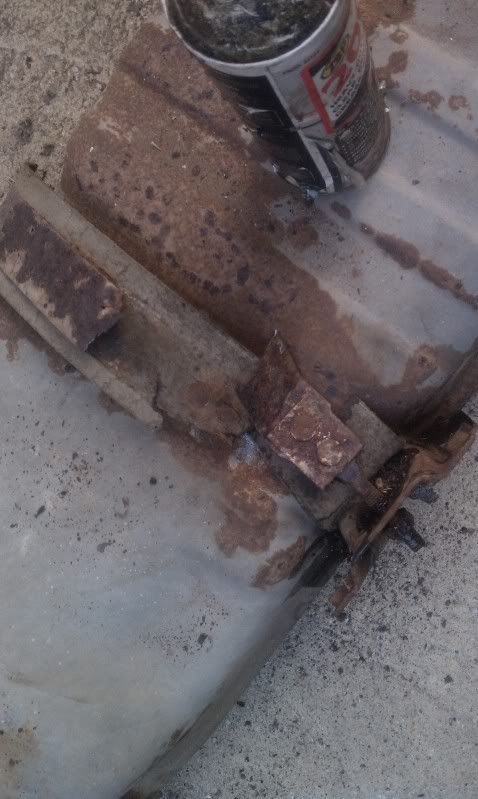
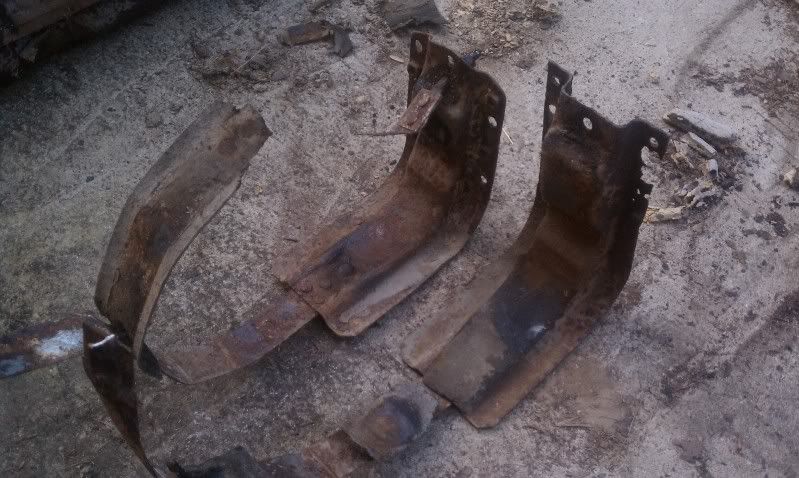
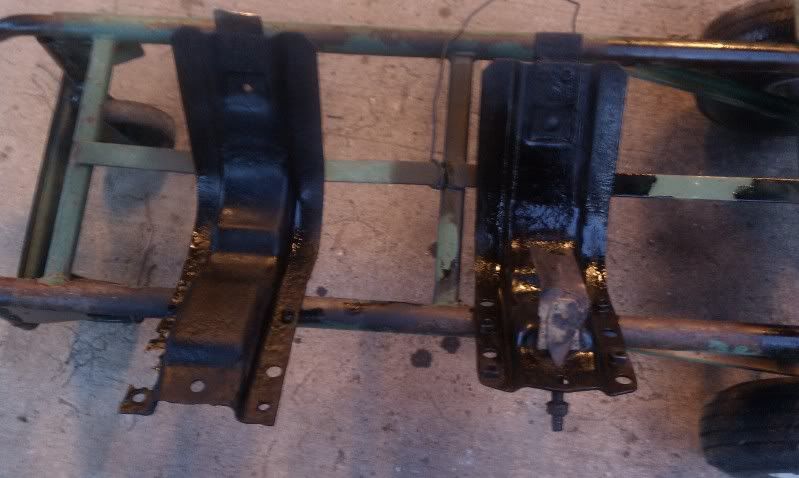
    Got the straps off.

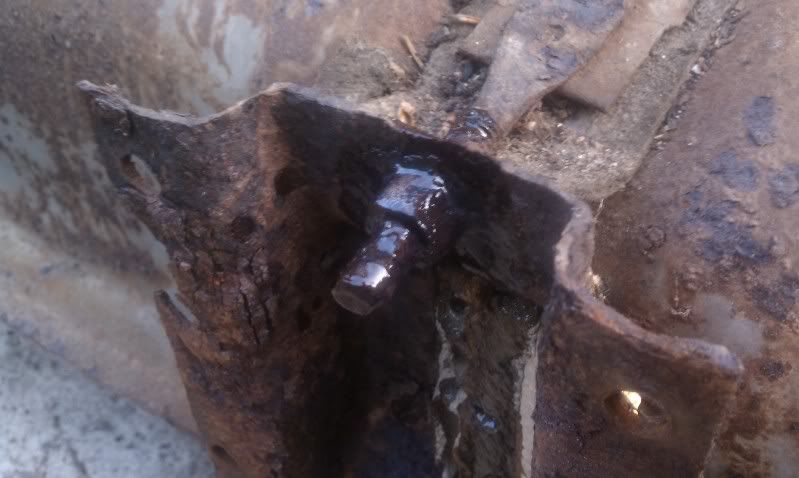
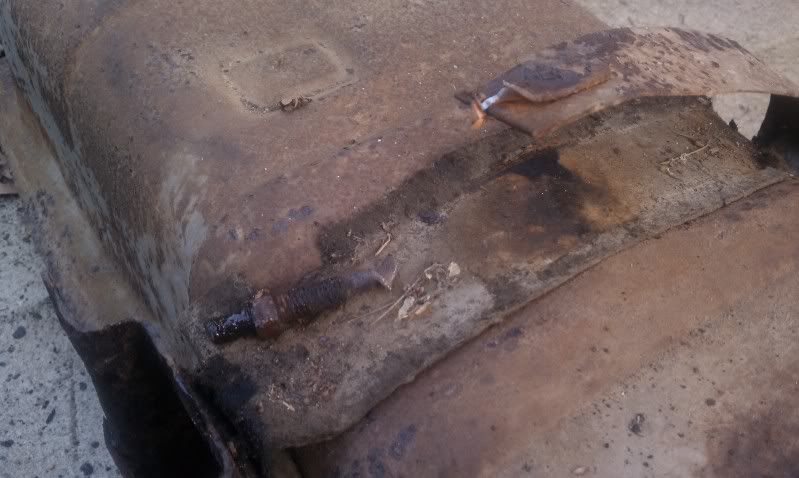
    Now, I'm not a betting man, but after looking at the straps I knew the nuts wouldn't come off. But I had to spray on some oil, and try... First one broke the strap itself, and the second twisted the stud clean off...


    After cleaning... Funny how exactly like you think the front one is rusted more... The nuts are pretty much rotted away, and the one side is rotted away. I'm considering welding on new nuts, and doing something to brace up the one rotted side...


    Need to fix those rust issues, and order some new straps.
    Current Projects
    -1979 Jeep DJ5 "Mail Jeep"
    -1981 Chevrolet K10

  4. #104
    Bottle of Whiskey! altec's Avatar
    Join Date
    Mar 2005
    Location
    Maryland
    Posts
    501

    Default Re: 1986 Chevy Silverado Shortbed Build-Up (Lots of 800x600 pictures)

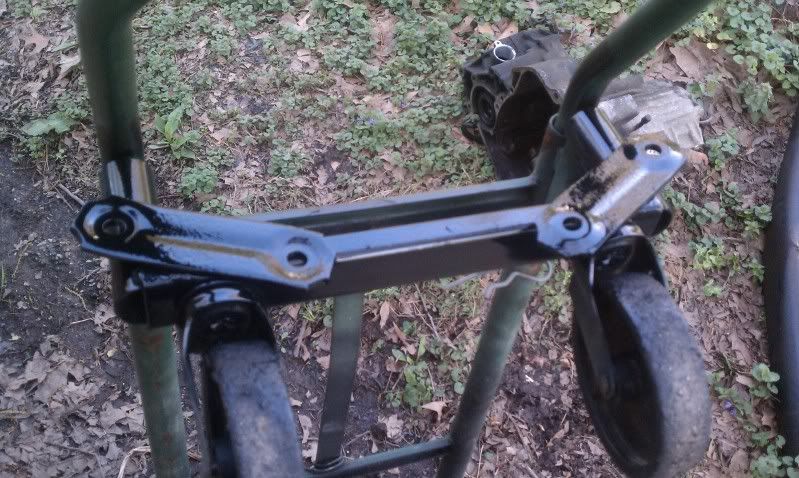
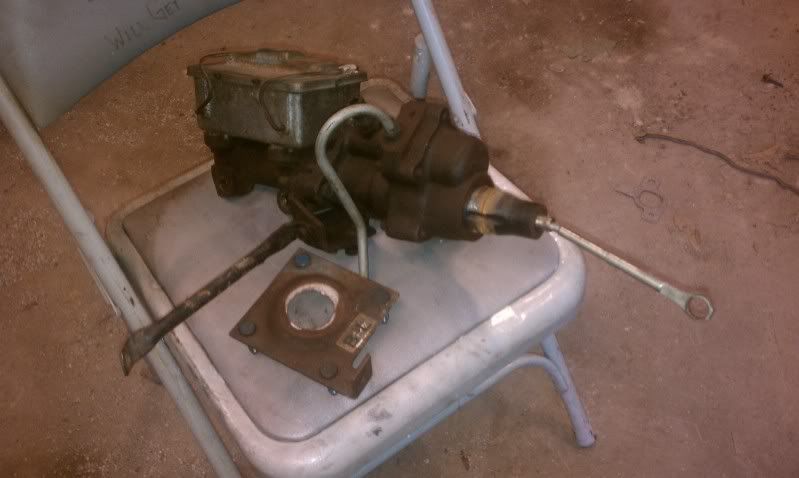
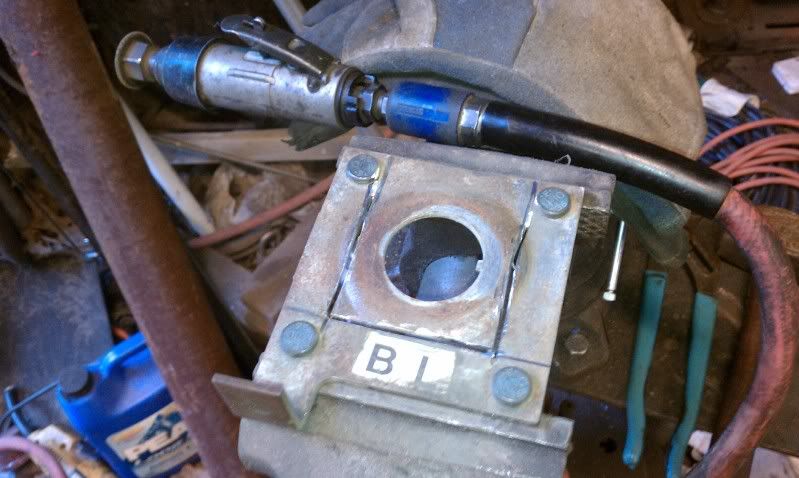
    Here is some progress. I cleaned the bracket, and cut it with a cut off wheel. No special measuring, just eye balked it...


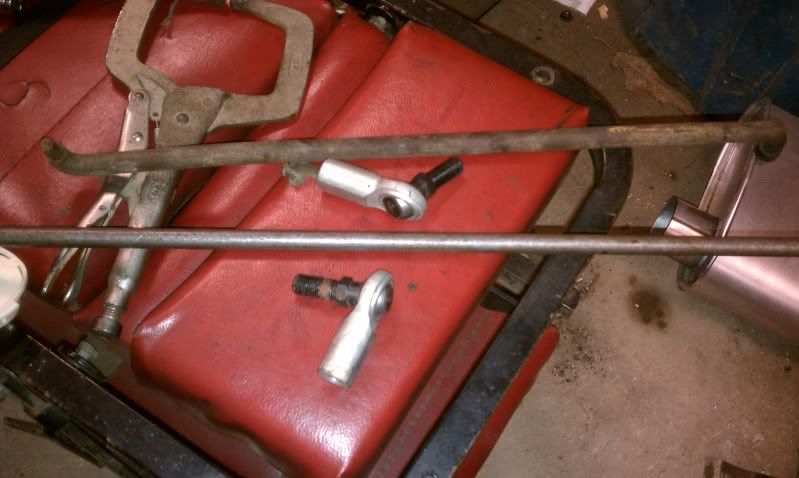
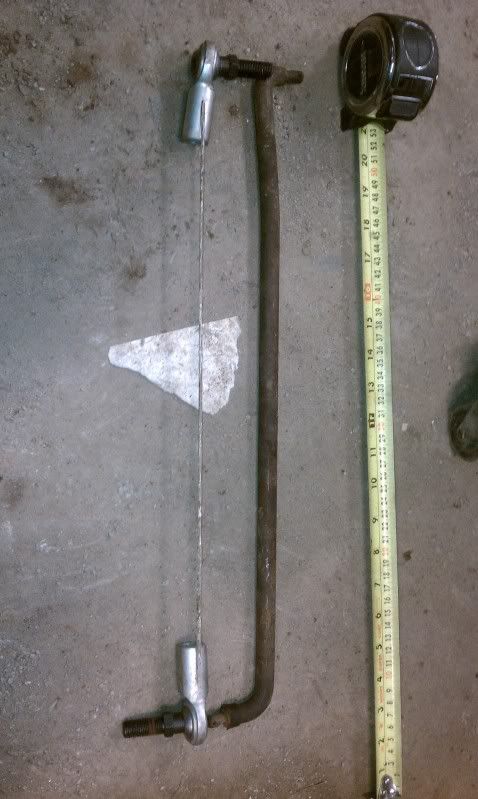
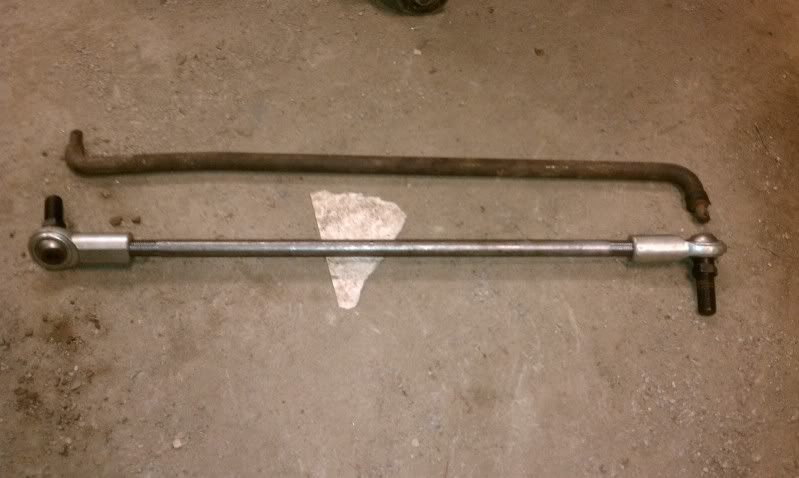
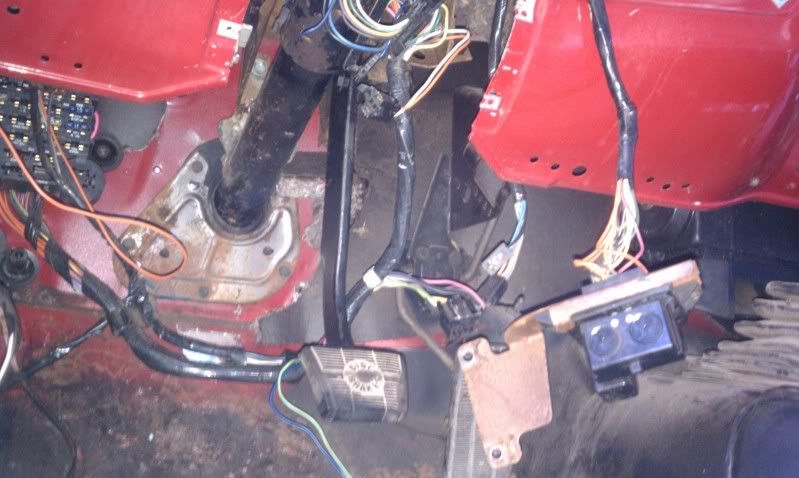
    And I made the pedal-to-bell crank rod I wanted to. Instead of making a bunch of fancy measurements, I used a piece of brazing rod, and cut it so the rod ends would be in right position at roughly half thread. That way I had some adjustment.

    I got the measurement (16"), and cut it using the cut off wheel. Then cleaned, and beveled the ends with a bench grinder. Then using a fine thread 1/2 die, I threaded the rod for enough threads to fully sink the rod end, and still have the jam nut. Which ended up to be about 1.7".


    Enjoy.
    Current Projects
    -1979 Jeep DJ5 "Mail Jeep"
    -1981 Chevrolet K10

  5. #105
    Bottle of Whiskey! altec's Avatar
    Join Date
    Mar 2005
    Location
    Maryland
    Posts
    501

    Default Re: 1986 Chevy Silverado Shortbed Build-Up (Lots of 800x600 pictures)

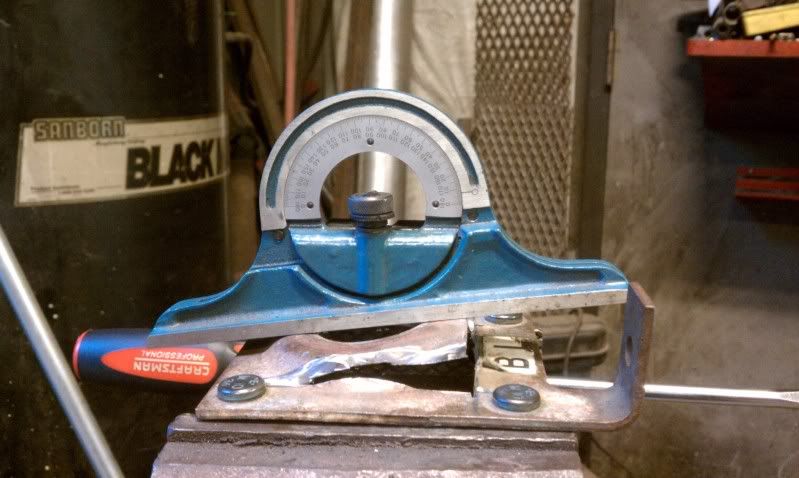
    I bent the bracket up. What I did was take the protractor from my square set, and leveled the vice so at 0* the bubble was level. Then I bent the bracket up until the bracket up until it read 8* with the bubble level. Simple.

    I picked 8* to help the actuating rod angle. Wasn't happy with the angle on the factory setup...


    I also took some paper, and made templates for the three filler pieces.

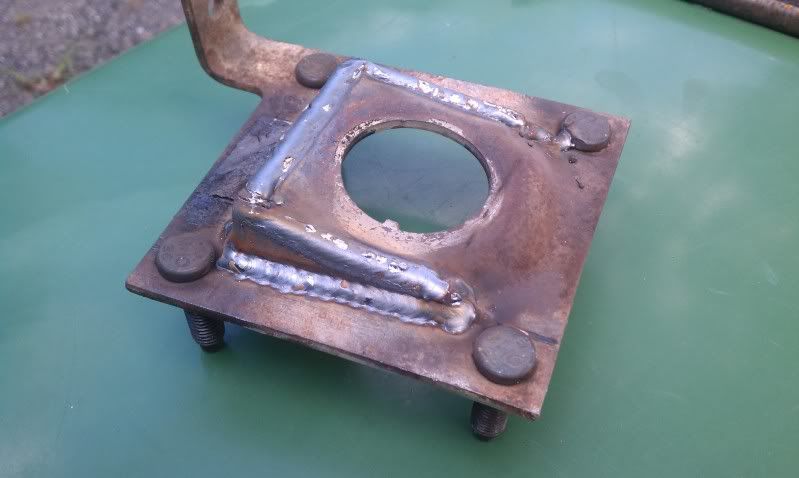
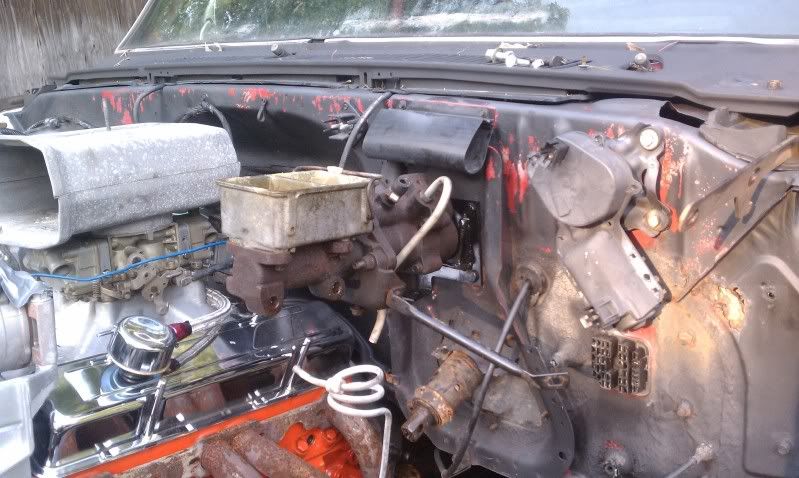
    The bracket is welded!


    The booster is in, and the pedal works great!


    Next is cleaning the bowls out, and hooking the lines up. Then getting the clutch working. THEN I am hooking a battery up, and getting this sucker running! Tired of waiting...
    Current Projects
    -1979 Jeep DJ5 "Mail Jeep"
    -1981 Chevrolet K10

  6. #106
    Mostly a nutcase CorsePerVita's Avatar
    Join Date
    Mar 2008
    Location
    Oregon!
    Posts
    426

    Default Re: 1986 Chevy Silverado Shortbed Build-Up (Lots of 800x600 pictures)

    Those are some smooth welds man! Nice work!

  7. #107
    100% Recycled Pixels. Twigsoffury's Avatar
    Join Date
    Jan 2006
    Location
    Oklahoma city
    Posts
    2,017

    Default Re: 1986 Chevy Silverado Shortbed Build-Up (Lots of 800x600 pictures)

    Quote Originally Posted by CorsePerVita View Post
    Those are some smooth welds man! Nice work!
    I was about to say the same thing!


    What the hell is that on top of the carb? is that a red-neck forced air induction cowl made out of two pieces of stamped steel?

    Thats hilarious and genius at the same time.

  8. #108
    Custom Title Honors Snowman's Avatar
    Join Date
    Jul 2008
    Location
    B F E
    Posts
    1,005

    Default Re: 1986 Chevy Silverado Shortbed Build-Up (Lots of 800x600 pictures)

    Quote Originally Posted by Twigsoffury View Post

    What the hell is that on top of the carb? is that a red-neck forced air induction cowl made out of two pieces of stamped steel?

    Thats hilarious and genius at the same time.
    Guy at the drag strip used an old paper boy delivery box
    Regedit'ed, Rooted, and Jailbroke anymore questions?
    Here’s a bumper sticker I’d like to see: “We are the proud parents of a child who’s self-esteem is sufficient that he doesn’t need us promoting his minor scholastic achievements on the back of our car.”

  9. #109
    Bottle of Whiskey! altec's Avatar
    Join Date
    Mar 2005
    Location
    Maryland
    Posts
    501

    Default Re: 1986 Chevy Silverado Shortbed Build-Up (Lots of 800x600 pictures)

    Quote Originally Posted by CorsePerVita View Post
    Those are some smooth welds man! Nice work!
    You are the third (And forth) people to make that comment! Like I told the others, I'll give my Dad your regards! He volunteered himself to weld it. At least I knew he'd do a good job. You should see him Arc weld!

    Quote Originally Posted by Twigsoffury View Post
    What the hell is that on top of the carb? is that a red-neck forced air induction cowl made out of two pieces of stamped steel?

    Thats hilarious and genius at the same time.
    That is a vintage B&M air cleaner I had sitting in the shop. Cast aluminum, with a round element inside. Been using it to keep critters, and dirt out of the engine. It is like the alternative to a Hillborn in the old days...

    http://www.jegs.com/p/Mr-Gasket/Mr-G...44181/10002/-1

    Quote Originally Posted by Snowman View Post
    Guy at the drag strip used an old paper boy delivery box
    That is/was fairly common around here. Even tin mail boxes...

    Back when my Dad had his '84 Monte Carlo, we joked about running one. Instead we took some 3/16" aluminum plate, and made something with a similar shape. Fed a 1050 just fine...Looked better too.
    Current Projects
    -1979 Jeep DJ5 "Mail Jeep"
    -1981 Chevrolet K10

  10. #110
    Custom Title Honors Snowman's Avatar
    Join Date
    Jul 2008
    Location
    B F E
    Posts
    1,005

    Default Re: 1986 Chevy Silverado Shortbed Build-Up (Lots of 800x600 pictures)

    Quote Originally Posted by altec View Post
    That is/was fairly common around here. Even tin mail boxes...

    Back when my Dad had his '84 Monte Carlo, we joked about running one. Instead we took some 3/16" aluminum plate, and made something with a similar shape. Fed a 1050 just fine...Looked better too.
    If it aint broke don't fix it, there are a lot of old gassers that just fiber glassed around them and left it.


    but at that point it would almost seem better to do velocity stacks depending on the motor

    Regedit'ed, Rooted, and Jailbroke anymore questions?
    Here’s a bumper sticker I’d like to see: “We are the proud parents of a child who’s self-esteem is sufficient that he doesn’t need us promoting his minor scholastic achievements on the back of our car.”

Posting Permissions

  • You may not post new threads
  • You may not post replies
  • You may not post attachments
  • You may not edit your posts
  •