Page 2 of 7 FirstFirst 1234567 LastLast
Results 11 to 20 of 70

Thread: Neptune's Trident

  1. #11
    Modding the World, One Case at a Time Boddaker's Avatar
    Join Date
    Jun 2005
    Location
    Northern CA
    Posts
    818

    Default Re: Neptune's Trident

    lol thanks Jeff.


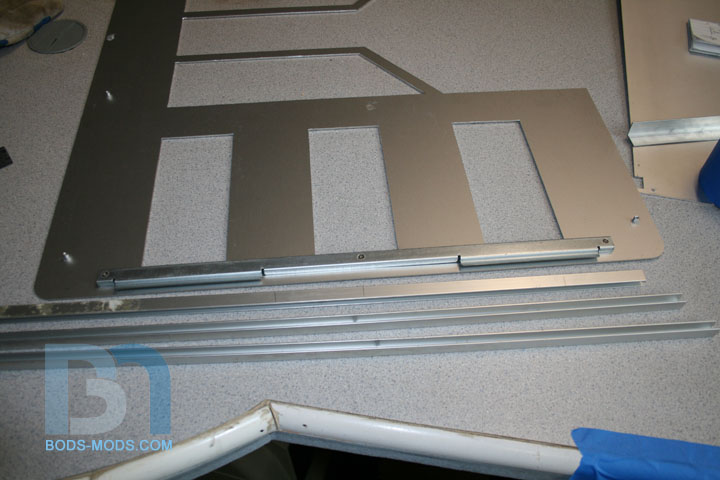
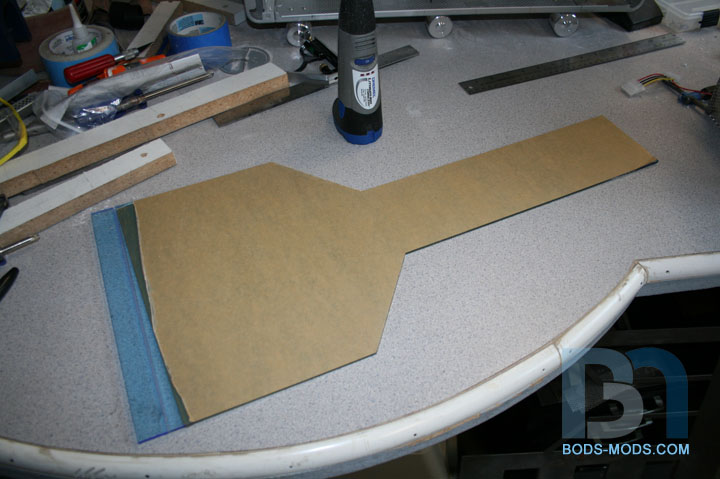
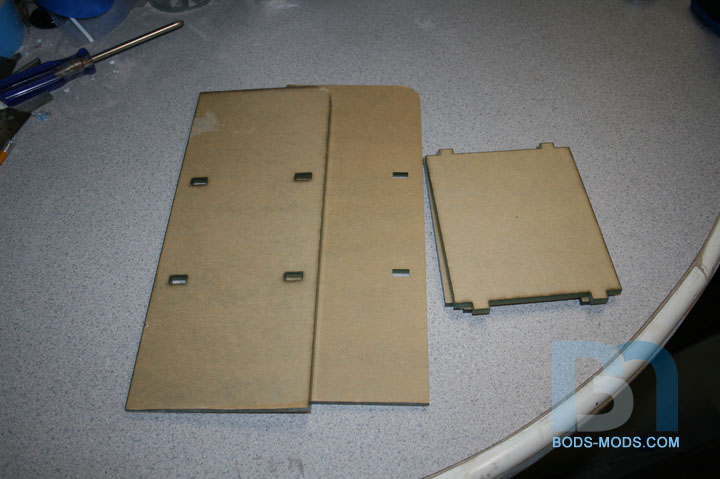
    Work continues on the side panels..

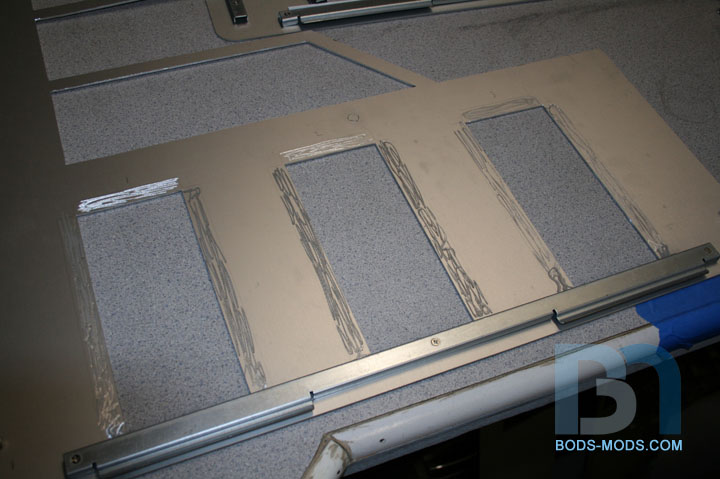
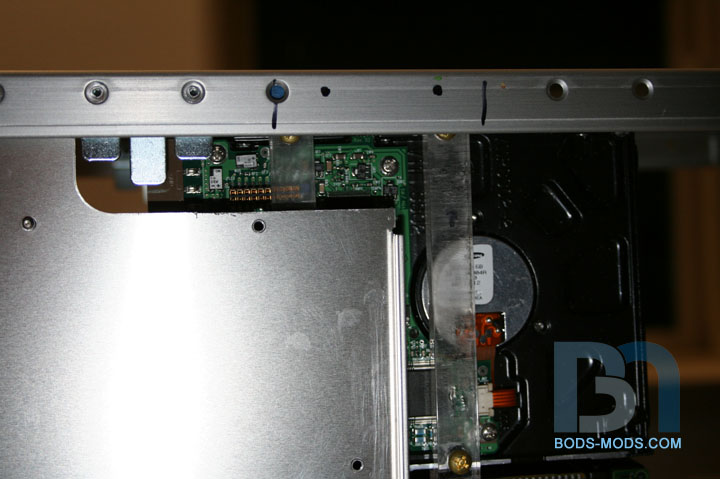
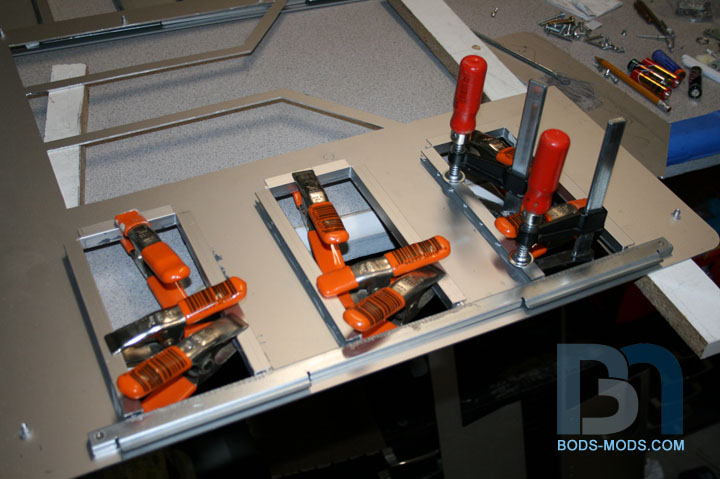
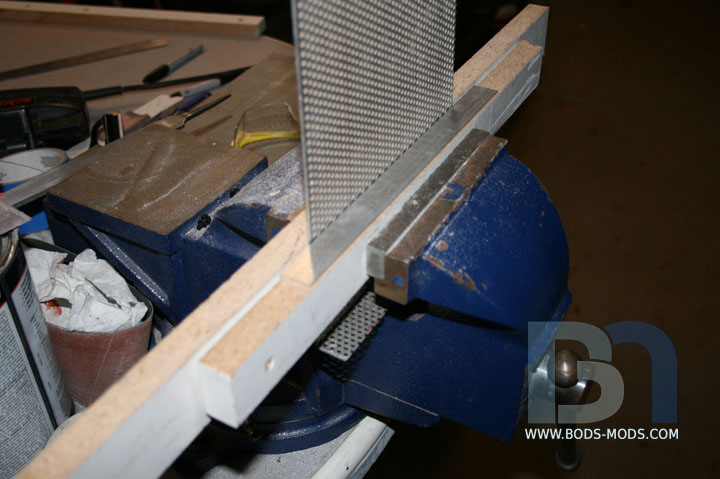
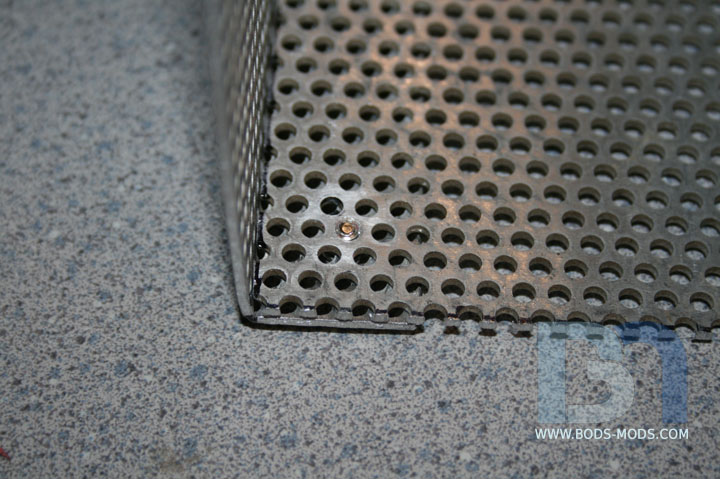
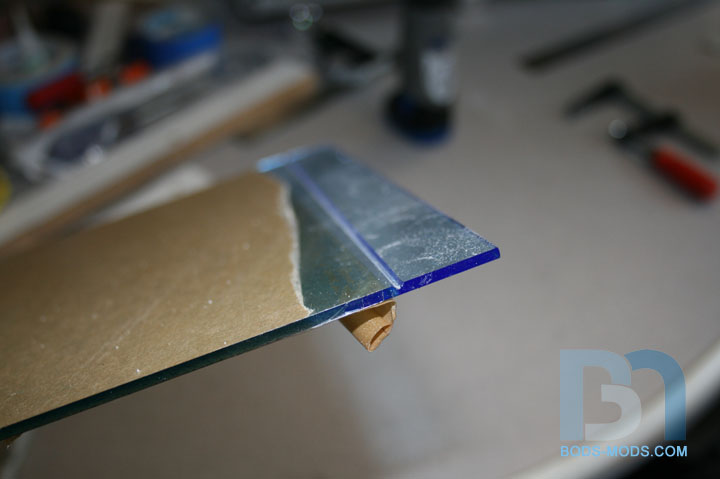
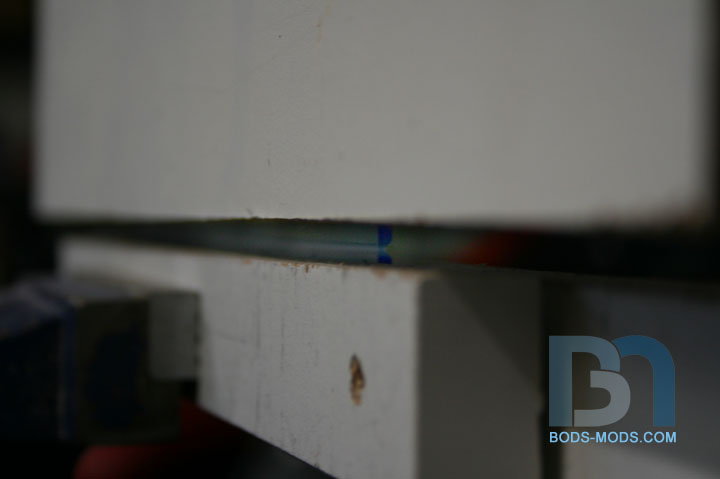
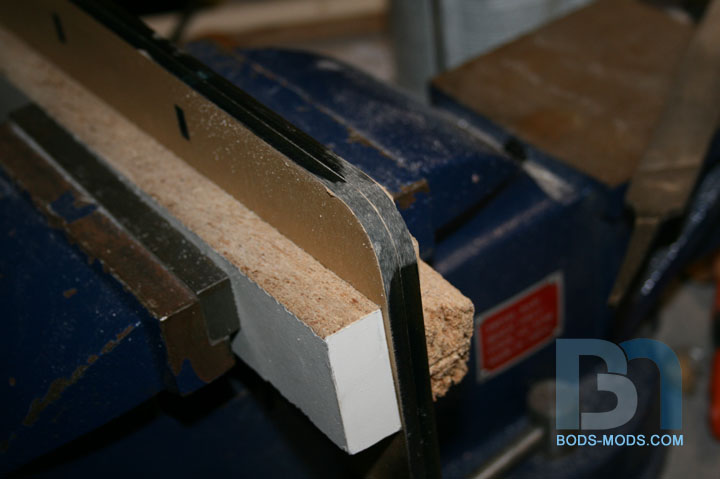
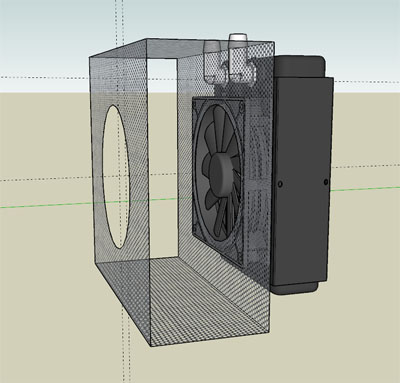
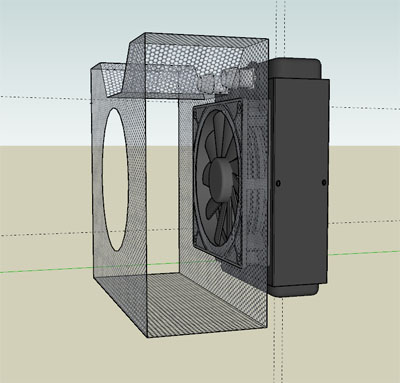
    Ok, so these three pass-through holes are becoming more tricky than I thought at first. In order to get a nice clean transition
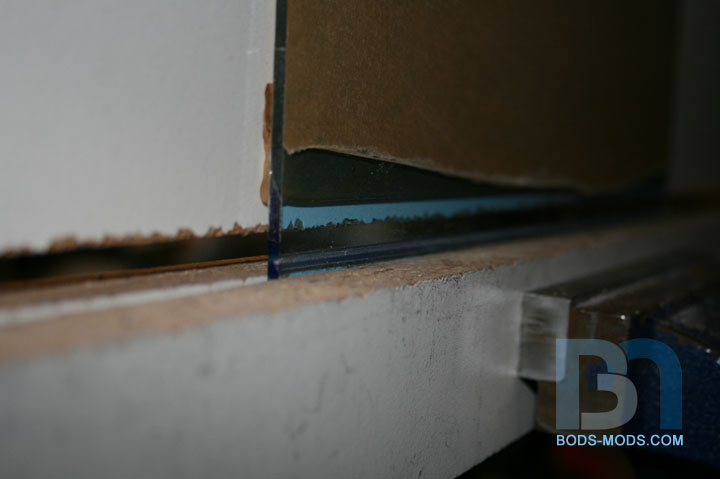
    through the side panel, I need to add a lip around each hole. You can see in this first pic there is already a bottom lip, which is the
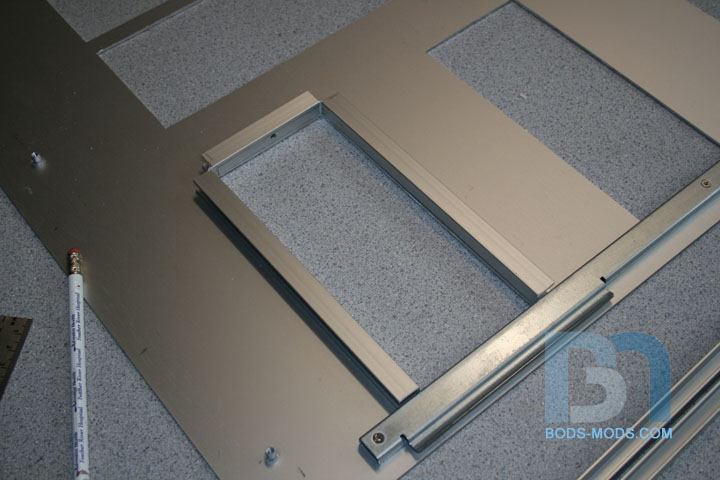
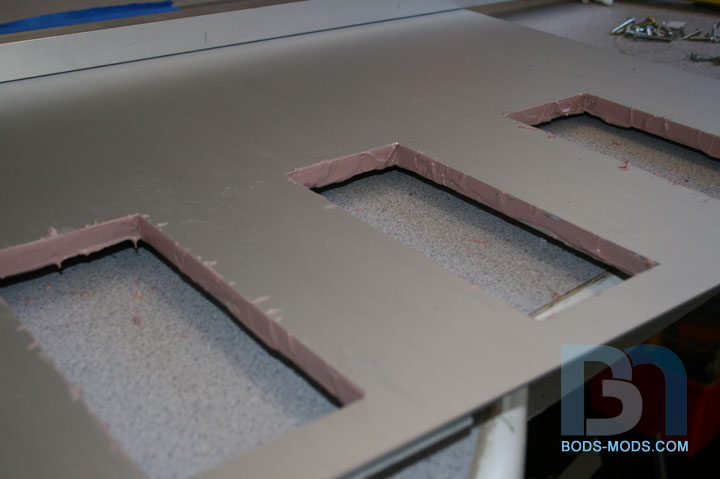
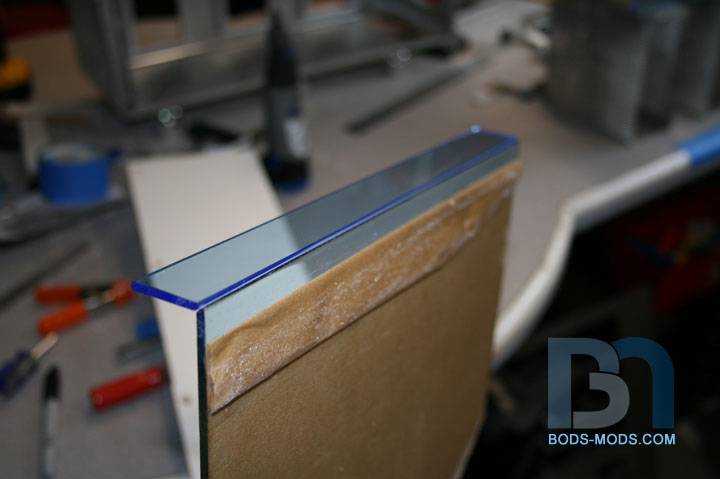
    channel used to secure the panel onto the case. So I had some U-channel lying around, and will continue the lip around each hole with it.


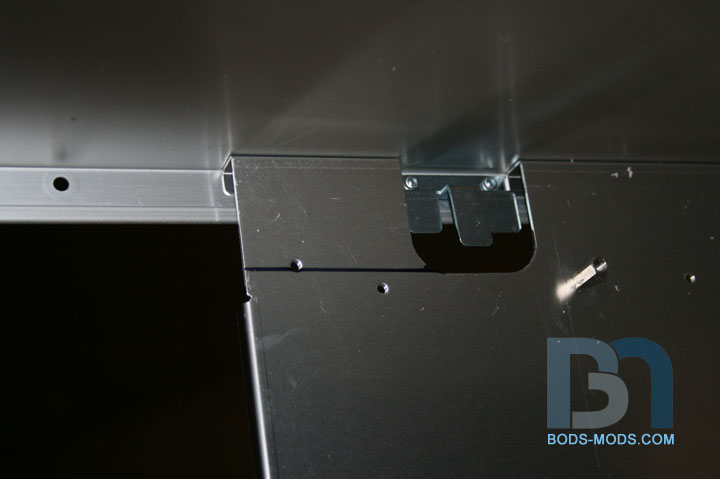
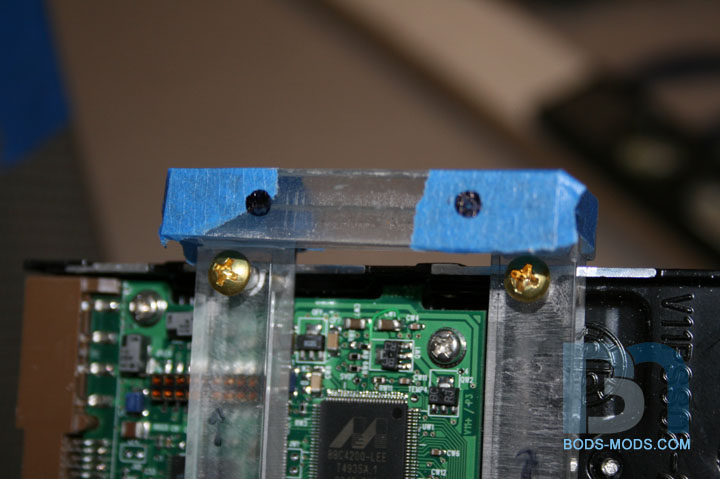
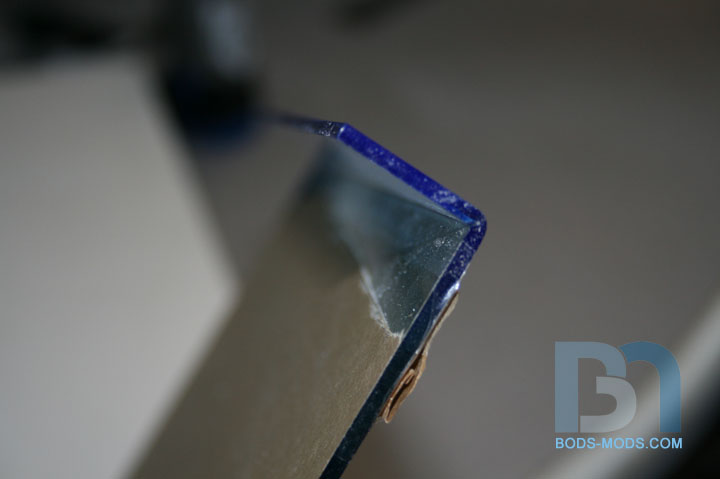
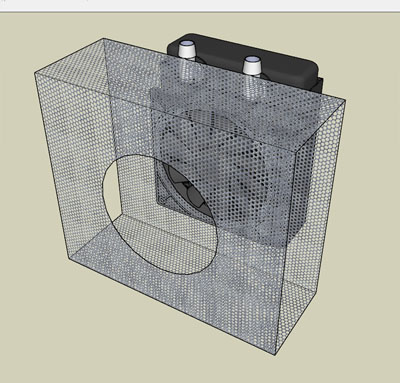
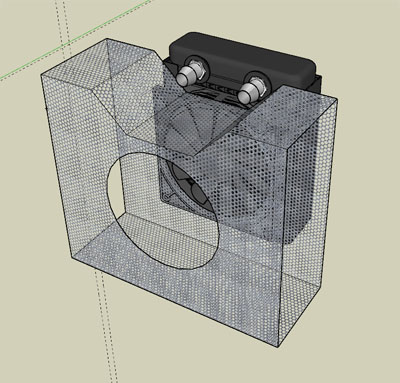
    All I had to do was make a cut into the open end of the channel, leaving the back side in tact, then bend 90° for each corner.


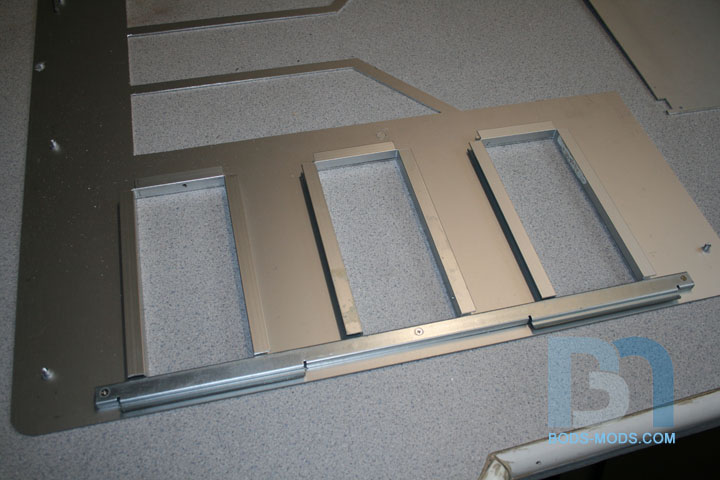
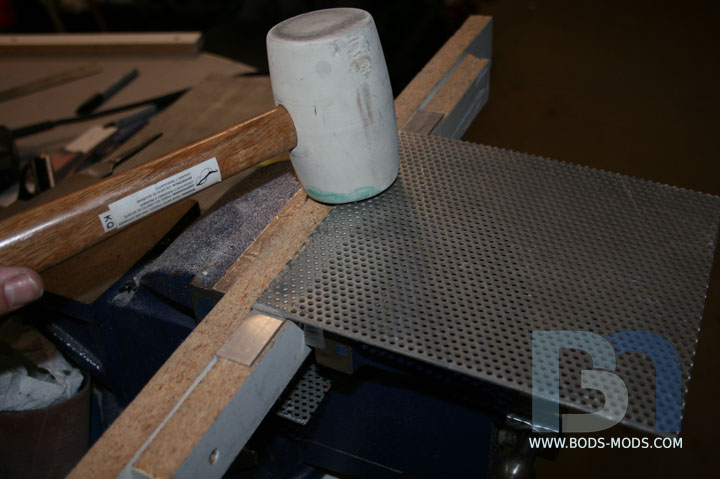
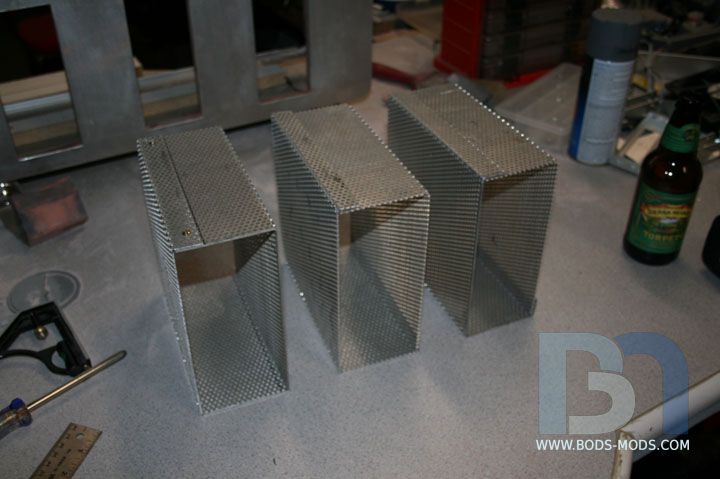
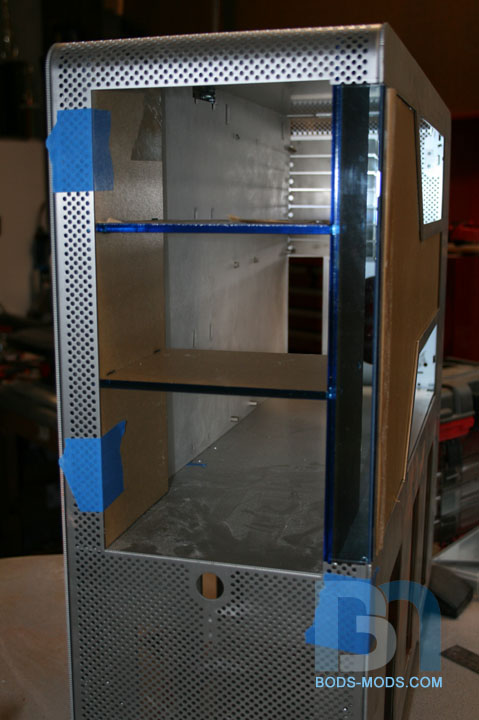
    Three done, three to go for the other side panel.


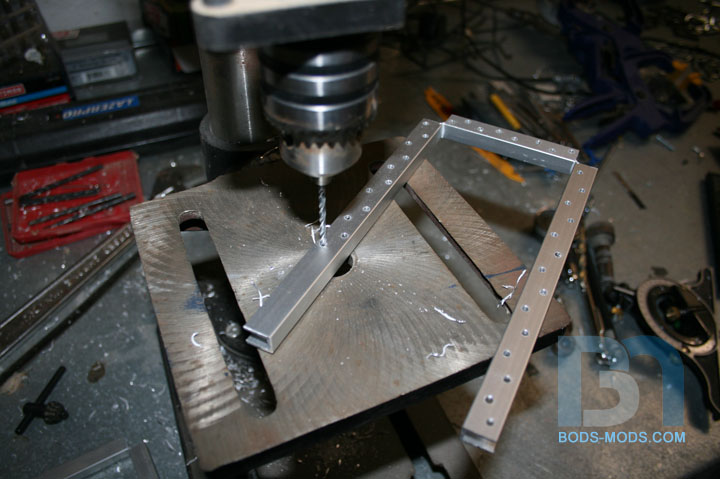
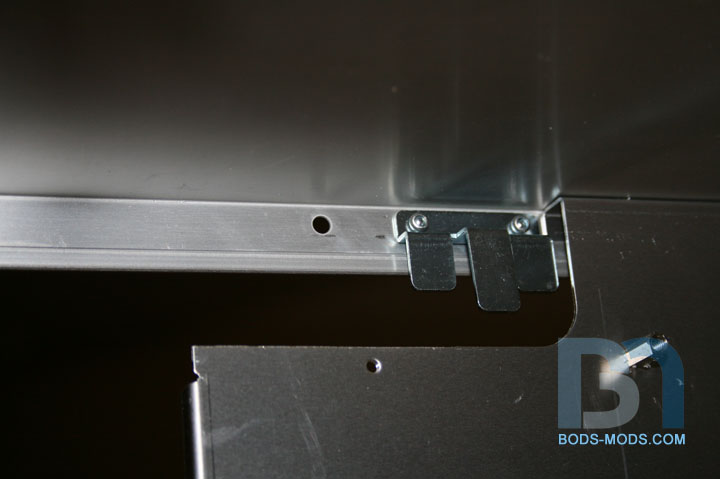
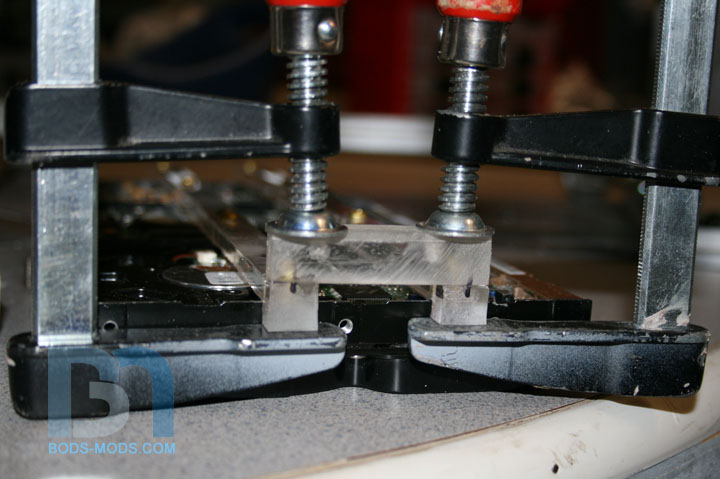
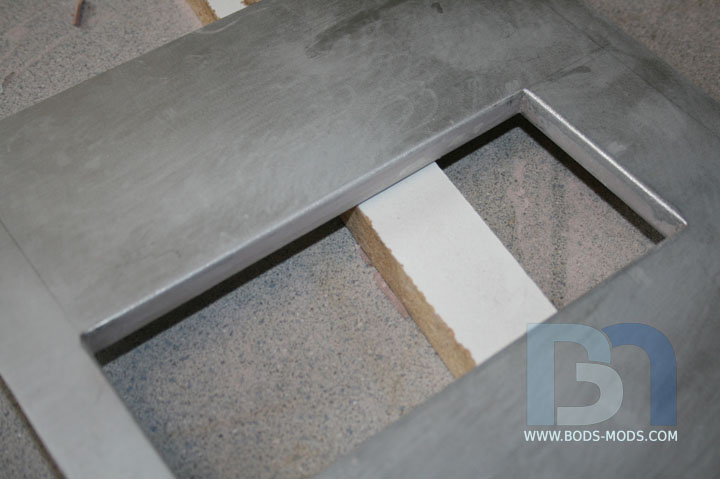
    To secure these to the side panel, I will be using some cold weld epoxy. I'm drilling a bunch of holes to give it something to grab onto.


    And on the panel side I ground it up a bit, again for better adhesion.


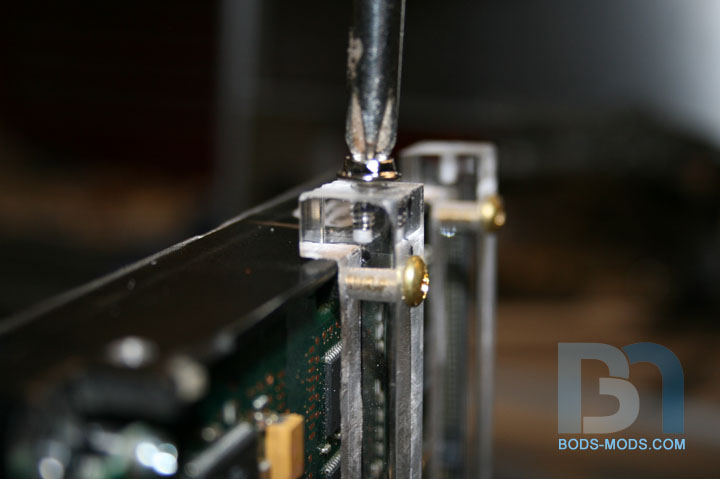
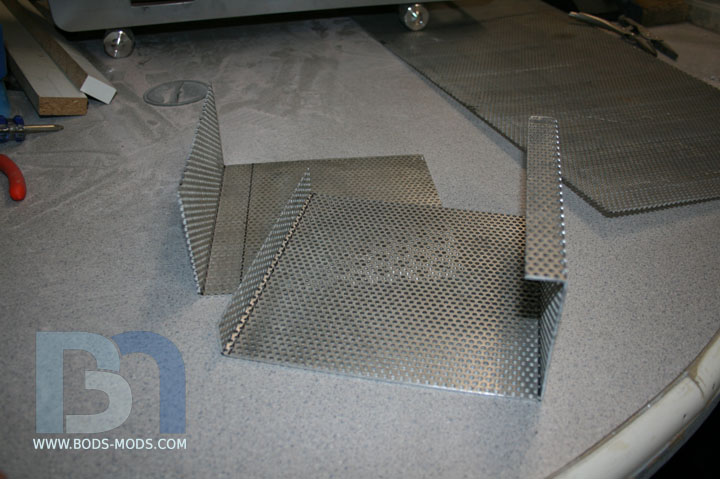
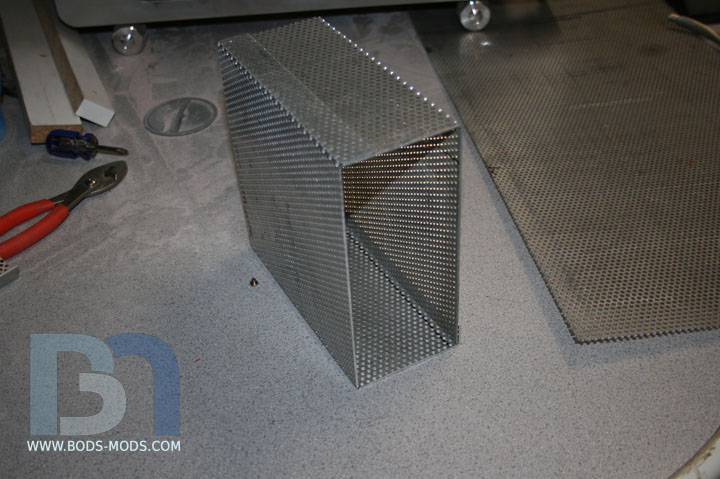
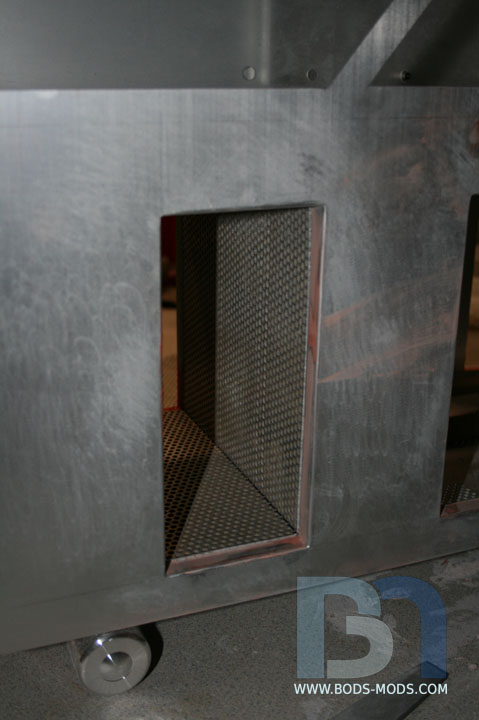
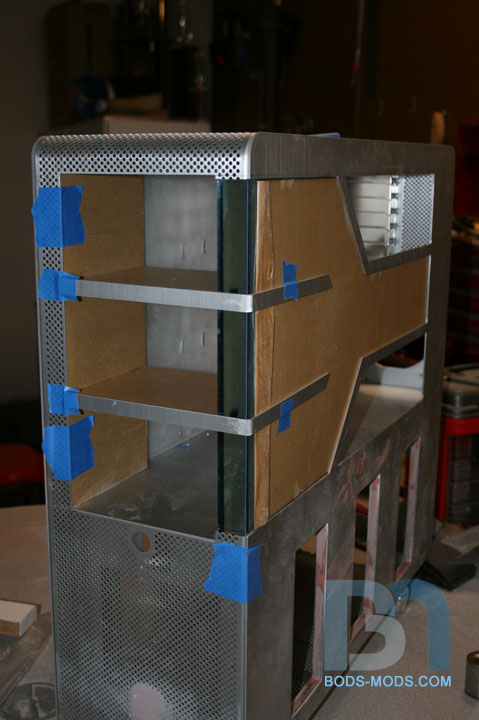
    Once I get it all epoxied up, I'll add some bondo around the seams and smooth it out. From the front it will look like the
    side panel is 1/2" thick. But more importantly, I will have a flat surface to which the rectangular tubes will mate.
    Honey Roasted Peanuts Ingredients: Salt; Artificial honey roasting agents; Pressed peanut sweepings.

  2. #12
    Modding the World, One Case at a Time Boddaker's Avatar
    Join Date
    Jun 2005
    Location
    Northern CA
    Posts
    818

    Default Re: Neptune's Trident

    Getting back to the hard drive rack today, I was able to get it mounted to the case.

    I wanted to position the hard drives evenly in between the reservoirs and the motherboard. As such, it turns out that I will have
    to notch the tray a bit at the top. So I marked the area where I needed to trim,


    ..and cut it away.


    Then I made an acrylic spacer to fit the lip of the case.


    Here's a shot from behind. I marked two spots for new holes,


    ..then once they were drilled out, I marked the spacer.


    Once that was drilled out, I glued it onto the hdd posts.


    Using countersunk fan screws, I secured the top to the case.


    For the bottom of the posts, I just marked the area of contact on the floor, drilled a hole and marked the bottoms of the posts.
    I seem to have misplaced my 6-32 tap, so I just used one of the screws instead. No, they weren't self-tapping screws.
    Since I was screwing into acrylic, I took my blow torch and heated up the screw a bit,


    ..then just screwed it into the hole, waited til the acrylic solidified, and backed it out again. Voila! Instant threads lol.


    Here's a shot from below showing the bottom screws in place.


    And a shot of the drive rack mounted in the case with drives.
    Honey Roasted Peanuts Ingredients: Salt; Artificial honey roasting agents; Pressed peanut sweepings.

  3. #13
    Modding the World, One Case at a Time Boddaker's Avatar
    Join Date
    Jun 2005
    Location
    Northern CA
    Posts
    818

    Default Re: Neptune's Trident

    Ok I have an update for ya.

    For the last week and a half I've been chuggin away at these side panels. The last side panel update I left off with prepping
    them for the cold weld epoxy for the edging around the holes.

    So here is a shot of the edging being epoxied down, held in place with as many clamps as I could find. ;-)


    It's been pretty cold up here, so I brought the panels inside to set up overnight. After that, I applied a bit of bondo to smooth
    out the transition between the panel and the edging.


    After the requisite amount of sanding and filing, here is the result. I also went ahead and rounded the corners for a nicer look.


    Since it's too cold to paint, I set the panels aside and started on the three mesh boxes. I scored a sheet of aluminum
    mesh from a local metal supply warehouse. 12x48 for $20. So in order to get three 7"x3" boxes out of that piece,
    I had to do two parts per box. So I cut the first piece and measured out my bend lines.


    Using a couple pieces of mdf and a piece of L bar, I started my bends.


    I used a rubber mallet to bend the mesh over.


    Got the first two-part box cut and bent.


    They slip together like so. Since the inside of the boxes are what will be seen, I made sure my overlapping ends were on the outside.


    I'm securing them together with some short screws that fit perfectly into the 1/8" holes. The mesh doesn't line up,
    so I drilled out the outside to match the inside, and screwed them together.


    A shot of the screw from the inside. Pretty subtle, and once painted, will be unnoticeable.


    Got all three boxes bent.


    And here's a shot of them inside the case with the side panels on.


    A closeup of the first hole.


    I got them propped up on some wood pieces right now, but they will eventually sit on the custom rad/fan mount I designed. Will show that when I get it in.

    :cooldude:
    Honey Roasted Peanuts Ingredients: Salt; Artificial honey roasting agents; Pressed peanut sweepings.

  4. #14
    Modding the World, One Case at a Time Boddaker's Avatar
    Join Date
    Jun 2005
    Location
    Northern CA
    Posts
    818

    Default Re: Neptune's Trident

    Thanks guys!

    Ok, got the acrylic pieces in and they look sweet!

    So I went straight to work on the rad/fan mounts. Rather than designing them as two one-piece
    rails and bending the mounting tabs, I opted to have them cut separately so I could glue them together.
    That way I get a clean 90° corner.
    Here they are with the tabs glued on.


    I didn't waste any time putting the fans and rads in place.


    ...And sitting in the case with the mesh boxes resting in their places.


    I will secure the rails to the bottom of the case with some brackets.

    Honey Roasted Peanuts Ingredients: Salt; Artificial honey roasting agents; Pressed peanut sweepings.

  5. #15
    Modding the World, One Case at a Time Boddaker's Avatar
    Join Date
    Jun 2005
    Location
    Northern CA
    Posts
    818

    Default Re: Neptune's Trident

    Time for the weekend update! Worked on more acrylic stuff. In addition to the fan/rad mounting,
    I had Moddersmart cut me the window and res rack, also out of transparent blue acrylic.

    Here is the center window, with the backing peeled off the end that will wrap around the corner of the case.


    Here you can see I had them route a V-notch at the bend point to facilitate a sharper corner,
    and make it easier to bend with a heat gun.


    The idea in setting up for the bend, is to direct the heat right where you want it. So I sandwich the
    acrylic between two pieces of MDF, with a larger piece clamped just above the bend line. This helps
    direct the heat and also helps keep the acrylic flat as I bend it down.


    Some closeup shots of the isolated area to be heated..


    After applying the heat, the acrylic is slowly bent to shape. The weight of the large MDF actually did
    most of the work lol.


    Here it is, taped in place.


    Next up is the res rack (formerly the 5 1/4 drive bays). After numerous measurings, I made up
    a design that would take the place of the drive bays, and accommodate the three pump/res's with
    room for a slot loading DVD drive at the bottom. Cross members were strategically placed so
    they would be in between the pump/res's and eventually hidden from view behind the two trim pieces.


    In order for the rack to be flush with the front of the case, I had to round the top corners to fit the
    case's radius. I used a socket with a matching radius to mark the acrlyic.


    Here is the rack assembled. Once I get the Typhoons in, I will drill the mounting holes to match,
    then glue everything together.


    Placed in the case..


    ..And with the metal trim pieces.


    I'll be working on securing the res rack into the case today.

    You also may have noticed I made an acrylic cover for the inside. This will go behind the motherboard
    and hard drive rack, and will be painted to match the interior.

    Ok, now for some goodies! I thought I'd reveal some of the hardware that will be going in this thing:


    EVGA 790i motherboard
    Intel Core 2 Extreme QX6850 3Ghz CPU
    EVGA GTX260 cards (x3)
    4Gb DDR3 Crucial Ballistix Tracers in blue 1600Mhz
    Samsung 1TB HDD (x3)
    Corsair 1000W PSU (shown previously)


    Honey Roasted Peanuts Ingredients: Salt; Artificial honey roasting agents; Pressed peanut sweepings.

  6. #16
    Modding the World, One Case at a Time Boddaker's Avatar
    Join Date
    Jun 2005
    Location
    Northern CA
    Posts
    818

    Default Re: Neptune's Trident

    Quote Originally Posted by The boy 4rm oz View Post
    Please tell me that you will water cool the GTX260's, they will cook like that lol.
    lol I will definitely be slapping some blocks on those 260's. I just threw them on the mobo for a quick pic.
    Honey Roasted Peanuts Ingredients: Salt; Artificial honey roasting agents; Pressed peanut sweepings.

  7. #17
    Modding the World, One Case at a Time Boddaker's Avatar
    Join Date
    Jun 2005
    Location
    Northern CA
    Posts
    818

    Default Re: Neptune's Trident

    So I've been trying to see how I can run the tubing to/from the radiators, through the floor and up
    to the reservoirs and blocks. Using Sketchup, I went through different configurations, but came
    to realize I just don't have enough room under the floor. This is due to a blatant miscalculation on
    my part at the very beginning of the build: I simply cut the holes in the side panels too large.

    As you can see in this pic, the mesh boxes are so tall, they block the radiator ports.
    Even with 90° elbow fittings, I don't think I can make it work.


    So, aside from obtaining two more side panels and cutting the holes again, which would mean re-doing all the edging and window cutting,
    I have a possible solution, depicted below. The top pics show the mesh boxes as they are now, and the bottom pics show the proposed solution.


    What do you guys think? Any other ideas that may work better?
    Honey Roasted Peanuts Ingredients: Salt; Artificial honey roasting agents; Pressed peanut sweepings.

  8. #18
    Modding the World, One Case at a Time Boddaker's Avatar
    Join Date
    Jun 2005
    Location
    Northern CA
    Posts
    818

    Default Re: Neptune's Trident

    Quote Originally Posted by p0Pe View Post
    but... i cant help to think. i almost got into trouble cooling my phenom quad, and a single gfx card with a 360 raddy. how are you gonna cool an intel extreme and 3 gpu´s :O honestly i dont think that the 3 raddy´s can handle it:/
    I think that is one of those questions where we'll just have to wait and see. There are many variables in WC'ing a system that make each configuration unique. For example, my BSG case utilizes a 360 rad, but only has two 120 fans on it. And it cools my AM2 6000 and both 8800GTS cards with no issues.

    On Trident, I will be breaking up the loops as follows: Loop 1- CPU, loop 2- GPU1 & 2, loop 3- GPU3 & NB (and possibly SB & mosfets too). I think a single 120 rad would be sufficient for each of the loops, but as I said, it will be a wait and see. I will also be toying with the fan directions to see what gives me better numbers.
    Honey Roasted Peanuts Ingredients: Salt; Artificial honey roasting agents; Pressed peanut sweepings.

  9. #19
    Modding the World, One Case at a Time Boddaker's Avatar
    Join Date
    Jun 2005
    Location
    Northern CA
    Posts
    818

    Default Re: Neptune's Trident

    Hey guys, I finally got something to show on the tubing. After spending countless hours running tubing in Sketchup, I ended up with this configuration:


    Please don't mind the mess under the floor, that is still under construction lol. I just wanted to get the upper portion figured out first. I had initially tried running the lines from the blocks straight across to the reservoirs, but that looked horrid (I'm not even going to show that jumbled mess!). So I opted to run all lines down through the floor making it neat and clean. Yes, it will add to the overall length of each loop, but with a dedicated pump for each, I don't think I will have any problems.

    What do you think?
    Honey Roasted Peanuts Ingredients: Salt; Artificial honey roasting agents; Pressed peanut sweepings.

  10. #20
    Modding the World, One Case at a Time Boddaker's Avatar
    Join Date
    Jun 2005
    Location
    Northern CA
    Posts
    818

    Default Re: Neptune's Trident

    Quote Originally Posted by The boy 4rm oz View Post
    I think it will look very neat, very unique. Am I right by guessing that the NB will have an actual water block and not the stock cooling?

    The HDD mounting looks awesome. Personally I would remove the stickers and polish up the silver top, that would look sweet.
    lol yeah, I couldn't separate that NB cooler from the sketchup model, so I just left it.
    And yes, I plan to remove the factory stickers from the Samsung drives, and add an acrylic cover with maybe an etching of some sort.
    Honey Roasted Peanuts Ingredients: Salt; Artificial honey roasting agents; Pressed peanut sweepings.

Posting Permissions

  • You may not post new threads
  • You may not post replies
  • You may not post attachments
  • You may not edit your posts
  •