Page 1 of 2 12 LastLast
Results 1 to 10 of 16

Thread: Scratchbuilding C&Cs Mammoth Tank

  1. #1
    Overclocked Munty's Avatar
    Join Date
    Dec 2008
    Location
    Littlehampton, UK
    Posts
    392

    Default Scratchbuilding C&Cs Mammoth Tank

    Ok, after a long time of not posting this here I decided what the hell. I don't have much to do today so I'm going to spend it sharing my crazy tank building with you

    This for those who didn't catch it in conversation elsewhere, is my brilliant idea to build a Mk.1 mammoth tank from the Command and Conquer series. And of course have it be radio controlled... And have a working turret... With firing guns...

    So yeah, I've been at it for a touch over 2 months now but I'm very easily distracted and incredibly poor so it rarely makes leaps and bounds progress-wise. That said, I thought I'd been at it for longer than 2 months already so given that I have a child to look after and am perpetually broke (and actually I didn't really get started till April so that's less than 2 months ) So yeah that's not bad

    Anyway I won't share the whole build right now as it already consists of nearly 200 images and a great deal of pondering. I'm going to take some exerts from my existing worklog elsewhere and post that here so it'll be a bit impersonal for now while I catch up you good folks but I promise it's not personal

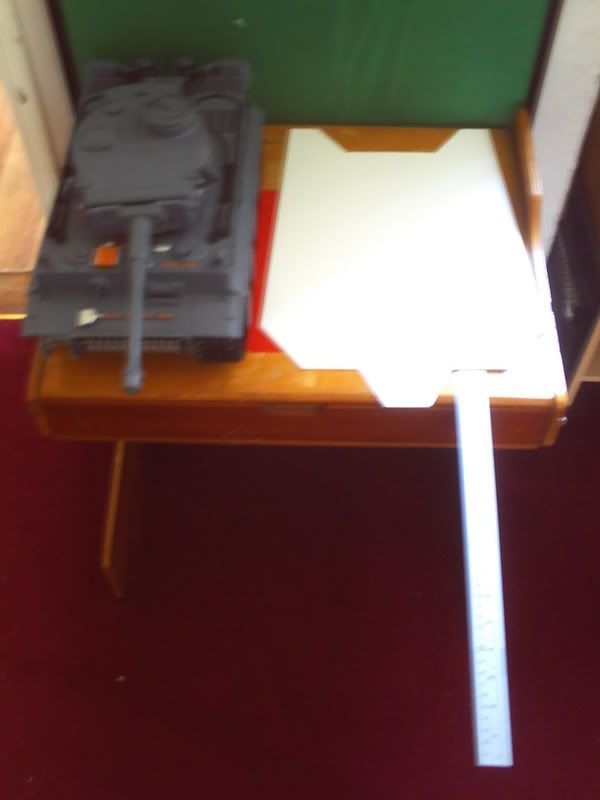
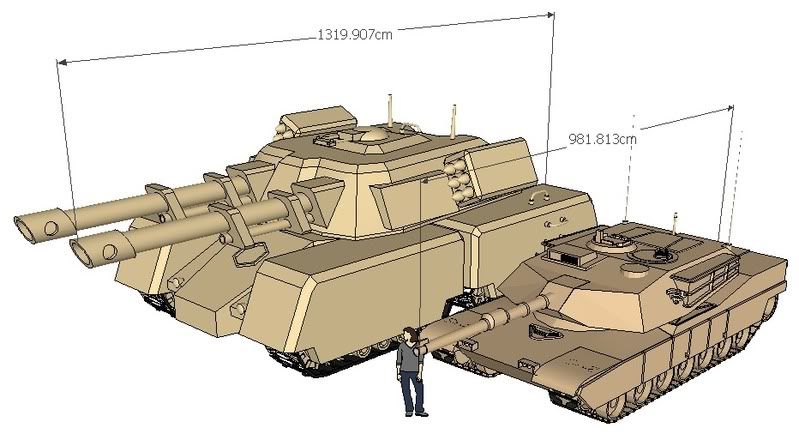
    So first thing sfirst I had to figure out the scale of this tank as nowhere is it actually mentioned how big it is. I used in game screenshots and original promotional images to gauge it but by far the most useful shot was this one with a soldier in the foreground.


    With that and a lot of other comparisons such as in-game footage of it alongside the medium tank (which is an Abrams) I came out with some final figures and then stole a model from Google's 3D warehouse for this first comparison shot.


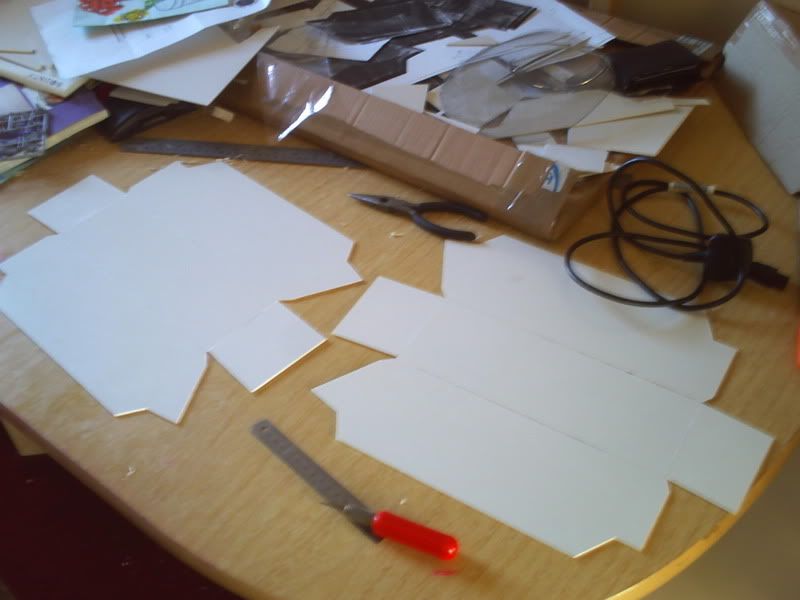
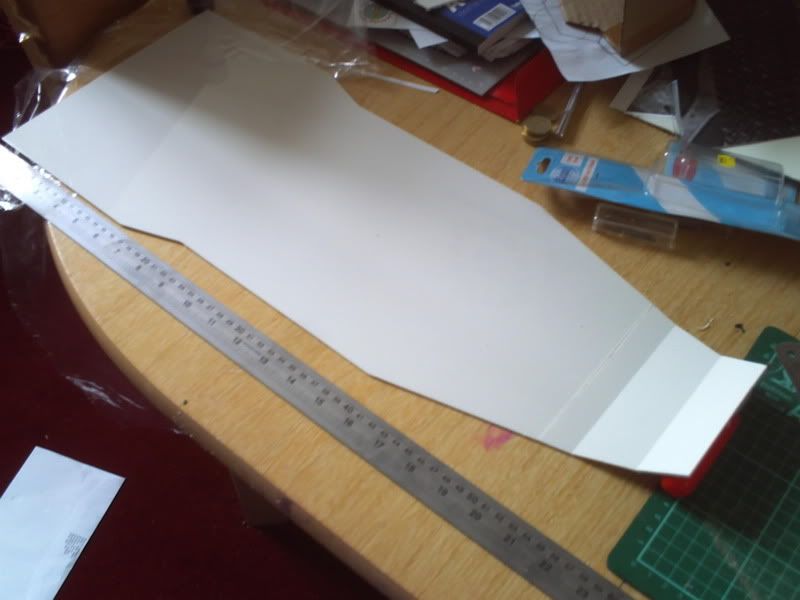
    With the scale down I got my hands on the 3D model of the tank from it's appearance in C&C : Renegade in 2-dimensional format. I printed off a few copies for small scale prototyping and found I could pretty much make it angle for angle then got another set of the plans blown up about 370% to get myself a set of full size templates for my 1:16 scale build (typical RC tank scale of course!)

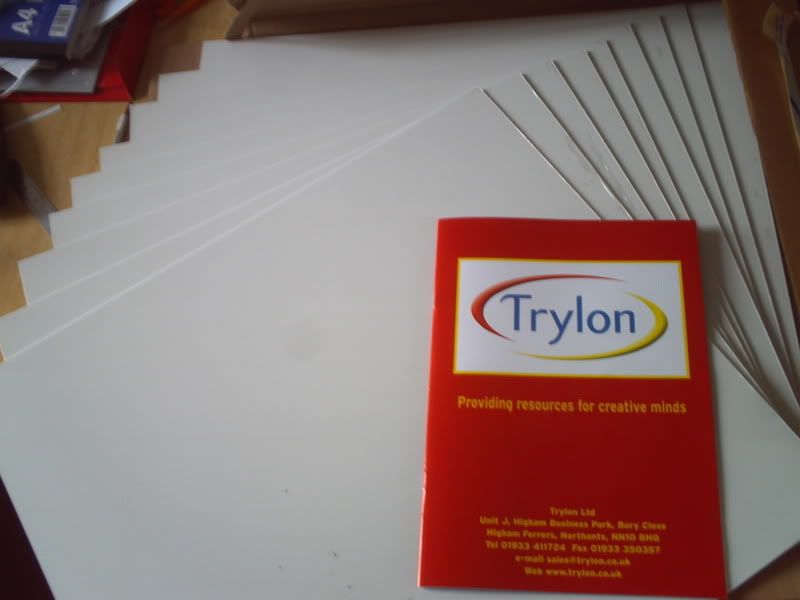
    Got my materials from Trylon (UK company) which was great and delivered lightening fast at a bargain price and then I set to work!


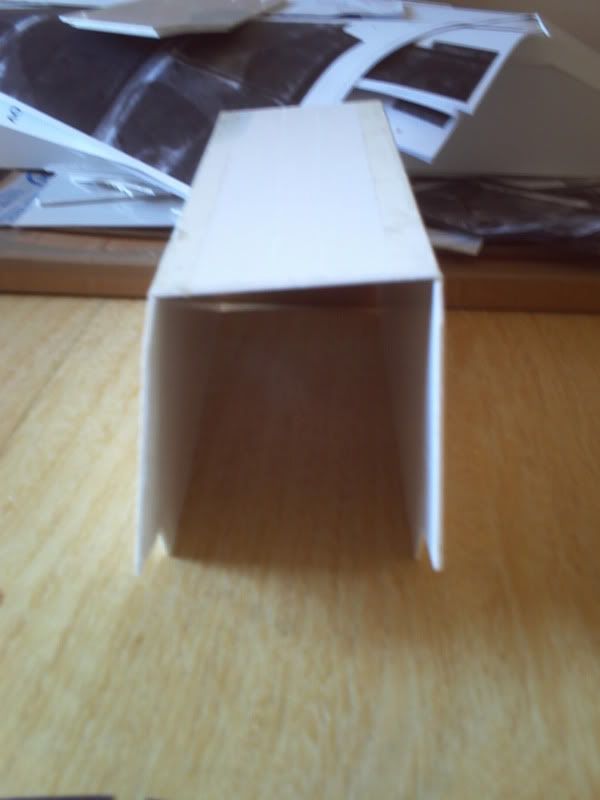
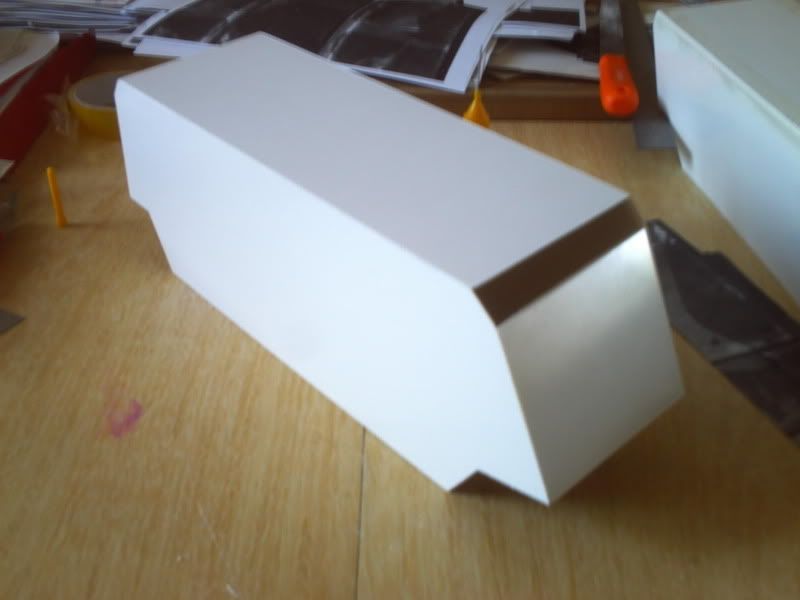
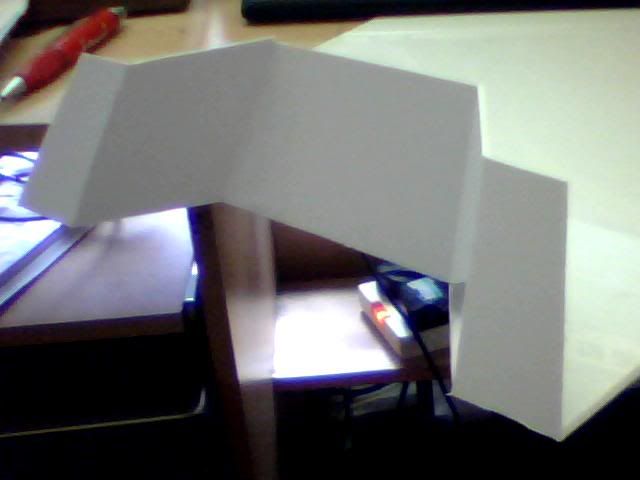
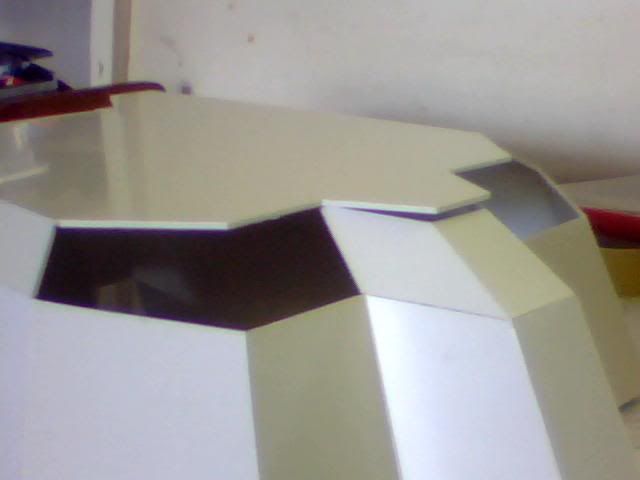
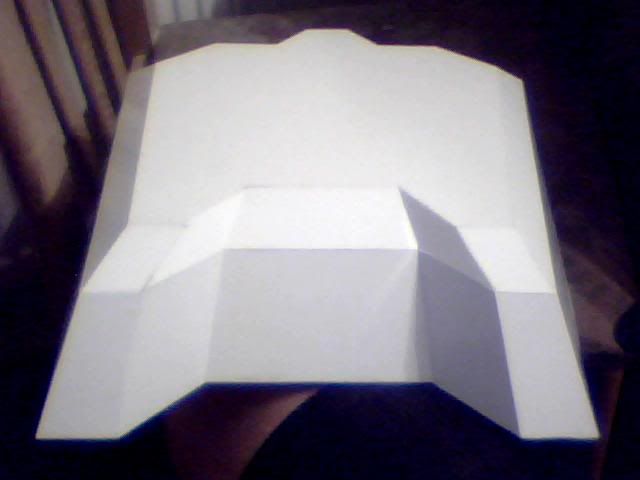
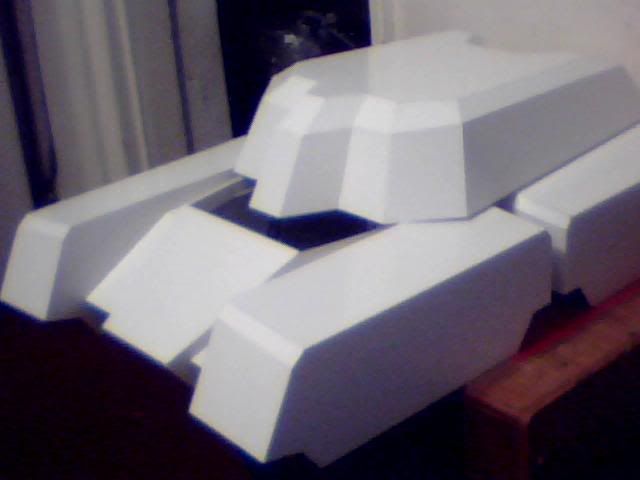
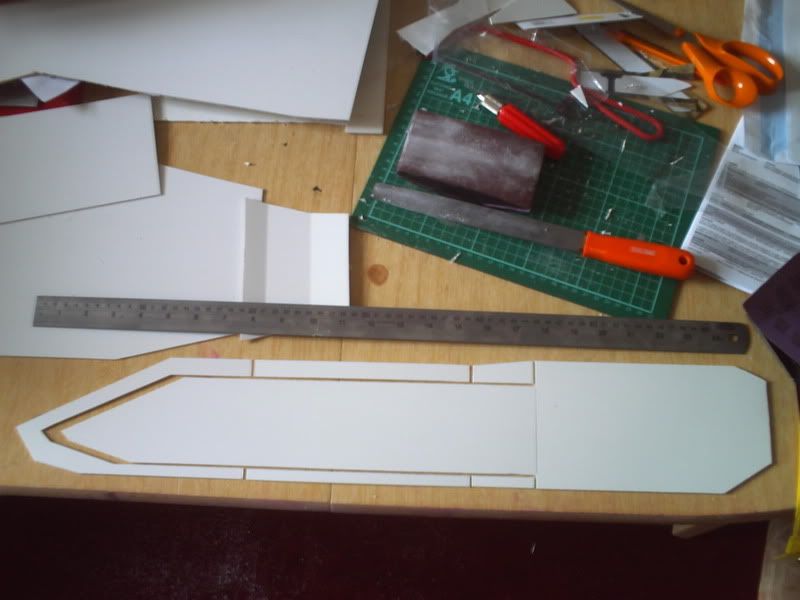
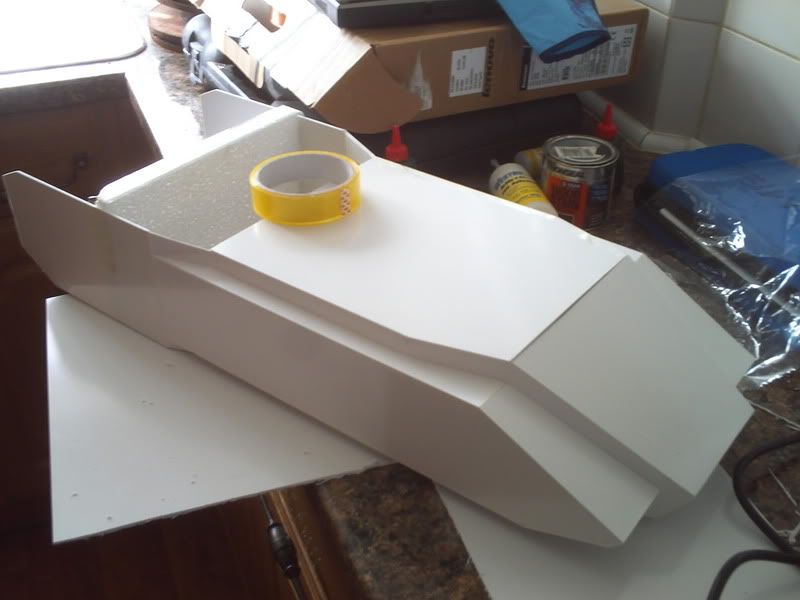
    Honestly the hardest bit was probably knowing where to start but the central hull seemed the obvious choice so I started from the bottom and worked my way up, immediately hitting a snag as I realised the material I had was about 1" too short for the bottom piece! It was easily fixed anyway and things built up from there.


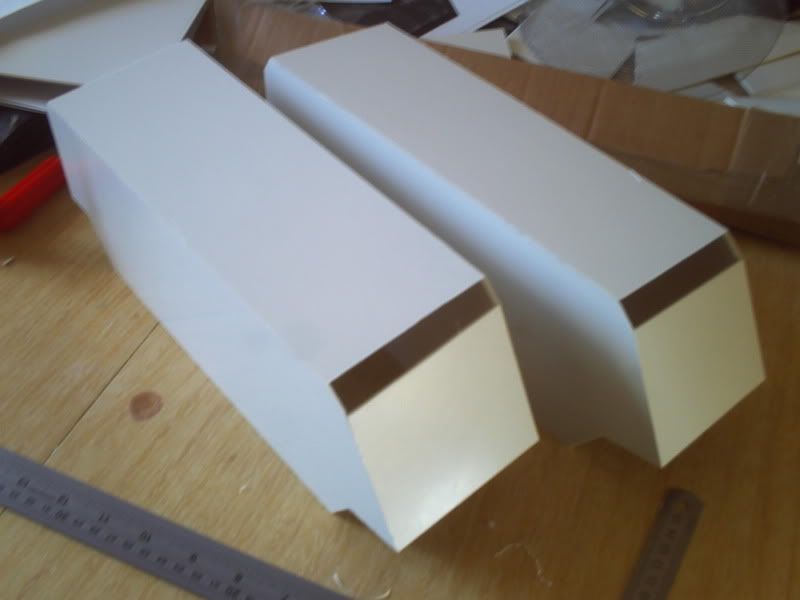
    Soon had the sides cut;


    And started building...


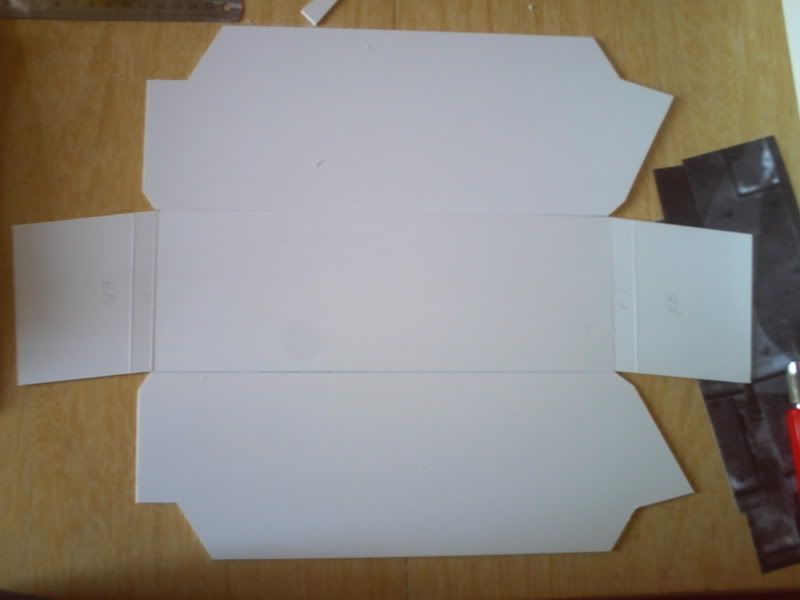
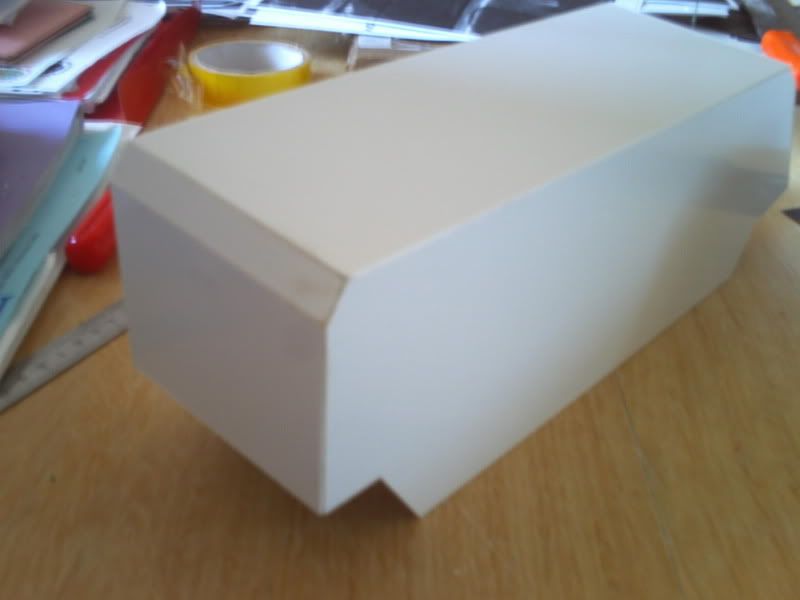
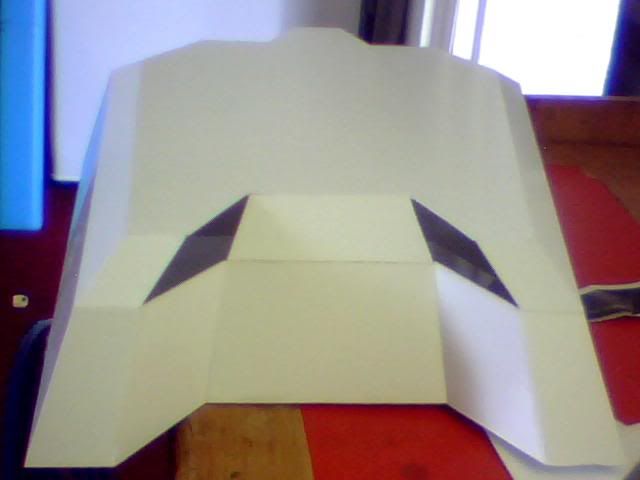
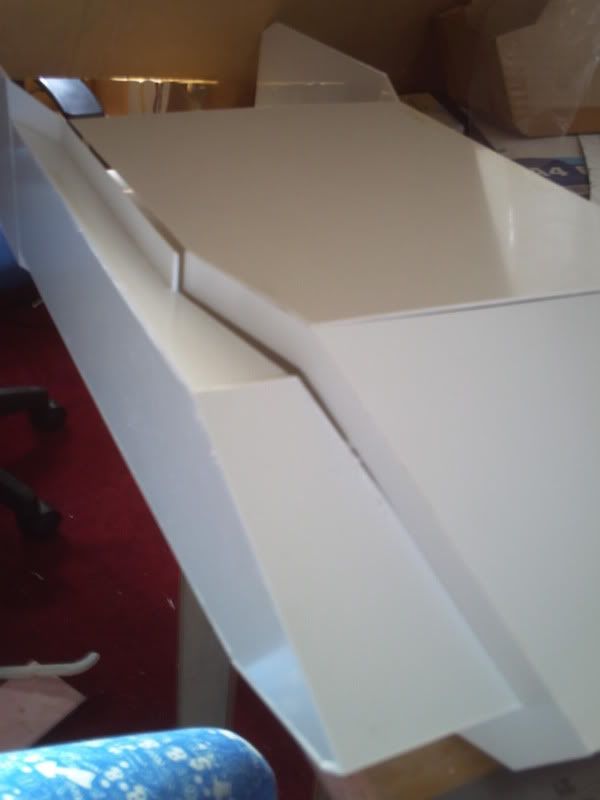
    The front panel turned out to be too narrow as I'd accidentally made the entire hull 4mm too wide by not applying a chamfer to the edges of the bottom piece and just building onto eitehr side. You'll see the result shortly!


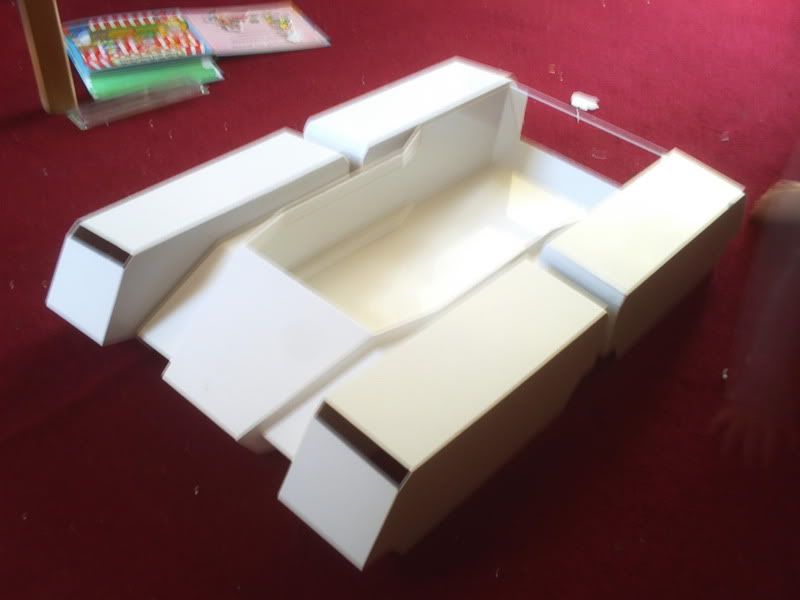
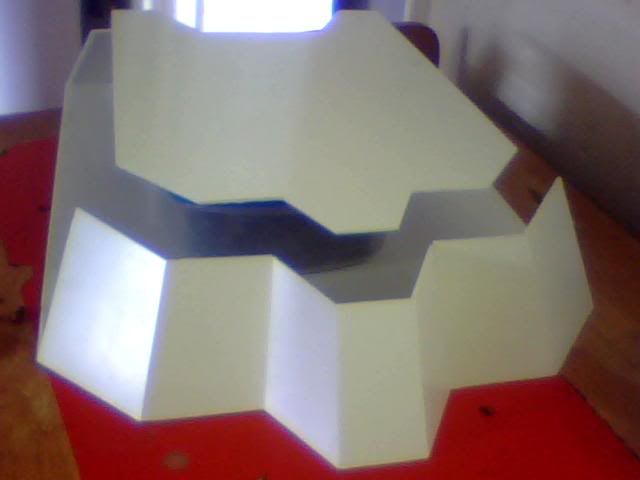
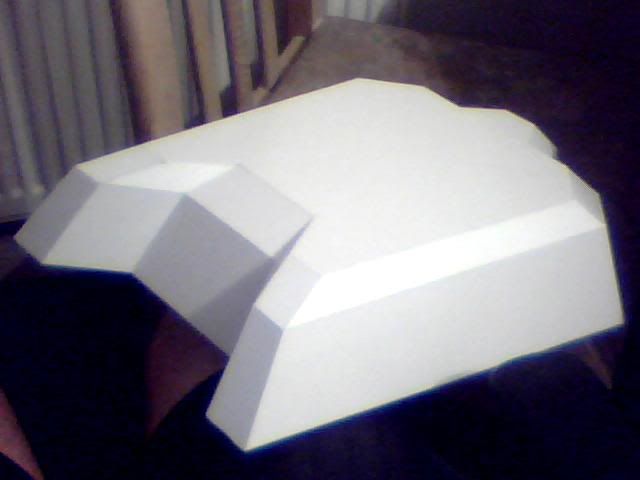
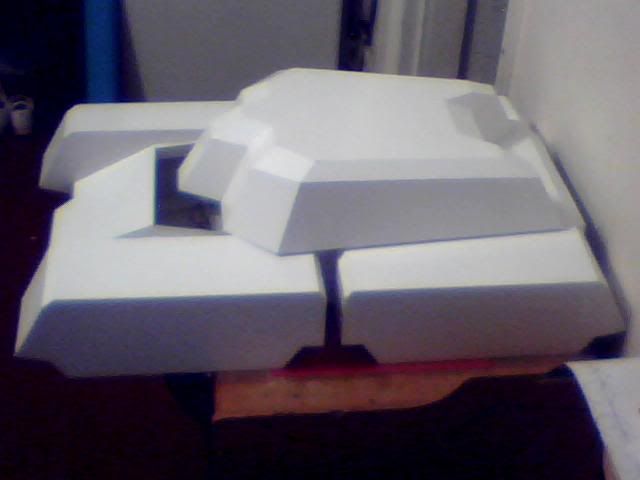
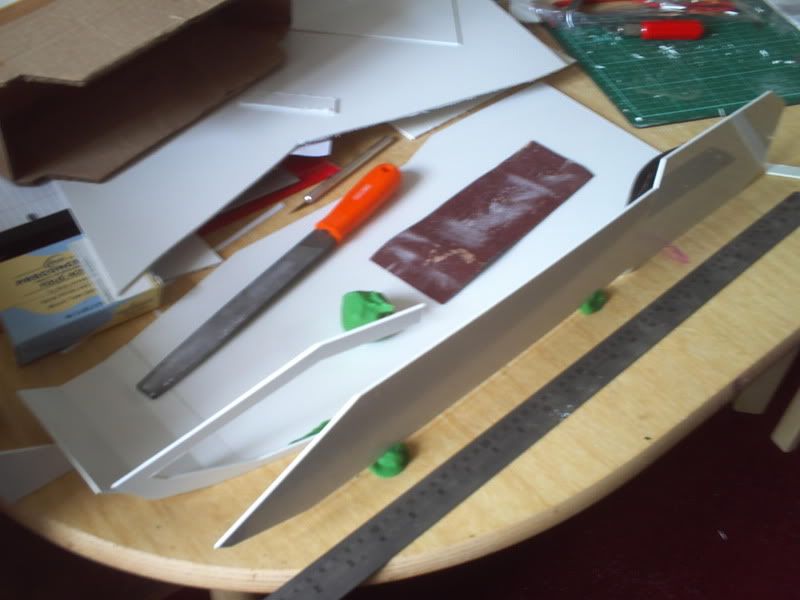
    Here it is with both sides finished and the hull top cut but this is also 4mm too narrow and is currently topping off my scrap pile (though it's a good piece so will be used!)


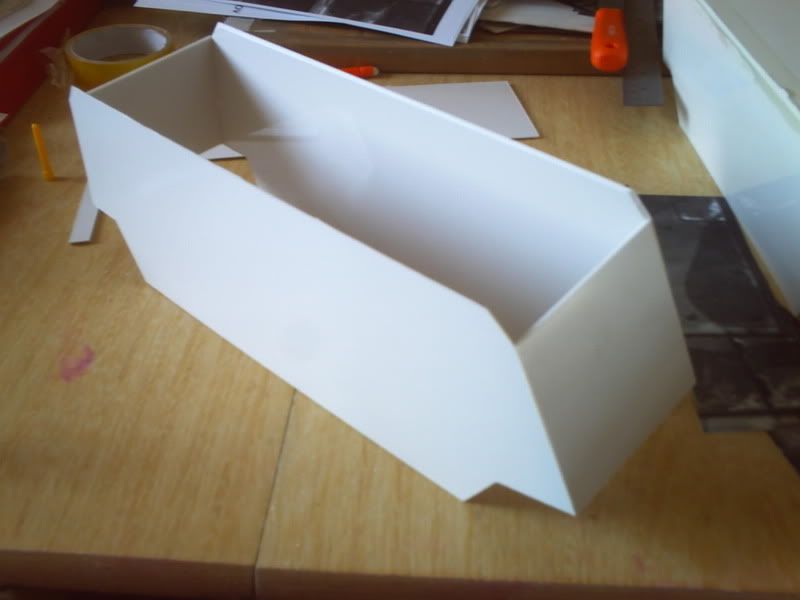
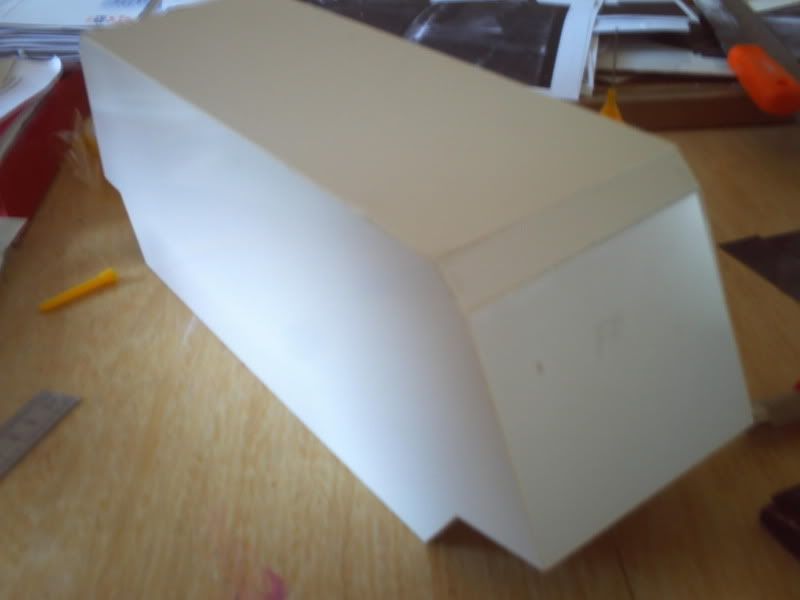
    I don't have an image of the problem caused by the narrow pieces I used but it was basically pulling the right side of the hull inwards at the top which looked horrible and was somewhat devastating for me! Luckily it was only that front piece causing it and breaking the seal fixed the problem. This is how far out my measurements were due to that silly mistake of adding 4mm!


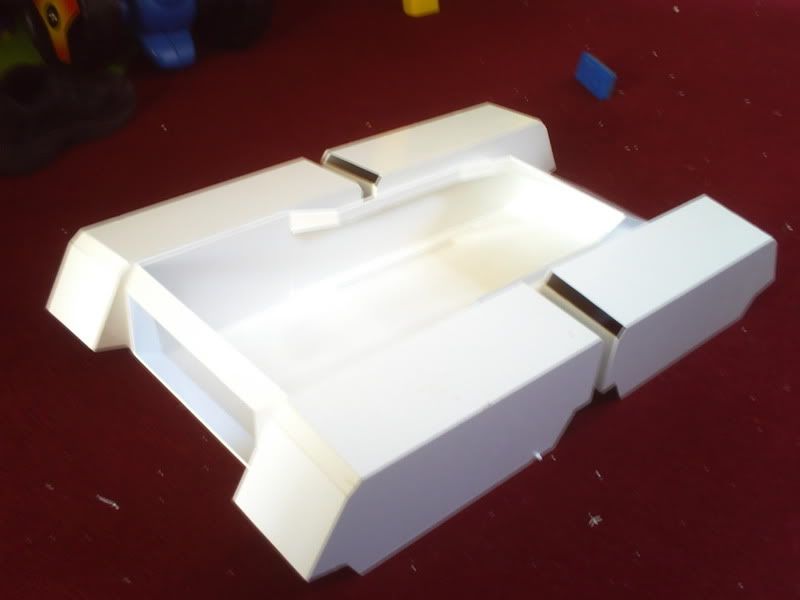
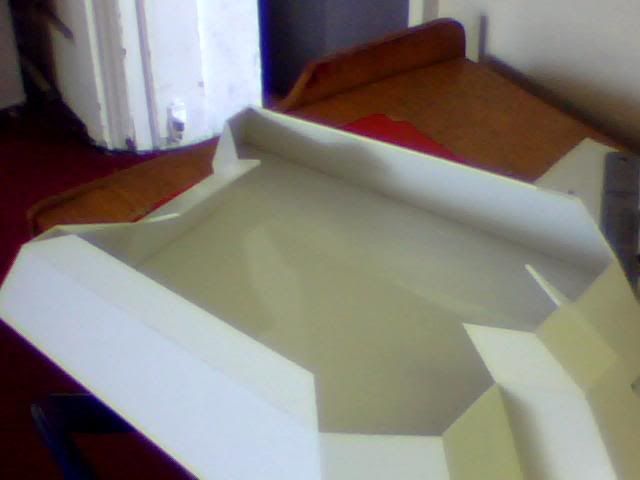
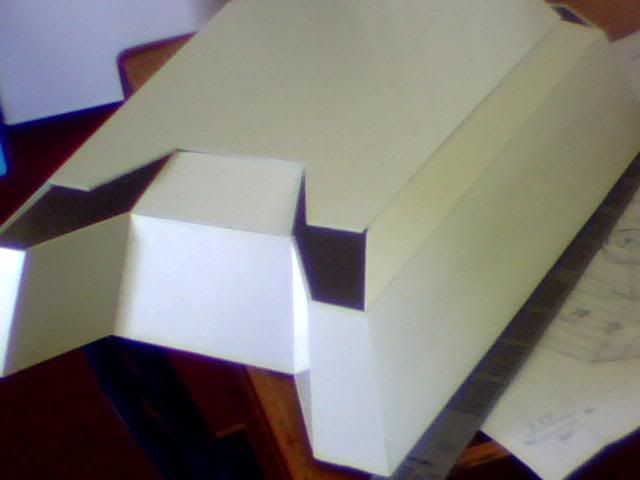
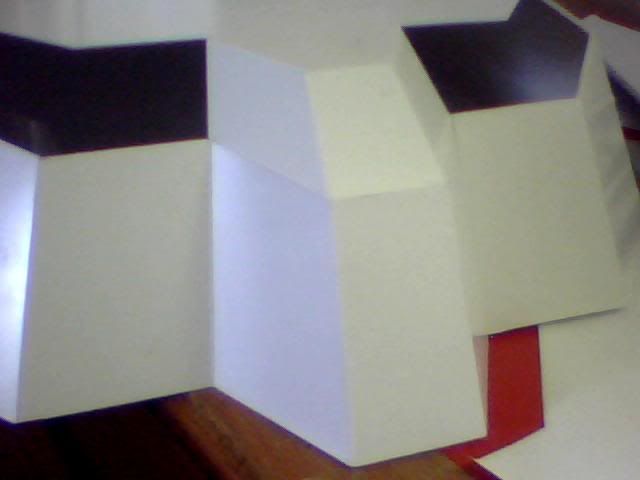
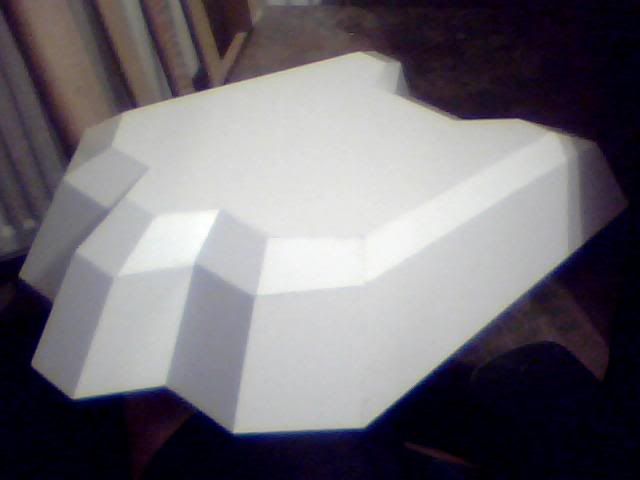
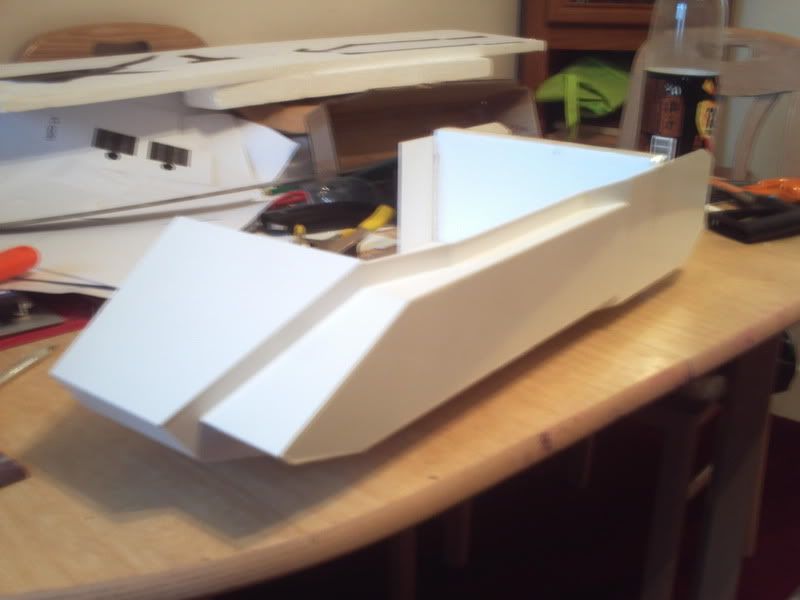
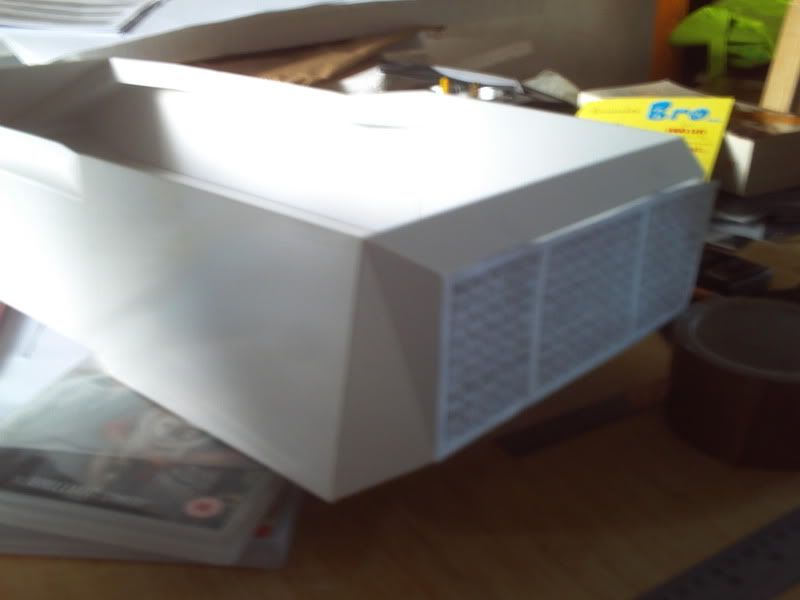
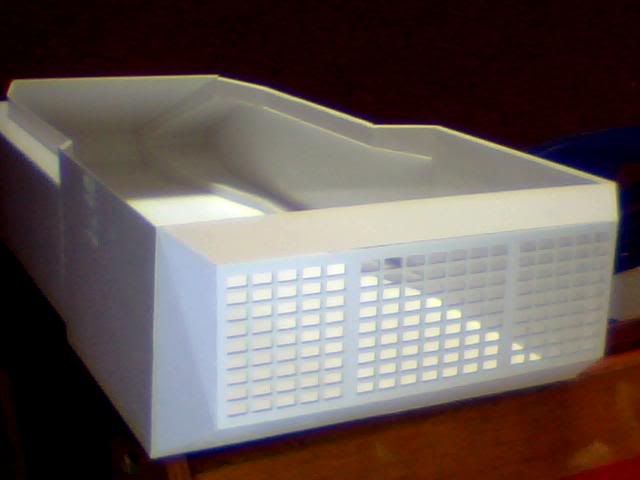
    Soon fixed that and moved onto the back which was horrible with some real nasty angles and not much to fix to! It has a large grill here which is kind of what the paper template represents here.


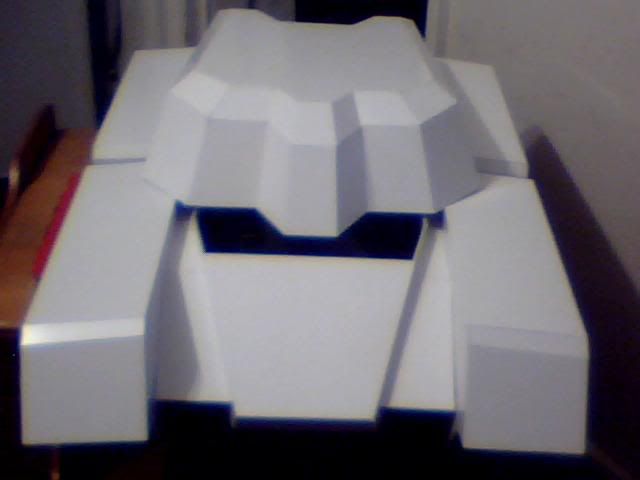
    It took a long time for that grill to arrive and it cost half as much as all the rest of the materials used to date! (9 big sheets of plasticard and one small grill!) It did the job nicely though and looks great. There'll be a finer grill on the inside of this at a later date. Topping the running right now is a kitchen sieve I um... liberated from it's handle...


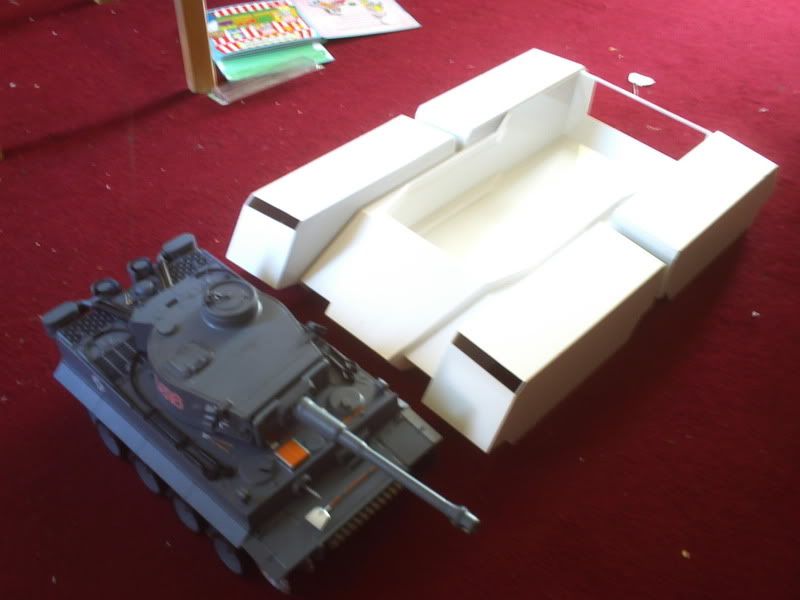
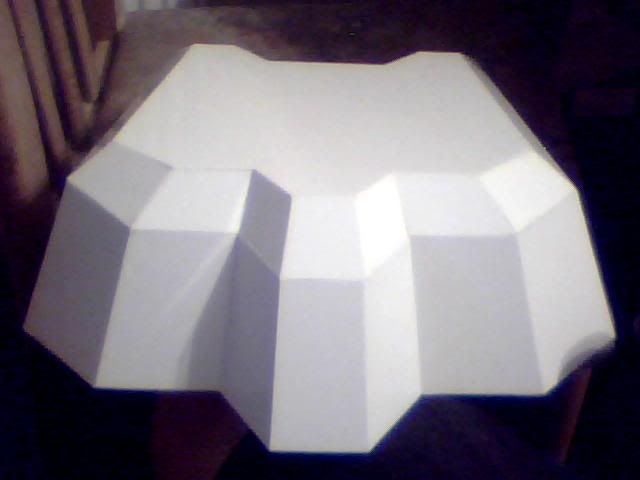
    In between those last 2 images I actually did loads, built up some track housings, took a hardware delivery AND made up some track but that's enough for now. You get the hull today and then if people are interested I'll show you the rest later

  2. #2
    100% Recycled Pixels. Twigsoffury's Avatar
    Join Date
    Jan 2006
    Location
    Oklahoma city
    Posts
    2,017

    Default Re: Scratchbuilding C&Cs Mammoth Tank

    I'm interested.

  3. #3
    If it isn't stock, it's modded! slaveofconvention's Avatar
    Join Date
    Aug 2005
    Location
    Sunderland, Tyne & Wear, UK
    Posts
    2,816

    Default Re: Scratchbuilding C&Cs Mammoth Tank

    C&C features here from time to time in conversation so yeah, I have no doubt you'll get yourself some attention with this.

    Course we WILL end up asking if you're going to put a PC in it, but thats just us

    Current Projects: Lobo | Unimatrix | High Voltage | Antec 900 Revamp (Phase 2)
    Completed Projects: General Lee | Synergy Green | Liquid Yellow
    Planned Projects: K-9-PC | Limey

  4. #4
    A.B. normal msmrx57's Avatar
    Join Date
    Jan 2008
    Location
    Western Wisconsin
    Posts
    1,602

    Default Re: Scratchbuilding C&Cs Mammoth Tank

    More, more, more, more, more, more, more, more!!!!!!! PLEEEEEEEAAAAAAASSSSSSE!!!!!
    Quote Originally Posted by SXRguyinMA View Post
    Now, off to the basement to do some fiddling with the rods and such.
    so far left of center i'm in right field

  5. #5
    Overclocked Munty's Avatar
    Join Date
    Dec 2008
    Location
    Littlehampton, UK
    Posts
    392

    Default Re: Scratchbuilding C&Cs Mammoth Tank

    Haha thanks guys, took your time though lol I'll update with the track and side armour shortly but not right now I'm afraid, just this moment finished work on the turret though which is pretty cool as far as landmarks go! I only have one more piece to cut from the styrene and then it's onto hardware and detailing so it's getting exciting now!

    And you know I really did consider whether to put a computer in it or whether to make it RC but for now the latter has won out! To be honest though the turret alone could hold a pretty decent system (or at least a complete laptop :p)

    Just so you can see what I mean, here's a pic of my 1:16 tiger tank next to the turret alone of the 1:16 mammoth :p The ruler indicates how long the barrels will be! Of course I'm a lot further along than that now but everyone likes comparison shots don't they?!

  6. #6
    A.B. normal msmrx57's Avatar
    Join Date
    Jan 2008
    Location
    Western Wisconsin
    Posts
    1,602

    Default Re: Scratchbuilding C&Cs Mammoth Tank

    I'd have commented sooner, but worked Sat. after a full week do today is my "get caught up on interwebz" day.

    As far as the PC/RC debate goes - once you've got it done the second one is easier.
    Quote Originally Posted by SXRguyinMA View Post
    Now, off to the basement to do some fiddling with the rods and such.
    so far left of center i'm in right field

  7. #7
    Overclocked Munty's Avatar
    Join Date
    Dec 2008
    Location
    Littlehampton, UK
    Posts
    392

    Default Re: Scratchbuilding C&Cs Mammoth Tank

    Ok I know I said it wouldn't be tonight but I just posted an update on the other site for the turret so I guess I can spare ten minutes to stick a few old pics on here

    Next up after the hull was the 4 track guards which are thankfully all the same and only consist of 7 pieces each. That's considerably less than the 30-something of the hull bottom alone!

    It took me a long time to get all four of these done as it was really quite boring but here for you guys they're all done in one instalment! Enjoy

    Obviously when I say all 4 corners are the same, I mean the pieces are the same, not the configurations! Here's a front view showing the angled top plate of these sections which will of course be reversed on each side of the tank.


    And here are all seven pieces from one of the tracks just waiting to have the chamfers filed into the corners before assembly.


    Due to the strange angles at the top of these assemblies I decided to start from one side and fitted the large front and rear pieces first.


    Next the other side went on...


    And then the top!


    The last two small pieces are different on every single corner of the tank for some reason but it's not overly noticeable so it's ok. Not sure how I managed it but with all the angles at play it doesn't really take much to throw these things off!


    I took a moment to mock up the tracks here but this is only a standard Tiger one I think (waaaaay too small for my big mammoth!)


    Rinse and repeat for the opposite track... Here's the construction line as I finished the last two together!


    Here's how she looked with all four tracks in place but they're only mocked up here. Notice how this is back before I recieved the rear grill and I haven't quite added the last smallest pieces of the last two tracks. This was due to their tendency to require odd shapes which took a lot of time! I think I ended up putting off making them for quite some time :p


    And here it is again with the Tiger tank for comparison. Remember it's the same scale!


    Next come the tracks and then the turret, though I may post the other way round as the turret's finished now but only one of the four tracks has been done

    I probably said this in my first post but I need some wire to finish the rest. It's 19SWG apparently (Standard Wire Gauge) so if anyone has a few dozen meters of it lying around somewhere just pm me for a mailing address

    I'll share some more tomorrow after a good sleep... Enjoy

  8. #8
    ATX Mental Case Blibbax's Avatar
    Join Date
    Oct 2010
    Location
    UK
    Posts
    134

    Default Re: Scratchbuilding C&Cs Mammoth Tank

    Have you thought about having it hold an RC tank... and a computer

    Would be a pretty pointless creation, given the need for trailing power cables, VGA cables etc., but epic nonetheless
    _

  9. #9
    Overclocked Munty's Avatar
    Join Date
    Dec 2008
    Location
    Littlehampton, UK
    Posts
    392

    Default Re: Scratchbuilding C&Cs Mammoth Tank

    Well I'll have plenty of space to fit more in it than just the RC gear. Maybe I could fit it with some wireless stuff... Or use it as mobile media storage and have a retractable USB cable somewhere lol Never be without those important documents (and a deadly entourage) again!

  10. #10
    Overclocked Munty's Avatar
    Join Date
    Dec 2008
    Location
    Littlehampton, UK
    Posts
    392

    Default Re: Scratchbuilding C&Cs Mammoth Tank

    While I'm here I figure I may as well post up the turret build... Sorry for the double post (if noone ninjas me while I write this up!)

    Anyway, I cut the turret base a long time ago during DVD night, before I'd even got the last two tracks built. You've already seen that piece a few posts back and I didn't take any more pictures until I built up the back of the first row of plating on it which is shown here...


    It then took a few days to do anything else but soon enough the front pieces followed and this shot shows the smaller topmost piece as well (it's on a box full of the track piees that I'll use for ONE of the four tracks later!)


    I'm skipping lots of pics and info here but this is with a start made on the second row. I actually had trouble with the long side pieces in the first row as following the templates left them completely the wrong shape to be useable. I took a few days off then came back and cut some new ones based off the turret I already had built. Here they are fitted along with 3 pieces at the nose of the assebly and a futher three pieces on the other sides.


    I was originally going to leave the top piece off until I had the cannons and turret hardware fitted but it was really hard getting all the angles right so I glued it down at this point. I'll cut a hatch in the bottom piece of the assembly to assemble the hardware later...


    Here you can see that the angles of the front three pieces are off so I removed them after taking this shot. I guess this is down to the front pieces being angled too far forward (something I've only realised as I sit writing this but would explain why the side pieces didn't fit and later why these angles were off!)


    Two easy bits go in at the back next, the plans having now been discarded in favour of custom build pieces based on paper templates and lots of filing!


    Then the front gets rebuilt. I'm able to reuse the central piece I removed earlier but the two side ones have horribly incorrect angles and so are discarded and replaced...


    Two more pieces at the front gave me some trouble as they required a slight flex to account for the fact that the in-game model actually uses 2 polys here and I'm choosing to make them from one single flat piece. After all I don't want to build in unnecessary angles just because they were necessary to create the original 3D model...


    Now the last pieces go in at the front...


    And the back... These were long narrow diamond shaped pieces which are also replacing 2 polys from the in-game model so it took some ingenuity to get them fitted correctly. Especially as they were the last pieces to go on!


    And voila the turret is done! Only need to make the Tusk missile pods now and then I'm finished with the plasticard except for bracing. I'm happy to announce I have 2 sheets of the stuff still untouched (I'll save that for the Mk.3 Mammoth )


    I decided to have a test fit of the turret on the hull to finish my day and did so with the employment of a co-operative toothpick! Here she is in most of her current glory (she has a full hulltop now so no more gaps!)


    I'll post up work on the tracks and drivetrain next but I'm still working on that so you're almost up to speed with progress so far. I'm still desperately seeking 19SWG wire so I can finish all 4 tracks (it's boring but quite easy!) so please keep your eyes peeled for me next time you're out shopping!

    Going to start on the interior detail now as I'm building an engine room in the back which will be as visible as possible when finished! I don't have all my materials yet though so don't expect updates on it any time soon.

    That's all for now folks! Come back again soon for more

Posting Permissions

  • You may not post new threads
  • You may not post replies
  • You may not post attachments
  • You may not edit your posts
  •