Page 1 of 3 123 LastLast
Results 1 to 10 of 23

Thread: The Game Desk

  1. #1
    Overclocked Munty's Avatar
    Join Date
    Dec 2008
    Location
    Littlehampton, UK
    Posts
    392

    Default The Game Desk

    I mentioned in another thread that once I'd finished with the hardware part of my new PC build I was hoping to upgrade my somewhat ageing desk. Well would you know I've only gone and done it?

    I'm infamous among those who know me as someone who completes approximately 10% of the projects I begin, my better half in particular despairs when I embark on new ventures, but this time I seem to be on a seriously nice completion streak as this desk is nearly finished after less than a week of work!

    I decided not to post this up in an 'as it happens' format because I was worried that it would just become another unfinished project if I did. Now that I've reached a point where everything important is finished though I feel a little more confident about sharing the journey with you fine folk!

    So the inspiration for this build is actually partially thanks to my afore mentioned partner in crime as she constantly nags me to get rid of the many PC games I've completed to free up some space. (Never-mind the fact that they're all tucked nicely away in a cupboard on the third floor where noone ever goes)

    I of course refuse because all of these games represent memories for me and some of them consumed several weeks of my life! Why should I trade them in for 10p a title or spend the next 5 years trying to sell them on ebay when I can find a far more satisfactory use for them?

    So I did!

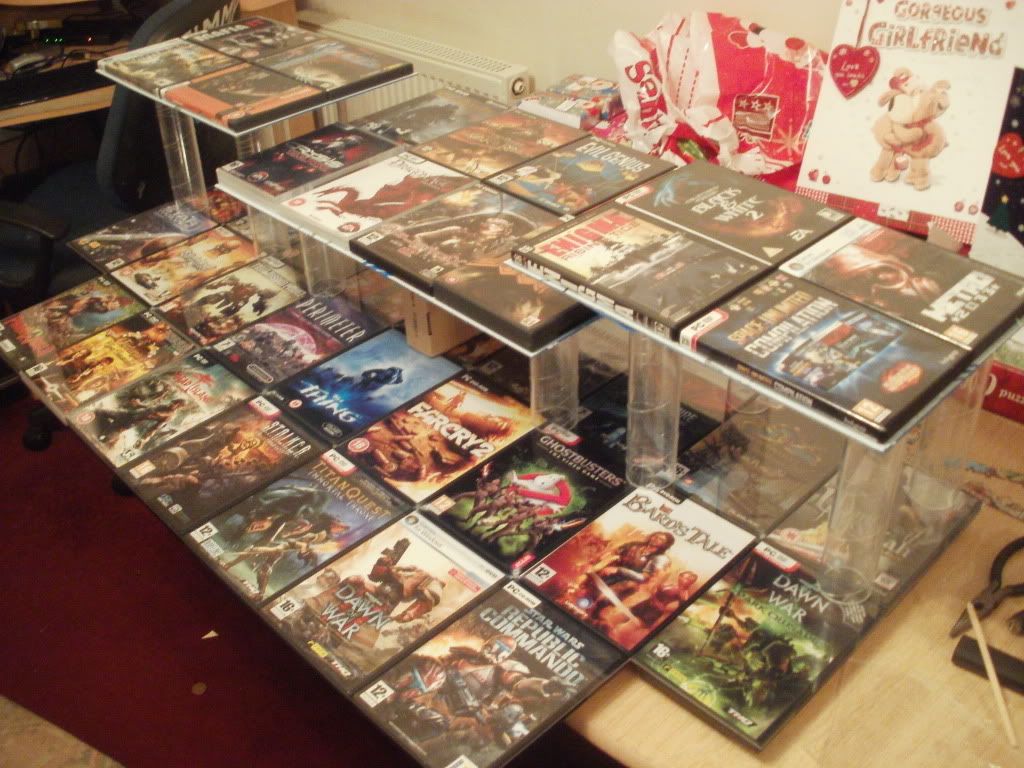
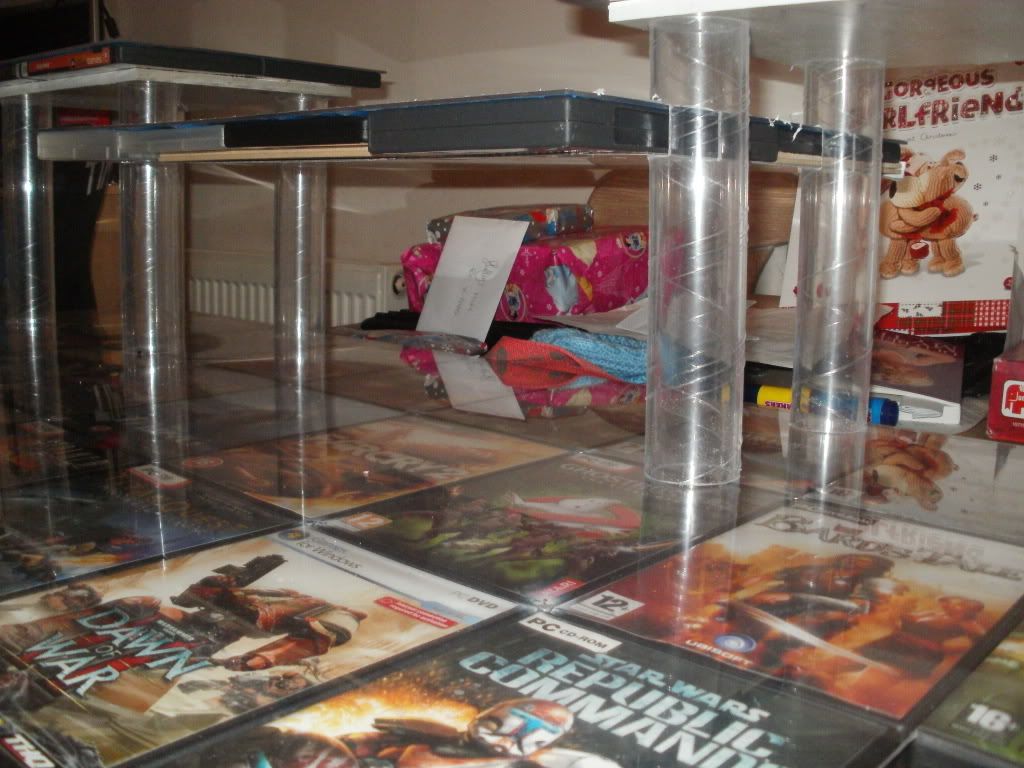
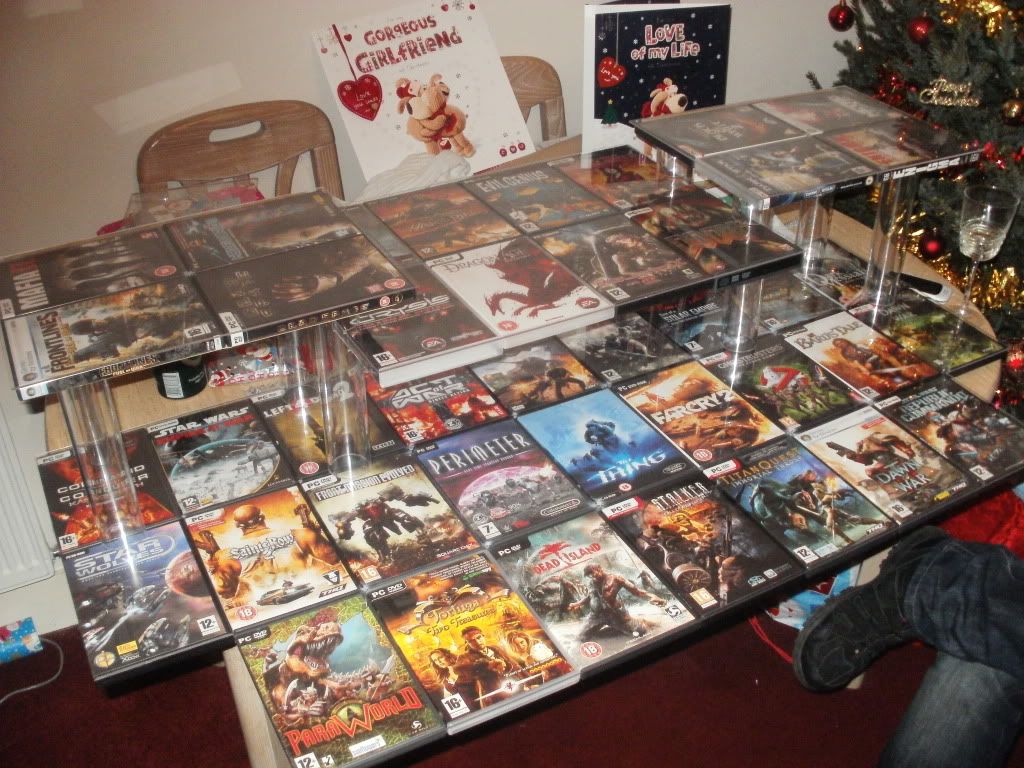
    Introducing the Game Desk, a part game, part desk construction sent from the future to totally look good

    The basic premise was a desk built entirely out of games from my completed pile which the woman seems so eager to destroy. It was pretty simple to come up with a basic design as the concept comes with massive limitations on shape and size due to the fact it's made from DVD cases which are 135x190mm in dimension. That immediately limited the shape of my build to domething blocky and rectangular and the size to multiples of the above figures.

    I spent a little while on Google to see if there were any nice designs that I liked and came across a very specific style which I took a bit of a shine to. This is the kind of thing I'm talking about, there are several different styles but it's essentially an all encompassing gaming table with spots for every kind of interface you'll ever need...


    The picture above was specifically helpful in putting together a design I liked as all of the components are rectangular in nature just like my desk would have to be.

    Of course I don't want to just go copying someone elses design and building it from a different medium. That would be lame...

    So I took it as inspiration and sat down for a doodle. I'm not a fan of simulators (I love space ones but my point is I won't ever need/want/have a throttle or joystick input device) Since that's what two of these sub-platforms are intended for and I couldn't think of any other practical purpose for them I decided to strike them from the plan.

    From there I tried to imagine exactly what I WOULD want on the desk and figured I could come up with a nice triple screen design (similar to that shown) and then fit everything else around it. I didn't want the keyboard on a seperate level to the mouse and I certainly didn't want to make any sliding trays and such so I opted for one large desktop area with three raised pedestals for the monitors.

    It's a pretty simple design in the end but it kind of has to be as I'm building out of old computer games which, believe it or not, don't have a great deal of strength or adaptability...

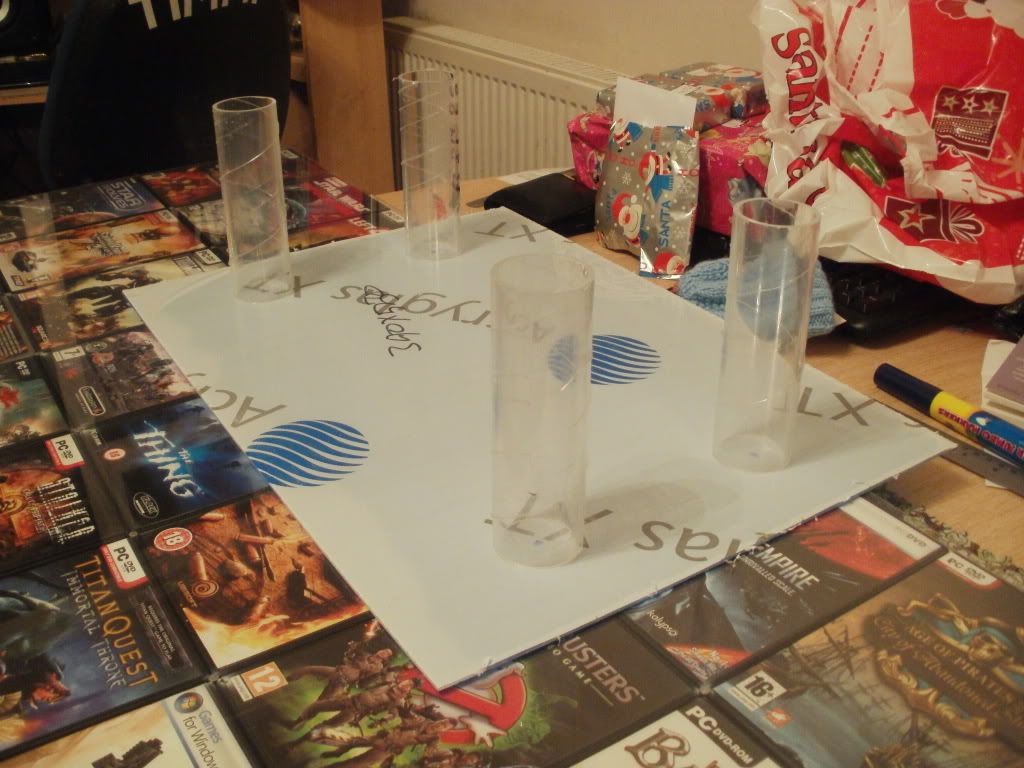
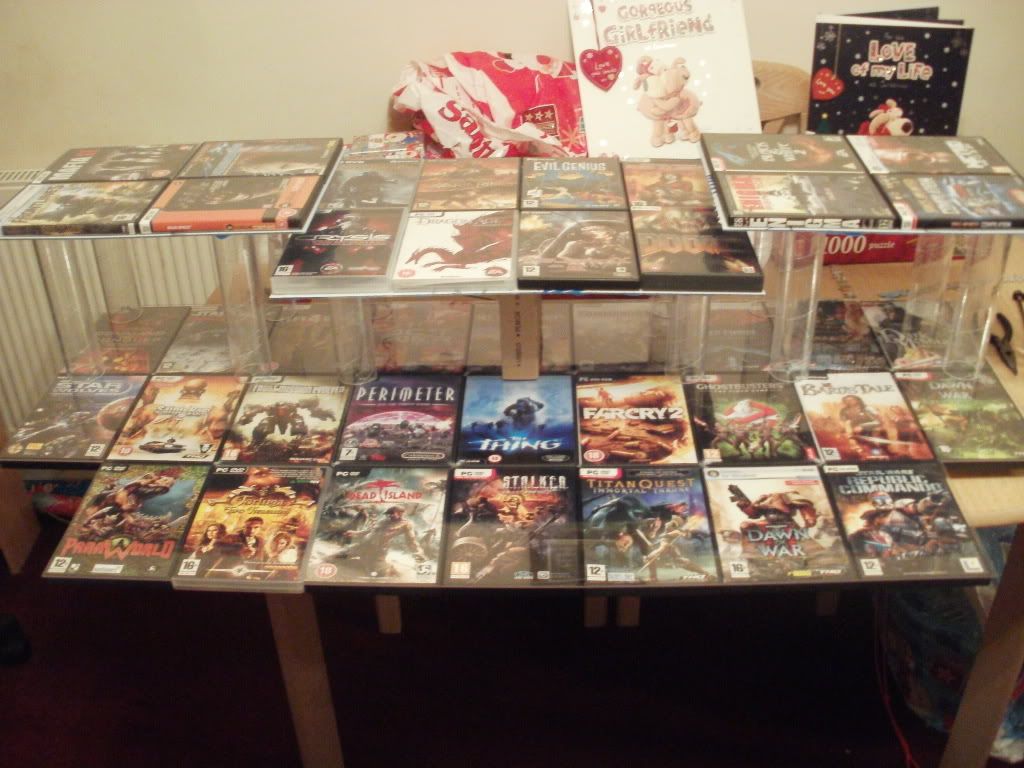
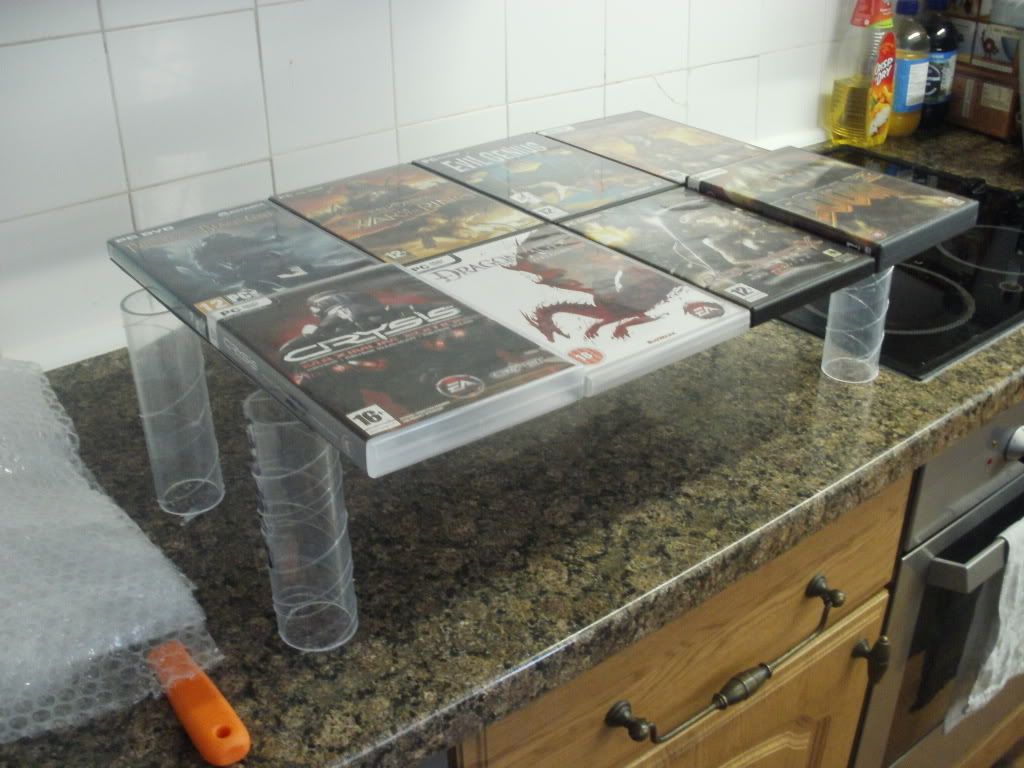
    To prevent the main desktop being just a big rectangle I went for 3 rows of 9 games but omitted the 2 front corners to give it a slightly less boring shape. The keyboard and mouse will sit on the front row of 7 cases while the back row will be under the monitor pedestals. I chose the height of these pedestals based on a few different things. Mainly I used the height of my current speakers to determine how much space I'd need below the 2 peripheral monitor pedestals as that's where they'd be placed. After that I used the size of the monitors I'll be using to determine how to place the third pedestal in the centre. I wanted the final result to place all 3 monitors so the tops were level so I used the difference in screen height to determine how much lower the main screen would need to be! Simple...

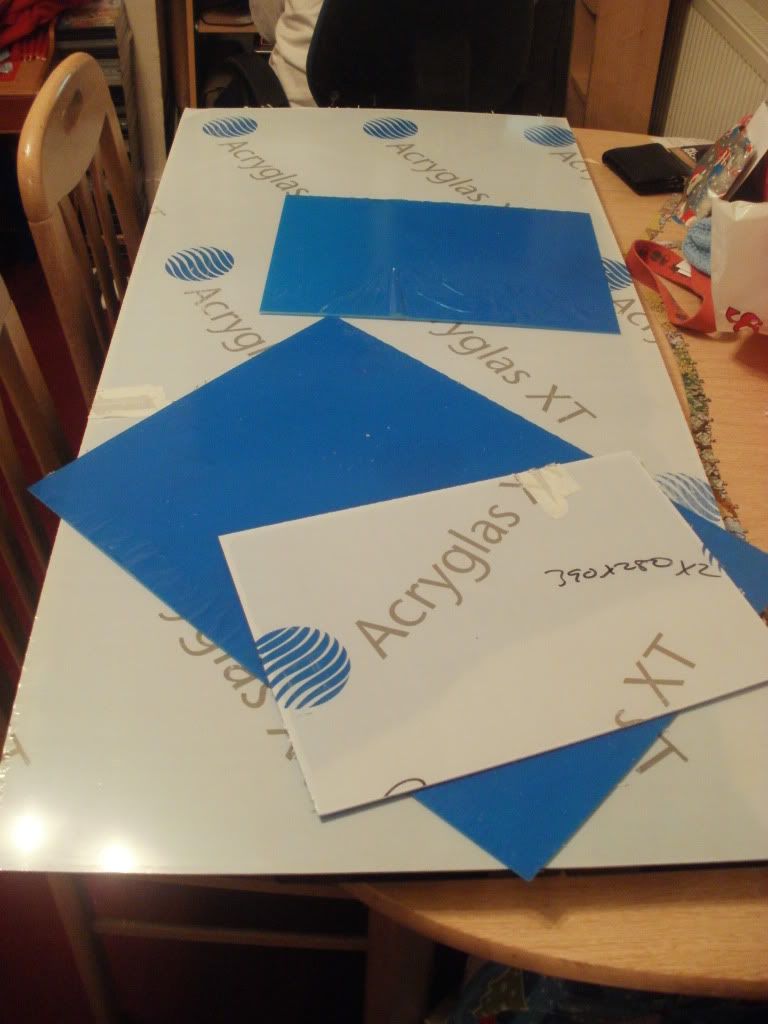
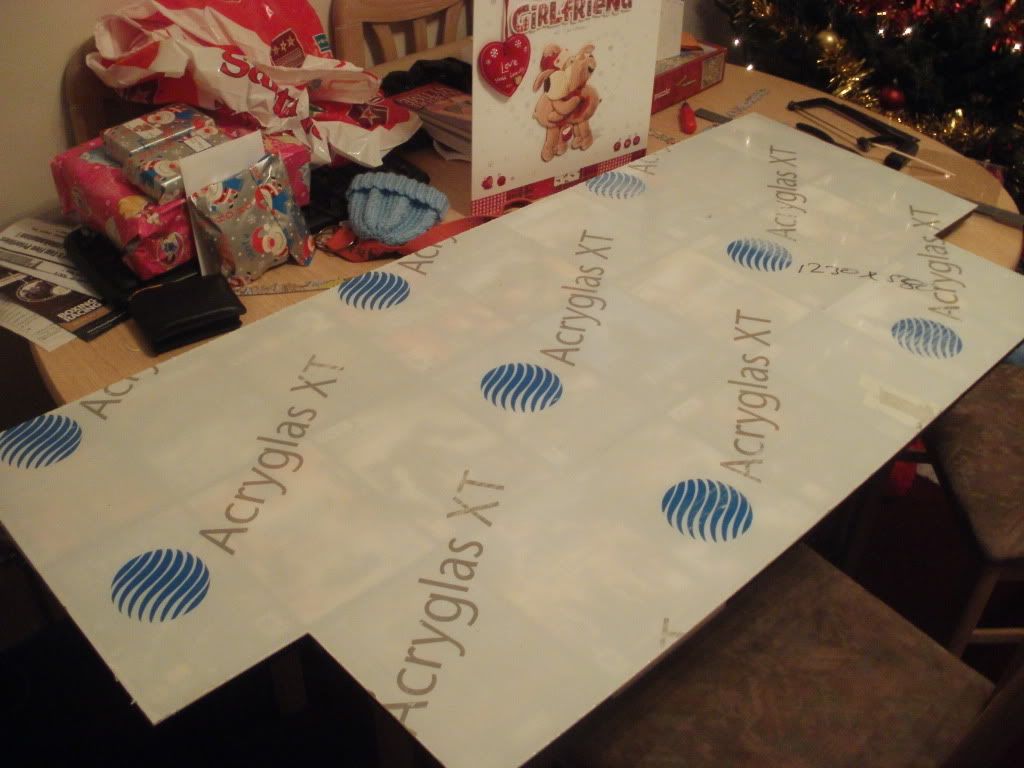
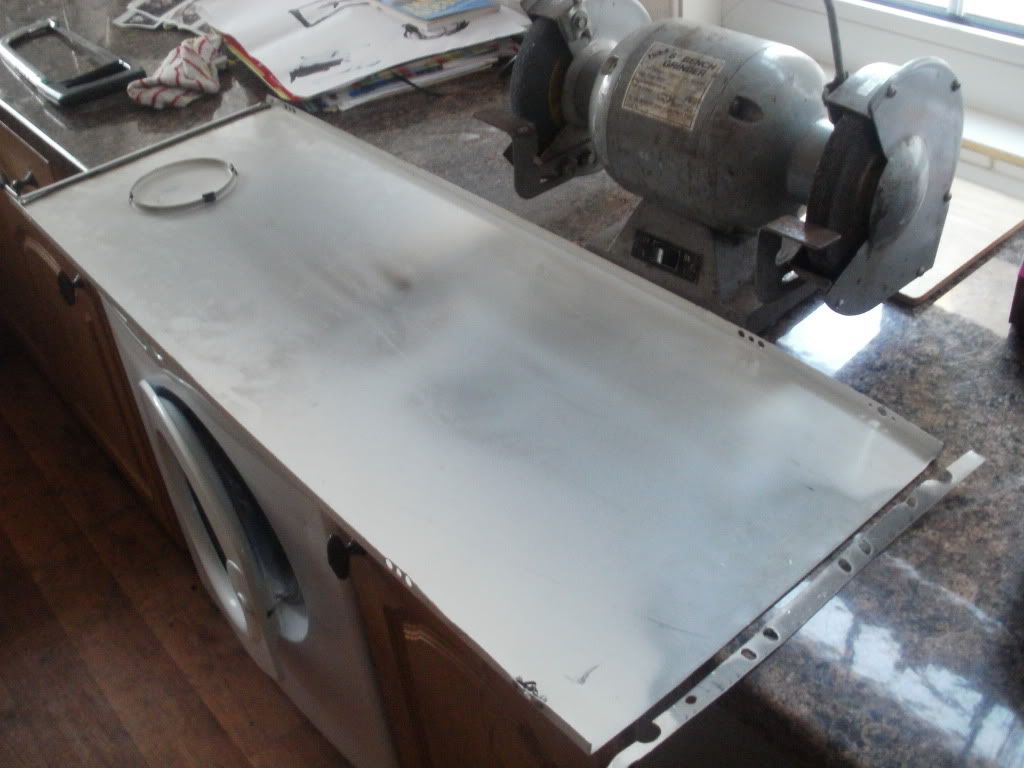
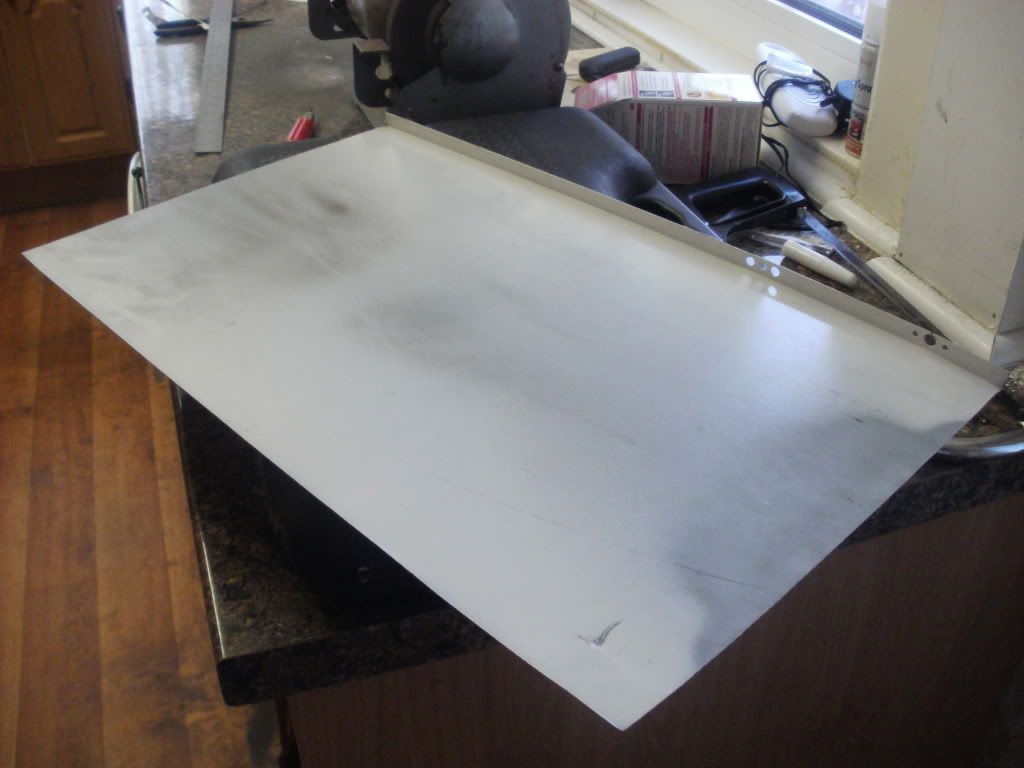
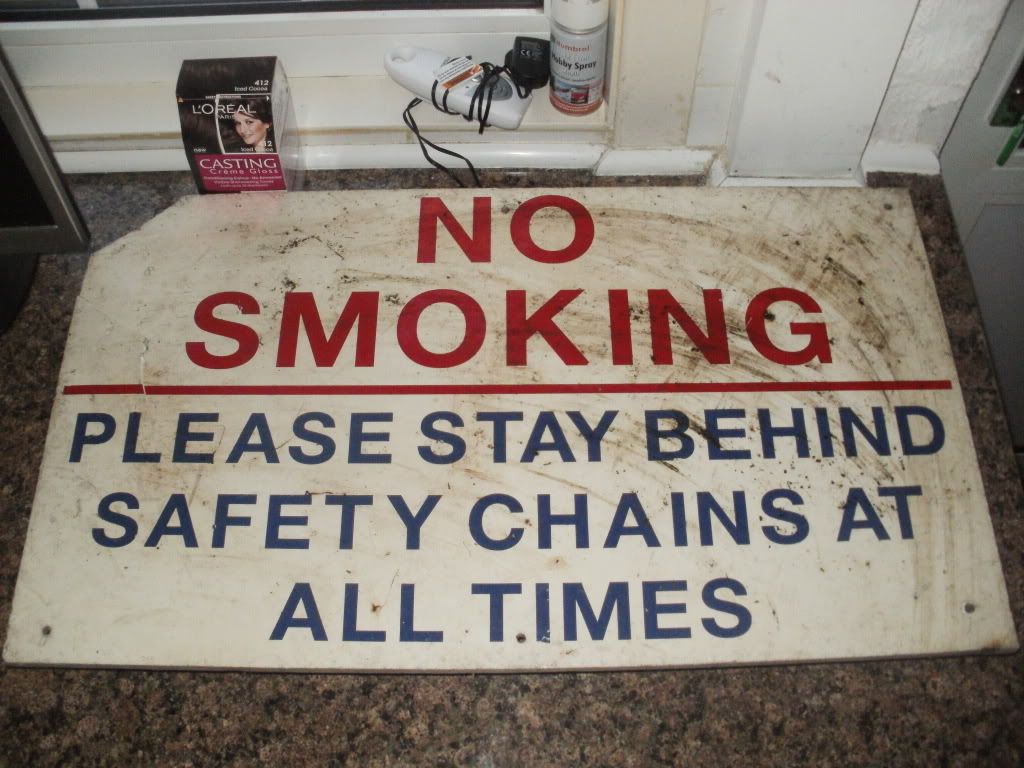
    While I pointed out right at the start that I'll be making this desk out of computer games, obviously there'll be no strength in the boxes so I needed some other materials too. Having already got plenty of games to choose from I decided to scrounge some wood to support the main desktop and then splashed out 60-something quid on some nice acrylic for the surfaces. Everything else I used was recycled from elsewhere (as you'll soon see) so to date my total build cost is just the price of the acrylic!

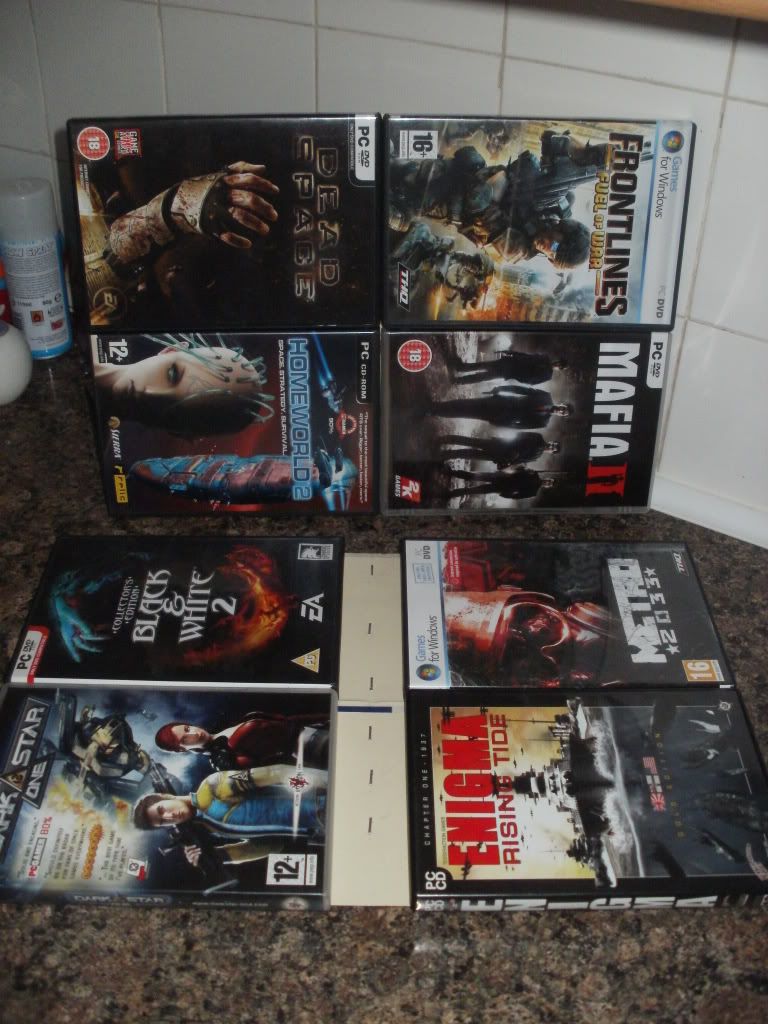
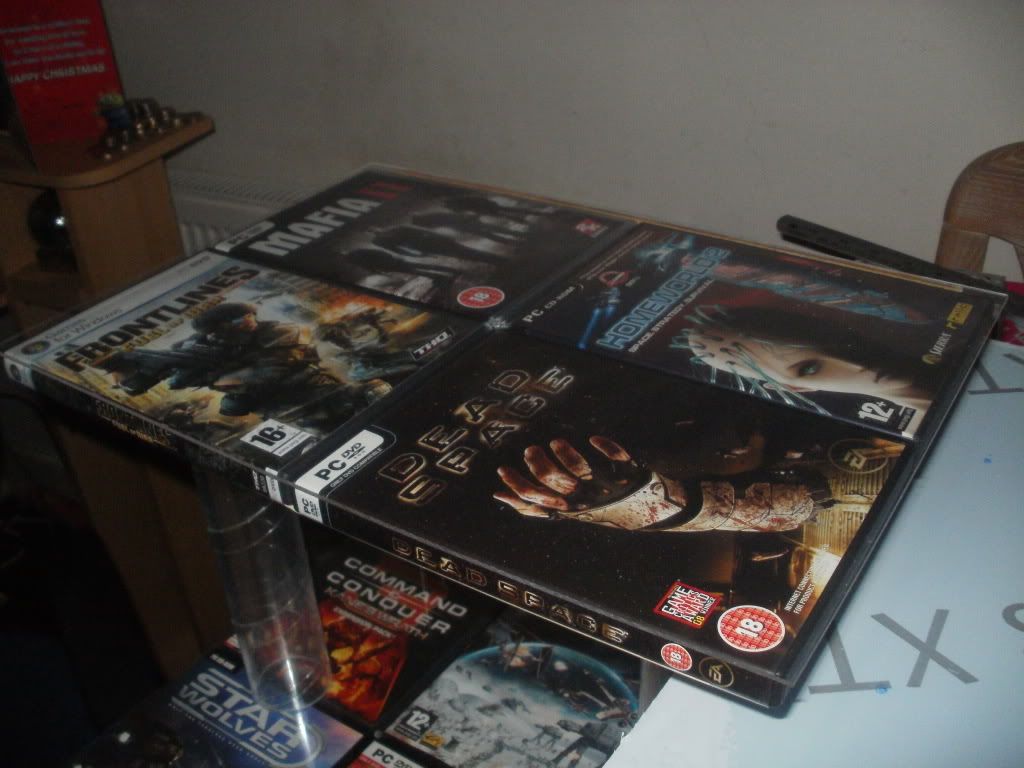
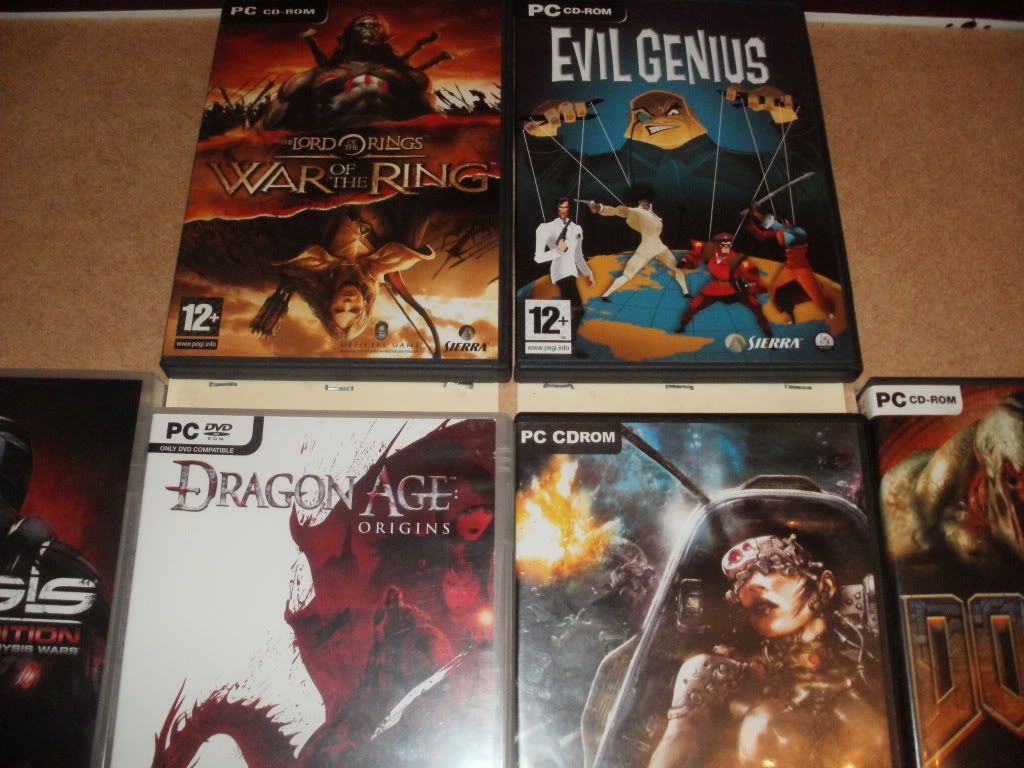
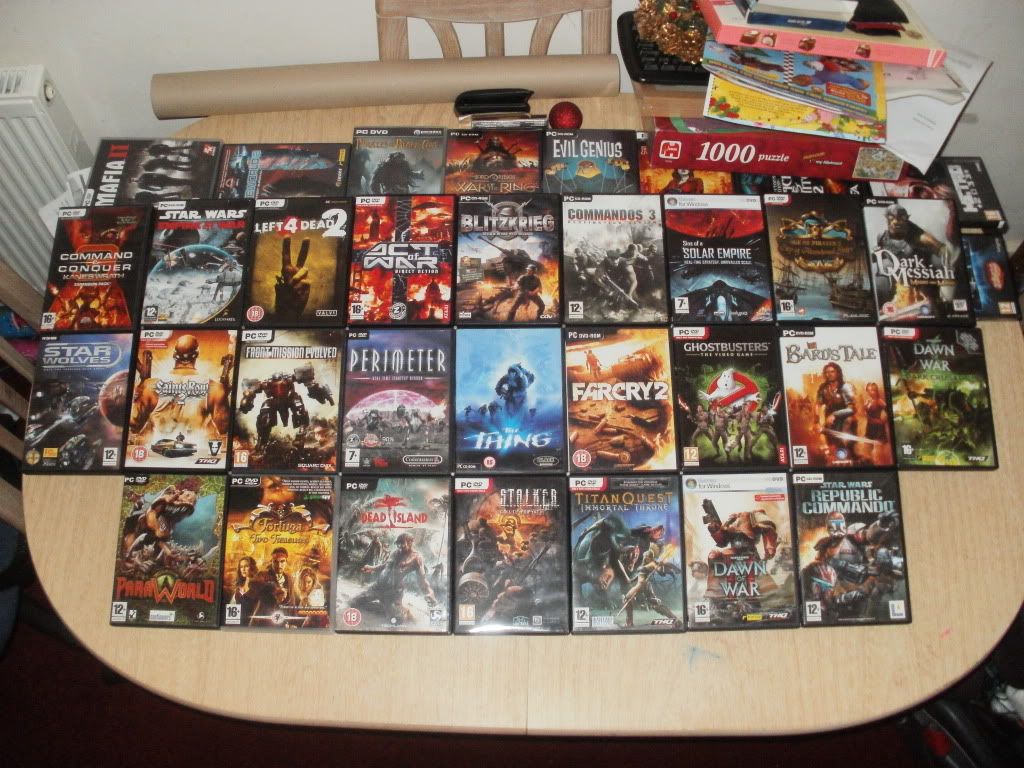
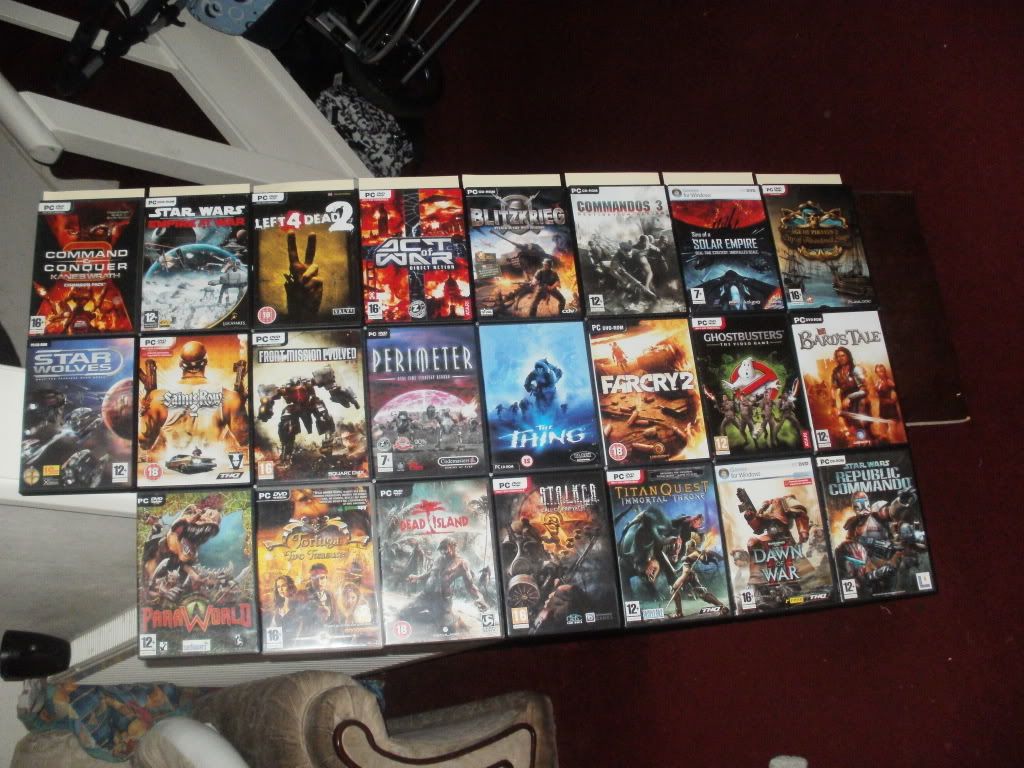
    The first thing I actually had to do before I even sourced the materials though was probably one of the hardest and probably THE most time consuming parts of the whole project. I have a couple hundred games to choose from but not all of them were worthy of inclusion in the desk. Re-releases of games through things like white label, soldout and the 'best seller series' games have small pictures and ugly borders so none of them could be used. Further to that, I decided early on that I wouldn't have more than one game from any franchise. Kane's Wrath for example was the only Command & Conquer title to be used in the build despite the fact I own almost every single one!

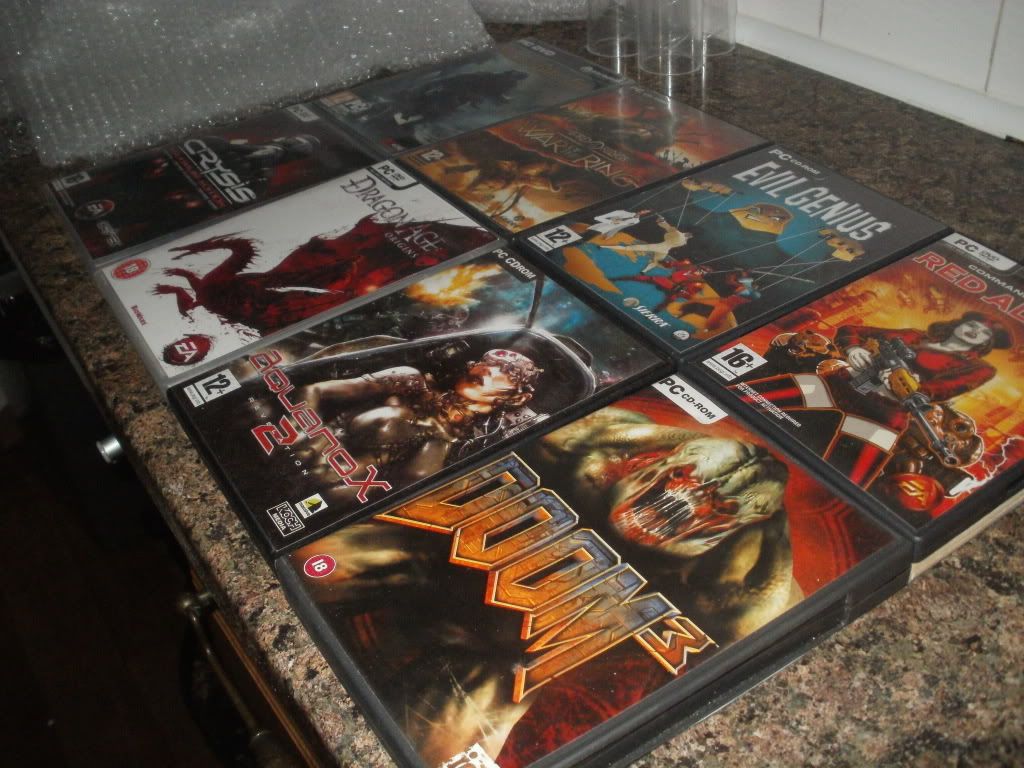
    After narrowing down the selection to around 90 games (I only needed 41) it became increasingly difficult to decide which titles would look best in the build and I spent literally days deciding on my favourite games for the project. In the end it came down to a number of factors. I used Act of War : Direct Action because I spend a lot of time playing it with a friend of mine over LAN, despite the fact it has a very boring case... Dragon Age Origins made it into the main pedestal despite the fact I haven't completed it yet (one of several) just because it gave a good contrast to surrounding cases. The Red on White of the case is rather pleasant to look at and I had a lot of dark games everywhere else. I recently played Pirates of Black Cove and HATED it but it's still in the desk because I quite like the picture. Other Games like Evil Genius and The Thing are in the build because I just LOVED the games and I'm quite happy to look at them every time I sit down, regardless of how well known they are!

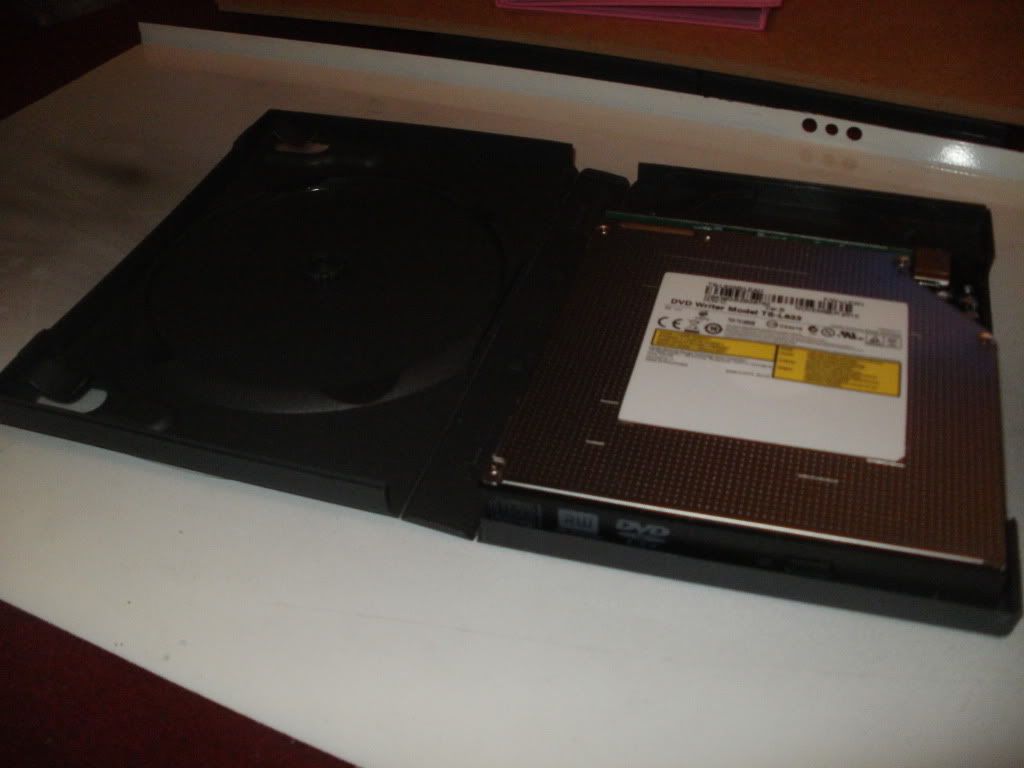
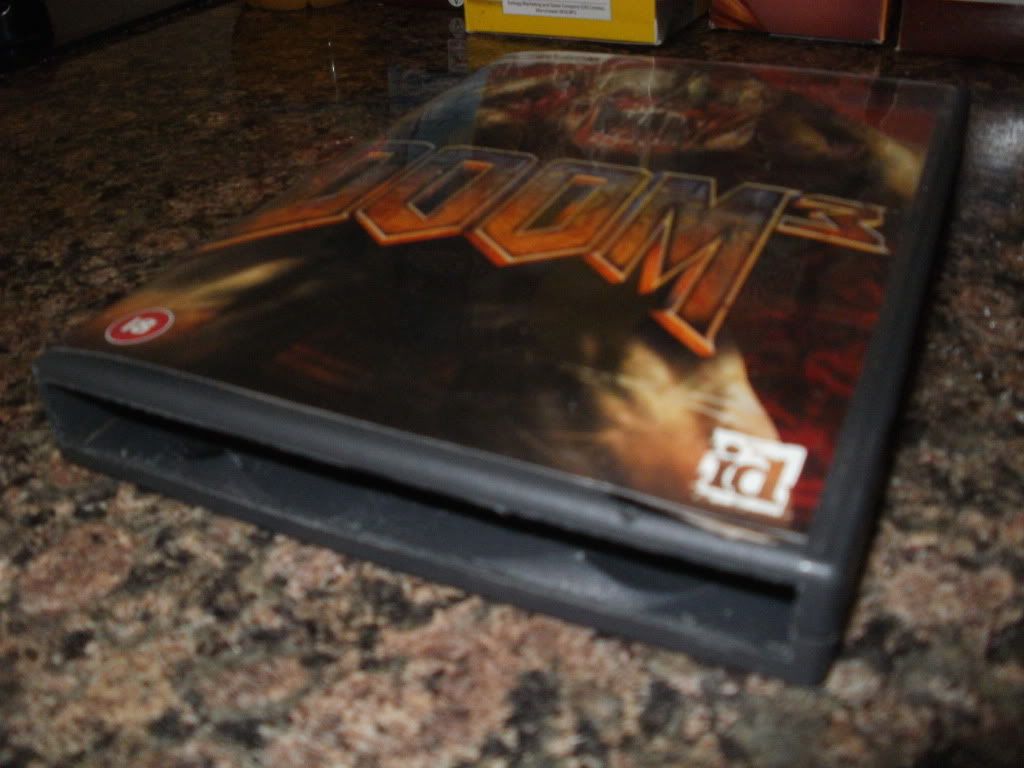
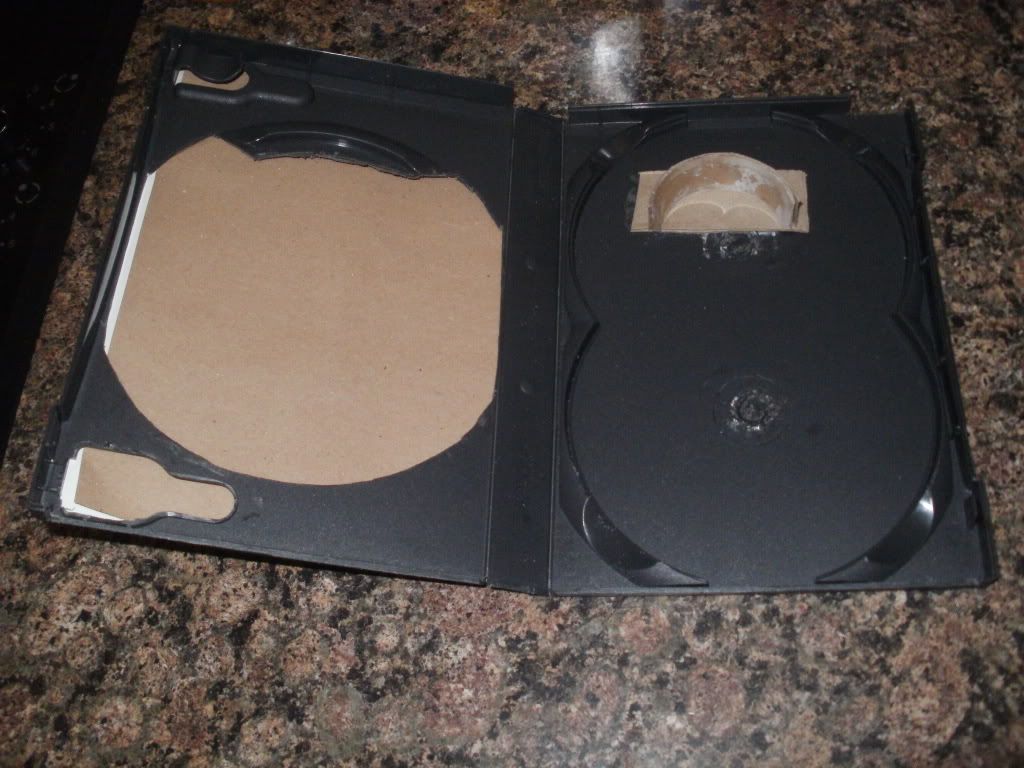
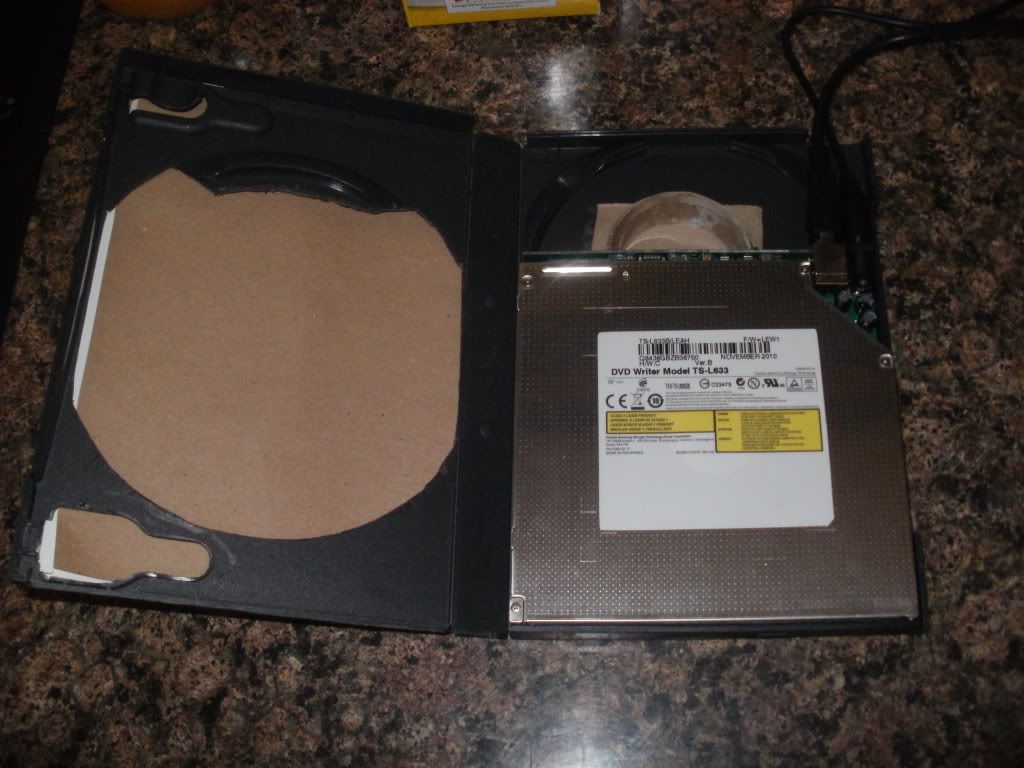
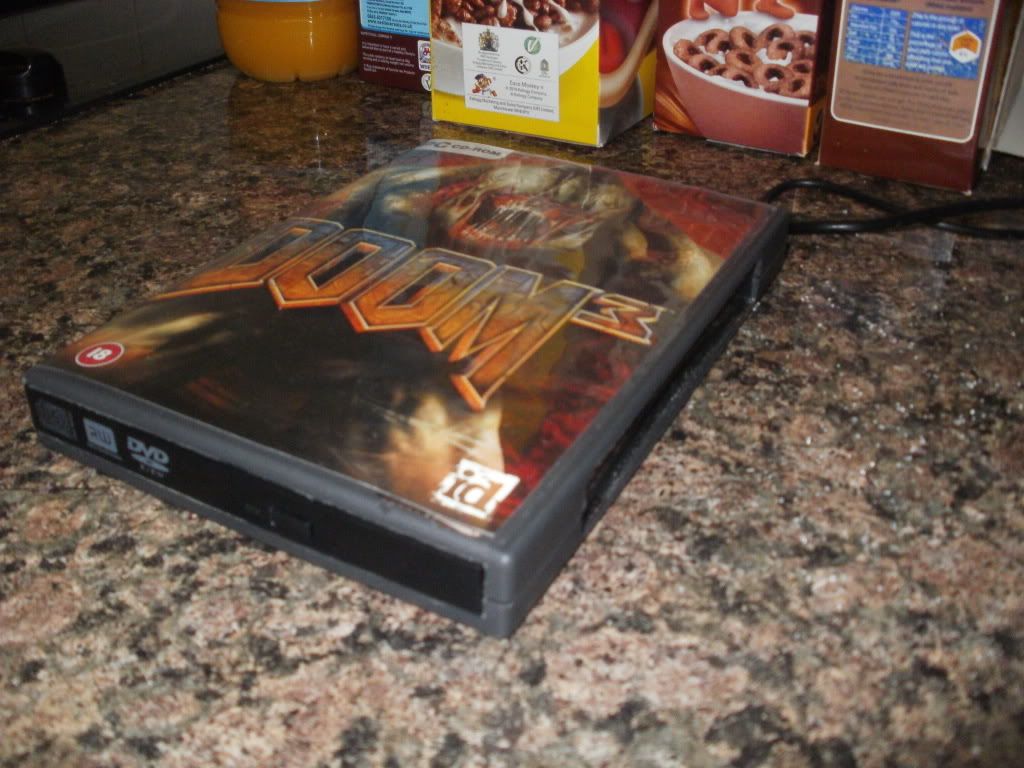
    So I did eventually get it down to 41 titles, all of them standard DVD cases save for 2. These were Crysis (as I bought the maximum edition) and Doom3 and they both have larger boxes due to the number of DVDs contained and whathaveyou. I always wanted to use Crysis as, although the image on the maximum edition isn't great, I really enjoyed the game. It's taken place in the main pedestal and not wanting an asymmetrical build I felt compelled to include another large case to rectify the situation. Doom3 is intended to conceal a DVD drive at this point but we'll talk about that later...

    The only 3 games in the build which I haven't completed yet are Dragon Age as mentioned, Metro 2033 (which I chose for the box) and STALKER Call of Pripyat. I own all 3 STALKER games and have completed the first 2 but I felt this had the best looking case so used it pre-emptively as I'm sure I'll be completing that next!

    Anyway, that's all well and good, and hopefully you now have some form of picture in your mind as to how this could look but of course, this thread is worthless without pictures... So here they come!

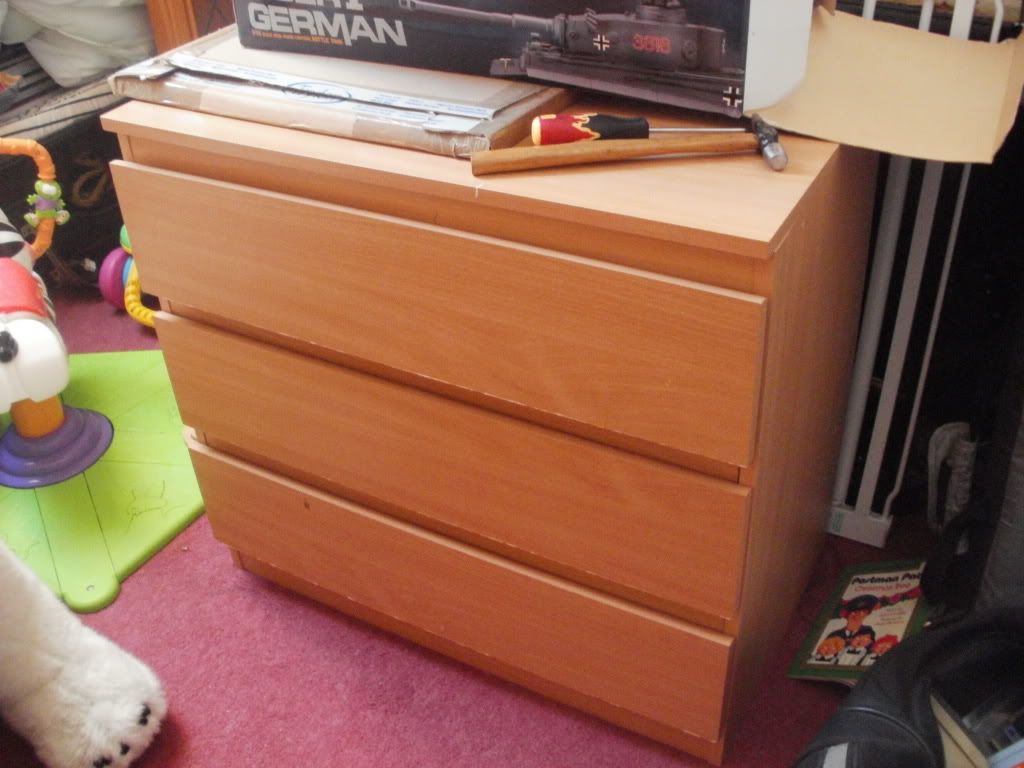
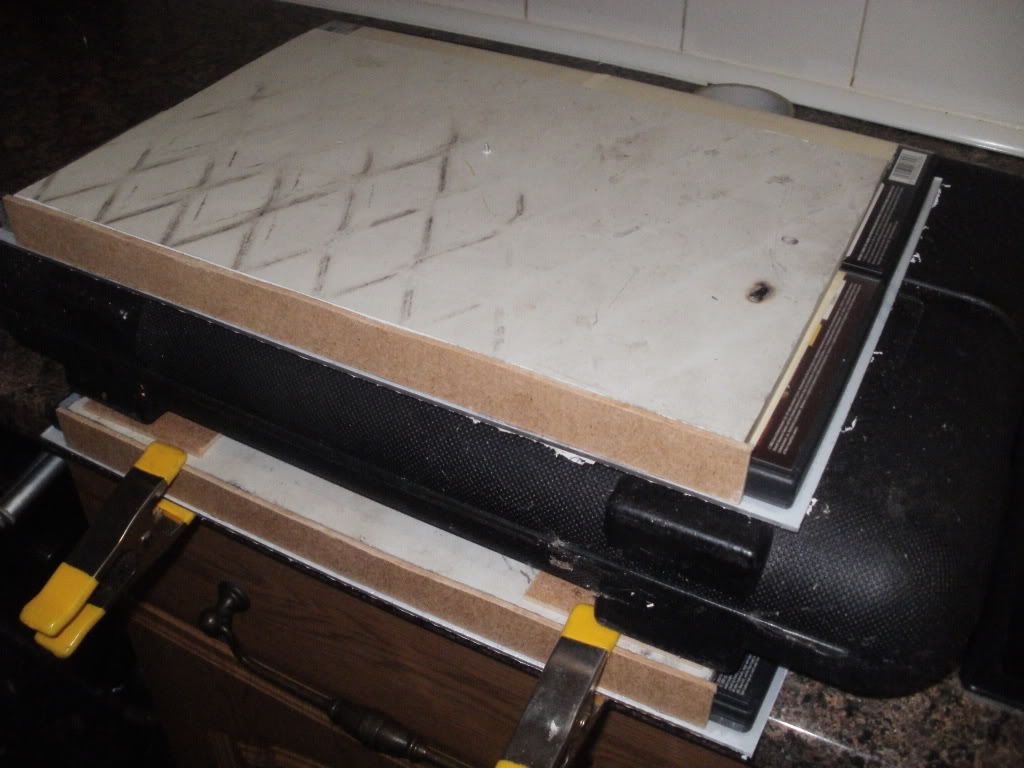
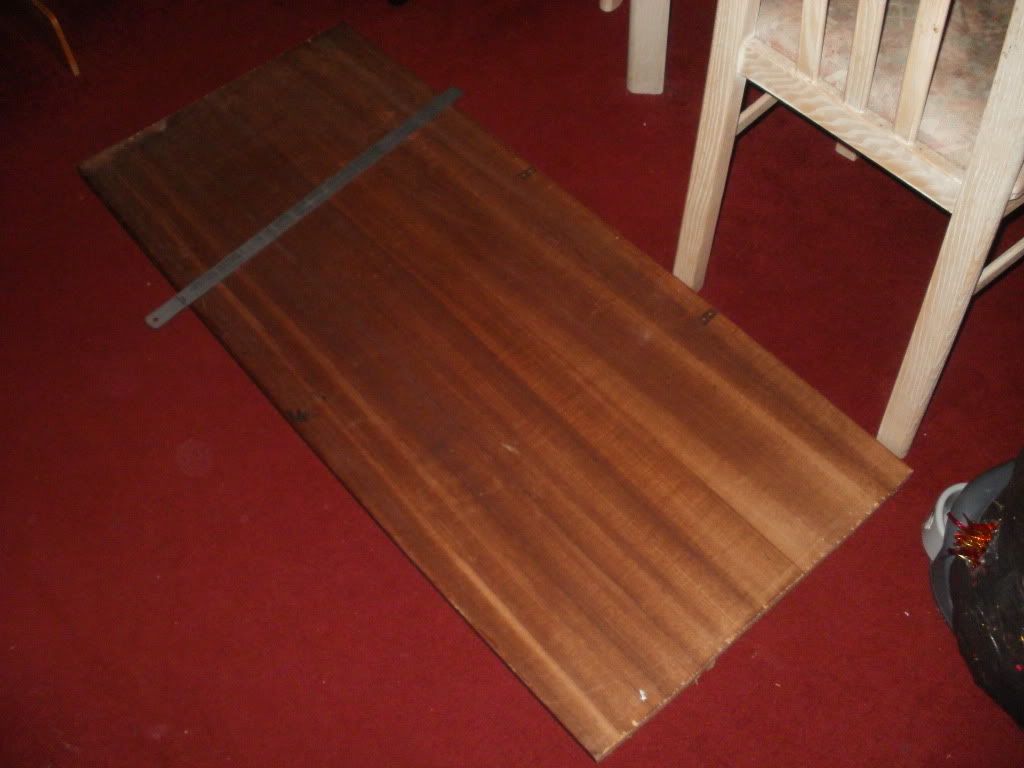
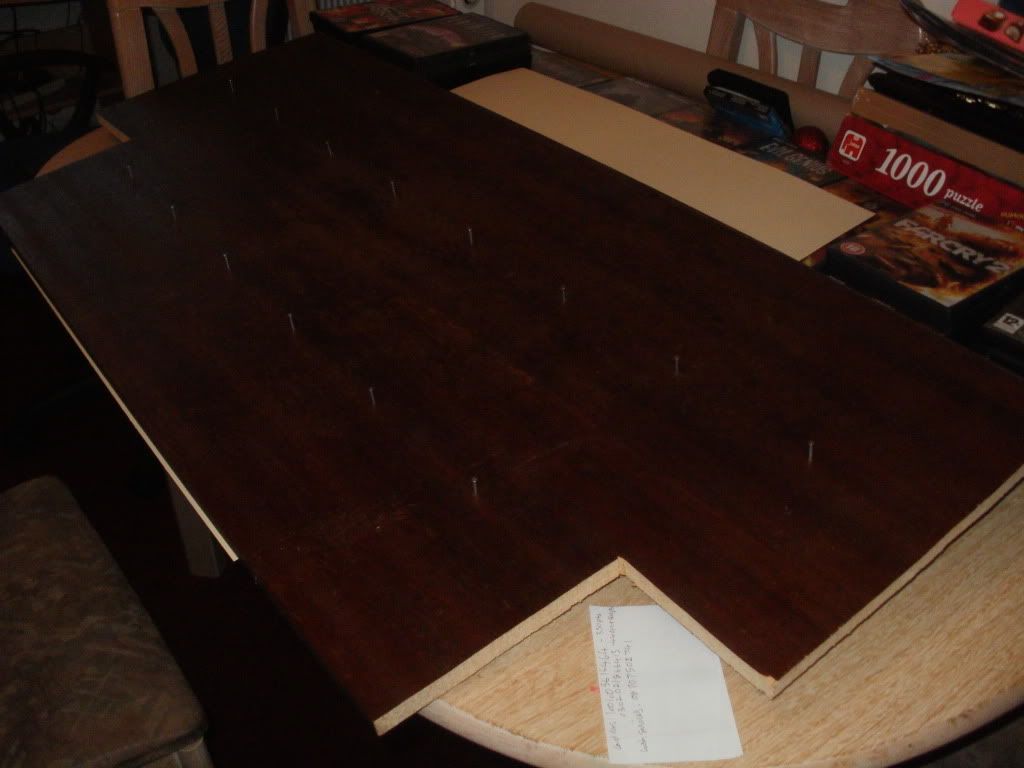
    As I mentioned, I chose wood to form the backbone of this build and I did quite well in my hunt for a suitable piece. I found one in a friends shed which was the perfect width and only slightly too long for what I needed. It's about 15mm thick and a nice hard wood so it has plenty of strength and cut like a dream! Here she be...


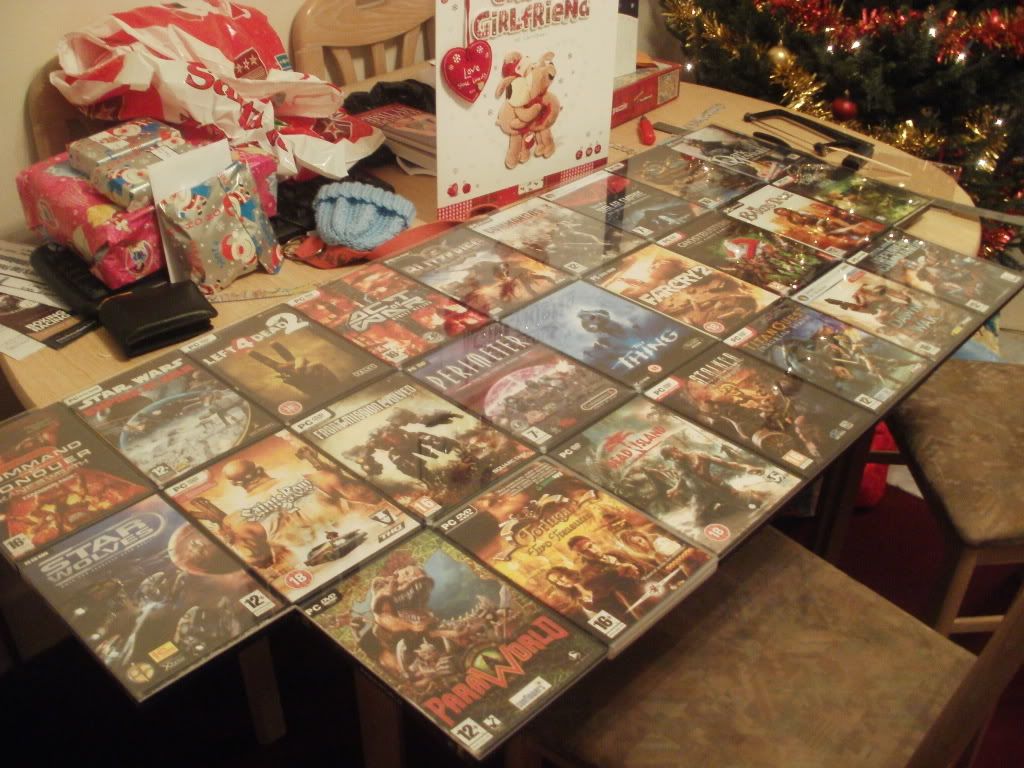
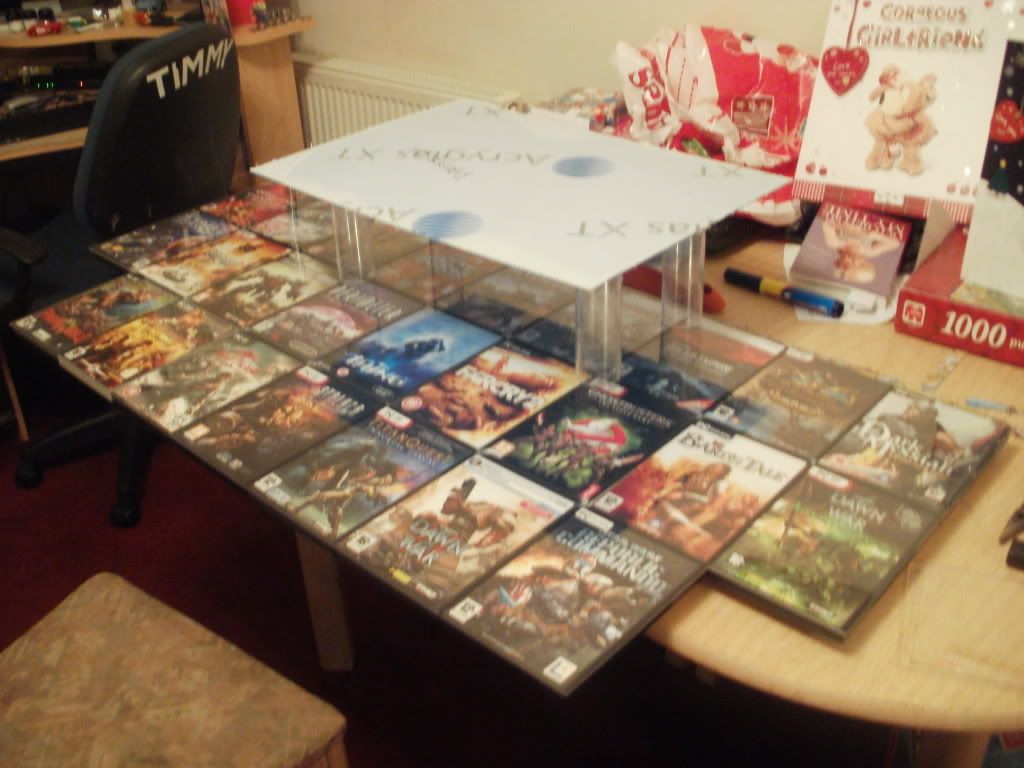
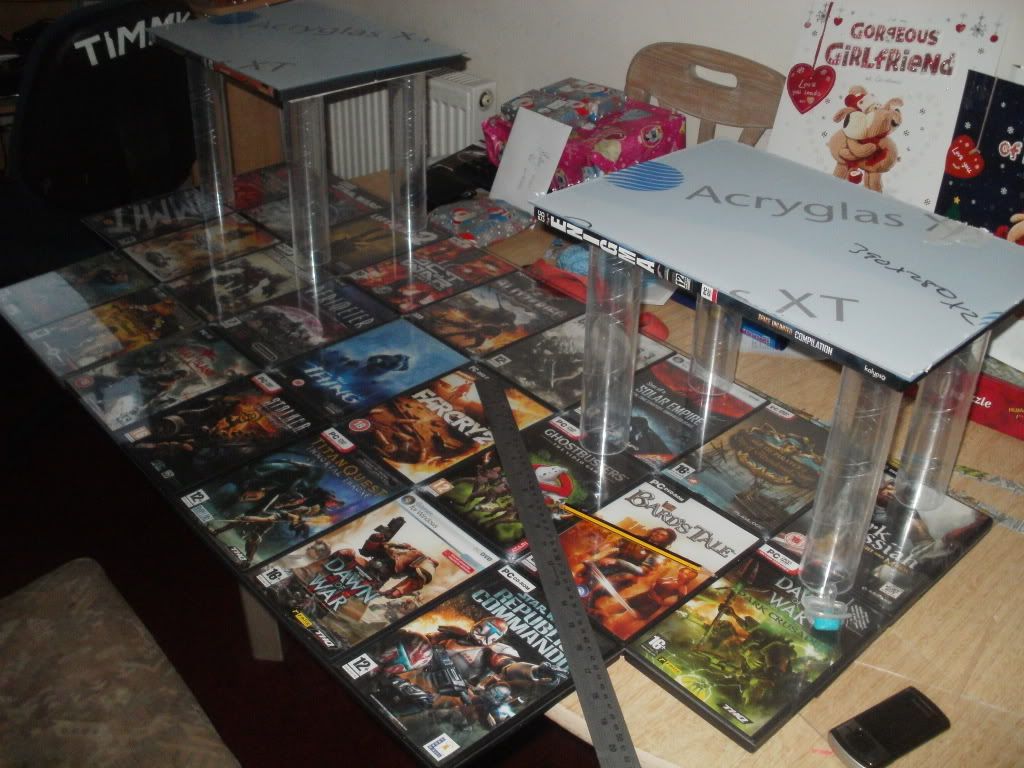
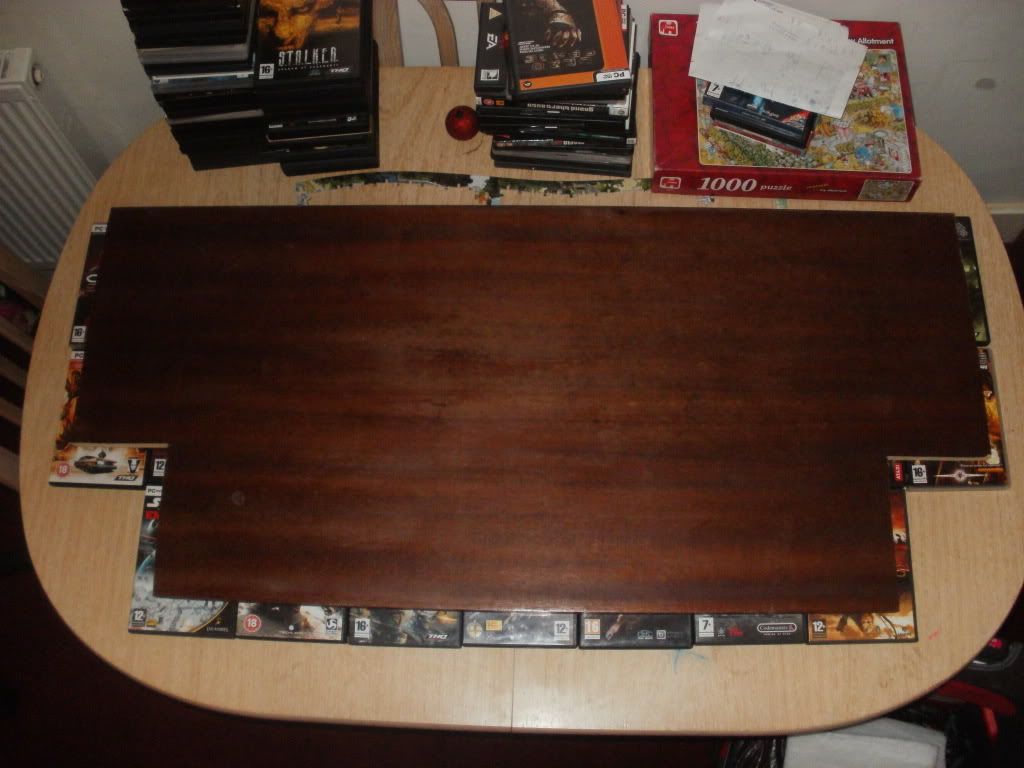
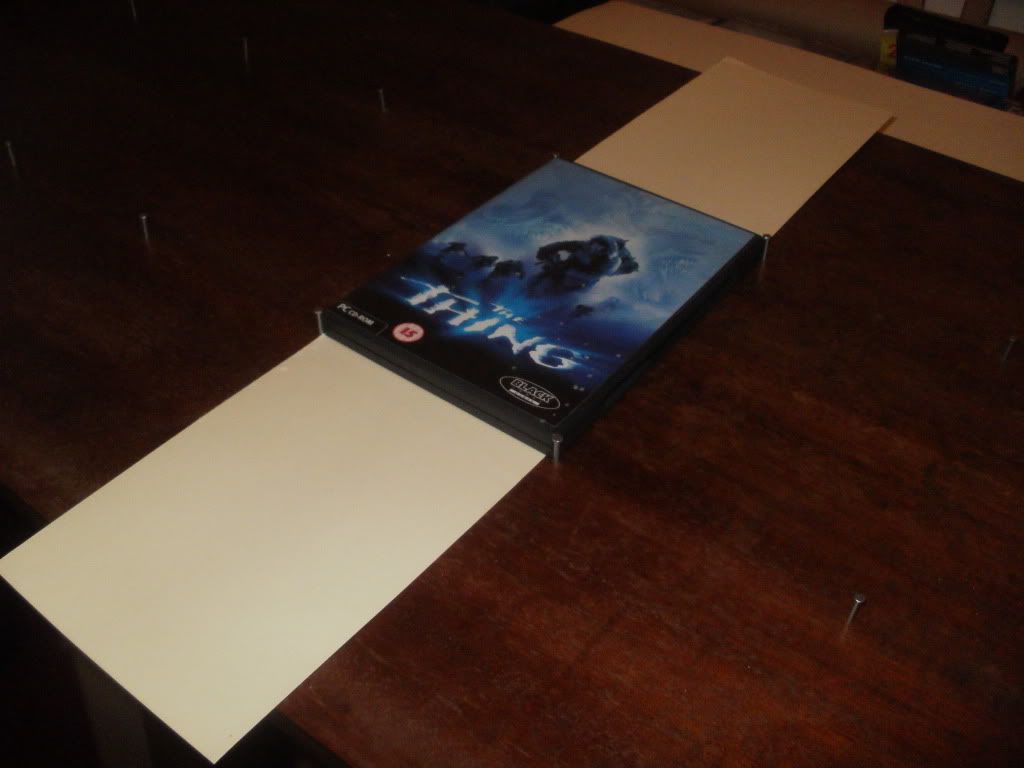
    And now after all the writing that started this topic off, you finally get to see the shape of the main desktop for the first time! Not only the placement of games but even the games themselves change drastically between now and the final layout but it gives you an idea of the design at long last! I'm building this desk to fit in a very dimension specific space so the 9-case width means it'll fit perfectly where my current desk is.


    I already mentioned that this piece of wood cut nicely but it needs reiterating I think. I used a jigsaw to cut all the wood pieces of this build and it cut through this stuff like butter! Getting the right shape out of this piece took me a matter of minutes and gave a beautiful finish too. Not that that matters as the whole point of the build is that nothing but games will be visible. For that reason, the wood is cut several inches smaller than the desktop itself.


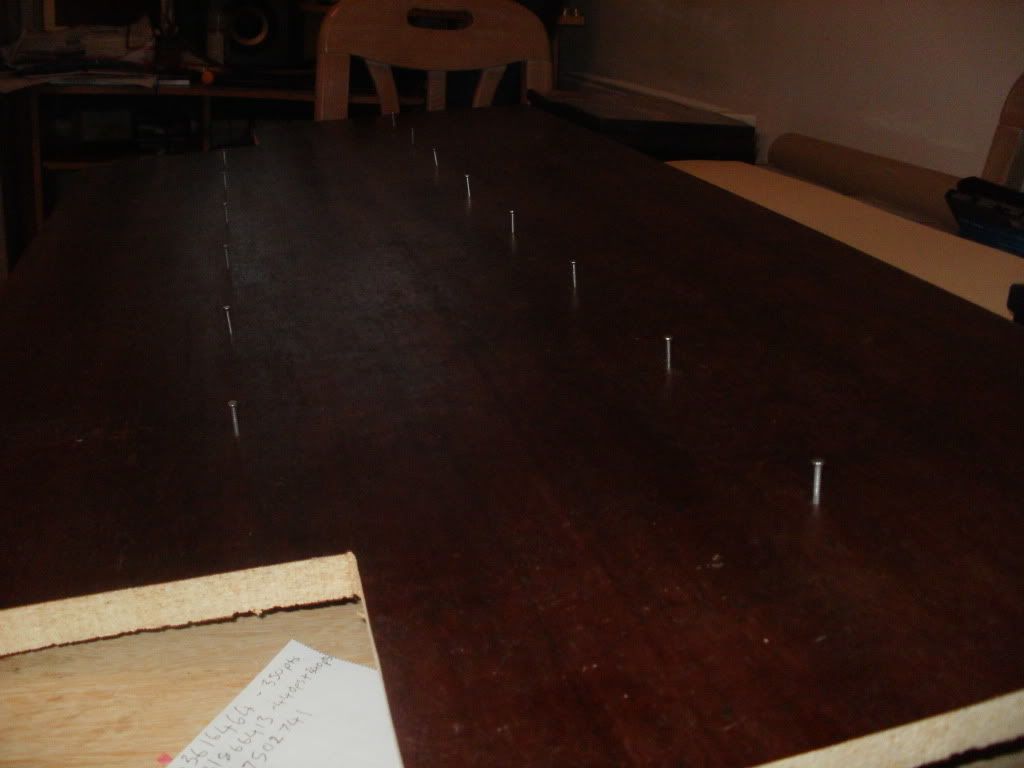
    In an attempt to avoid damaging any of the cases used in this build (all DVDs and manuals have been removed already!) I won't be gluing, nailing or otherwise attaching them to anything. This, coupled with the fact it'll have a clear acrylic top fitted later made it rather difficult to know how to keep everything together. So I improvised... Anywhere that 4 cases meet, I've put a nail to restrict movement of the adjacent games. The real effect of this is felt by the central 5 games which now cannot be moved at all. Of course those on the outside are still completely free but that's another job... Here's the first step of my solution!


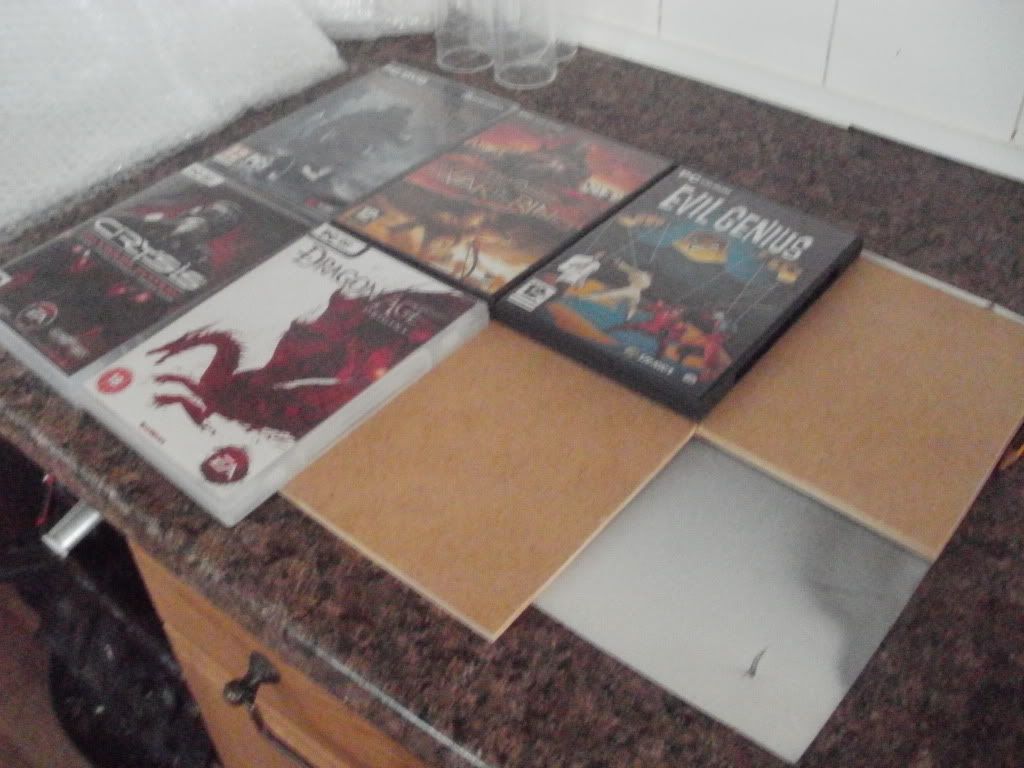
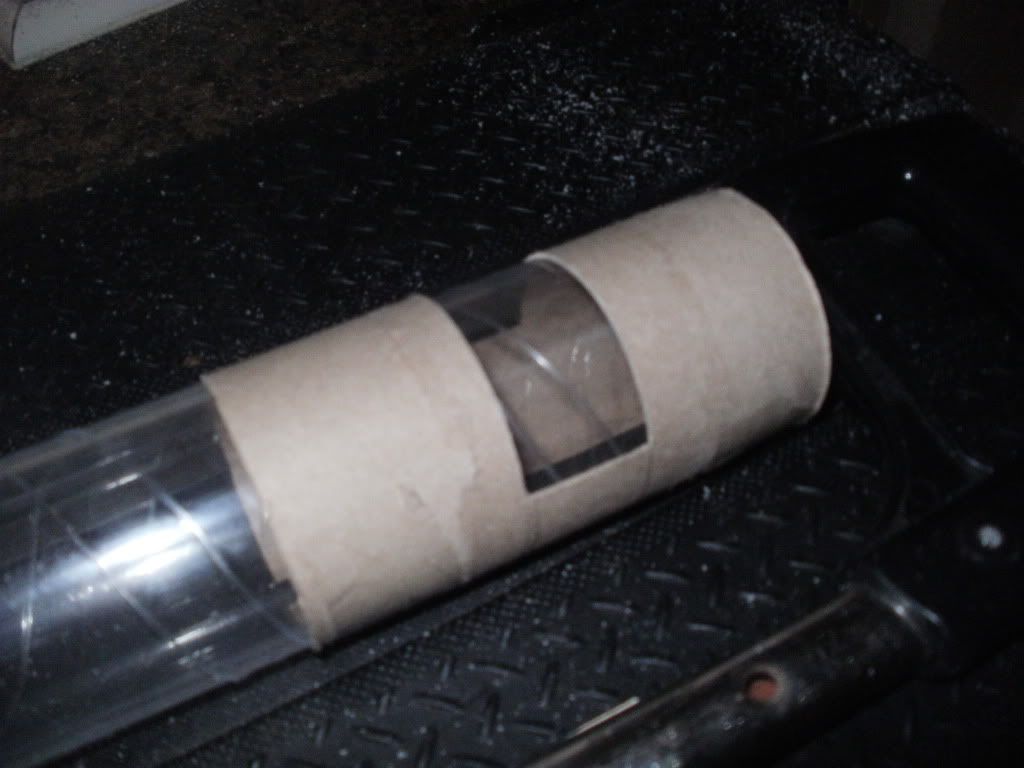
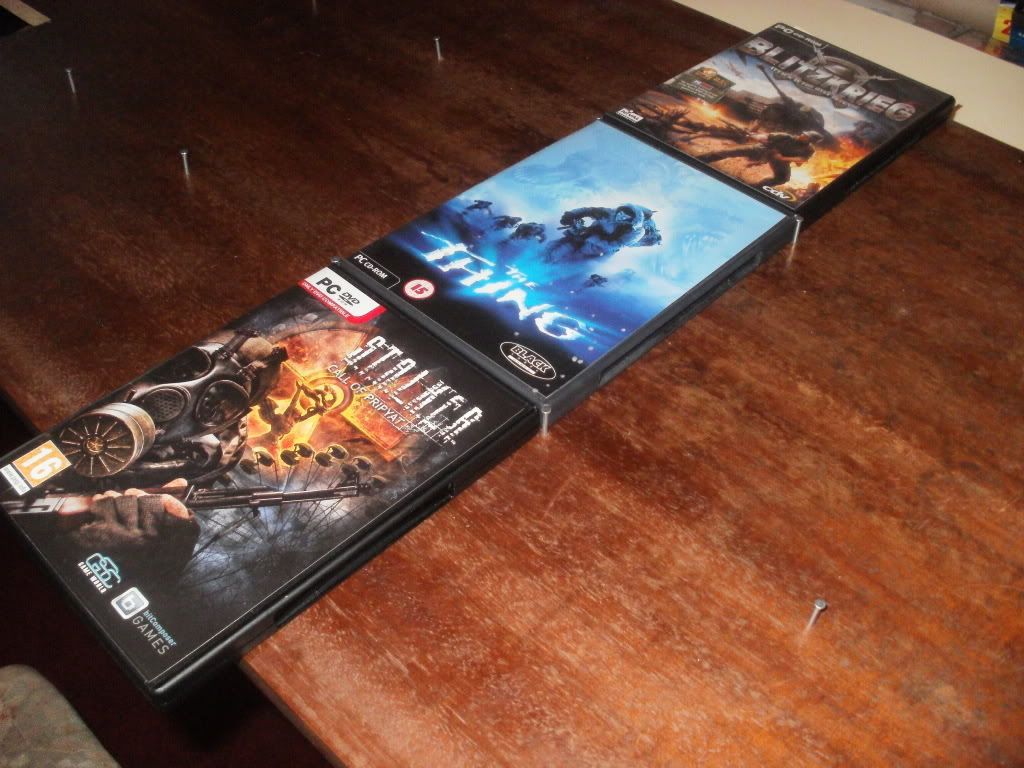
    With the first hurdle cleared I now needed to stop the outer rows of cases from moving. I'm quite chuffed with the way I solved this problem and you'd seriously be amazed how effective it is! All I've done here is cut some medium weight card into strips that are 3 cases long and 1 case wide. I'll let the images tell the story...


    See where I'm going with this yet? By clamping the card inside the back of the middle case (remember I said those ones now don't move at all due to the nails) I can slide the next 2 cases onto the same piece of card and hold the entire column completely steady. The best bit about this is that every additional case makes it's neighbours stronger.

    Here's the finished process for the central row but I actually had to start from the right side in the end as it was necessary to open the cases in order to slide them onto the card. Can't do that if there are cases already in position to the left of the column you're working on!


    Of course the reason this process worked for the central 5 columns is because the middle cases were completely surrounded by nails preventing any movement. The next 2 out (not the very ends) only had 3 nails and so weren't completely secure but once the remaining cases were attached these too became completely secure.

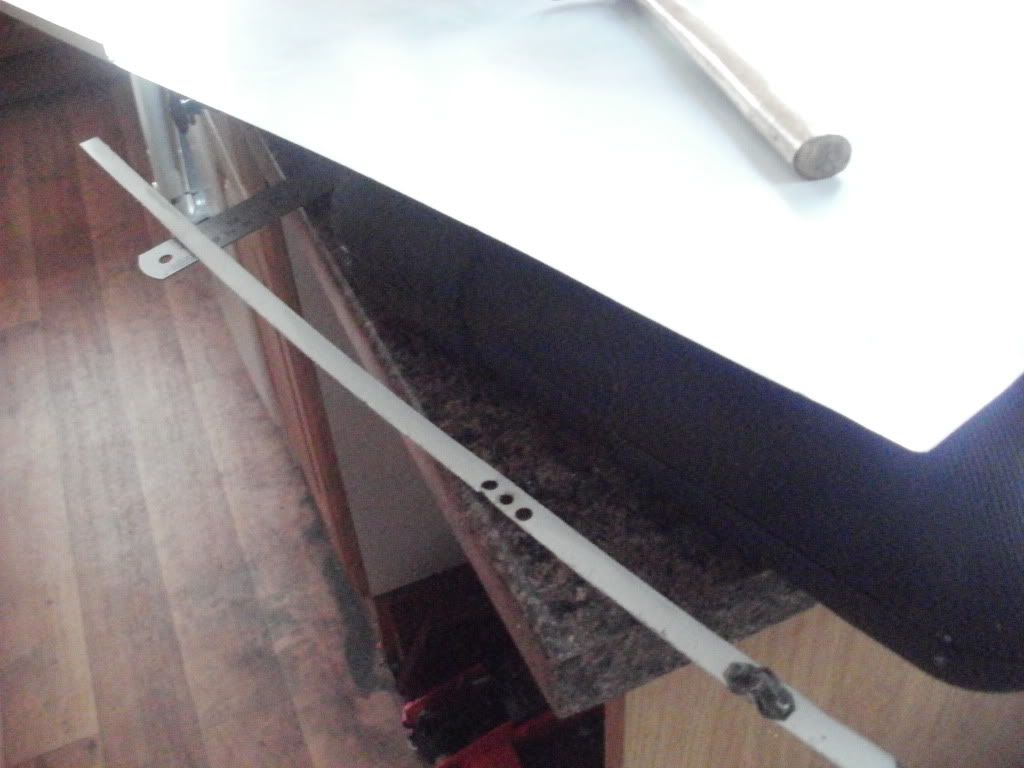
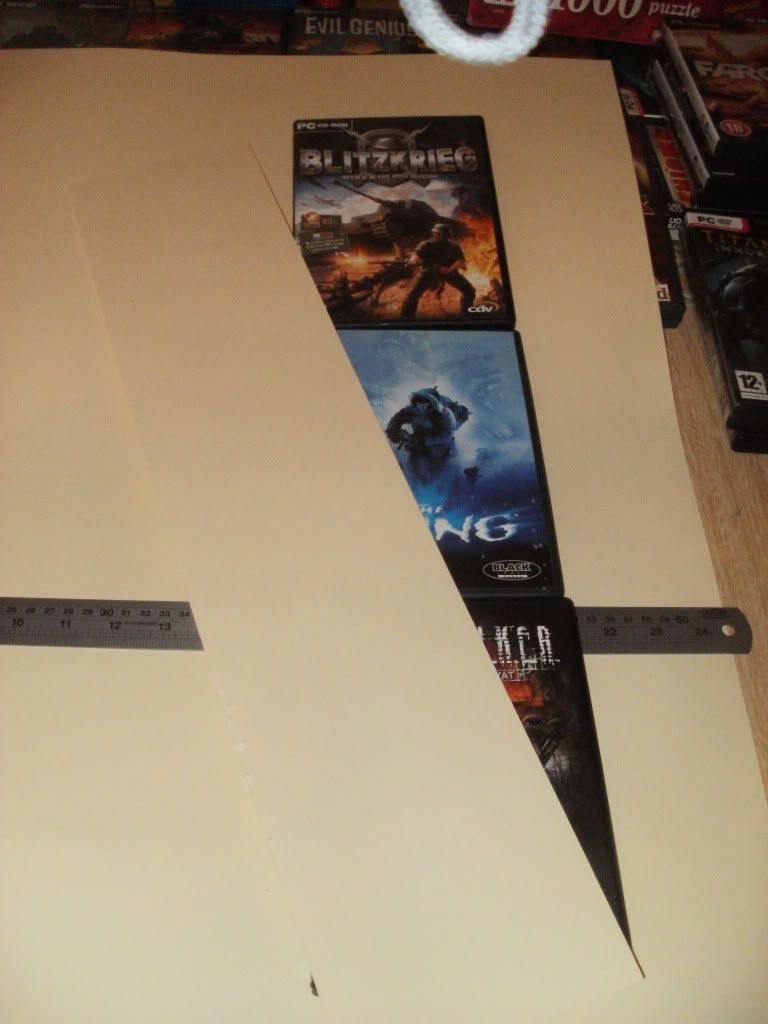
    The 4 games on the very ends of the desk had no nails to help them but used a similar process to the one used so far. I cut a smaller piece of card just 2 cases long and then used some nice heavy duty staples to fix it to the wood. The remaining games were then slid onto the card as before, their neighbouring cases lending some additional strength.


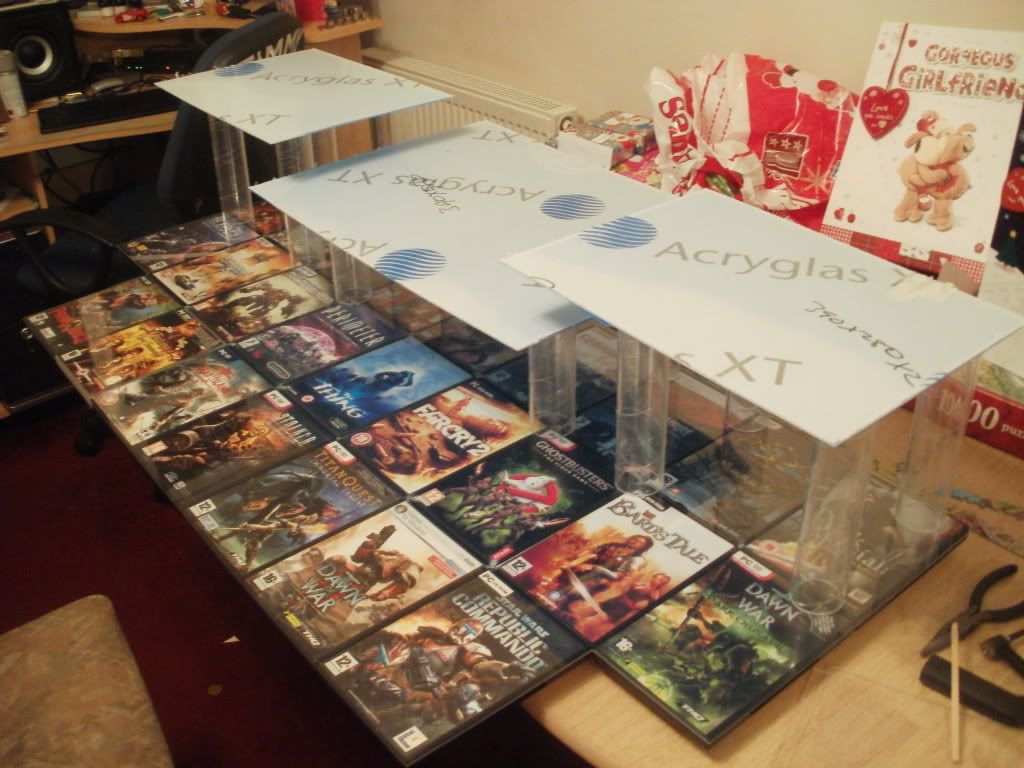
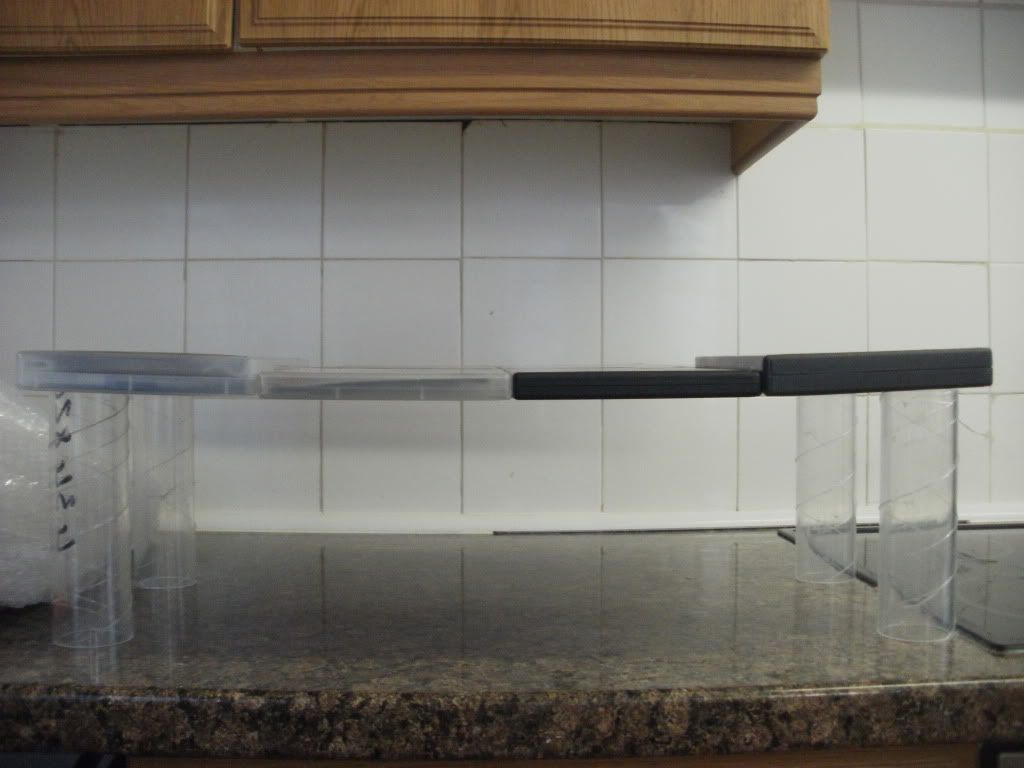
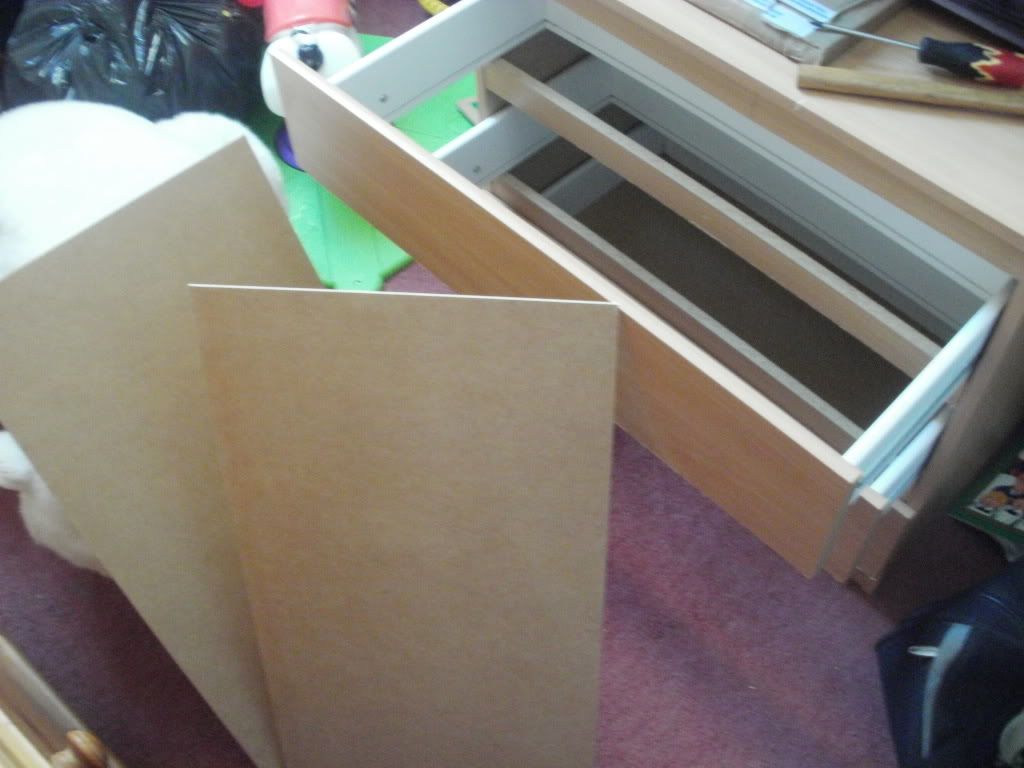
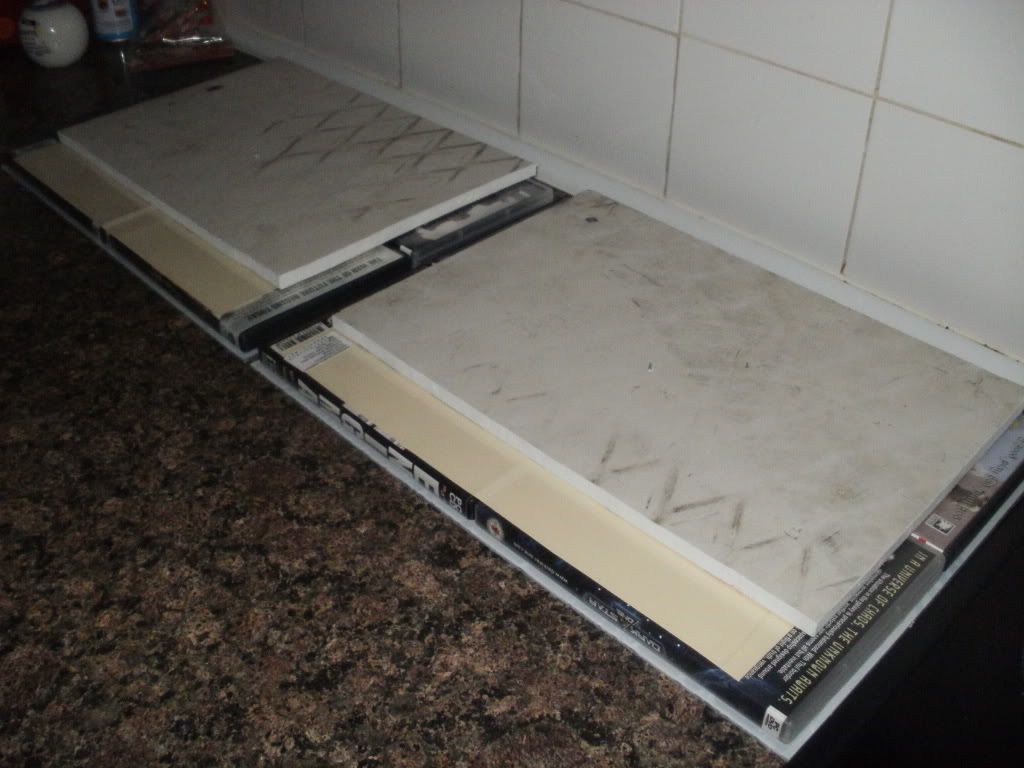
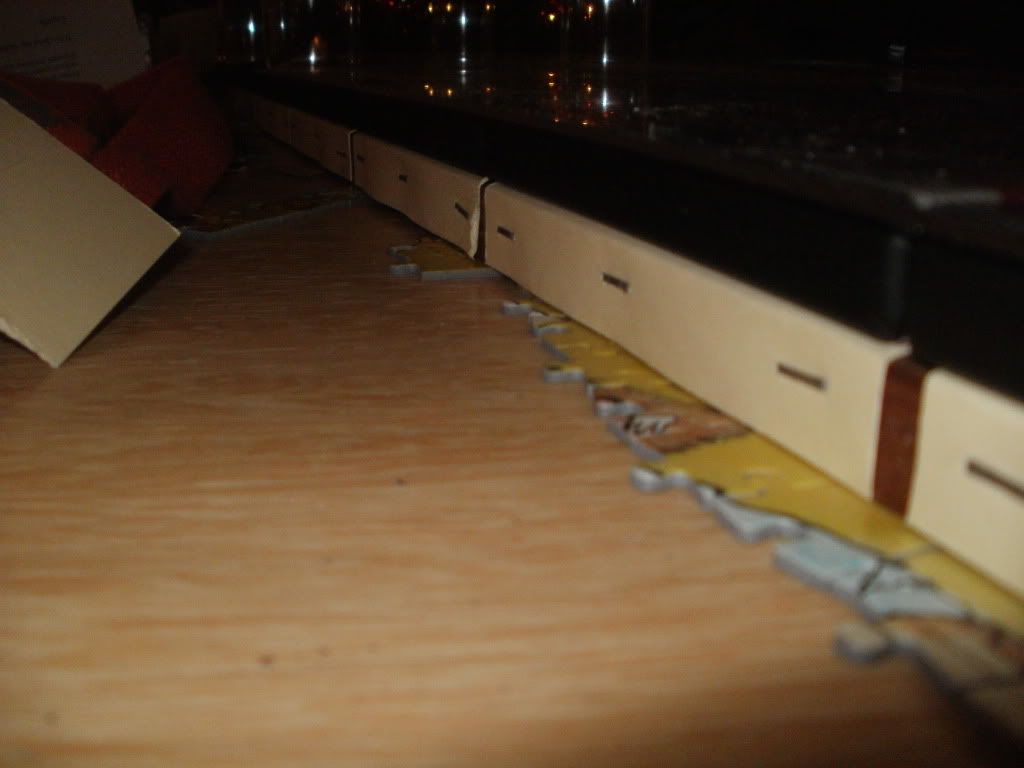
    This next image is out of order and was actually taken before the end cases were attached. It's meant as an example of how solid this simple technique has proved to be as the desk is shown almost vertical with no trouble at all to the attached games. (The top 2 are simply placed on for this shot)


    Here's a closer shot of the excess card that was visible in the last shot. Anyone wondering why it's there will soon be enlightened...


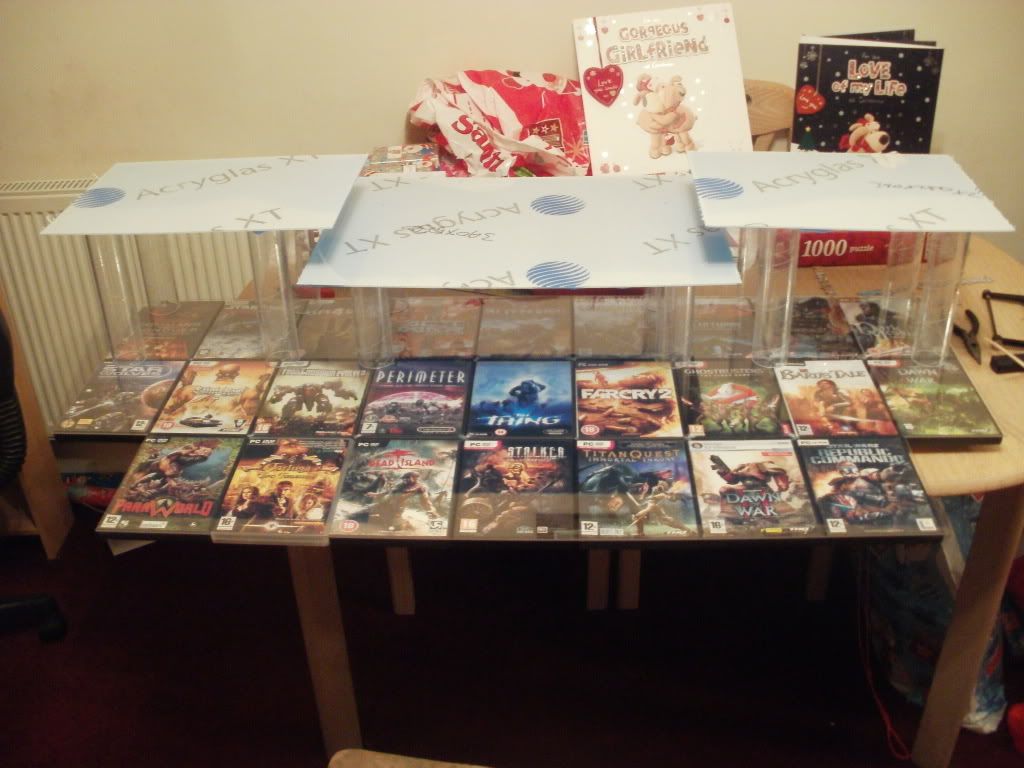
    This next one is also out of order as I seem to have forgotten to take it until now! It shows the purpose of the card tabs at the back of the desk if anyone hadn't already figured it out. By leaving these strips too long at the rear and subsequently stapling them into the wood, the back row of games becomes as immovable as the middle one! The only issue now is that the front row of cases can technically be lifted UP but since it'll soon have acrylic on it that isn't really an issue. The tabs were just intended to provide a little extra strength to the whole thing and they did so nicely...


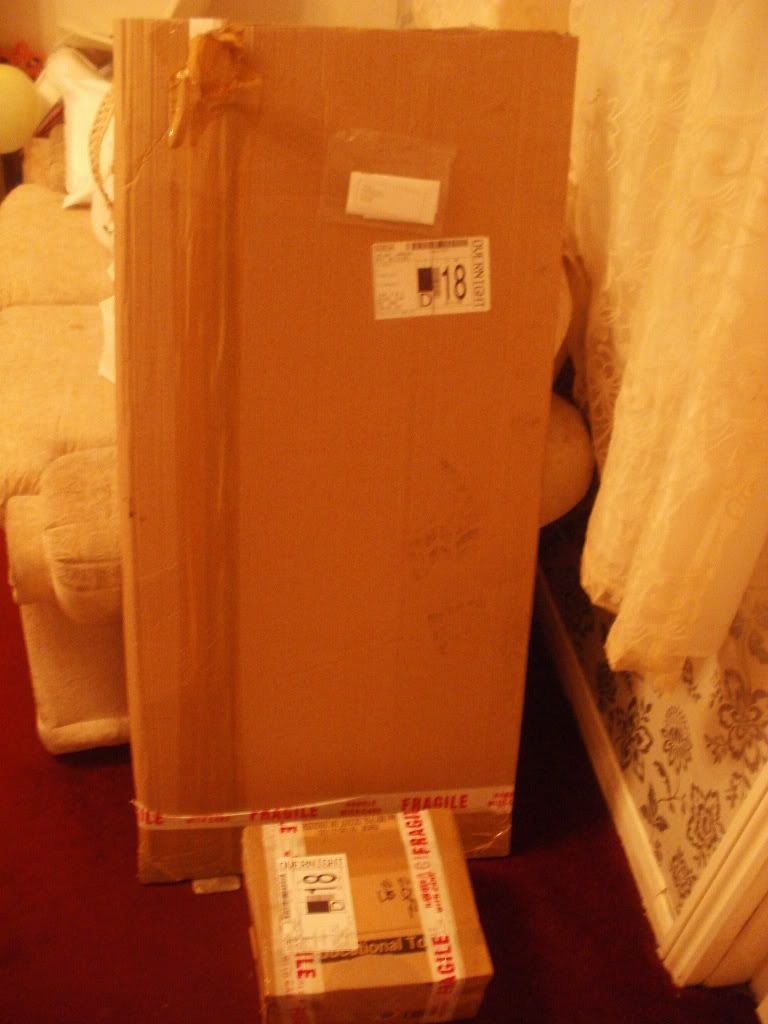
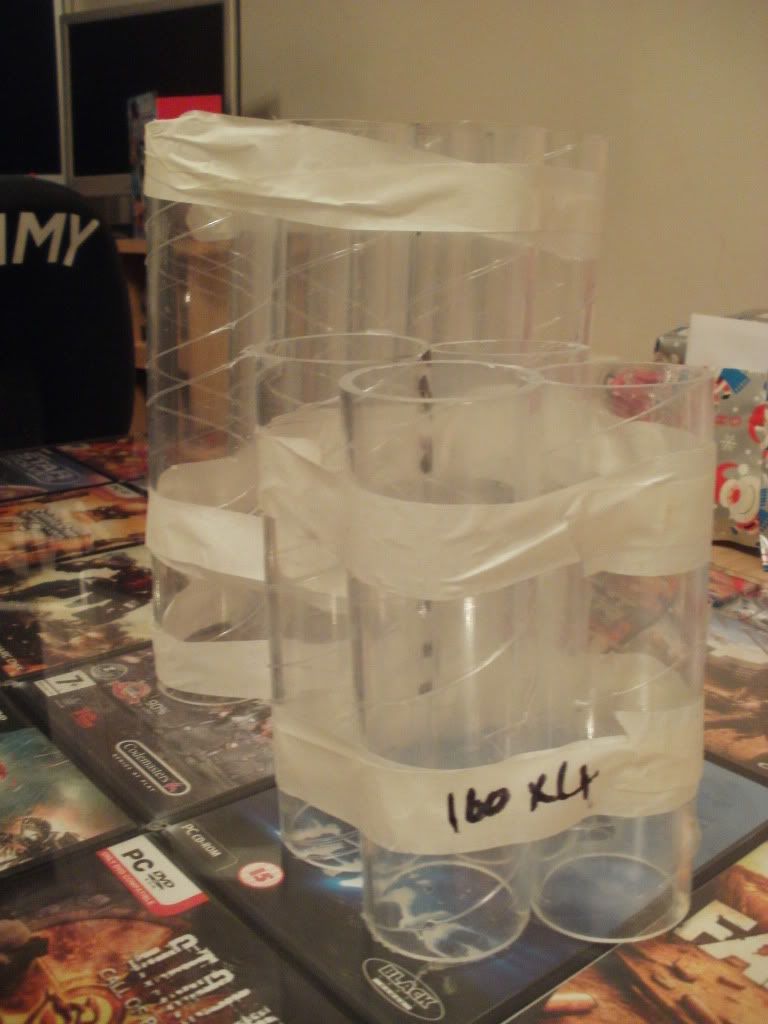
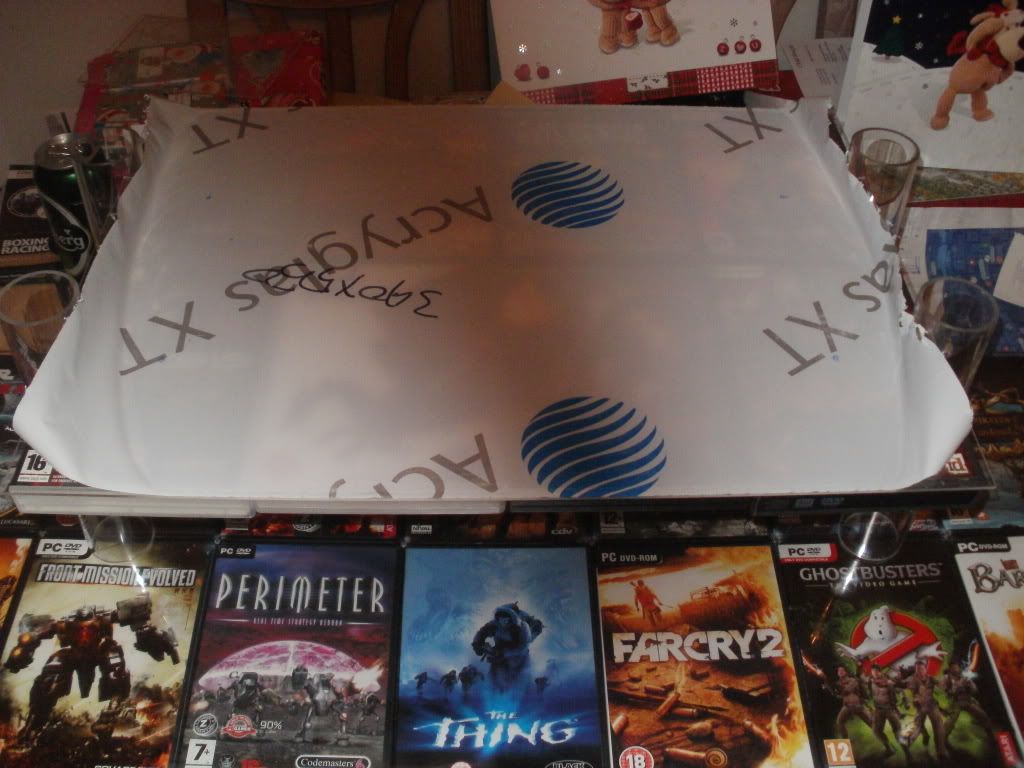
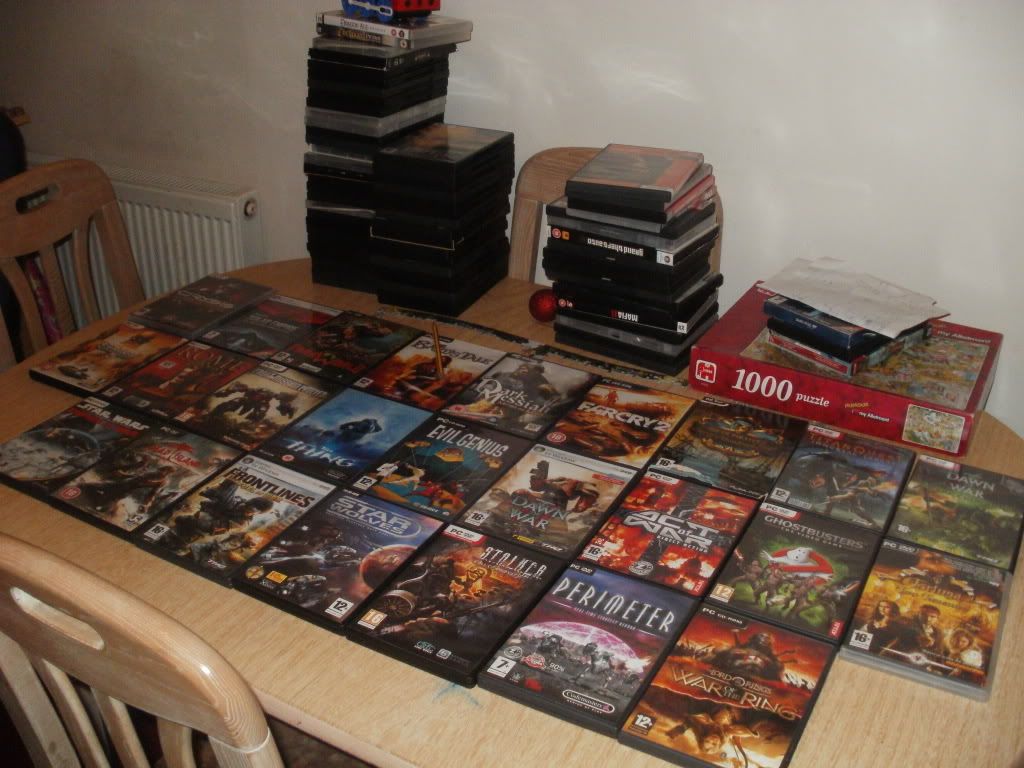
    I'm not sure if there's an image limit on these forums but I'm pretty sure I won't be far off it by now if there is! I'll post more now so consider this a brief intermission. Here's a nice parting shot of what Santa bought me to help with this build. What could be in the box???


  2. #2
    Overclocked Munty's Avatar
    Join Date
    Dec 2008
    Location
    Littlehampton, UK
    Posts
    392

    Default Re: The Game Desk

    Of course, Santa has brought me my acrylic... The box has the supports for the three pedestals in while the 4 sheets I ordered come in a slightly larger box! Apparently it wouldn't fit down the chimney and it later arrived by the standard postal service...


    Here's the goodies from my flatpack. Apart from the corners I cut off the main desktop, these 4 pieces are already cut to size.


    What with the main surface ready for it's covering already, the only thing standing in my way at this point was the removal of that pesky excess material so I got it marked up quick-sharp.


    Then removed both corners very carefully with a manual hacksaw. I was lucky early on as this acrylic actually cracked while I was working on it! Thankfully it was the bit I was removing but it was a welcome reminder to take my sweet time on this big sheet of money!


    With the corners removed and the edges sanded, all that remained was to attach this piece to the desktop itself. It's the biggest component part of the build so I drafted in the missus for help. There's not much holding this acyrlic on as I wanted to maintain the whole 'built purely from games' appearance but I did have a sneaky ulterior motive when I fitted those fatheaded nails. Each one would receive a small amount of the super-duperiest glue I could find before the top was fitted and weighted down with, wait for it, more computer games! Yep I have them coming out of my ears, used them for weights, props and even an impromptu work bench at one point!


    I'd planned for a 2mm overhang on all sides of the desk but sadly me and the other half were a little off and the whole sheet is slightly too far to the right. That means the edge of case and acrylic alike are level on the left while a larger overhang exists on the right. I'm annoyed but it's not too bad. More frustrating is that the sag of the acrylic made it very hard to avoid smearing the glue a little which has obviously marked the plastic too. It's only a matter of a millimetre or two at the worst but it's frustrating nonetheless. Something I hadn't been prepared for was the whitening of some of the plastic cases (silly seeing as I've been a modeller for years! Should've seen that coming) At any rate the overall appearance is bang on and this is the first view of the final desktop.


    To highlight how nice this looks up close and personal I took a shot of it in some nice light with a spanking reflection going on. Who likes my upside-down Xmas tree?!


    This next shot is of the supports for the 3 pedestals but you can also see the damage I mentioned in the lower left of the shot near STALKER. It's nothing major and will hopefully go unnoticed by most but it's a lesson learned for the next time I build out of computer games!


    The next few images are mostly me trying to finalise the design of this thing so you'll see a few changes as we go further (including one complete rethink!) This is the positioning of the central pedestal on it's 160mm supports. They're 50mm acrylic tube with 3mm walls, very sturdy.


    This is the first 'draft' of the main pedestal. You'll notice from this and the previous shot that it's actually set back from the rear edge of the main desktop. There are a few reasons for this. Mainly I did it because if the edges were level I'd lose a lot of surface area on the main desktop and, by extension, a lot of the games I've built with would essentially disappear. The reason I've been able to set it back though is because the desk will be located in a window which gives me an extra 90-100mm depth in the centre compared to at the sides where the window frame will be touching the back of the main desktop. Get me?!


    Here is the final mockup based on my original design but something didn't look right to me. You may notice that the peripheral pedestals are of slightly different proportions to the rest of this build and you'd be right. While the main desktop and pedestal have the games oriented vertically, the other 2 will have them horizontally (by which I mean sideways, not on their edge...)


    Here it is with the games in place though a few of them do move a little before the final build. Notice how Dead Space is a crap case and there's a 'Spaceunlimited' collection there too? I ordered original copies of both games to replace these and get the nasty looking boxes seen here out of the build! I just really wanted to use both of these games as I loved them (the latter will become Dark Star One) so despite having crappy boxes they still made it into the build!


    You'll notice the cardboard box in that last shot is helping stop that centre section sagging. That's because it's only acrylic taking the weight though so it's fine...

    I mentioned earlier that this didn't look right to me and that's because of the supports. The contrast between clear legs and colourful cases didn't seem quite right and the cluster of supports in the middle wasn't good either. In the end I kept the legs clear but I had a rethink about the supports which will be revealed shortly...

    So onto the pedestal bases and it was back to scavenging parts. I very much doubt anyone will remember my first project on these boards but I once attempted to create a pirate themed case dubbed 'Swashbuckled' (I'll be rebooting it soon so consider it trademarked!) The primary material used in this build was metal which I salvaged from an old neighbours broken boiler. Luckily I kept a piece of this when we moved house and so managed to put it to good use in this build now!


    That last picture showed one edge already removed but it needed cutting in half to be the right size for use and then anotehr edge had to go as well. Lacking an appropriate tool to remove the edges neatly I went with a bit of intuition and used an old-school bench grinder to file off the corners of the excess edges. When they were satisfactorily weakened I took a hammer to them and they snapped clean off! Couldn't find the metal bitz for my jigsaw so had to cut off the excess length of the sheet by hand.


    And here's the final product with just the rear edge kept in place for strength purposes. This is for the main pedestal and is the full width of the games used in it's construction but a few inches shorter height wise so that it's invisible from the front.


    I have to take my leave for a while now but will return with the rest of this build shortly so let me know what you think! Cheers T

  3. #3
    Overclocked Munty's Avatar
    Join Date
    Dec 2008
    Location
    Littlehampton, UK
    Posts
    392

    Default Re: The Game Desk

    Ok back again, hopefully I can catch this build up to the state it's in now before I have to call it a night now!

    The last pics showed the metal base for the central pedestal, and remember I said I didn't like that there were so many supports in the middle? Well there aren't anymore...

    A change in the design for the centre section sees the 4 160mm tubes removed completely and instead have it supported by the innermost supports of the peripheral pedestals. First things first I wanted to see if the design would have enough strength so I stuck the games onto the metal piece and then put the whole thing up on tubes. See how now they're right at the ends of the assembly rather than inside the corners?


    There's noticeable sag with this design right now but it'll get reinforced with about 6mm of wood (so all the cases are level) and of course the acrylic on top. I'm hoping that will be enough to instill in it the strength I need!


    For the aforementioned 6mm gap I had to be resourceful again so I headed up to the third floor once more and found this thing...


    It's already going to be thrown out so I figure I could at least give part of it a last hurrah so to speak... For future reference, that thin wood in drawer bottoms is about 3mm thick. Exactly half what I need!


    Here's where the transformation from drawer to desk took place. Obviously the top one is finished and the bottom is awaiting the chop...


    As I mentioned earlier, there are two games in thicker boxes than the others and that's why I need this spacer material. Here it is mocked up to show how the fat Crysis case is now level with the other normal cases.


    And here's the assembly finished (well a little bit anyway, we'll come back to it later!)


    Next up was to find a material for the bases of the peripheral pedestals. It couldn't be the metal I used for the middle one as there wasn't enough left but as these 2 shelves are only for small (15") secondary monitors they won't be carrying much weight. The supports are relatively close together too so there'll be minimal sag possible even with a weaker material.

    In the end I found something perfect when I took the recycling out. Some fool had left a no smoking sign out the front of my house a few months ago so I just chucked it by my bins. Turned out to be perfect for this next job!


    The sign was dirty and cracked at one end but a quick wipe over got all the crap off it and I was left with a nice usable material for my last two shelves! I cut the pieces I needed (smaller than necessary as always) and gave yet another piece of junk a new lease of life!


    Now I had all 3 shelves mocked up I decided to take another look at how to support that central shelf without using the shorter supports. Here's how the taller pedestals look.


    I decide it's at least worth a go if it's going to leave me with something I'm really happy with, despite how hard it may turn out to be! The plan was to cut a notch near the top of 4 of the 230mm supports and then use these slots to support the central shelf. For this purpose I took a few measurements from the mocked up peripheral shelves to determine where the notches should be and then created a template out of a toilet roll tube! (I'm just recycling everything for this one, just you wait and see!) Here's the template taped in place and me ready to make my first tentative cut.


    I worked pretty slowly on the first support as I wasn't sure how strong this stuff would be but 3mm can apparently withstand a fair amount of force! I used a hacksaw for the long cuts and then finished off with a Dremel and some filing. I don't think the filing has been done in this next picture...


    As I carried on with the remaining 3 supports I got faster and pleasantly didn't break anything! Here's the finished article, though it still has the protective plastic on for now...


    And so with all four supports cut came the moment of truth! Time to mockup my new shelves...


    I'm so pleased I changed the design for this. The wood has completely removed the sag from that middle shelf and it looks sooo much better without the extra supports in the middle. Shame I still had to pay for them but hey, I'm sure I'll use them for something...

    Anyway, with that moment of tension over and done I moved onto building up the peripheral shelves on the no smoking sign I'd cut. It was relatively simple having already done the main desktop and the size meant there was relatively little to do.

    I used the same method to attach the games to these shelves as I did to the end ones on the main desktop, card and staples. Once all 4 were on there was no movement at all. As with the other components, the base for these shelves is aligned with the back while there is a gap at the front and sides to prevent it being visible without investigation!


    You can see what I mean by that in this next picture in which I've inserted the obligatory nail and attached the acrylic already. I left them to set for a while with a nice amount of weight to compress the whole sandwich but although both sides came out great there was a lot of rotational movement due to the sole point of contact.


    The solution here was fairly simple and gave my old drawers yet another chance to be involved in the build. I simply cut two this strips from the offcuts I had left and used them to brace the rear of both assemblies. One side was glued to the baseboard and the other to the acrylic itself.


    While technically I may have made a slight boo-boo due to the fact the wood is visible from above, it does the job and looks pretty good too. As far as I'm concerned it's well in keeping with the style I wanted and there are still no big giveaway clues as to how this thing is actually all held together. Note my new copy of Dead Space in this picture, it's the first time I've ever bought a game I don't intend to play!


    Now we're really getting somewhere! Both the sides and the main desktop are now finished so it's just the middle left before we can put it all together! Except for the legs obviously... As the more astute may have noticed I won't be covering those here as I haven't done them yet! Everything is now complete from the waist up however and I have a plan for the bottom as well (thanks to an alcohol fuelled discussion with a new acquaintance of mine!) I'll do the bottom soon but for now I'm waiting on a little more cash, all will soon be revealed though.

    So back to the middle... We have the metal tray which is an all-encompassing base for this section, the wooden T-shaped spacer to bring the normal sized cases up to a level with the fatboys and of course the games themselves. So next job is to get it all put together!

    At this point I've actually almost run out of card (having used some more on the two side shelves) but I have enough to attach the middle four games in the time-honoured fashion for now.


    After that was done I had one more strip left (the length of 2 cases) so it was cut in half and used to attach the Crysis and Doom boxes to the BOTTOM of the wooden spacer. I distinctly remember snapping pictures of this but they've vanished so you'll have to use your imagination...

    Of course I did mention something about stealthing away a DVD drive earlier didn't I? Well, I did! The Doom box was to become it's new home and it remains the only case harmed in the making of this desk! Here's how much I had to mutilate it in order to fit the thing in...

    Starting off with the ever popular electric pink external DVD drive of course...

    And here's where I want it to go.


    Some measuring twice and cutting once later and I managed to get an appropriate hole for the drawer.


    Oh and a whole lot of chopping up inside! The brown card is pretty flimsy but I wanted to give the jacket a little extra support seeing as I cut so much of the plastic away. I was however, very careful not to undermine the integrity of the case by leaving all the corners intact. Had I not done this it could have been a real pain to get it looking right from the outside again later. Oh and remember what I said about recycling? That on the right is one of the offcuts from a support tube and a few bits of my toilet roll template which have become a buffer to prevent backward movement of the drive!


    And here's how it does it! As a happy coincidence, the top of that tube offcut sits perfectly inside the lip of disc 1's holder on the top of the case when it's closed making for a pretty strong assembly (especially given the components used!)


    And here she is, not stealthed clearly but I'd like to think of it as secreted away at least! I think I'll probably remove this case and repaint the whole thing so the colours match at some point, then we'll be one step closer to stealthed anyway but it's not a big deal.


    Before the final dry fitting of all the finished components I had to modify the central supports a little more to accomodate a 3mm overhang of acrylic on each side of the central shelf. I took the majority of it out with careful Dremelage and then got the rest out with a combination of knife and hacksaw!


    Here's the top finally in place, the only thing holding the whole sandwich together is the clamping action of those four supports so no glue anywhere here!


    And finally the reveal!


    Here's the obligatory 'finished' picture but really it's not yet. I haven't permanently attached any of the supports to anything yet so I won't be putting monitors on it just yet and of course it needs legs too! But enough of what isn't finished, take a look at what is and tell me what you think...


    The current plans for legs are fairly simple but also rather ingenious. I've had lots of thoughts but none seemed quite right. I don't want to overdo the whole use of computer cases as despite being the whole point of the build, it's still rather minimalist in nature. On the other hand though, I don't really want it just plonked on top of £3 Ikea legs that will look crap and inevitably fall off...

    The plan now is to find 2 nice chunky wooden beams for strong back legs and then hide them both by putting a board across the entire width of it. That'll be covered in the same way as the rest of the desk so imagine the main desktop but vertical and underneath the back on the desk itself...

    At the front, the legs will actually be DVD racks and these will hold all the games I'm currently playing, or failing that just some more of my favourite titles. This should aid in the illusion that there's practically nothing holding the desk up and that's exactly what I want.

    Now I just need to wait for payday so I can get 2 of these racks to chop up. In the meantime I'm back on the scrounge for some wood to make the back wall and legs from!

    For now though this build log is over! Sadly I won't be able to use this desk until the legs are built (a real shame as it now has my only usable DVD drive inside it!) but I'm looking forward to it all the same.

    As a parting image, I know I said this build was all about showcasing some of my best and favourite games. It turns out I found a use for one of my least favourite as well in the end though. I'm certainly not going to play it so at least this way Command & Conquer 4 can be recycled as well!


    Cheers for watching, T

  4. #4
    Its not cool till its watercooled. Fuganater's Avatar
    Join Date
    Oct 2007
    Location
    Kinshasa, DRC
    Posts
    2,843

    Default Re: The Game Desk

    Looks great dude! Another idea for coasters are some HDD platters.

  5. #5
    Why must hard drives fail together? TheMainMan's Avatar
    Join Date
    May 2008
    Location
    Canada
    Posts
    804

    Default Re: The Game Desk

    This is an awesome design! Love the ingenuity in getting the cases to stay without damaging them.
    TheMainMan

  6. #6
    Overclocked Munty's Avatar
    Join Date
    Dec 2008
    Location
    Littlehampton, UK
    Posts
    392

    Default Re: The Game Desk

    Thanks guys! Been left alone this weekend with no family to hamper my progress so I'm hoping I'll be able to find some suitable materials to complete this build.

    Fug, I'm actually hoping to stash away the HDD that my computer runs off somewhere in this build but I've no idea where to put it... I've just spent about £600 upgrading my tower and would like to have it on show for that much money!

    I figure if the CDD and HDD are mounted externally and hidden away somewhat I can just have the mobo assembly sat under the central pedestal. Maybe in it's own acrylic case, I don't know... The original plan for the space under there was for a third speaker or something but currently I only have a 2:1 rig so it'll be empty space for a while.

    I'm itching to get running off this desk as I have no CDD right now, I don't want to mock it up and then have to disassemble it again though...

    Oh and returning to the original mention, I actually have several HDDs that are surplus to requirement. I'm not up to speed on internal components but I guess you mean the actual disc right?

  7. #7
    Administrator OvRiDe's Avatar
    Join Date
    Dec 2005
    Location
    Tulsa, OK
    Posts
    4,586

    Default Re: The Game Desk

    Very nice, this is really cool.

  8. #8
    Bottle of Whiskey! altec's Avatar
    Join Date
    Mar 2005
    Location
    Maryland
    Posts
    501

    Default Re: The Game Desk

    The Thing
    Current Projects
    -1979 Jeep DJ5 "Mail Jeep"
    -1981 Chevrolet K10

  9. #9
    Overclocked Munty's Avatar
    Join Date
    Dec 2008
    Location
    Littlehampton, UK
    Posts
    392

    Default Re: The Game Desk

    Quote Originally Posted by altec View Post
    The Thing
    Haha, love The Thing and was actually a pretty good game in the end! John Carpenter was an absolute legend and I was bowled over last week when I heard there'd been a remake! Thankfully it was designed as a prequel and despite not being J.C.'s version it was still pretty cool. The advances in CG technology allowed for some seriously wicked Things and it was perfectly in keeping with the original. The only problem I had with it was the remarkable number of similarities between this film and the first. Seriously, it wasn't remake but it may as well have been for about 80% of the runtime...

    But anyway! I mocked up the desk yesterday and it looks just how I was hoping it would do now that all of my hardware is in place. Even the DVD drive disappears somewhat now there's so much else to look at and I'm collecting my third monitor this week.

    I have however made 2 blunders in this build... Despite a great deal of measuring early on in the design, the central pedestal (namely the space between the two peripheral ones) isn't large enough for the width of my main 24" monitor! I've had to jack it up on some more gamecases for now to make it fit but I'm toying with the idea of cutting the front speakers off to make it fit as the cable got chewed off by our old rabbit months ago anyway... The other whoopsie is not a blunder so much as a failure to consider the fact that an optical mouse won't work on clear plastic! My original plan was to use some fairly opaque window tinting film for a semi-permanent mousemat as I didn't want to risk damaging the expensive acrylic with the constant movement. Given this revelation though I guess I'll have to try something a bit darker and hope for the best! If not I'll get a custom mousemat made from a scan of the games it will cover up and then attach it directly above them. Will help to maintain much of the illusion that way but still sucks a bit...

    Been thinking more about incorporating my new build into this desk and think I know how to do it, I need a little help though. I know there are people here who can do absolutely anything so can someone please point me in the direction of someone who could make me a nice acrylic nameplate for this build? The idea is to place my hardware under the central pedestal and then fill the void in front of it with a sheet of acrylic. It would be nice if that could have the name of the build cut out of it though and I think some blue or UV lighting above the mobo too. Then with that done and some legs on this baby I think the build will really be just what I was hoping for!

  10. #10
    Why must hard drives fail together? TheMainMan's Avatar
    Join Date
    May 2008
    Location
    Canada
    Posts
    804

    Default Re: The Game Desk

    You need a Darkfield mouse.
    TheMainMan

Posting Permissions

  • You may not post new threads
  • You may not post replies
  • You may not post attachments
  • You may not edit your posts
  •