Page 12 of 17 FirstFirst ... 27891011121314151617 LastLast
Results 111 to 120 of 168

Thread: Cosmos Cruizer

  1. #111
    Moderator TLHarrell's Avatar
    Join Date
    Jan 2012
    Location
    Morgan Hill, CA
    Posts
    1,143

    Default Re: Cosmos Cruizer

    Awesome! New updates! I look forward to these.

    FYI: for lighting the UV orange acrylic, you might try out some blue LEDs or LED strip. It's crazy, but it reacts much more with blue than UV. I'm doing an entire mod lit by UV orange acrylic and some blue light bleeding around.
    I have a hammer! I can put things together! I can knock things apart! I can alter my environment at will and make an incredible din all the while! -Calvin

  2. #112
    Modding the World, One Case at a Time Boddaker's Avatar
    Join Date
    Jun 2005
    Location
    Northern CA
    Posts
    818

    Default Re: Cosmos Cruizer

    Thanks TLHarrell, interesting idea witth the blue leds. I wonder if it has anything to do with the fact that blue and orange are opposite each other on the color wheel.
    Honey Roasted Peanuts Ingredients: Salt; Artificial honey roasting agents; Pressed peanut sweepings.

  3. #113
    Modding the World, One Case at a Time Boddaker's Avatar
    Join Date
    Jun 2005
    Location
    Northern CA
    Posts
    818

    Default Re: Cosmos Cruizer

    Not much progress over the Easter weekend since I was out of town, but here are a few pics of the cabling and new IO plate...

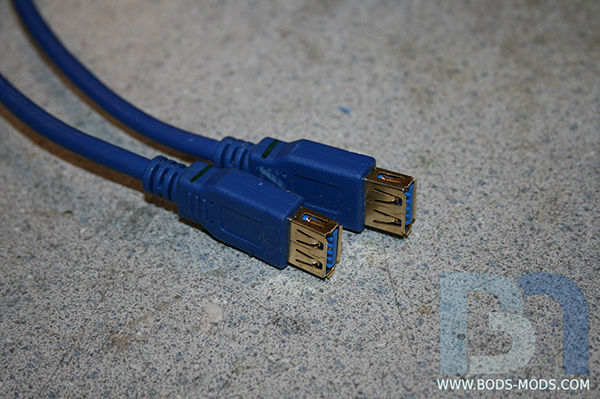
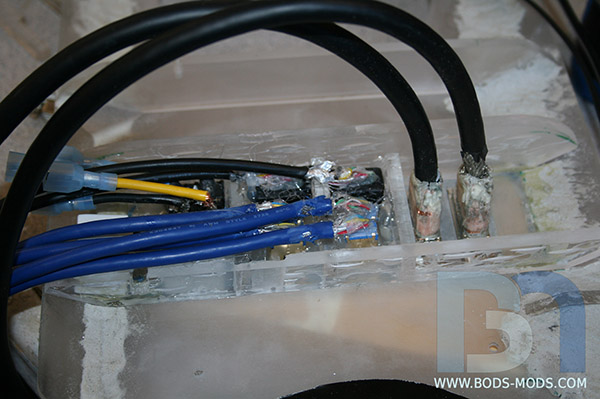
    I got these short USB 3.0 extension cables to run from the motherboard to the back panel. But one end must be modified into an angled plug.


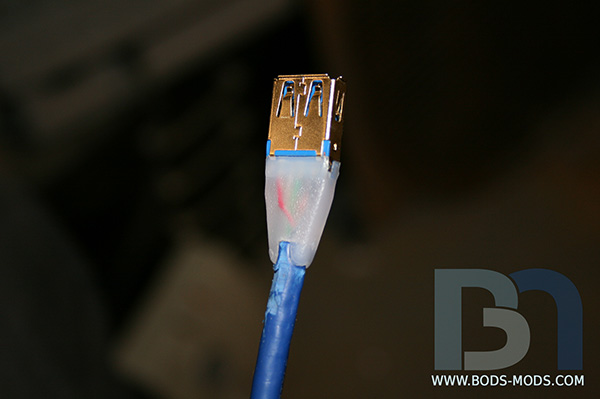
    So the rubber casing was stripped away, exposing the wax underneath...


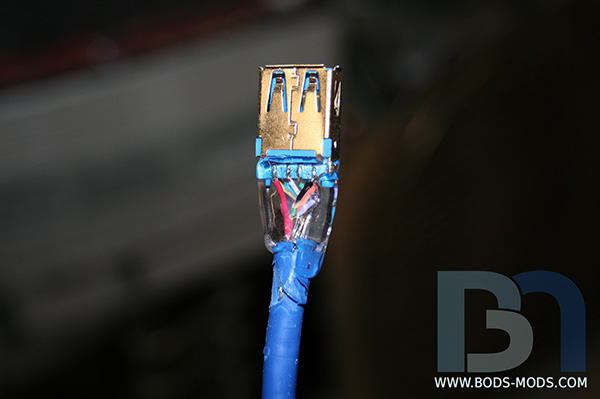
    using my heat gun, the wax is easily melted, and becomes clear.


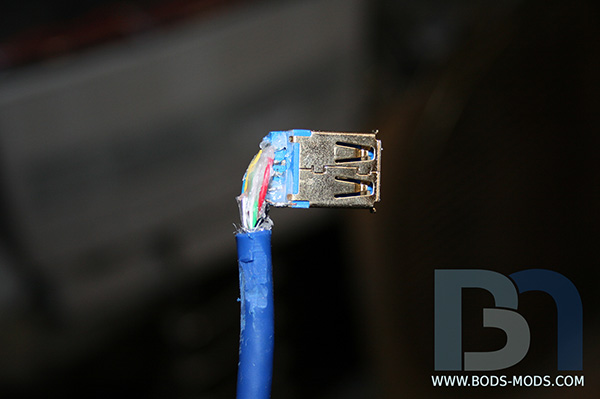
    Then I just scraped most of it off the wiring so I could bend the USB port over creating my angle plug.


    I proceeded to apply the same treatment to the other 3 USB cables, as well as two HDMI cables, and hot-glued them into place behind the back panel. Here you can also see the two DVI cables which were stripped of their gigantic white casings, and the back of the PSU power switch (top left) with extended wiring. Also hidden behind the usb cables is the ethernet adapter. I know this doesn't look pretty, but it will be all covered up in the end.


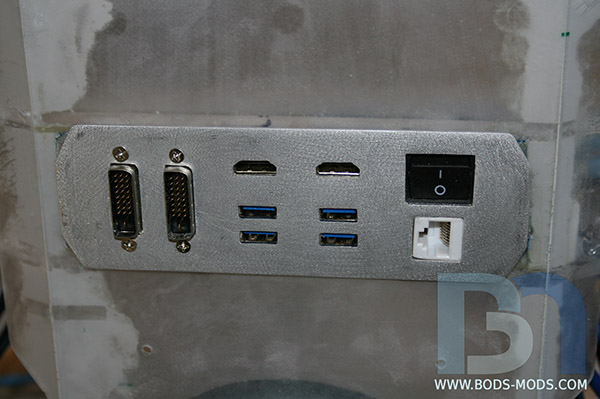
    And here is what hopefully will be the final IO plate.


    What the heck is going on here?? SSD watercooling?
    Honey Roasted Peanuts Ingredients: Salt; Artificial honey roasting agents; Pressed peanut sweepings.

  4. #114
    Moderator TLHarrell's Avatar
    Join Date
    Jan 2012
    Location
    Morgan Hill, CA
    Posts
    1,143

    Default Re: Cosmos Cruizer

    Nope. Does it with other UV colors as well. Looks pretty amazing in real life seeing one color become another.

    I have a hammer! I can put things together! I can knock things apart! I can alter my environment at will and make an incredible din all the while! -Calvin

  5. #115
    Modding the World, One Case at a Time Boddaker's Avatar
    Join Date
    Jun 2005
    Location
    Northern CA
    Posts
    818

    Default Re: Cosmos Cruizer

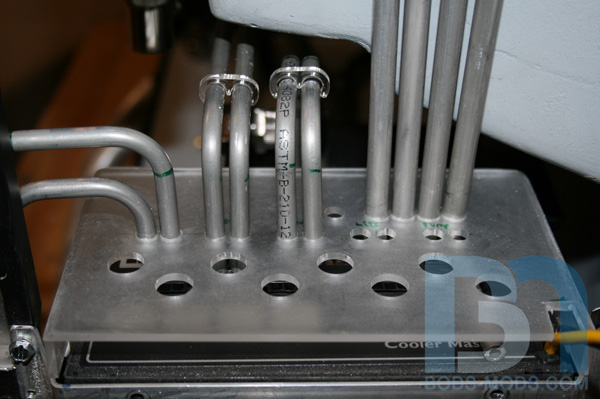
    Made some good headway on the PSU wiring yesterday. This being an automotive/hotrod theme, I couldn't just do normal sleeving and be ok with it. I had to go with the theme and run simulated brake lines from the PSU for all 12v accessories and motherboard power.

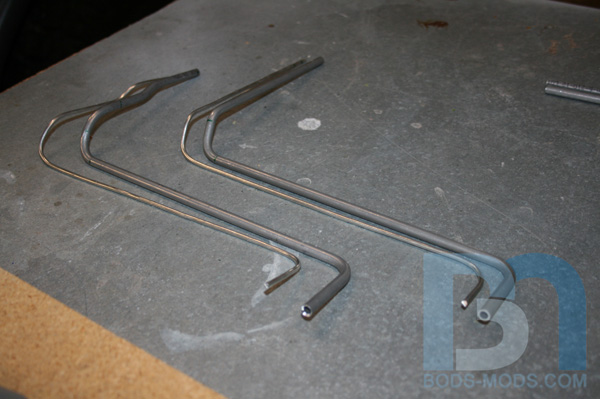
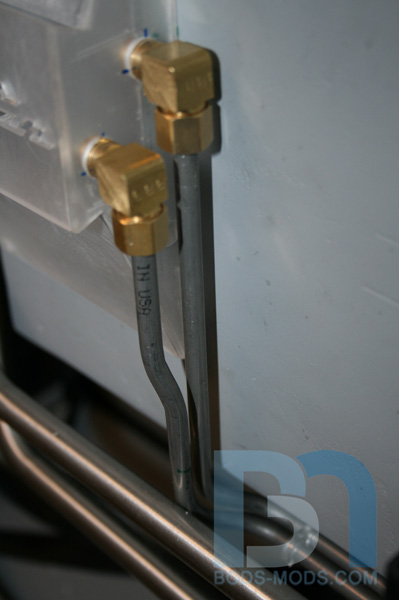
    Using the same technique as I did with the 1/2" stainless tubing, I made templates out of soldering wire and bent the 1/4" aluminum tubing to match. These runs will carry the SATA power cables to the SSD's.


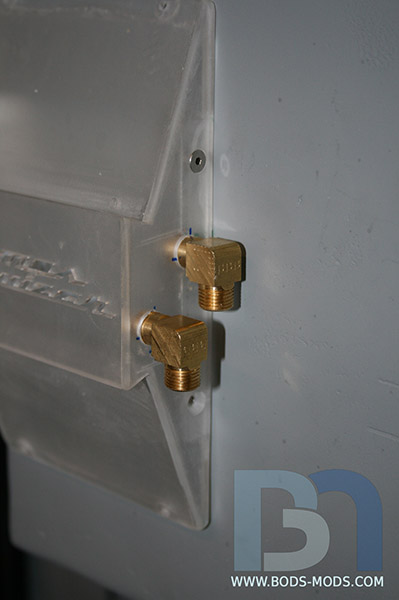
    I employed 90° compression fittings to transition from the tubing into the SSD mount.


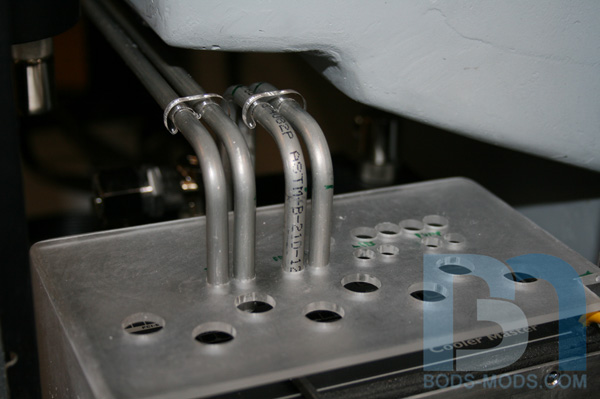
    On the other end, the tubes simply fit into the PSU cover where the cables plug in. The next set of tubes will provide power for the fan controller and LCD screen on the front bezel. The tubes drop down to the floor where the wires will continue hidden underneath to the front.


    This pair runs power to the led strips that will run around the inside of the frame.


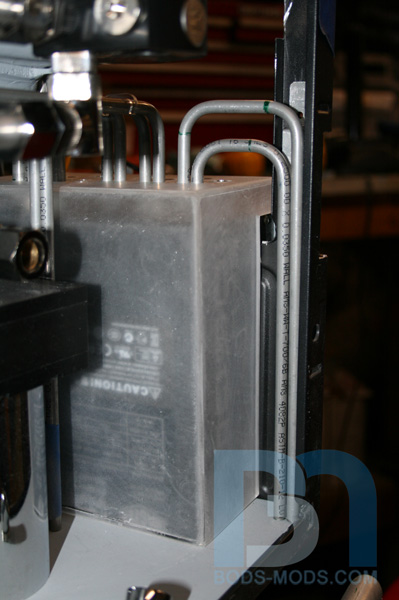
    These tubes are for the dual 8pin CPU power cables. Each tube will carry 4 wires, hence the need for the slightly larger 5/16" tubing. Again, 90° compression fittings are used to bring the cables through the fiberglass panel to the motherboard.


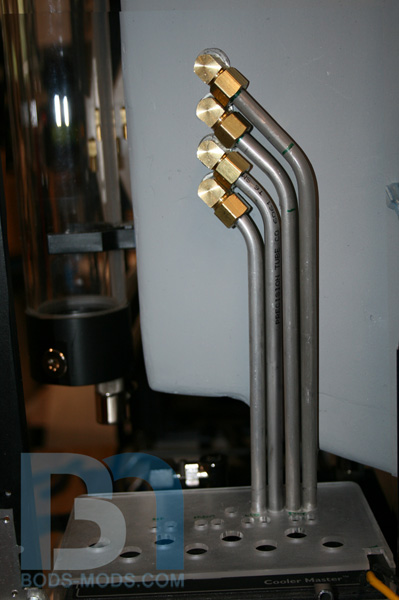
    Here's an overall shot of the PSU cover with all brake line tubing installed. The open holes on the right are extras. I was going to do one more set for the pumps, but they are so close to the PSU, I will just run the wires under the floor.


    Next up is the main ATX 24pin and PCI-E cables. But these won't be run in aluminum tubing, nor will they be sleeved. To give you a clue, hotrods typically have 8 cylinder engines in them, and you can see there are 8 large holes in the PSU cover... :wink:
    Honey Roasted Peanuts Ingredients: Salt; Artificial honey roasting agents; Pressed peanut sweepings.

  6. #116
    Administrator OvRiDe's Avatar
    Join Date
    Dec 2005
    Location
    Tulsa, OK
    Posts
    4,586

    Default Re: Cosmos Cruizer

    I don't comment on this log nearly enough, because how many times can you say AMAZING, and Great Job...

    BUT

    That brake line idea and execution is truly AMAZING work!

  7. #117
    Modding the World, One Case at a Time Boddaker's Avatar
    Join Date
    Jun 2005
    Location
    Northern CA
    Posts
    818

    Default Re: Cosmos Cruizer

    Quote Originally Posted by OvRiDe View Post
    I don't comment on this log nearly enough, because how many times can you say AMAZING, and Great Job...

    BUT

    That brake line idea and execution is truly AMAZING work!
    Thanks man. It's getting real close now! Almost done with all the piddly stuff, then the major milestones will follow: Paint, Chrome, Upholstery, Final Assembly. woot!!
    Honey Roasted Peanuts Ingredients: Salt; Artificial honey roasting agents; Pressed peanut sweepings.

  8. #118
    Water Cooled Stonerboy779's Avatar
    Join Date
    Jan 2012
    Location
    Melbourne, Australia
    Posts
    557

    Default Re: Cosmos Cruizer

    Ohhh can't wait to see more.

  9. #119
    A.B. normal msmrx57's Avatar
    Join Date
    Jan 2008
    Location
    Western Wisconsin
    Posts
    1,602

    Default Re: Cosmos Cruizer

    Quote Originally Posted by OvRiDe View Post
    I don't comment on this log nearly enough, because how many times can you say AMAZING, and Great Job...

    BUT

    That brake line idea and execution is truly AMAZING work!
    Agree completely!!!!

    Quote Originally Posted by Boddaker View Post
    Thanks man. It's getting real close now! Almost done with all the piddly stuff, then the major milestones will follow: Paint, Chrome, Upholstery, Final Assembly. woot!!
    SWEET!! Looking forward to seeing this in all it's glory. Wait, Upholstery?!?!?
    Quote Originally Posted by SXRguyinMA View Post
    Now, off to the basement to do some fiddling with the rods and such.
    so far left of center i'm in right field

  10. #120
    Modding the World, One Case at a Time Boddaker's Avatar
    Join Date
    Jun 2005
    Location
    Northern CA
    Posts
    818

    Default Re: Cosmos Cruizer

    Quote Originally Posted by msmrx57 View Post
    SWEET!! Looking forward to seeing this in all it's glory. Wait, Upholstery?!?!?
    Oh, did I type that out loud?

    Well, what kind of hotrod theme would this be without a white leather interior?
    Honey Roasted Peanuts Ingredients: Salt; Artificial honey roasting agents; Pressed peanut sweepings.

Posting Permissions

  • You may not post new threads
  • You may not post replies
  • You may not post attachments
  • You may not edit your posts
  •