Page 3 of 9 FirstFirst 12345678 ... LastLast
Results 21 to 30 of 81

Thread: PC-Playstation 2 Hybrid

  1. #21
    Super Secret Agent
    Join Date
    Jul 2006
    Location
    Glasgow, Scotland
    Posts
    126

    Default Re: PC-Playstation 2 Hybrid

    A very quick update...

    Was going to finish the case before I added these images, but I got a bit over excited and started the update.

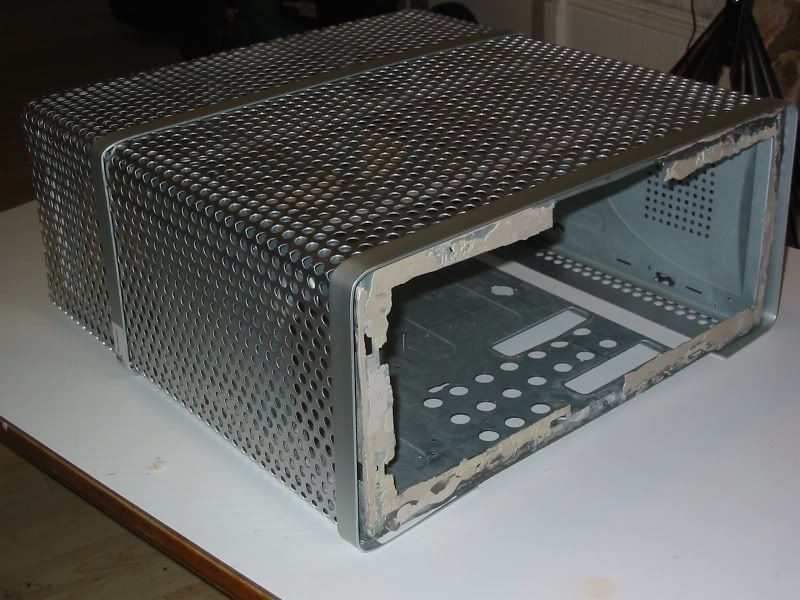
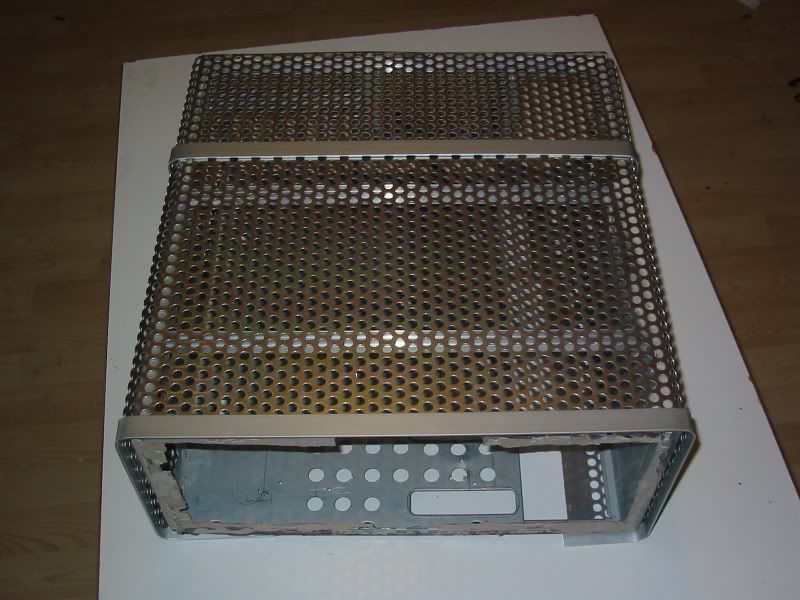
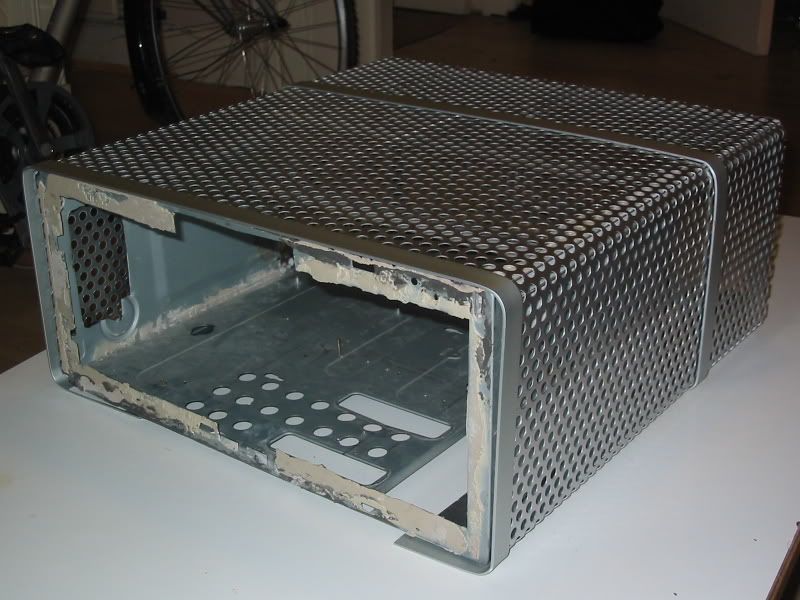
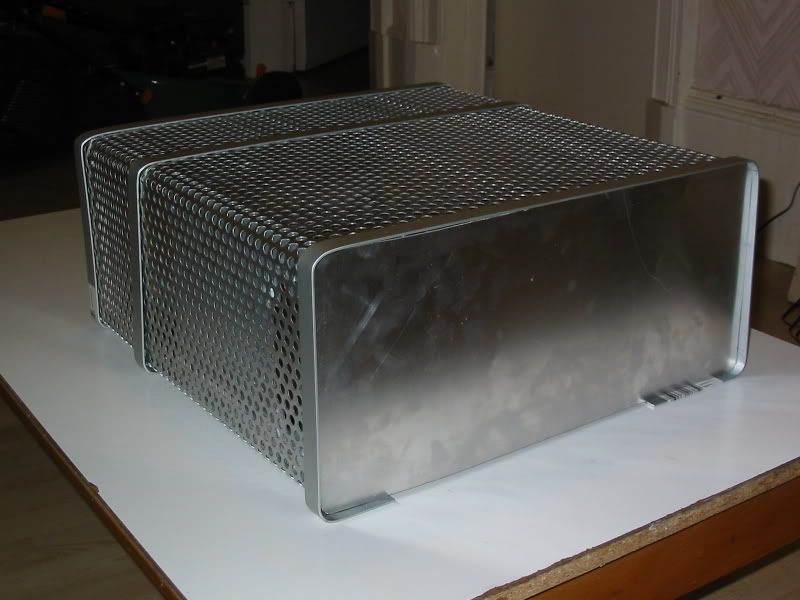
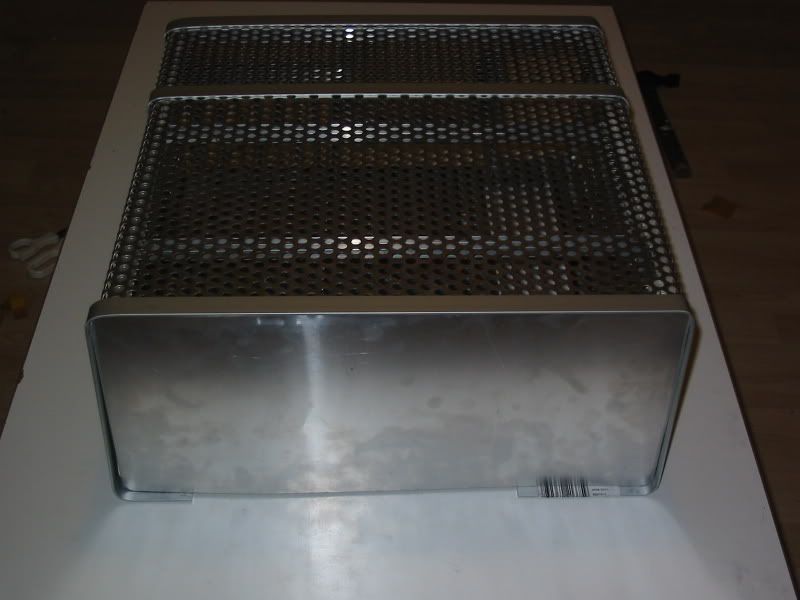
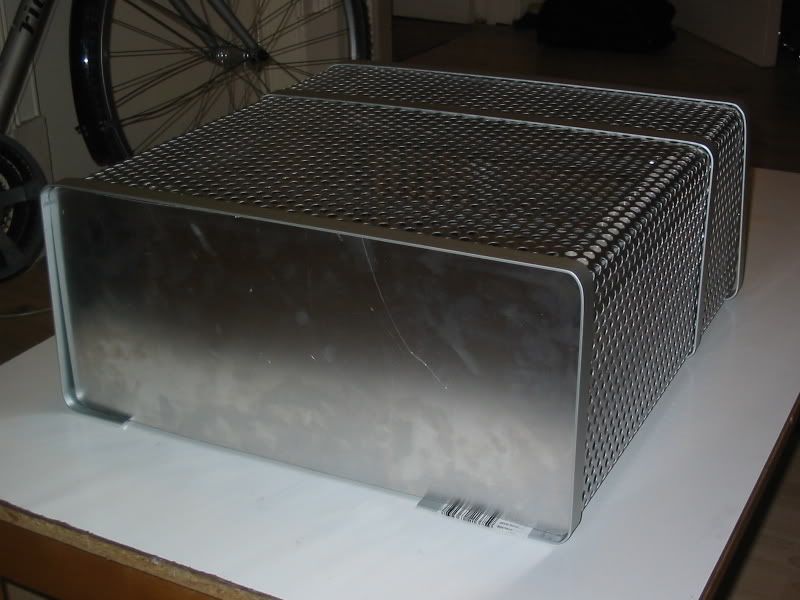
    I just completed 2 of 3 of the anodised "bands" that finish the case lid. The result is exacly what I hoped for!

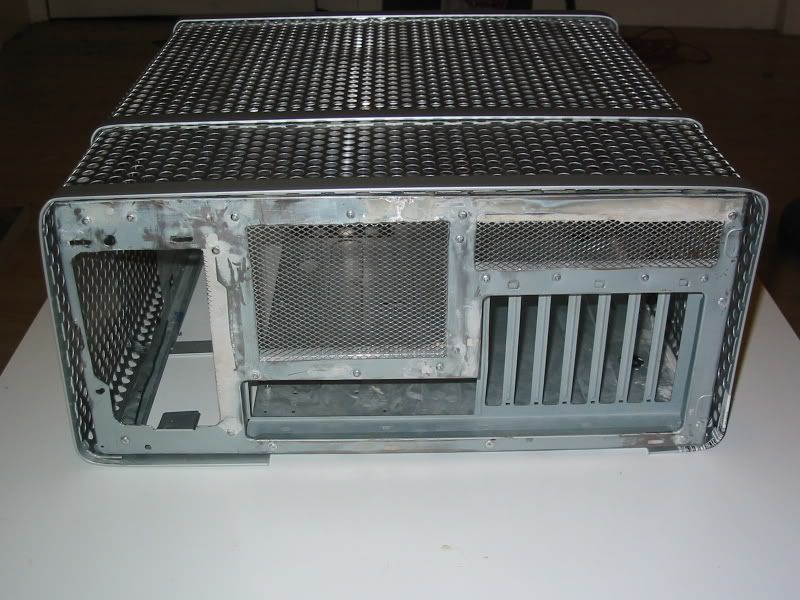
    Dont know how long the next one and the facia will take, but these images give a pretty clear impression on what the finished result will be...

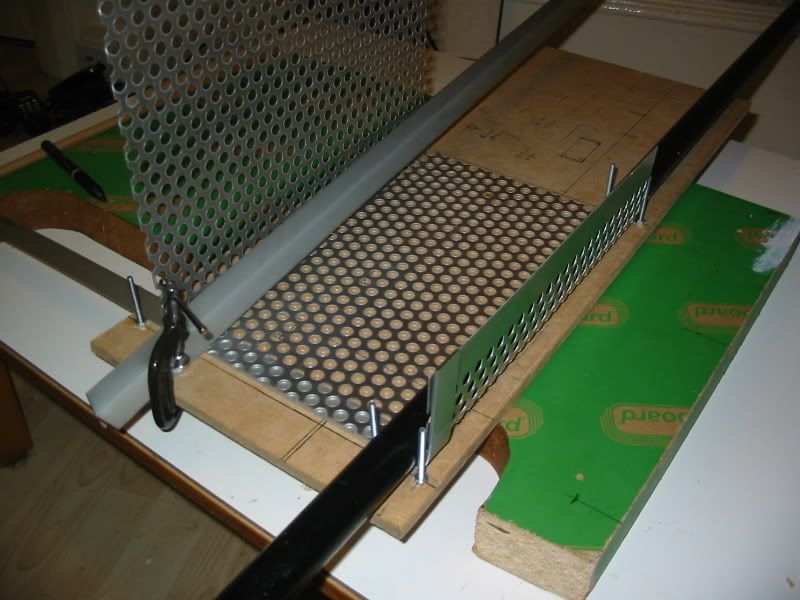
    First how I made them... I used the same bending rig as before, this time though I put the origional mesh in as well as the strap. 2 benefits to this..

    1. Gives me a very accurate fit, mm perfect in fact with little effort.

    2. No measuring or compansating for the mesh in my calculations Yey


    Pretty easy this time, in fact a 20 minute job at most.

    And now the results


    The level of precision required scared me off starting this job for a few days. Turned out a lot easier than I thought. Any small gaps you spot here will disapear when its screwed together. Nothings fixed yet.

    Unlike the sheet steel I used before, the alu is a lot easier to manipulate, and is forgiving of mistakes (just bend back)

    I'm getting excited. Going to try and not get too drunk tonight (My mates away to Australia to live, tonights his leaving do). If I dont have the shakes too bad tomorrow, I might get the majority of the exteriour done!

  2. #22
    Super Secret Agent
    Join Date
    Jul 2006
    Location
    Glasgow, Scotland
    Posts
    126

    Default Re: PC-Playstation 2 Hybrid

    I did get too drunk, tried to make the back band, which was to be from an L shaped bit of Alu... Big mistake! It requires cutting and shaping and either my calcs are out, my skills are blunted or it was a daft idea. I'm scrapping the L anyway, but got to go to the harware store and get more alu...

    Going to use strip instead, then tidy the gaps some other way.

    Damn the demon drink!

  3. #23
    rest in peace mate GT40_GearHead's Avatar
    Join Date
    Mar 2006
    Location
    Ramania
    Posts
    1,661

    Default Re: PC-Playstation 2 Hybrid

    i see you like mesh... hhhm
    what are you gonna do under the mesh, lights.... ?!

    ou and i see a problem with vibrations, or is it just me?

    LOUD AND PROUD !

  4. #24
    Super Secret Agent
    Join Date
    Jul 2006
    Location
    Glasgow, Scotland
    Posts
    126

    Default Re: PC-Playstation 2 Hybrid

    Not expecting any problems with vibrations.. The only moving parts are the HD unless the ps2 is on. The HD is going to be encased and suspended on elastic by the end of the build.

    As for liking the mesh? Well this is a cases of function dictating style. The system must be meshed to allow it to run passive. However I do have an option to add some 2mm thick perspex to the case to cover some of it if all that mesh starts to annoy me... Currently I'm thinking its quite a cool look, and very distinctive... But time will tell, I'll reaappraise this when the novelty has worn off.

    I am considering putting some blue leds into the case, though I cant imagine using it with them on... But it might make a nice final glamour shot for the project. I have an idea for a switch, but It will have to wait till I get the rest of the electriconics. I have a shopping list for chips, caps leds and resistors. Once I am sure that it is exhaustive, I will bung an order over to farnell.

    I'm going to have a bit to eat, then take some final shots for the worklog tonight. Hangover is still with me!

  5. #25
    Super Secret Agent
    Join Date
    Jul 2006
    Location
    Glasgow, Scotland
    Posts
    126

    Default Re: PC-Playstation 2 Hybrid

    Here are the last few shots of the project as it stands at the end of the weekend. I'm a bit disapointed with my progress, But I had to take frequent naps today. In my defense I am stuggling with the cold, though the drink did have a devastating effect on my effectiveness today.

    What I did get done today on top of my earlier failed attempt was

    1. Got another alu strip from the hardware store.

    2. Made the third band for the case top.

    3. Cut and shaped a thin alu sheet for the front facia. I have not though cut the relevant holes for drives, screen and switches yet. I wanted to wait till my head was a bit clearer before doing this design orientated stuff.

    So here are the shots...


    You can see in the last shot the rear of the machine. There are two 1.3 cm gaps at the sides. I had intended using the L angled alu to fill this and make up the last band... That was the cutting and shaping I could not get right this morning. Instead I will fill this gap another way.

    Probably going to use perspex dyed black for this. It should finish off the rear of the case nicely.

    So thats it so far folks... Hopefully I will get a few hours done this week in the evenings. I hopefully will recieve the pci matrox g200 card tomorrow. Thayt will be dedicated to the psone screen, should make controlling it a bit less complicated <fingers crossed>. I intend soldering the RGB and sync connections either direct to the card, or add a header to the card that allows me to keep the cabling internal.

    I was just looking at the mobo etc which is scattered around the living room. I will need to make a post covering the mods I have made there. I took pictures at the time... I'll see how I feel after a cup of tea.. Might do some of it tonight.

  6. #26
    Super Secret Agent
    Join Date
    Jul 2006
    Location
    Glasgow, Scotland
    Posts
    126

    Default Re: PC-Playstation 2 Hybrid

    Ok the tea didn't do me any good the other night. But I look through my albums to see what I had. Here are some photos of the mobo, cpu cooler mods.


    You can see in the pictures that there has been quite a few mods made to the mobo and also the TT big typhoon cooler. I didn't take pictures as I went along, so this is just a finished result. The mods are.

    Mobo.

    Cut up 2 pII anodised heatsinks. The bits were used to add cooling to.

    Green one

    The southbridge of the mobo
    The power regulator for the graphics card

    For the southbridge I had to trim a chunk out of it to allow the graphics card clearance. By happy coincidence the chunk that was trimmed was the right size and shape to sit on the power regulator without fouling the card.

    Blue one.

    The power regulation section of the mobo
    The power regulation for the memory
    Any other chips that were hot to the touch.

    This got really cut up. I shaped it initially to fit on the mobos power regulation mosfets that control vcore etc. There were 5 (i think) mosfets to cool, but the snag was that they had caps sitting between them. I trimmed the cpu cooler to fit around the caps. It actually is 2 pieces of alu, but lined up to look like one.

    The remaining pieces were used to cool any other mosfets or hot chips that I could find on the board.

    All the alu sections were attached using double sided thermal tape. This I would say is an extreme mod to do, I know that overclockers have got some extra mhz by cooling the mosfets. In my case though i was out to ensure that passive operation wasn't going to cause instability in the system.

    The northbridge needed a bit more...

    For this I took an evercool pure copper 6cm heatsink and trimmed it down to clear the CPU cooler. I attached it by using self tapping screws (and plastic washers to spread the tension and insulate) throught the 2 origional mounting holes. It replaced a whiny little fan that was standard in on the Abit NF7 mobo.

    I dont know how much of this modification stabalized the system. I do recall that the vcore fluctuations were more stable when viewed on speedfan, but as the system was stable before, I cant say for certain that this more stable vcore made much difference. However this whole setting up phase was done in free air, so perhaps I avoided some problems later.

    The Typhoon is another story. I used a tt 8cm copper core from a volcano cooler. Shaped its base, removed the bracket system from the base of the typhoon and attached it to the base. The fins were bent to make it fit. I also bent out the heatpipes, and the alu fins to allow as much fresh air in as possible.

    Overall I am not happy with the aesthetics of this, though the mod certainly is a practical one. In free air in my passive config It reduced the idle from 49c to 40c and reduced the load temp from 53.5c down to 48c.

    When you are working passive systems any sort of drop in temperature is difficult to achieve. The system runs at most of the time below 40% cpu useage when running MCE. So this made a big difference to the temps. At the time I was running the processor at 1100mhz. This mod gave me another 100 mhz of clock speed whilst the sytem remained stable.

    ************************************************** ********

    Just to show the process, here is a step by step of my second attempt.

    I did this mod a second time, this time with lessons learned. This is the worklog for the second typhoon. You can see how much better I got this second time round 
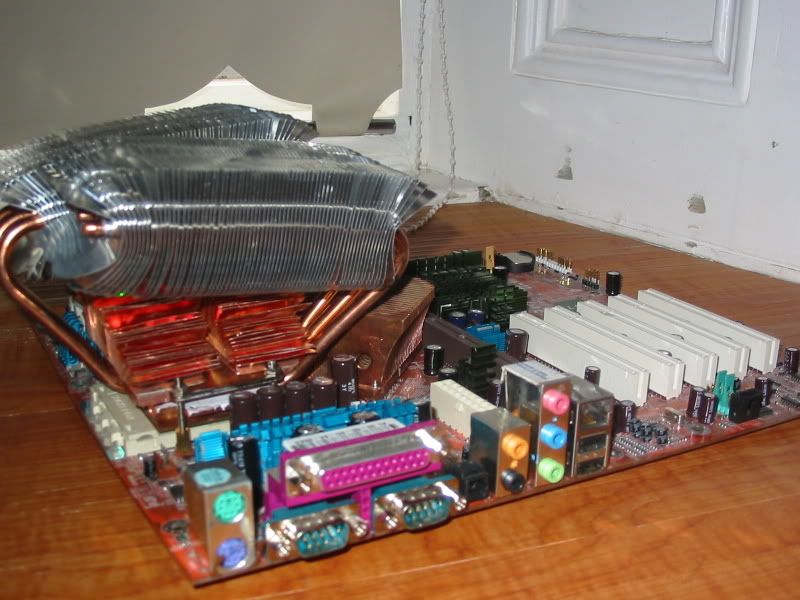
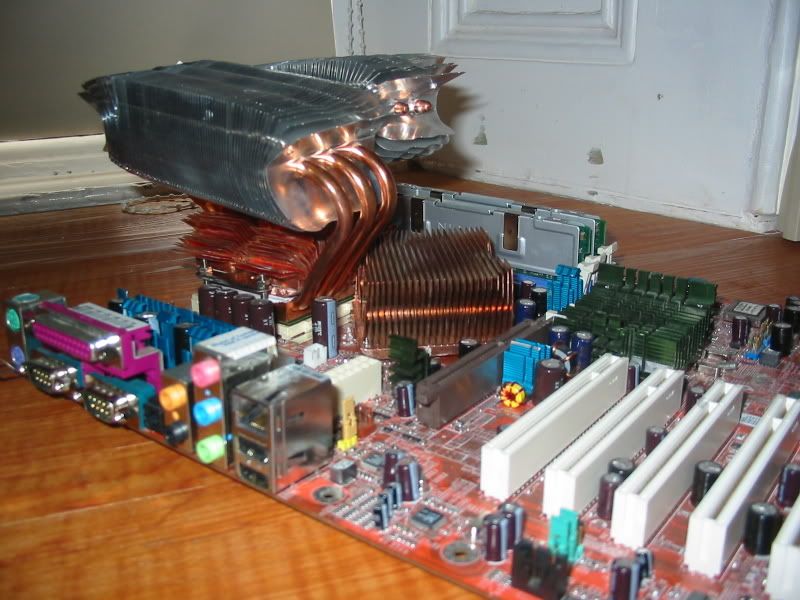
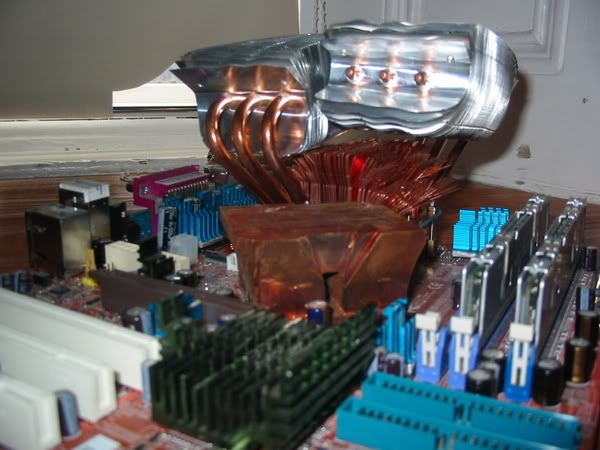
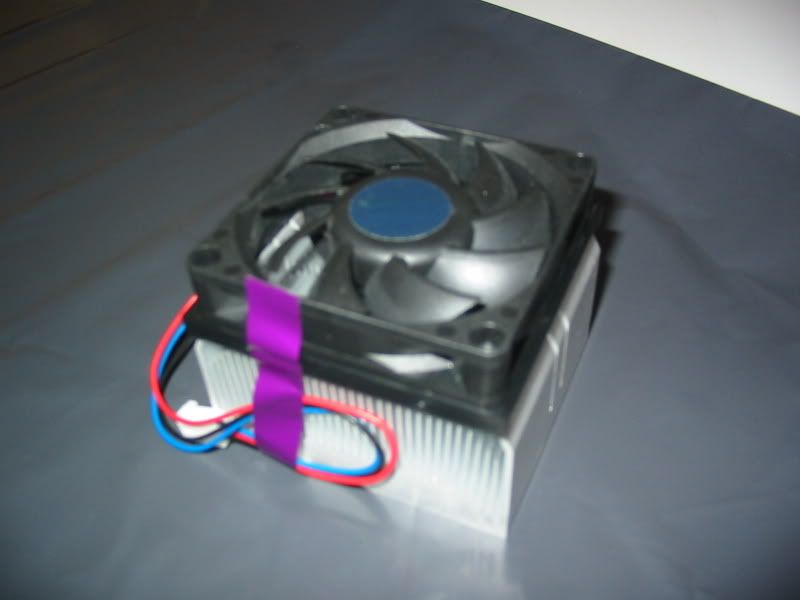
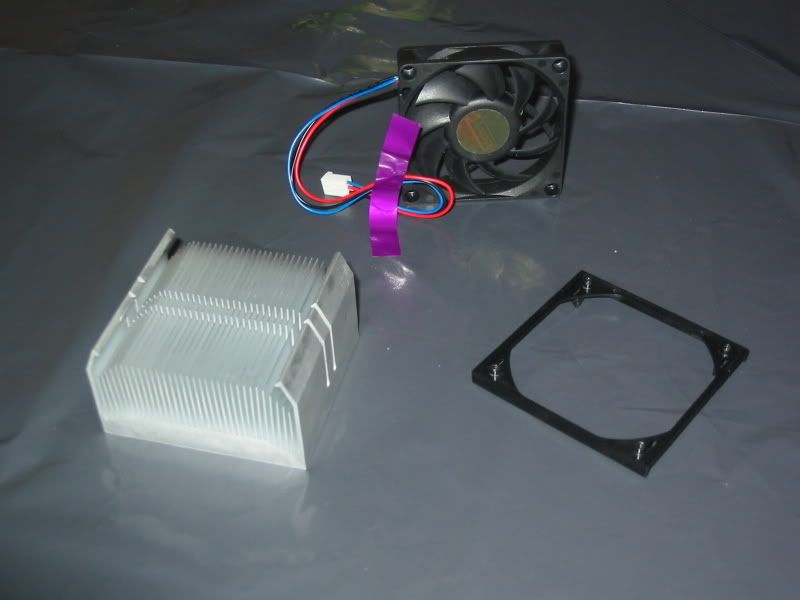
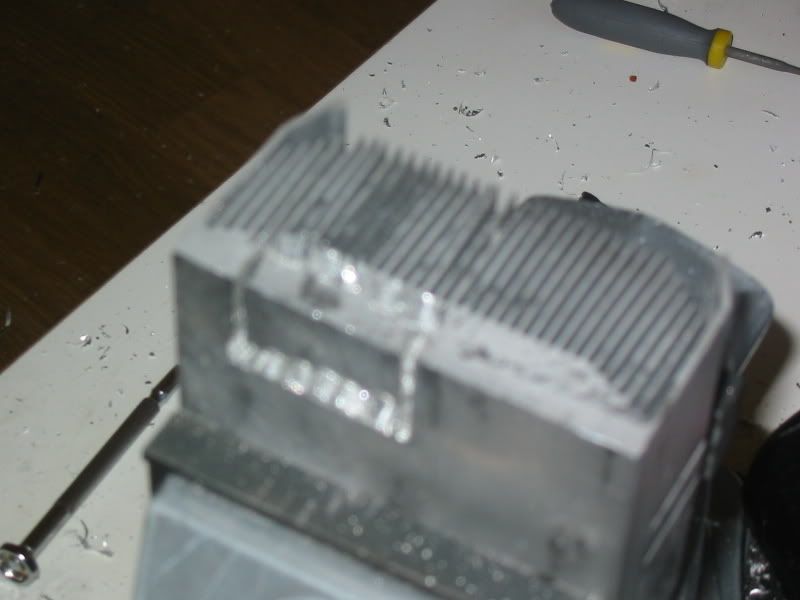
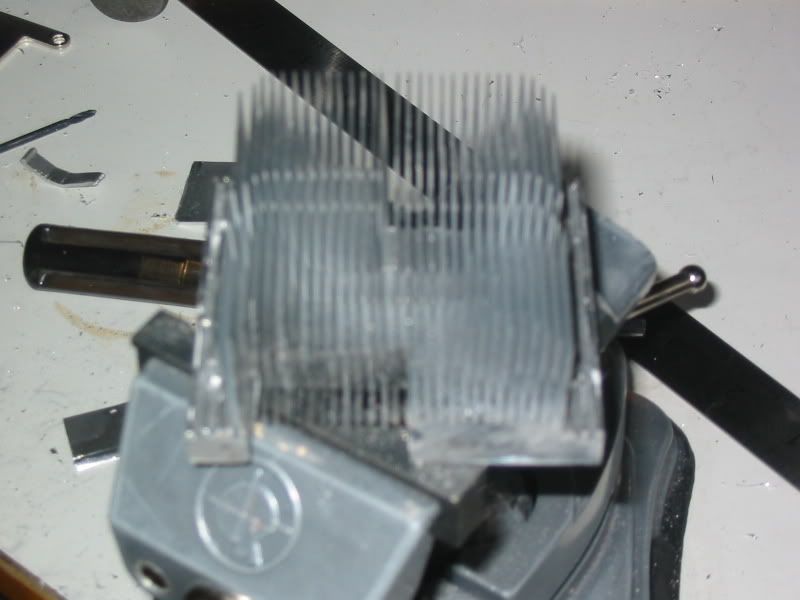
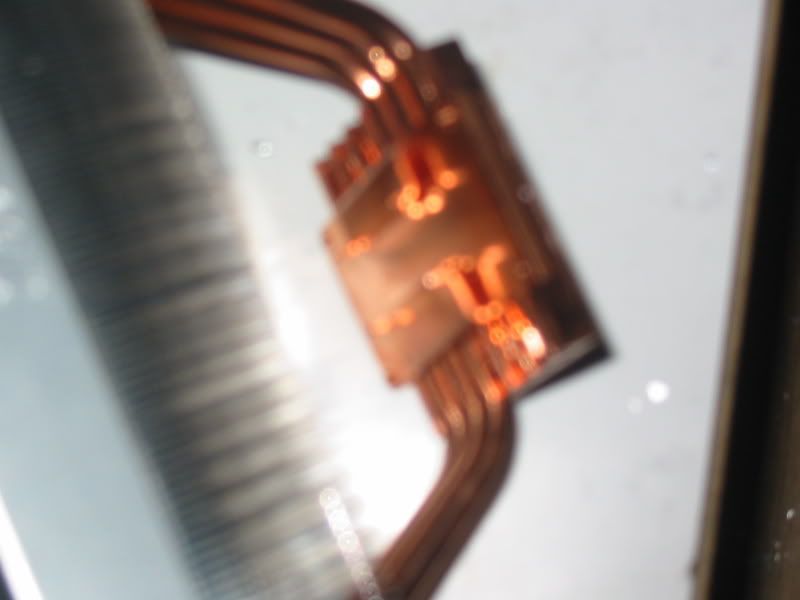
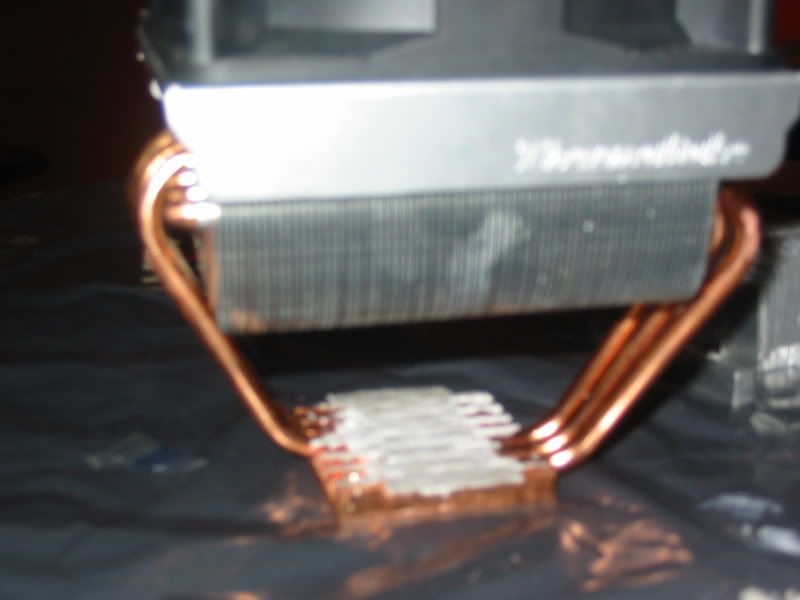
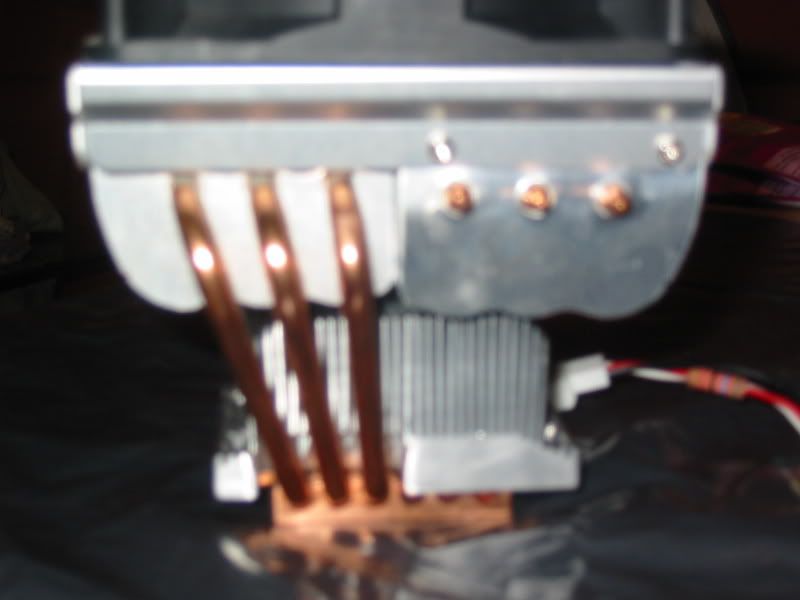
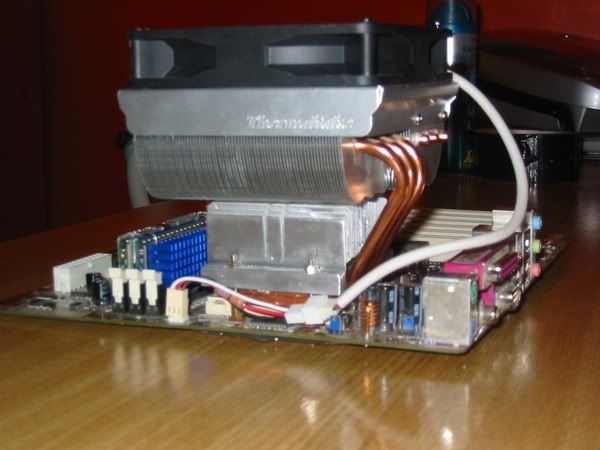
This one sits in my desk pc, but I may redo the one for the passive pc if I can find a donor heatsink. I got a better result, the mounting system is much neater and I think the airflow is better.


    To begin with I started with a standard Athlon XPx2 Cooler. This cost me nothing as it came supplied with a processor being used elsewhere in the house.


    Here as you can see it is disassembled and ready for modding.

    The fan and the bracket are heading for the parts bin.


    Next I marked up the base of the donor ready to be shaped. This will start to make sense when you see the Typhoon ad the donor combined. The section on the base marked pipe needs to be removed, This is to clear the heatpipes on the Typhoon when the donor is placed on top of the Typhoon's collecting plate.

    You can see in this picture I have started to drill a line out to remove the pipe section.


    I used a jigsaw to cut away more of the base. This was far quicker than drilling. I used the fins on the other side as a guide. You can see on the other side the desired result.


    You can see through the glare on this picture the heatpipe section cut and drilled. Ready now to pop it out. More drilling is required to do this.... .


    Here you can see I drilled down from the side, near the fins (Sorry the camera doesn't like closeups). Then I used a set of precision files to join the drill holes. Eventually a nugget of Alu fell out and I had clearance for the typhoon pipes.

    Next I had to produce a way of mounting the two heatsinks to each other and to the motherboard. The Typhoon normally uses a H plate to mount to the Mobo. In my previous mod I had retained this mechanism as you can see in this picture..


    This time I didn't want to cut a slot, I decided that the best way forward was to shape the donor heatsink so that it became part of the mounting mechism. I removed the fins at each end of the heatsink to create a flat surface that replaced the uprights of the H shaped mount. (Kinda hard to explain, the phots make it clearer)


    I drilled holes for the bolts through these flat sections and filed clean the cuts. A bit of sandpaper was used to clean away as much tool marks as possible.

    Next I had to prepare the typhoon. On the heat plate, there is a copper cover that holds in the heatpipes and also provides a guide for the H bracket. This had to be removed.


    First there are 4 Jewelers screws that come out easily with a precision screwdriver. Next the Bracket has to be prised off as it is bonded also. To do this takes guts. I first prised open a gap between the bracket and the plate below. Then out comes a chisel. Holding it flat against the plate I gave it a gentle tap. The glue released and hey presto I have a cooler minus bracket. Sorry i have no photo, Both hands were occupied with the heatsink and chisel. If I had a third hand it would have been wiping the sweat off my brow!!

    Fortunately the glue holds the heatpipes in place.


    Next I applied as much TIM as I could find in my spares bin. The picture above was taken about half way through. I used about 5g of the stuff. I glued in a couple of strips to the open ends of the pipe grooves so I could hold more TIM.

    Now it was time to join the donor and the Typhoon.


    The fit was good. All that had to be done now was to bolt the modded typhoon onto the mobo. The bolts hold the whole assembly together.


    Attached the fan to the mobo fan header then fitted. You can see also the inline resister that I added to slow the fan down. The results were as follows..

    Initially I tested the cooler outside of the case. This yeilded the following...

    The processor is an Athlon 3000XP it throws out 90w plus of heat at full load

    Before...Idle 34c Load 39c

    After...Idle 31c Load 36c

    The results were a little marginal, around a 3c drop (6f) both under load and idle. I was a bit disapointed. However when the mobo was fitted back into the case the work became a lot more worthwhile...

    Before

    47c idle 59c+ load

    After

    37c idle 47c load

    Massive success when the cooler was tested in its intended destination. The PSU fan is in close proximity and it would appear that

    a: The PSU is drawing air through the donor,

    b: This design is more useful in higher temps.

    ************************************************** *********

    Now to clarify a point before it is questioned.

    My camera does some weird stuff in closeup shots. The first modded pictures appear to show a huge bend on the mobo. In real life their is a very small amount of distortion (caused by the Northbridge heatsink), the camera makes it look like a massive bend.
    www.Justblair.co.uk My depository for electronic projects and articles

  7. #27

    Default Re: PC-Playstation 2 Hybrid

    Rock on dude!
    I Like to mod it! Mod it! I like to Mod it! Mod it! Yeah! Like to, Mod it!
    www.pariahs-guild.blogspot.com

  8. #28
    Super Secret Agent
    Join Date
    Jul 2006
    Location
    Glasgow, Scotland
    Posts
    126

    Default Re: PC-Playstation 2 Hybrid

    Well this weekend I did not have much time to get much works done, been out protesting... Next weekend is looking pretty limited for time as well. By the time I got back I was pretty knackered... lots of time on my feet.

    I did put in a few hours on the software side, and I got good news and bad news.

    Good news was that using Samurize I managed to put together a pretty decent looking status screen for the psone screen. It will no doubt evolve in time, but for a first attempt I am pleased.


    This is a screenshot if it displaying when a recoded tv show is running. Notice the temperature meters on the left hand side.


    And here it is playing some block rockin beats. The temperature meters get replaced with album art.

    I have to say thankyou to Uziq accross at the Samurize forums. He adapted a plugin for me so that I could speed the meters up beyond their origional design. This now works very well, so when I press a button on my remote control I get almost instantaneous feedback from the status screen. I left my camera at work, so I cant show you it on the screen, but it looks dam good.

    To make the config I had to do some searching to get images that give that Windows MCE theme.

    Now for the bad news.....

    The processor is an undervolted 2100XP Through all of my months of testing, I have had it running sweet at around 60% processor useage at its busiest (recording tv and playing back at the same time.)

    However now with all of the meters running on Samurize, my proc useage has leapt. Playing music back i am getting 100% useage all the time. I have to make some decisions.

    a) Do I scrap the status screen and continue the project to my origional spec? Reluctant to do this, the screen looks so sweet, I would be loathed to loose it.

    b) Do I bung a fan on the processor and speed it back up to its stock mhz? I was set on the system being fanless... This is a last resort!

    c) Do I continue my search for status software that is lighter on the resources (I have a trial for dashboard, an aussie product that is designed specifically for MCE), then strip out what I can from the operating system? The operating sytem will be stripped down anyway just to be more power efficient and to keep the temps down. I experimented with this before, I know I can lop off at least 20% of the processor useage this way.

    d) Do I upgrade the processor? I have a 3000XP in my bedroom machine that never gets used to its full potential.

    The answer I suspect will be a mixture of c and d. I have to unlock the 3000XP processor if I am to undervolt/underclock it. I cant remember how to do this, memory sort of suggests that it can be done with a wire mod (though I prefer to use conductive ink for this kind of circuit bypassing.

    But the eye candy that the screen offers I think will make the project. The design for the case I am going for is discrete hopefully, the screen should give it that air of quality.

    Any other suggestions to how to beat this one will be welcomed!
    www.Justblair.co.uk My depository for electronic projects and articles

  9. #29
    Super Secret Agent
    Join Date
    Jul 2006
    Location
    Glasgow, Scotland
    Posts
    126

    Default Re: PC-Playstation 2 Hybrid

    The last two nights I have been researching IC chips for the next part of the project. I have been thinking about producing an off board thermometer attached to the IC bus. I was buying a few bits and pieces anyway for this project, so I thought I would stretch my skills a little and make a pcb. This would let me monitor the PS2 for temps... I'm planning to go passive on it as well.

    Need a power regulator for the psone screen, A Lm350 voltage regulator plus caps etc will give me the 7.5v that it needs. Means I wont have a seperate power plug for the screen.

    A 24lc21 eeprom to trick out the graphics card into thinking the psone screen is a monitor. Then I can remove powerstrip as part of my OS strip down. Added bonus is I wont get the flickering screen when the machine powers up.

    An Alu hamond box to try make a HD enclosure. (I got some cool gel packs a while ago). I'm actually thinking about 2 of these because my 160gb NAS is full. And if the HTPC is going to be powered (S3) then it may as well become a server. I think the silentdrive enclosure isn't the best idea for my HD temps. May add some fins to them to help passive cooling.

    A bundle of LEDS for the money shot at the end! Its vain but I think it will look good.

    I am planning on adding a riser to one of the graphics cards so that all the cabling for the PSone screen is held internally.

    I am also planning on having a pair of usb ports that will auto switch between the PS2 and the PC section. So that the two ports destined for the side of the machine will become dual purpose. Havn't found the switch that will do it, but I know its out there. If anyone can point me in the right direction, I want it to switch on one of the ps2 power rails. i.e. if the PS2 leaves standby the usb is switched to it.

    On top of that lot, I intend adding a manual switch for the front of the case that will switch between (leds/screen)-(all off)-(screen only) cased on an on-on-on selector switch.

    Planning on having that lot on a single pcb. which will be the sort of control centre that will link the whole project together.. Never attempted anything but the simplest of circuits before, so this is part is akin to uzbekistan joining the space race! By using headers to all the components it should be a sort of linking module for the whole project.

    Going to attempt to use the toner transfer method for manufacturing the PCB.

    I dont want this project to end I guess, so I keep stretching the design brief.

    I have circuits penciled out for all but the USB switching, anyone can help with that I would be grateful.
    www.Justblair.co.uk My depository for electronic projects and articles

  10. #30
    rest in peace mate GT40_GearHead's Avatar
    Join Date
    Mar 2006
    Location
    Ramania
    Posts
    1,661

    Default Re: PC-Playstation 2 Hybrid

    you got me going
    great work on the Typhoon

    i realy wana see how that thermometer will come along

    LOUD AND PROUD !

Similar Threads

  1. Project: NES PC (By D_Stilgar)
    By d_stilgar in forum Works in progress
    Replies: 62
    Last Post: 06-04-2012, 10:55 PM
  2. XLostSpartanX's First PC case mod.
    By XLostSpartanX in forum Works in progress
    Replies: 7
    Last Post: 05-29-2006, 07:01 PM
  3. Nes Pc
    By d_stilgar in forum Your Mods
    Replies: 14
    Last Post: 12-16-2005, 05:03 AM
  4. Maximum Pc guide To PC hardware hacking??
    By weirdguy in forum The Chatterbox
    Replies: 6
    Last Post: 10-04-2005, 05:46 PM
  5. non pc speaker with pc
    By Xbrid in forum Sound Cards, Speakers, & Headphones
    Replies: 3
    Last Post: 05-01-2005, 01:46 PM

Posting Permissions

  • You may not post new threads
  • You may not post replies
  • You may not post attachments
  • You may not edit your posts
  •