Results 1 to 10 of 10

Thread: Project Tranquillity

  1. #1
    The One and Only
    Join Date
    Mar 2005
    Location
    Reading, United Kingdom
    Posts
    121

    Default Project Tranquillity

    It is time to start one more little project to do before I continue with the Time Machine.

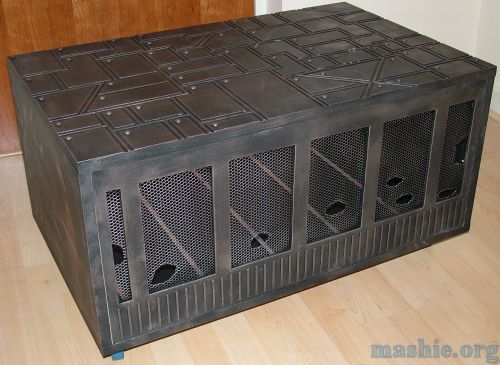
    As you can see by the name it is yet again inspired by the characters in Peter F. Hamiltons The Night's Dawn Triology. For those of you who has read the books knows that Tranquillity is a big space habitat with roughly a cubic kilometre of brain matter.

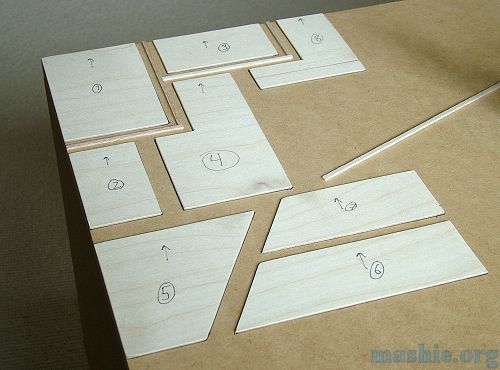
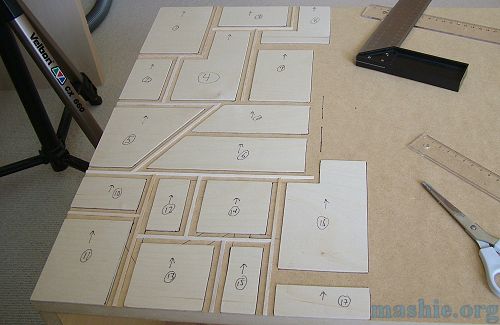
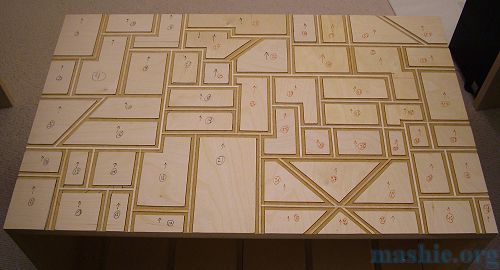
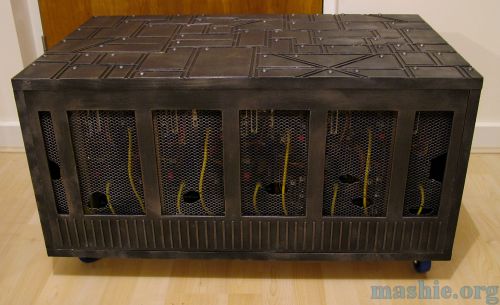
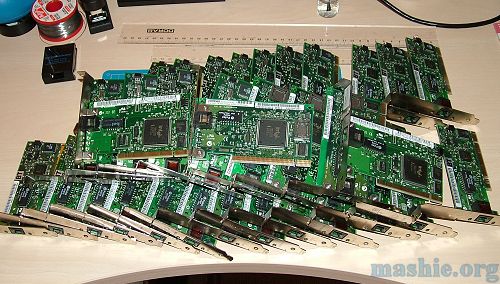
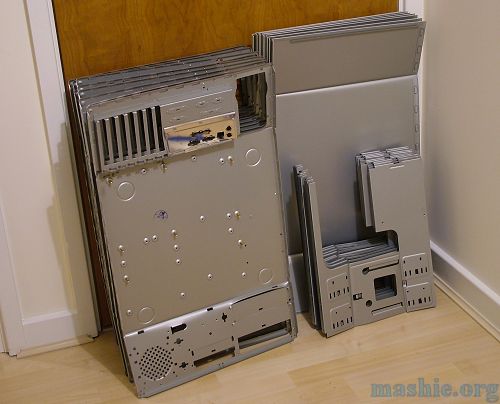
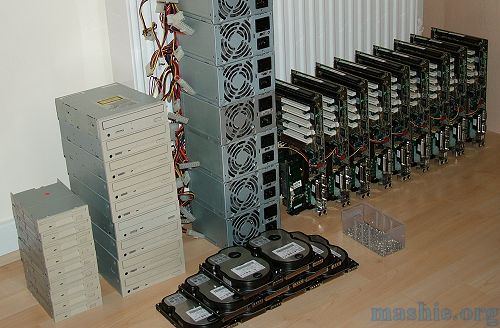
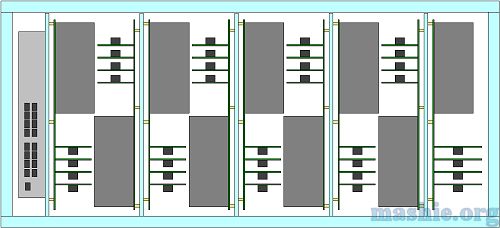
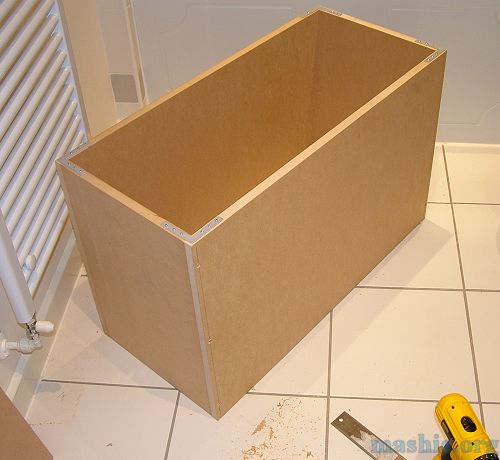
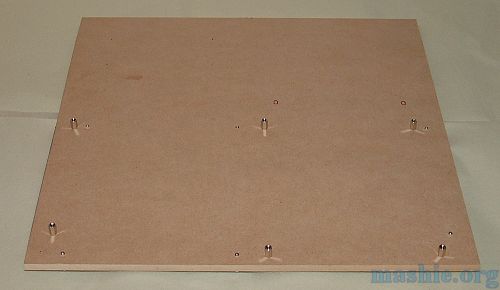
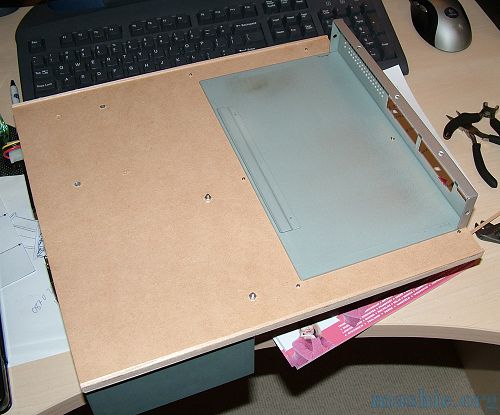
    That is where all similarities ends though. Tranquillity here will be used as some kind of router lab by friends in need so it will have 9 motherboards and 30+ network cards in the smallest possible volume. The construction material will be MDF so a good exercise before starting the work on the Time Machine.

    Anyway, time to get the work started.

    ModCam status:
    www mashie org

  2. #2
    The One and Only
    Join Date
    Mar 2005
    Location
    Reading, United Kingdom
    Posts
    121

    Default Re: Project Tranquillity

    So nine systems, nothing fancy needed really. The minimum specification on the list I got was:

    CPU: 200MHz
    RAM: 64MB
    HDD: 1GB
    PCI slots: 4
    Integrated video or able to run without videocard installed.


    The best place to find cheap old specification hardware is and will always be eBay. After winning two auctions with six computers each I ended up with this pile of 12 very heavy units. The hardware in nine of them did fit the bill with Celeron 366MHz, 64MB RAM, 4.3GB HDD, MicroStar 6117 motherboards (AGP, 5 PCI) as well as 140W PSUs. The other three will be sold on to another friend since I won't need them.


    Another auction brought me 33 Intel Pro/100 NICs :cool:


    Two evenings had to be spent extracting the hardware from the cases, not to mention chasing the dust rats with the vacuum cleaner. The blue bucket is filled with hardware to keep such as videocards, soundscards, NICs and IDE cables. The plastic bags contain the plastic parts destined for the bin.


    A little bit of jumping and the old cases became flat packs and will meet the bin as well.

    The steel is over 1mm so they are very heavy, but then again they were designed to be used in the most rough environment imaginable - public schools.


    With the disassembly done, this is all that remains.
    www mashie org

  3. #3
    The One and Only
    Join Date
    Mar 2005
    Location
    Reading, United Kingdom
    Posts
    121

    Default Re: Project Tranquillity

    Allright, minor update.

    I removed all brackets from the NICs and installed them in the motherboards to test different layouts.


    After a few trial and errors this ended up being the most efficient layout, a switch will be included as well to provide management connectivity.


    With the general design in the head I quickly draw the whole case in CAD. Each vertical "tray" will hold two motherboards with HDDs and PSUs. Only the mobo/NICs/CPU are drawn since the HDD and PSU is one layer further back. Each tray is 325mm (12.8") high and 340mm (13.4") deep. The whole unit will be 800mm (31.5") wide, 500mm (19.7") deep and 450mm (17.7") high with casters installed.
    www mashie org

  4. #4
    The One and Only
    Join Date
    Mar 2005
    Location
    Reading, United Kingdom
    Posts
    121

    Default Re: Project Tranquillity

    Update time.


    Finally time to do some actual contruction work and not only cleaning old hardware which seems to be the most common case lately... So with the case being built by MDF board has a few advantages, the main one is to have it all precut in store. However next time I will make my life easier by drawing out the cut pattern in CAD as well instead of trying to place out all parts on the fly in store to generate as little spill as possible. Here we have the bottom half of the main frame laid out to see if it fit.


    The box is slowly drilled and screwed together using 2.5" screws and L-brackets to get the angle square. The brackets will be the rear of the finished unit btw.


    The outer layer of MDF is 18mm (3/4") while the internal spacers between the aluminium profiles are 6mm (1/4"). The spacers and the profiles are simply attached using PVA glue.


    Profiles and spacers on both top and bottom glued in place. With nearly 1" thick material this unit is getting heavy, can't wait to install some casters tomorrow or next week after MML.

    If any of you attend MML this year you will see Doom 3: Hell Inside in action, if not you get a second chance at QuakeCon.
    www mashie org

  5. #5
    The One and Only
    Join Date
    Mar 2005
    Location
    Reading, United Kingdom
    Posts
    121

    Default Re: Project Tranquillity

    Final update before I leave for MML.


    To make the final unit movable 4 caster wheels were added using M6 bolts and nuts.


    With the assembly of the outer frame done I was curious to see how it all looked like with some hardware in place. Next step will be to make the hardware trays before continuing on the outer texture/finish. I will definately go for a techno/armor kinda look.
    www mashie org

  6. #6
    The One and Only
    Join Date
    Mar 2005
    Location
    Reading, United Kingdom
    Posts
    121

    Default Re: Project Tranquillity

    Small update from the progress today.


    The time has come to work on the trays that will hold two complete systems each. The material is 6mm MDF. One nice little feature with MDF is that it can be threaded using normal metal taps. After drilling a fair number of 2.5mm holes they were quickly threaded to M3 and the motherboard stands were installed.

    I have a feeling some of the people defining the ATX standard did think twice since the stands from the opposite sides do stay clear from each other when the motherboards are mounted like this.


    Next to follow was adding a few more holes for the PSUs and HDDs. After a bit of pain I realized how awkward it turned out to be mounting the HDDs and PSUs. The PSU will block the mounting screws for the HDD on the opposite side but then it has to sit on top of it's power lead from the PSU on the same side... To make a long story short, four hands had helped but I got there in the end. Now I just have to make another four of these.
    www mashie org

  7. #7
    The One and Only
    Join Date
    Mar 2005
    Location
    Reading, United Kingdom
    Posts
    121

    Default Re: Project Tranquillity

    Another day, another update...


    It felt like manufacturing doing unit after unit. At last all are done regarding major assembly. Power button and LEDs are still left to do on these units. They will not be painted and when the outer shell is ready they won't be that easy to see anyway

    If you look closely you can see ribs of wood attached near the top edge. They were added to make the 6mm MDF fit perfectly centered inside the 10mm aluminium profile.


    The last tray was slightly different to make since it hold a system as well as a 16 port 10/100 switch. I wasn't too keen to add spacers to make the switch stay clear of the mobo stands so a suitable hole was drilled before gluing it in place.

    All new switches I get from now on will be gigabit only so this one will be retired together with this project in a far distant future...


    I can happily announce that somehow I managed to measure everything correctly so it did fit

    The spacing is 5mm between CPU and NICs on the next system.


    In case the HDDs needs to be reimaged that can be done fairly easily from the rear. It is lucky the PSUs has bypass power as well since this will eliminate the need for loads of messy cables and splitters.
    www mashie org

  8. #8
    The One and Only
    Join Date
    Mar 2005
    Location
    Reading, United Kingdom
    Posts
    121

    Default Re: Project Tranquillity

    Ok, tiny update.

    Yesterday I did fire up all systems for the first time to see if they worked. Well the first thing that happened was that one PSU blow up due to some joker setting it to 110V instead of 220V... Those of you watching the ModCam had the pleasure to see the flash and smoke live. With the PSU replaced I found out that two of the nine systems had duff motherboards. BIOS is dead, after resetting it I get a lovely input device error so unable to configure the BIOS to boot from HDD or floppy to reflash it. 
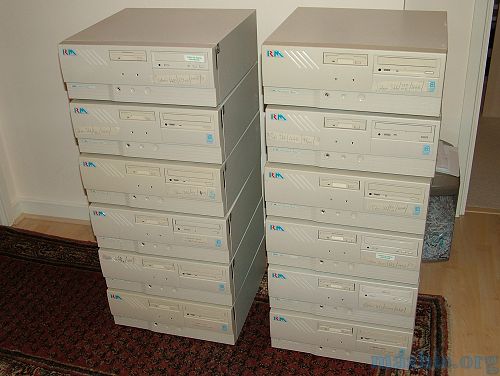
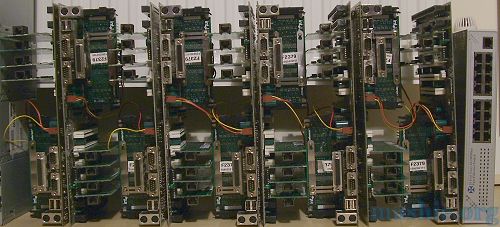
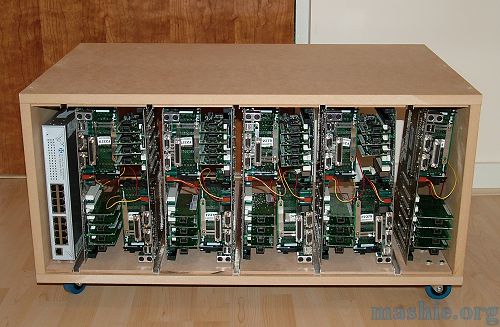
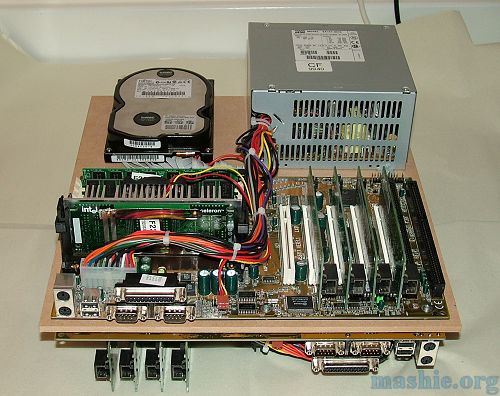
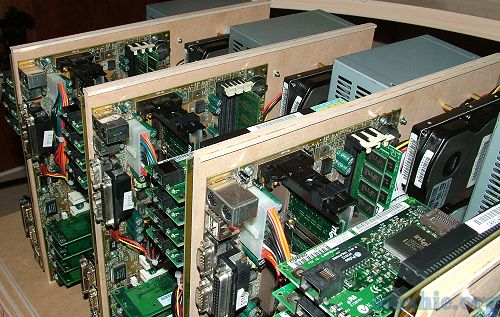
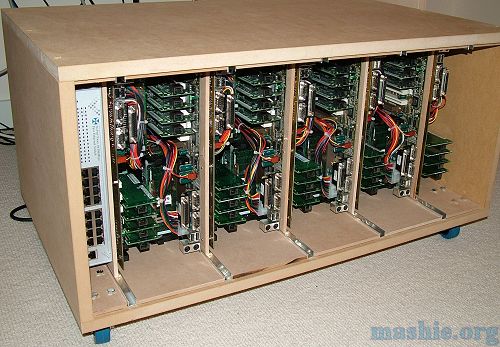
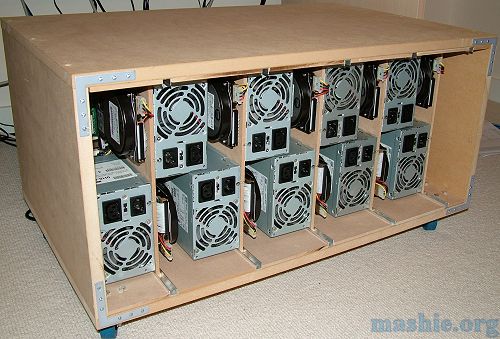
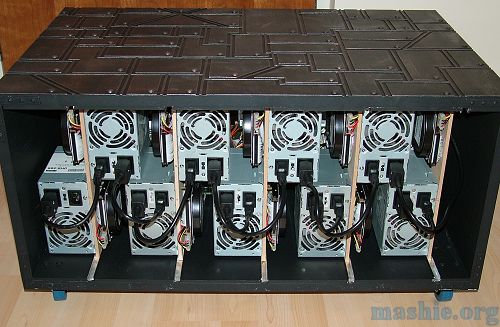
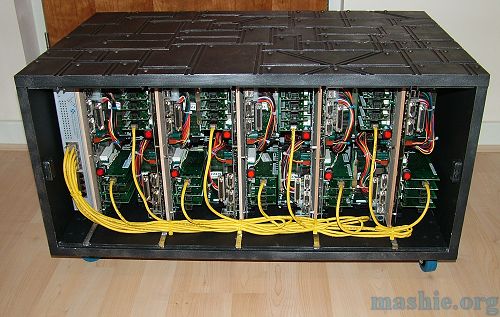
It will have to work with seven systems for now and then later on the mobos will be replaced.

    Anyway, time for some more good news.


    The work has started to give the outer shell a more interesting look compared to bare MDF. The armor plating is done using 2mm plywood and some basla wood.


    Slow but steady progress, this will probably take the whole next week to get done...
    www mashie org

  9. #9
    The One and Only
    Join Date
    Mar 2005
    Location
    Reading, United Kingdom
    Posts
    121

    Default Re: Project Tranquillity

    Measure, cut, sand, glue, measure, cut, sand, glue... repeat 54 times and this is the result.


    The top has all the wood work done, just going to add some details tomorrow before it is ready to be painted.


    The plates are 2mm plywood while the ribs are balsa wood. The biggest advantage of balsa, it is dead easy to cut so a scissor was all that was needed. Then just put it all in place with some cyanoacrylate glue.

    I'm still a bit undecided what to do with the sides though. Armor plating is one option, just that it feels a bit waste of time considering they won't be visible at it's final location.
    www mashie org

  10. #10
    The One and Only
    Join Date
    Mar 2005
    Location
    Reading, United Kingdom
    Posts
    121

    Default Re: Project Tranquillity

    Final update.


    After some more MDF cutting making a removable front panel the whole unit was painted. First two layers of MDF primer, then two layers of matt black acrylic and finally a bit of magic (drybrushing with brass and pewter colored paint).


    It is quite easy to make a ripple in aluminium mesh, just cut out a small piece with a wire snip and then bend the sharp edges inwards.


    Project Tranquillity is done!

    For those of you thinking cooling will be an issue, trust me, the nine fans in the PSUs generate a nice little storm across the case. You can also see the short mains leads that has been custom made to keep the wire mess to a minimum.


    The management network has been installed and another 10-15 cross-over cables will be added later. The red power buttons are illuminated and act as power LEDs.


    And finally, everything assembled and ready to be used.

    A clean copy of the worklog can be found here.


    Link to Original Thread
    Last edited by jdbnsn; 05-07-2007 at 12:53 PM.
    www mashie org

Similar Threads

  1. Project: LilBlue
    By slaveofconvention in forum Works in progress
    Replies: 9
    Last Post: 07-04-2009, 01:07 PM
  2. Project Nighthawk: Skunkworks F117-A Worklog
    By Crimson Sky in forum Paul Capello's Worklogs
    Replies: 98
    Last Post: 02-17-2009, 05:26 PM
  3. Project: KNS-01 19-AUG
    By Kumo in forum Works in progress
    Replies: 35
    Last Post: 11-14-2006, 05:29 PM

Posting Permissions

  • You may not post new threads
  • You may not post replies
  • You may not post attachments
  • You may not edit your posts
  •