Page 3 of 3 FirstFirst 123
Results 21 to 26 of 26

Thread: PC-Playstation 2 Hybrid

  1. #21
    Super Secret Agent
    Join Date
    Jul 2006
    Location
    Glasgow, Scotland
    Posts
    126

    Default Re: PC-Playstation 2 Hybrid

    I got mine in my local elcetronics store. Maplins. Kemo is the brand name on the kit.

    However you dont need to buy it as a kit. You can but the stuff seperately (I dare say it would be cheaper.)

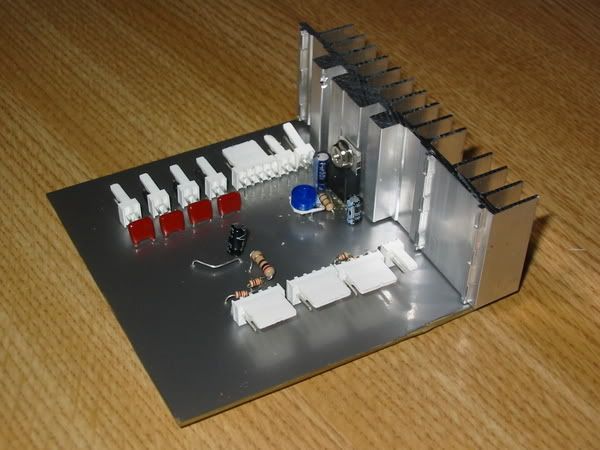
    The kit I used had...

    A plastic tray
    A pair of plastic tweezers (it has to be plastic, the etching solution is highly corrosive to metal)
    A sachet of developer
    A sachet of Etching Solution.
    A selection of 3 PCB boards (one photoresist, one double sided, one single sided)

    I bought an extra photoresist board, which I split in three. Two for PCB,s one as a test strip.

    There are loads of tutorials on the web.. Google diy photoresist pcb. you will get instructions on how to do it. Some mention making your own photoresist layer. i dont see much point in that if your doing a one off. Pre-prepared photoresist boards dont cost much more than standard boards. Then you get a probably better board with less hassle.

    Just one of many tutorials
    www.Justblair.co.uk My depository for electronic projects and articles

  2. #22
    Super Secret Agent
    Join Date
    Jul 2006
    Location
    Glasgow, Scotland
    Posts
    126

    Default Re: PC-Playstation 2 Hybrid

    Update...

    I finished the pcb. Mostly without trouble, but I had an issue with the power regulator. First of all the good stuff.

    The temperature sensor worked straight away. Even though soldering the 5mm 16 pin soic looked terrifying, it was as easy, if not easier than the through board solders.


    Here is the Maxim 1668 in all its glory! This is my favourite part, it looks so difficult to do, but it really isn't. From now on I'm doing surface mount stuff in all of my projects.

    Tested it first, and the local sensor worked first time. I checked it with a medical thermometer, and the accuracy is better than the +/- 1c that maxim quote.

    Here is the reverse side of the PCB. The 24LC21 chip is there as well. It worked first time as well. Though I haven't got it programmed yet to the right settings, it is accepting programming and is reading correctly by the matrox card.

    You can see also that I tinned the copper traces with solder. Cleaned them fluxed them and then drew on a thin layer of solder. In real life you can't see the imperfections.

    Now the gory bit. I tried the power regulator, but all was not well. It could be adjusted to the right voltage using an adj resistor. Then when I plugged the psone screen in, it just didn't light up... Bugger.

    After posting for help on SPCR someone pointed out what was wrong. I had followed the manufacturers diagrams for the regulator. However the diagrams had the wrong pin assignation on them! How stupid is that? Then I had an issue. Do I start again? Do I keep the mostly working pcb and build a power regulator seperately?


    Nope. I had another plan. I tore up a couple of tracks, inserted a couple of jump wires and lo and behold I had a working regulator. On the printed side (above) of the pcb it is a little messy, but on the side that will be visible, you can hardly tell the difference.

    Then I attached a heatsink to the regulator. It was a heatsink from the first ps2 that I killed (technically sony slaughter... I didn't mean it your honour)

    I also had in my cupboard some adhesive vinyl that I purchased in Hungary on an impulse (that will be usefull for something) purchase in March. This I used to coat the non tracked side of the pcb. It silvery, but non conductive. I think it adds a touch of class to the component side of the board, which will most likely be visible when I find a place for it. The result I am most pleased with... Check it out...


    The other thing I am happy with is that I finally worked out how to use the camera... No more blurry closeups!

    Now I have to come up with a creative way to mount it. That heatsink is live... Its only 7.5v so its not dangerous, but it will have to remain isolated from the chasis of the puter, I get sparks otherwise!

    ***Edit***

    I completely forgot to say... I finished my mod on the matrox graphics card as well. As mentioned before I attacked the vga header with a hacksaw. What I was left with were 15 pins. I soldered some single core copper wire to these pins and at the other end added molex connectors to attach to my PCB. Here is the result...


    This means all of the psone screens wiring is now held inside the case. I attached enough wire that I can hide it when it comes to final build time.
    www.Justblair.co.uk My depository for electronic projects and articles

  3. #23
    Super Secret Agent
    Join Date
    Jul 2006
    Location
    Glasgow, Scotland
    Posts
    126

    Default Re: PC-Playstation 2 Hybrid

    Well this update has been a while coming....

    So what have I been up to?

    Well. I built a mount for the psone screen. This I made out of alu L brackets. Finally got to use my drill press in anger... What a usefull tool it is.

    Basicly I made a rectangular box. Then using four bolts through the screens mounting points I had an adjustable (for depth) mount.


    Here you can see the psone mounted (ooh err).

    And one from behind (double ooh err!)


    When I fired it up, nothing happened... I had damaged the cables at the molex end going into my homemade pcb. The problem (I found after spending an hour with a multimeter) is that the psone screens cables are very fine. This was a relief, as to get the right clearances I filed off about a centemetre of the screens pcb. On the right of the pcb is a lot of ground plane, this is what I removed. I have a plan to make a more durable connection which is yet to be executed. I did though get it working.

    When it was lit up I noticed something that had eluded me before. The backlight of the screen shines through the pcb highlighting the gaps between the tracks. This i thought had to be exploited. So I made a cover for the back. i used 2mm thick perpex then covered it in a smoke tint film (the kind you get for car windows).


    When I get the power to this, I think it will look pretty damn good.

    Next on the things to do list was a front panel. This is made of a very thin sheet of alu, then a sheet of perspex in front of it.

    There was a lot of cutting and shaping to do to both layers. On the perspex there is a hole cut for the drive bay covers (lian li) plus two stainless steel buttons which will be the power buttons for the pc and the playstation.

    I also drilled and counter sunk some screw holes top and bottom to hold the facia onto the case. I had considered glueing, but the countersunk screws I think look cool. It would perhaps have been a bit bland otherwise.


    On the alu I did the same plus cut a hole for the psone screen and the remote sensor. Here is the result....


    The scratches are on the alu sheet behind. There are still some bubbles on the tint, but I am hoping that they will disapear as it dries out.

    I am pretty pleased with the result. There is a whole lot more to do, but I think that the front panel is getting to the point where you can imagine how the finished case is going to look.

    The alu will be spray painted black. This should make the psone screen and the IR sensor disapear behind the smoked perspex.

    On the to do list now.

    1. A side panel needs to be manufactured with the PS2 inputs, Usb ports and two rotary switches (with alu dials of course) which will switch the usb (between the PC and PS2) and switch the lights and psone screen on and off.

    2. A base needs to be made. i have a set of sorbothane feet already. Some of the base will be meshed.

    3. I have a sheet of perspex mostly cut to sit on the mobo tray where it is exposed. i will cover this in some more of the silver sticky backed plastic. The pcb will mount to this.

    4. I will have to redo the ps2 controller extensions to take into account the new location of the psone.

    5. I have to build a new mount for the ps2

    6. I still have some tidying to do for the case lid, including screwing it all together. I plan to use countersunk screws in the alu bands. I also have to put a final strip in on the front at the bottom.

    Ideas are still welcome even at this late stage?
    www.Justblair.co.uk My depository for electronic projects and articles

  4. #24
    Super Secret Agent
    Join Date
    Jul 2006
    Location
    Glasgow, Scotland
    Posts
    126

    Default Re: PC-Playstation 2 Hybrid

    Soldering those little suface mount chips is not that hard to do... This was my very first attempt at them. Its one of those jobs that looks way harder than it is.

    Best advice I can give to anyone considering it is to check online for video tutorials for surface mount components... There are loads of them out there.

    The key points to this kind of soldering.

    1...clean the contacts first with a pcb solvent. I think you might get away without doing this, but a pen is a few quid, and it is very usefull for cleaning up after.

    2...Use a flux pen to apply liquid flux to the solder contacts. This bit is essential

    3...Then place your chip. (the guides suggest a magnifying glass on the tools list. I didn't need this) I found the flux was slightly tacky making this easier

    4...Then holding the chip in place with tweezers or fine pliars, dry solder the chip in place. Basicly press down on one of the outside pins and it sticks to the board. Then dry solder the diagonally opposite pin. This bit makes it a whole lot easier.. Again essential IMO

    5...Then place the wire of solder accross the base of all the pins on one side.

    6...Starting at the top of the leg of the chip mover your iron downwards into the solder. As if by magic (and this is where the flux makes a difference) the solder melts and sticks only to the board and the chip contacts. Accuracy is not that important, you can do several pins at the same time.

    7...If you get any bridged contacts, drawing the iron down again, then along the pcb trace wicks the excess solder away and the gap is formed. A little more flux may be required if your origional application is no longer liquid.

    8... Finally use your solvent pen to clean the now brown and goey flux from the pcb.

    9... Stand back and marvel at your work. Better still stick the pcb directly under the nose of a family member and demand that they hail you as a deity.

    Thanks to all that have given such kind and supportive posts!
    www.Justblair.co.uk My depository for electronic projects and articles

  5. #25
    Super Secret Agent
    Join Date
    Jul 2006
    Location
    Glasgow, Scotland
    Posts
    126

    Default Re: PC-Playstation 2 Hybrid

    How long overdue is this update then???

    I have not been lazy though I have made some progress..

    First of all the bad news.

    The window tint did not take on the perspex. I dont know why, but I got too many bubbles in between the tint and the glex. This was frustrating to say the least.

    So I was left with 3 options...

    1. Try again with the tint
    2. buy some proper smoked perspex
    3. come up with another idea


    I tried to source some smoked sheet perspex, but was not having much luck, so I thought I would give the third option a go. I managed to source 3mm thick sheet alu locally so I thought that I would give it a go...


    What do you think.

    Of note in the design is that I made a small panel for the power switches. It is made from a sheet of thin perspex sandwiched between the main 3mm sheet and a much thinner sheet (1mm at most) of alu. The power buttons hold the panel together. I have been experimenting with shining blue leds through perspex rods to backlight the panel. I get a nice sort of glow from behind it. I should really be honest, this was not my origional plan, but I messed up with the drilling of the holes in the 3mm sheet. My 16mm drill bit chewed up the sheet leaving a rough edge that I just couldn't fix. The panel masks this. I have plans to try making a couple of panel designs to see which I prefer.. I'll be taking votes.


    You can also see in the photo how I tackled the IR sensor. I used my drill press to cut a set of 5 4mm holes in the pannel. I then forced through some perspex rod, trimmed it and then sanded it down to flush. The final stage will see the whole front facia polished to either an even brushed alu or more likely a mirror finish. The pespex in the sensors by the way is not that light looking in real fife. Its very dark in fact but the flash lit it up.

    What you cant see in the pictures (cause I forgot to take a snap) is that I have removed even more of the steel in the chassis. I added a couple of alu w shaped rod in first then jigsawed out the remaining side panels. This is of course to add more ventilation.

    I had origionally intended to keep these in to mute the sound of the HD. But the enclosure has been so successful, I have no need for this.

    I have a plan sorted out for the back of the unit now as well... More Alu. I have enough 3mm sheet left to make a cosmetic plate to tidy the back up and also to put a polished alu sheet in to the exposed floor of the case.

    I also made a first attempt at the side panel for the case, but you will have to wait on that one, I think I will be revisiing it again

    In the meanwhile, does the alu sheet get a vote of confidence or should I try and find some of that elusive black perspex?
    www.Justblair.co.uk My depository for electronic projects and articles

  6. #26
    Super Secret Agent
    Join Date
    Jul 2006
    Location
    Glasgow, Scotland
    Posts
    126

    Default Re: PC-Playstation 2 Hybrid

    @The boy 4rm oz

    Hi. Sorry I took a couple of days to spot your posts

    Regarding the playstation 1. I certainly wouldn’t consider myself an authority on them yet, but I have learned a bit.

    The fact that it is blowing a fuse when you plug it in would lead me to suspect that it is indeed your power supply that is buggered. I would imagine that if you open the thing you will find a blown capacitor on the power supply board. If you are opening it, a small word of caution. The capacitors on the power supply are capable of holding a charge, so be carefull what you touch. The caps on these supplies are not too large, so I doubt it would injure you too badly if you got a jolt, but it wouldn’t be pleasant! You can test to see if the power supply is causing the fuse to blow by removing it from the playstation and then powering it. If the fuse blows then its buggered.

    In your playstation there will be three PCBs. One will be the power supply itself, easy to spot as it will have a few large components on it and the chord from the rear switch will enter it. It’s the easiest to get to. When you remove the bottom part of the case, it will be the first thing you see. Its held on with four screws. And you will be looking at the underside of it. Remove it carefully if you have had power to the unit recently. Inspect the components on the top side. My guess is you will spot a burst cap. If you do, then you know that it is the power supply that is burst, if not power it up and see if its broken or not. Do this with extreme caution. Mains electricity is dangerous and can kill. Then you have some choices….


    1. Buy a power supply from an online parts store. But if yours is one of the origionals this might be both difficult to track down and more expensive than the machine merits. The playstations have been through a few revisions (10 on the old style case), and the size and placement of components vary between revisions.

    2. If its a blown cap you could desolder it and replace it with a cap of the same value.

    2. Modify an external power supply to attach it to the old board. This is the route I would take, its probably cheaper. I seem to remember the ps2 is rated at about 3A, so you would have to make sure the supply you used was rated high enough. On your playstation there are 4 pins that carry power to the electronics. They are in the same dimensions as a molex plug uses, but don’t be fooled into thinking they are wireed the same. 2 carry 12v and 2 carry the common ground. You have to identify which is which. This I did by measuring a working power supply with a multimeter, but you can also search t’internet to get the right ones. Then you can either snip the external power supplies 12v plug and hard wire it to the pins or you could buy a socket and wire that up to give yourself a plug in external power supply. This is similar to what I have done for this project though I have used the 12v line from my PC power supply.

    If that doesn’t work then you have to look to the surface mount fuses that are on the playstation itself. A t’internet search will help you find diagrams to identify them. A multimeter is essential for this job as you will have to check them to see if any are blown. If they are you can either replace them (if your good with a soldering iron or bridge them. I use conductive ink to do this, simply painting over the top of them. It’s a quick and durty way of working, but on an old playstation who cares?

    @onlegout. I know what you mean about the alu being plain in comparison. However I have a plan to combat it. The screen for a start will hopefully add interest to the front when I get it wired in, I have also created a lighting effect for the pannel around the power switches. Hopefully this will add sufficient interest to the front pannel to get over the sameness with the sides and top. Time will tell :0)


    Link To Original Thread
    Last edited by jdbnsn; 05-08-2007 at 07:18 PM.
    www.Justblair.co.uk My depository for electronic projects and articles

Similar Threads

  1. Project: NES PC (By D_Stilgar)
    By d_stilgar in forum Works in progress
    Replies: 62
    Last Post: 06-04-2012, 10:55 PM
  2. XLostSpartanX's First PC case mod.
    By XLostSpartanX in forum Works in progress
    Replies: 7
    Last Post: 05-29-2006, 07:01 PM
  3. Nes Pc
    By d_stilgar in forum Your Mods
    Replies: 14
    Last Post: 12-16-2005, 05:03 AM
  4. Maximum Pc guide To PC hardware hacking??
    By weirdguy in forum The Chatterbox
    Replies: 6
    Last Post: 10-04-2005, 05:46 PM
  5. non pc speaker with pc
    By Xbrid in forum Sound Cards, Speakers, & Headphones
    Replies: 3
    Last Post: 05-01-2005, 01:46 PM

Posting Permissions

  • You may not post new threads
  • You may not post replies
  • You may not post attachments
  • You may not edit your posts
  •