-
Re: Night of the Living Dead 40th Tribute
Just to let everyone know, work continues on schedule. I haven't done an update because I am in a bondo-and-paint section of the project. This means that I'll do a bit, snap a picture, wait for it to dry and go work on something else. Therefore, there's not enough of any one thing to give a proper update. In the next few days, I should have an update showcasing the progress on the base, which I am very happy with. Thanks for checking in!
-
Re: Night of the Living Dead 40th Tribute
As mentioned, Ive been trapped in the work a little and then do something else while that dries stage of the project, leaving me with bits and pieces of a number of things that dont lend themselves to a full update. Finally, I am moving through that and will hopefully have several updates this week. Todays update will deal with some work on the front bezel, and the fitting of the PSU.
First, the PSU:
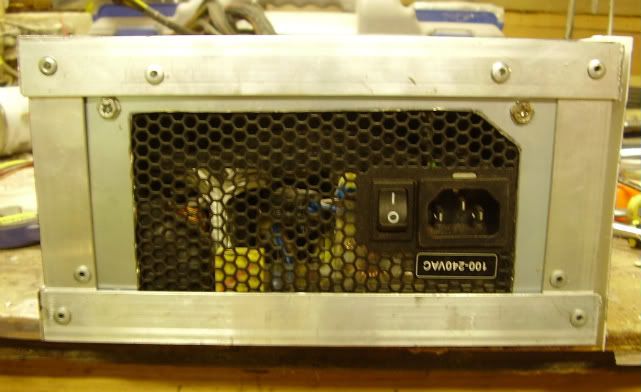
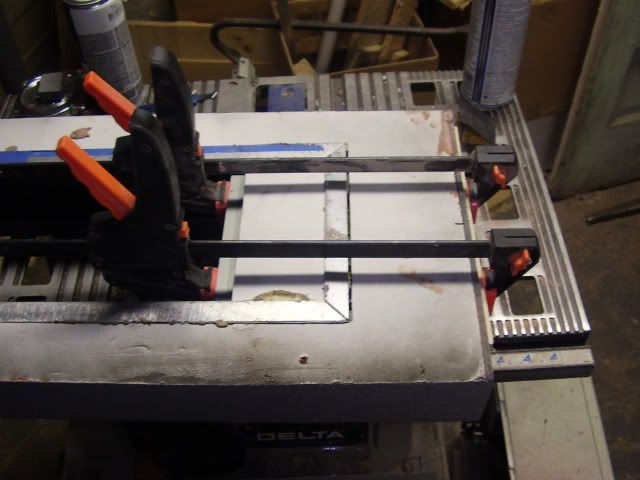
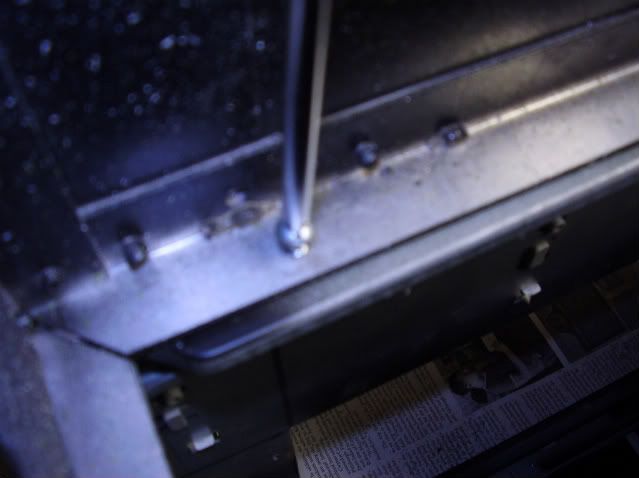
The power supply for this project is coming from my gaming rig, and is a SeaSonic 600W PSU. This thing is pretty much the whole reason that I had to make the base for this project, as it wouldnt fit in the case with a full ATX board. Mounting in the base is fairly simple, as it rides the rails of the metal cage part. All I needed to do was to fashion a back plate for it.
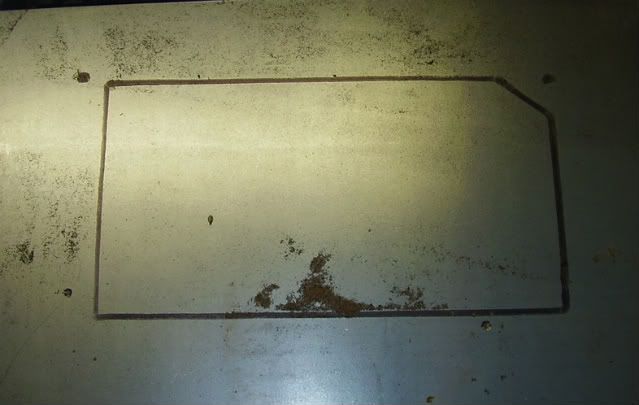
I cut this out of some standard metal sheeting, using a stencil I made from the back of the case the PSU is currently in. Then, it was just a matter of Dremeling it out, drilling the screw holes and mounting the PSU to test fit.
There we go. After some finish filing, this will be good to go.
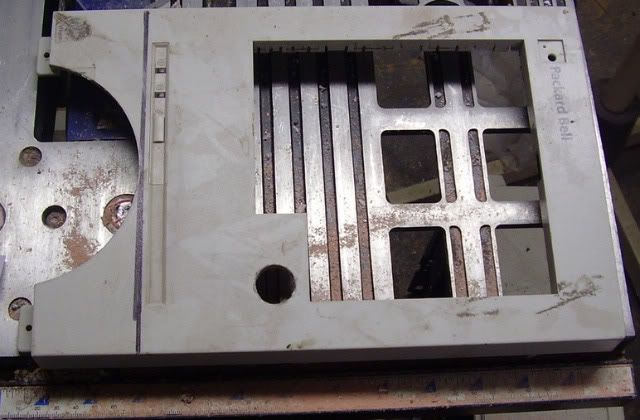
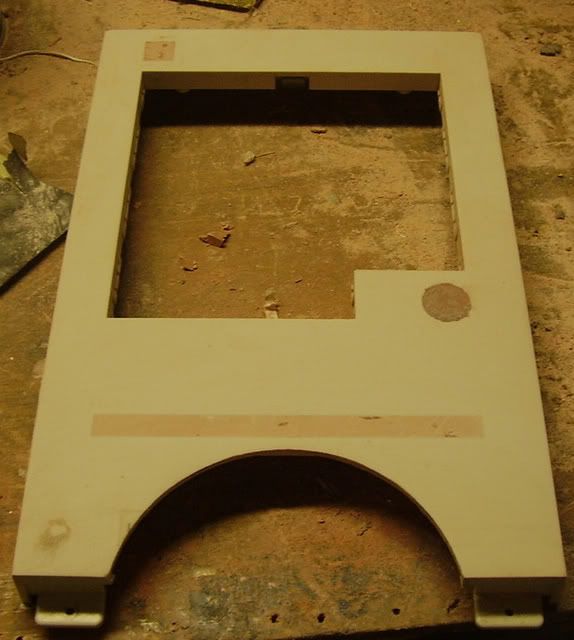
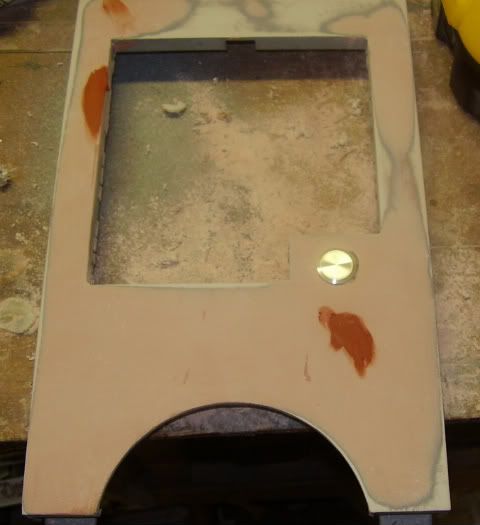
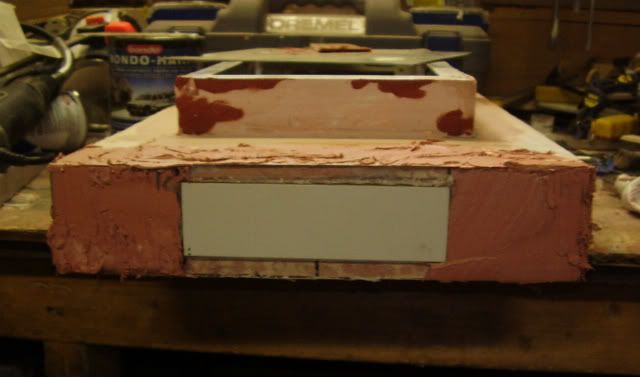
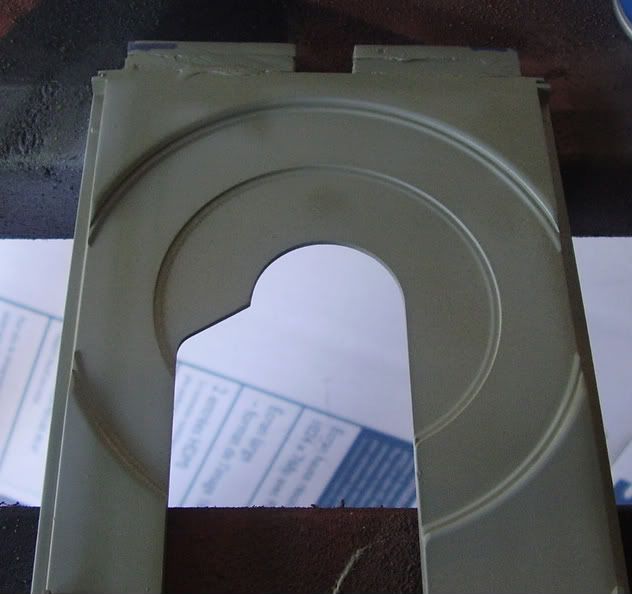
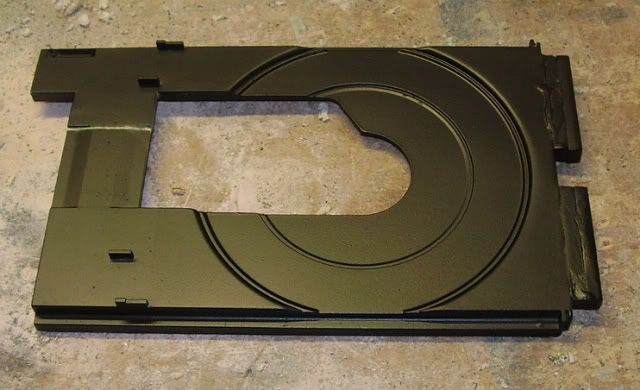
The bezel certainly required more work.
For one thing, I wont be keeping the lights and reset button section, so that will need to be filled in. Also, there is the spot towards the top where the Packard logo was. Finally, there is the power button hole. When I knocked the old one out, I found that the hole was about a millimeter too big for the button I will be using. Therefore, that will need to be filled in and re-drilled.
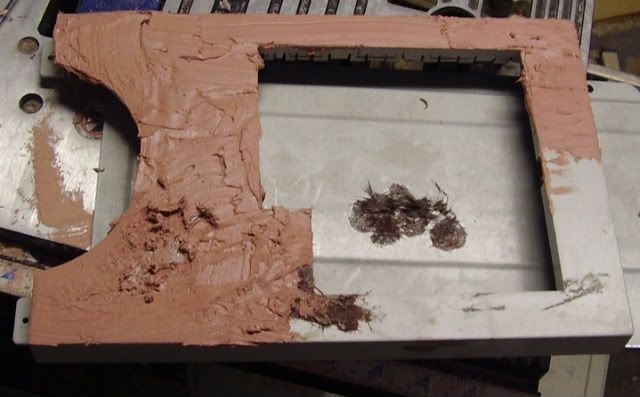
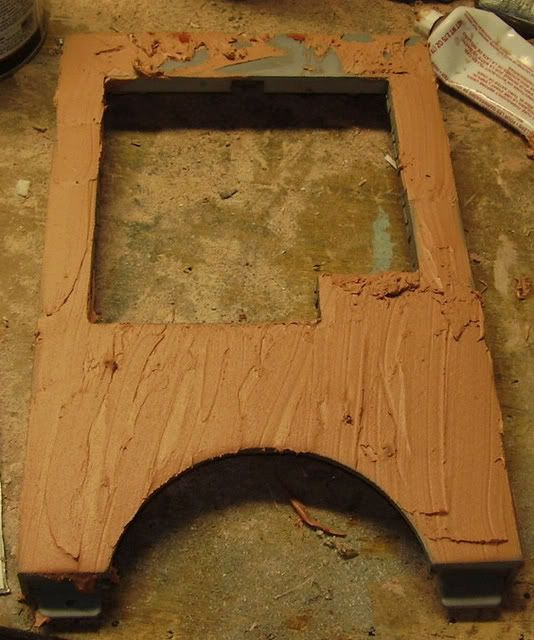
The bondo here is partly that I wanted to fill in some scratches and gouges, and partly that I mixed up too much. Oh well, thats what sandpaper is for. :)
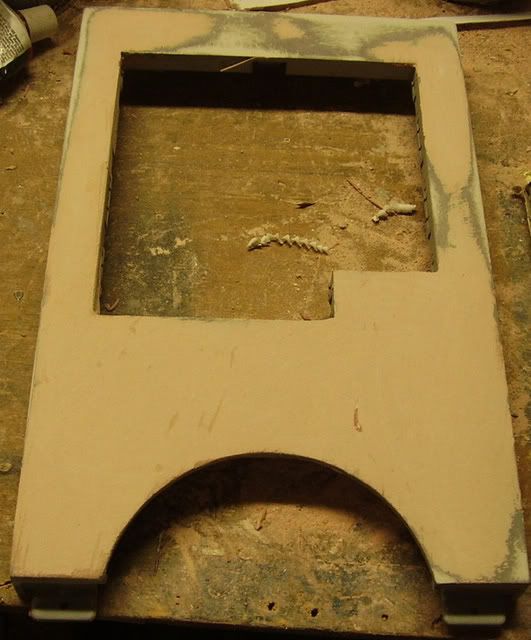
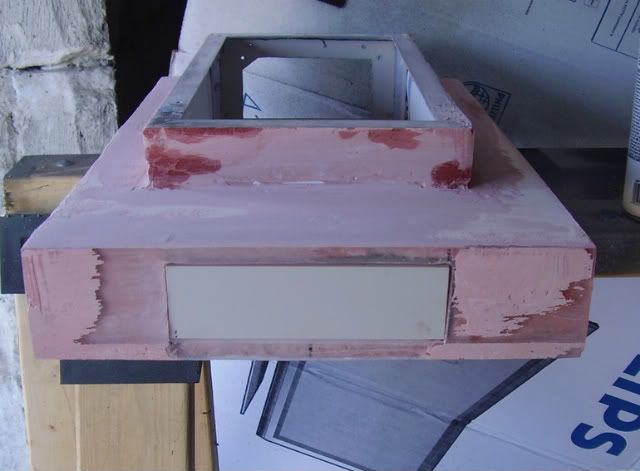
After I sanded it down and sprayed a light coat of primer on it, I was able to see that the filled-in needed some more work to blend them in. So more Bondo.
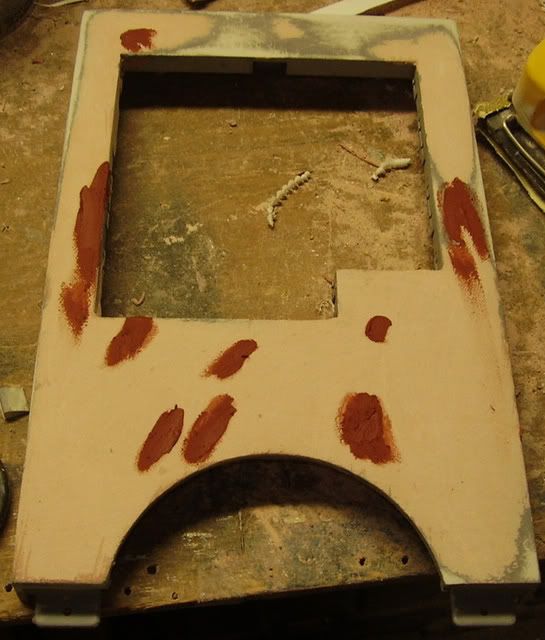
This time, I intended to mix up the amount that I did.
This time, when sanded down, everything is looking good. Now, there are only a few pits that need to be filled in with putty and it is structurally done.
After some finish sanding, I will get this primed and painted. I will be back in a day or two with another update, so stay tuned.
-
Re: Night of the Living Dead 40th Tribute
-
Re: Night of the Living Dead 40th Tribute
nice work,.. that stuff can get annoying
good work
-
Re: Night of the Living Dead 40th Tribute
Back again. First off, before I forget: I added a power button to the bezel.
Just thought youd like to know.
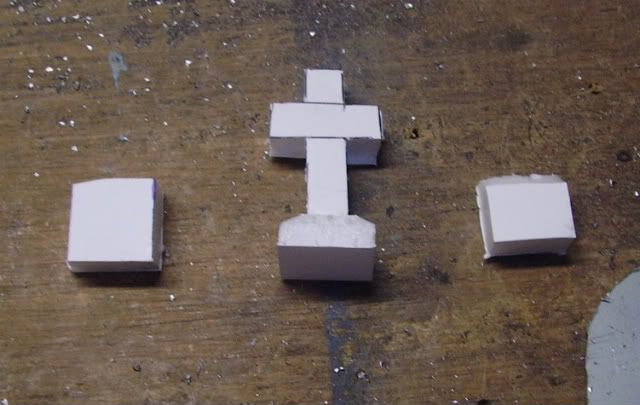
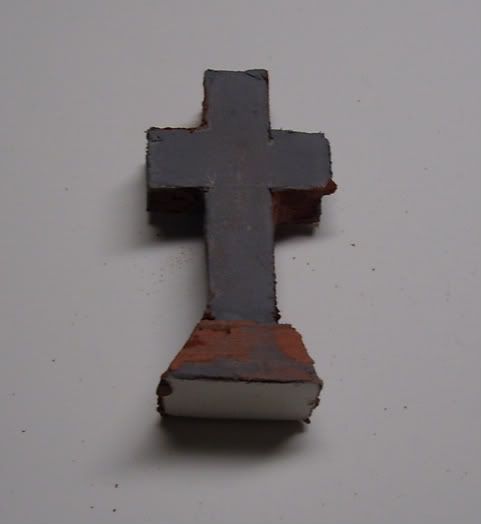
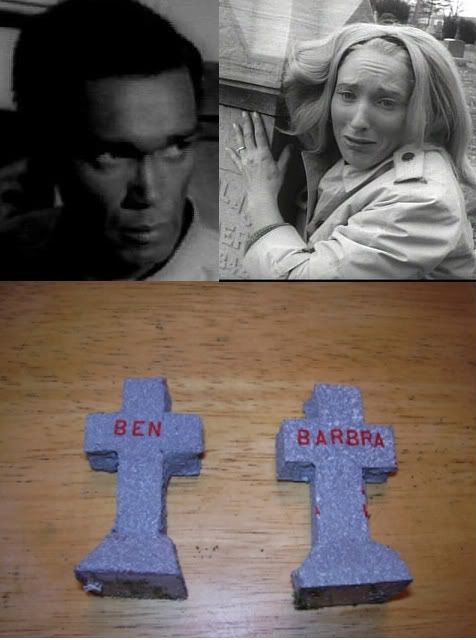
Today, were going to deal with tombstones. Im going to need a bunch of these, but I only made a few as prototypes to see if my idea was going to work. What I did was to first cut them out of the same type of foam board that I made the base from.
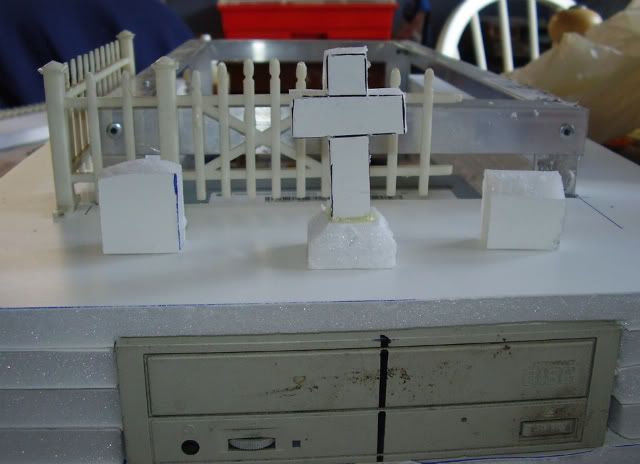
Here they are in context:
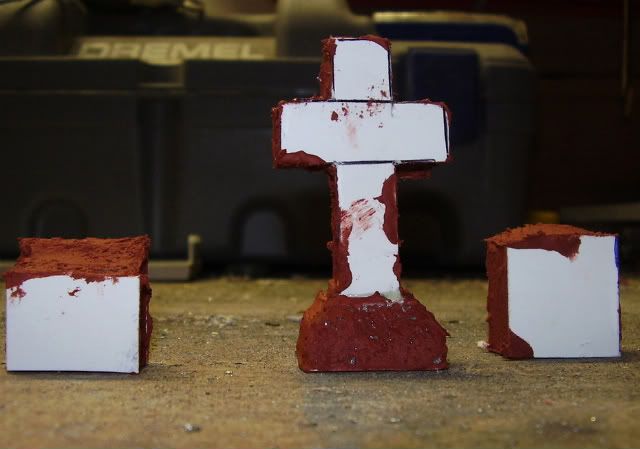
The next step was to use some of the spot putty on the edges to cover the non-ridged internal foam.
Oddly enough, the spot putty reacted with the foam core and made it collapse in on itself, where-as the Bondo (which creates heat when it dries) did not when used on the base. I had chosen the spot putty because A.) it allowed me more working time, and B.) didnt require me to mix up a batch of anything. Even with the reaction, it just took me an additional application to get where I wanted:
After some detail sanding and some primer, I went back and filled holes. After this was all finished, I went over each piece with some stone-texture paint to give them the right look. It turned out great
and
.I
.dont seem to have a picture of it here in my PB account. I will remedy this later and add it to the worklog
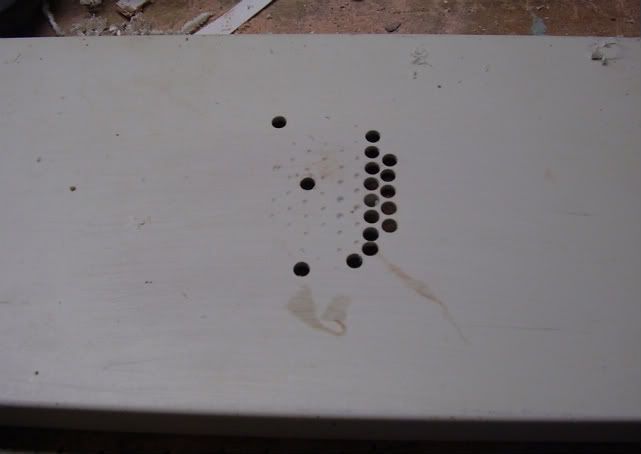
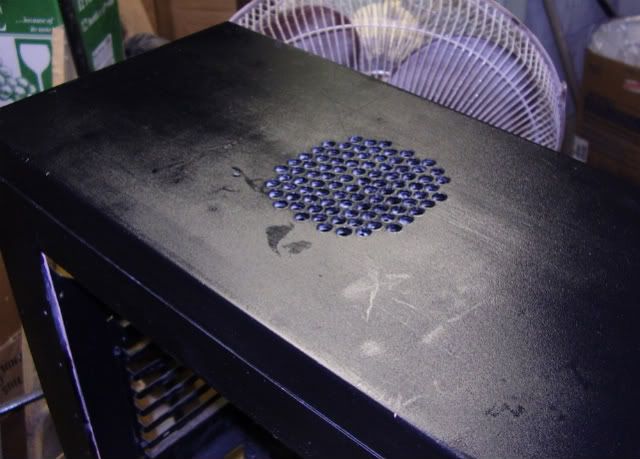
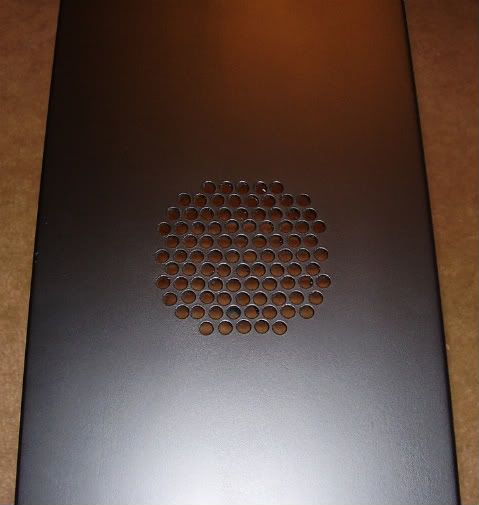
Next, Im going to touch base on the top of the case. The only modification that needed to be made to it was the blowhole, which I cut in the chassis. Instead of cutting a hole in the corresponding plastic panel and adding a grill, I decided that I wanted to just have a drilled vent. The plan is to use a red LED fan under it, and put a bloody handprint over it.
For the vent, I actually found one that I liked on another computer chassis but I didnt want to cut it out to use as a template
so I balanced it just so, and then maneuvered the drill inside as best as I could and buzzed a few guide divots. No pictures of this, because the job required three hands as it was, so there were none spare for the camera.
In the end, though, this gave me some guidance to start the drilling
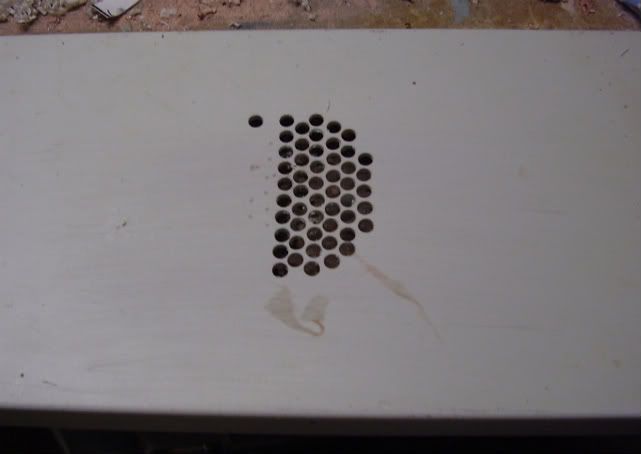
And drilling some more
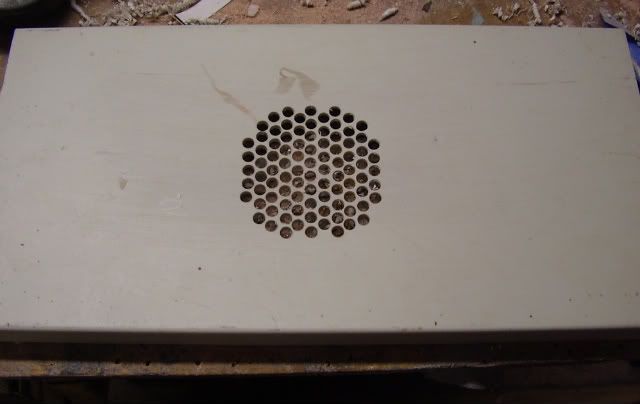
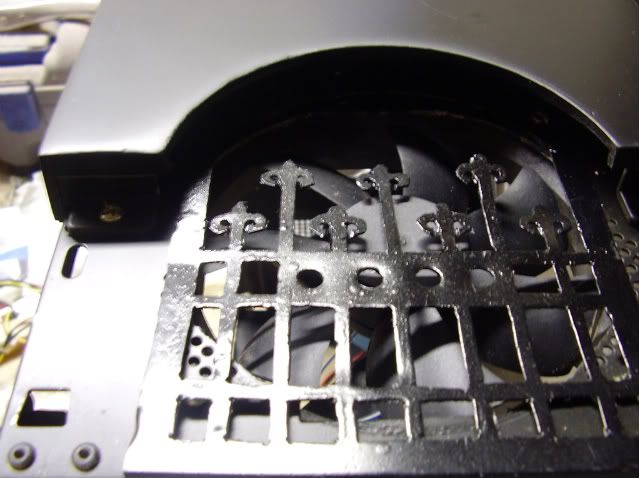
and then reaching this:
To shamelessly toot my own horn, this was a step back and take a good look moment for me. For something free-hand, this looks almost machined, and Im damn proud of it.
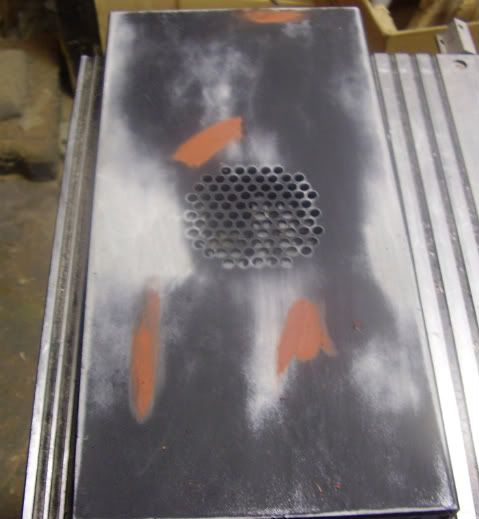
Which is good, because the paint-job brought me right back down:
The paint that I used ended up not hiding any sins. Every imperfection in the surface ones that are normally completely covered by the paint shown through, clear as day. This is what I get for saving a few bucks.
So, I sanded that bad-boy down, added some putty, and then hit it again with the fine-grain stuff. Its looking better:
Currently, it is in my garage letting another few coats of paint dry. Ill take a look at it again tonight and see if its ready to move on to the hand-print stage of the game.
Thats it for todays update. Let me know if you have any questions.
-
Re: Night of the Living Dead 40th Tribute
Dude, that vent looks awesome. Like factory-stock, but with a nicer layout and less "dead space". Very nice. +rep
The tombstones look promising, as well. So what's goin' on 'em, hmm? Hmmmm? :D
-
Re: Night of the Living Dead 40th Tribute
Excellent job on the vent man. It looks like it's a factory job. +rep.
-
Re: Night of the Living Dead 40th Tribute
i..... respect... no ...... admire your enthusiasm to mod
-
Re: Night of the Living Dead 40th Tribute
Fuzzy, Mitt and Fear - thanks for your compliments. Glad that you like it as much as I do.
Now, time for an actual update on the base of this project.
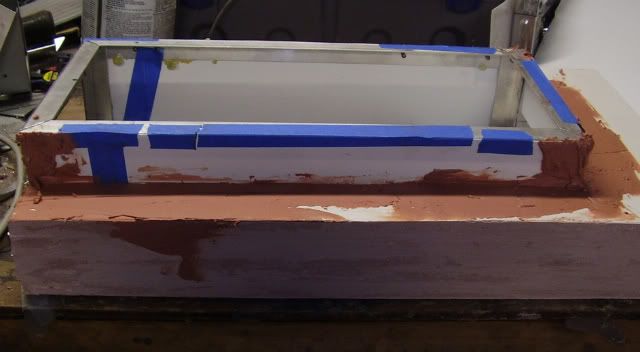
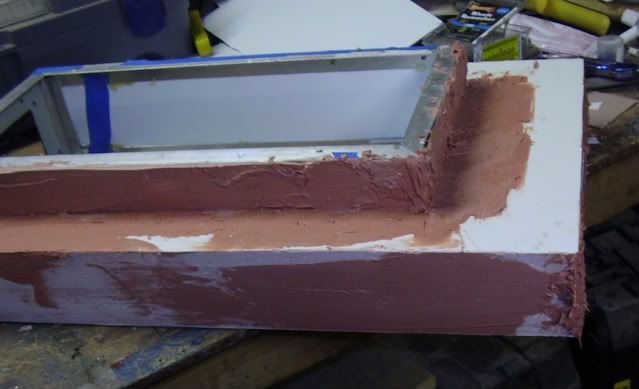
As you know, I built the rough shape of it out of foam board around a metal frame. After that, I bondod the outside edges to give it some strength, and then set about attaching it to the frame.
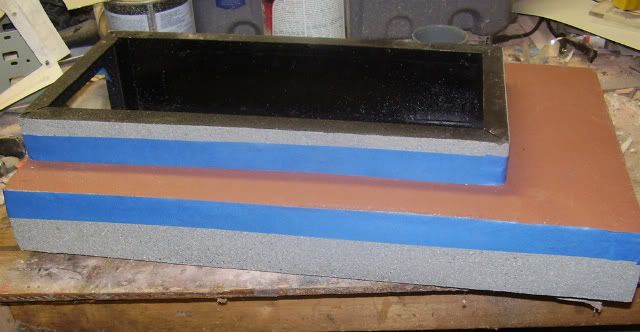
I used pop-rivets to affix styrene sheets to the frame, and then glue to affix the styro to the styrene. The blue painters tape is there to hold the top edges of the styrene flush to the metal until some super glue dries. This is to hold the edges flush until I Bondo over them.
After it was dry, I cut the styrene at random heights along the side so that there wouldnt be one single fault line under the Bondo, which would invite stress cracks later.
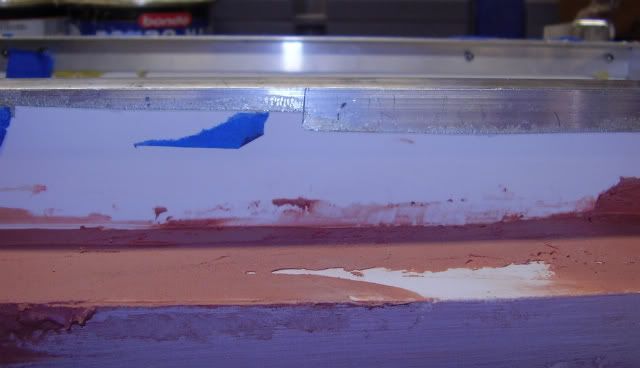
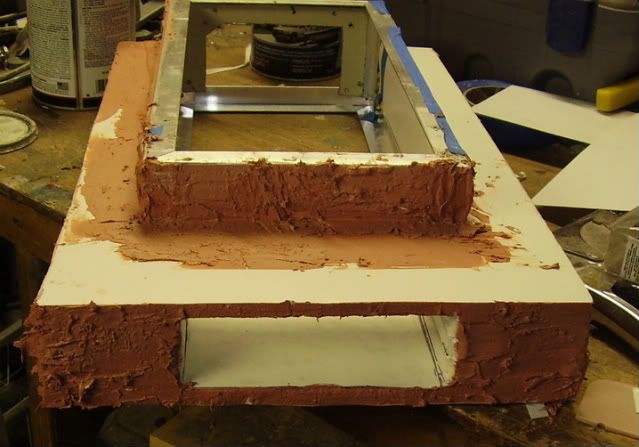
The next step was to start covering the styrene, as well as fill in craters along the sides and front (notice the cavity for the second optical drive.) Here it is after the next sanding:
It was at this point that I came to the conclusion that I would never be happy with the front drive bay as it currently existed. The styro was just not holding a clean cut for the drive bay, and it was just never going to look right. Rather than scrap the idea, I turned to the one building supply that had never let me down: Plexi.
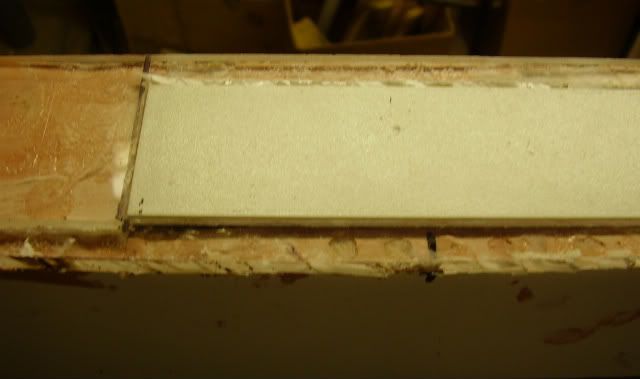
I didnt have any full sheets around, and since it was going to be covered any way, I made do with scraps. Here is a close up of the main piece, custom-cut to fit the front drive cover:
Then, a bottom piece and a liberal coating of Bondo:
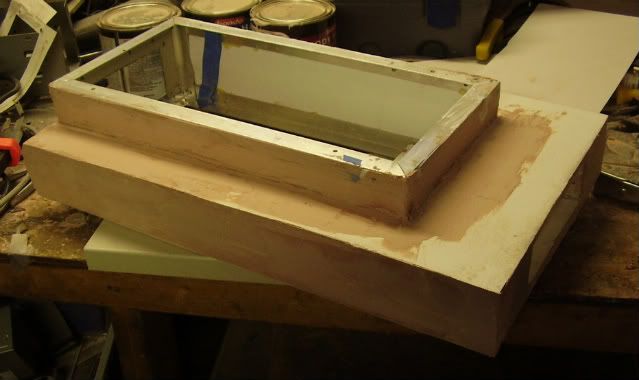
Sanded up, it was a thing of beauty:
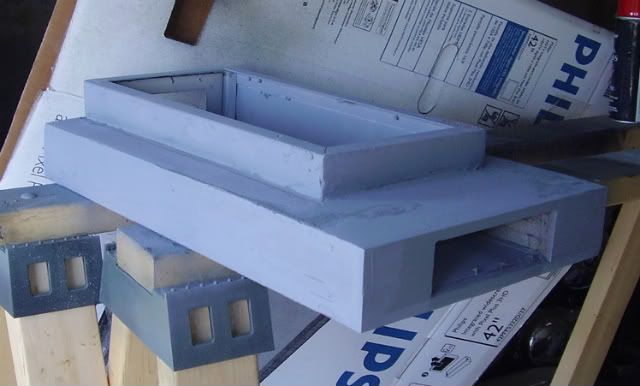
Now, Im good to go, and have a base bezel that I can be happy with. After that, it was off to my paint booth. (Also known as my garage.)
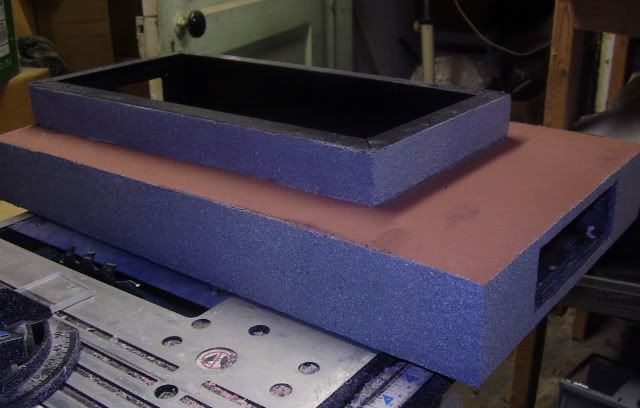
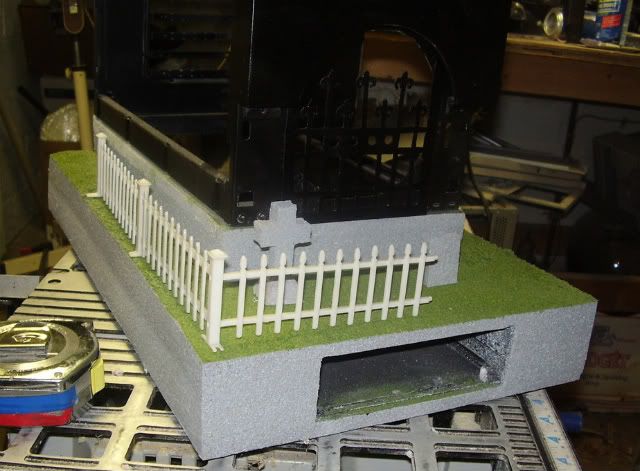
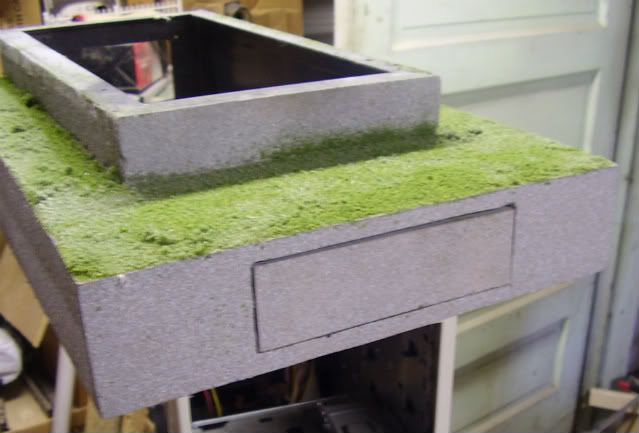
The first pic is just primer, and the second includes a black base that I used for under the next layer. The horizontal surfaces are to be painted with a slightly textured brown that will be the dirt under the graveyard grass. The vertical surfaces are to be painted with the same texture paint that I used on the stones to symbolize cemetery walls, churches, etc.
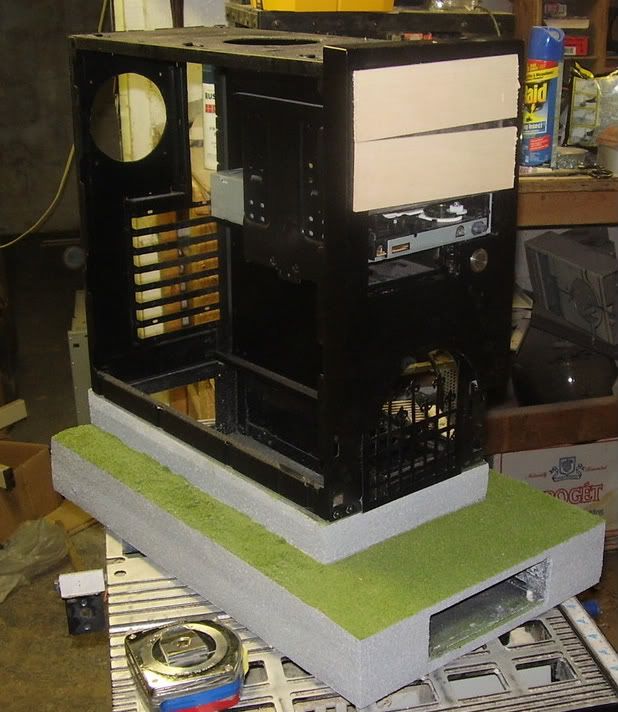
Having finished that and letting it dry for a few days (with the humidity Ive had, textured paint takes a long time to dry) I got to begin on the fun stuff. First, I masked off these finished sections of paint:
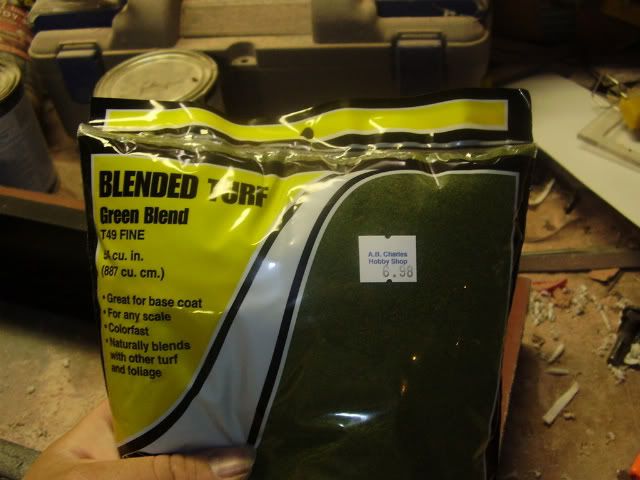
then grabbed some spray adhesive and some good old-fashioned railroad scenery:
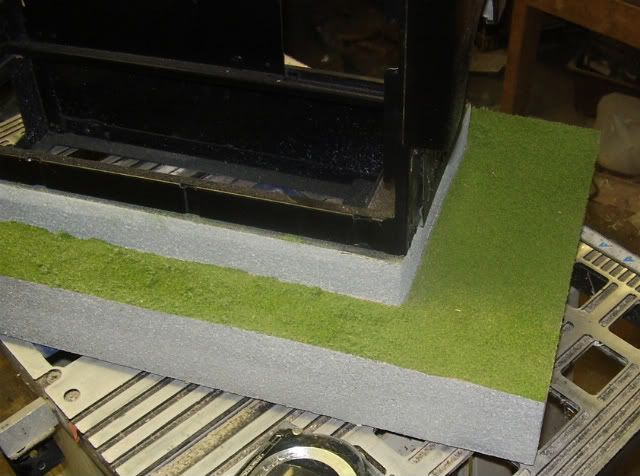
End result, is this (notice the painted tombstones in the last picture sorry, the flash drowned them a bit.):
Every day is a step closer. My personal deadline is rapidly approaching, but I think that Im running pretty much on track. More to come soon.
-
Re: Night of the Living Dead 40th Tribute
wow that looks great. i like it
-
Re: Night of the Living Dead 40th Tribute
wow, this project is really turning out! can't wait to see the final project. +sub
-
Re: Night of the Living Dead 40th Tribute
Now that it's coming together, this is one mean lookin' mod. I love it!
-
Re: Night of the Living Dead 40th Tribute
Quote:
Originally Posted by
FuzzyPlushroom

So what's goin' on 'em, hmm? Hmmmm? :D
Mmmmm...I dunno. Little this. Little that.
I'm gonna make one for each member of "the family."
Also, I painted the wood slats and such and dry-fitted them:
My original plan had been to stain the wood, however, that changed as I moved along. As the project came together, it developed almost a cartoonish, satire feel. Therefor, I decided to stick with the same color as the trim and foster that feel because that really fits.
Just a little update for y'all.
-
Re: Night of the Living Dead 40th Tribute
Looking good. I thing you made the right choice on the wood, staining it wouldn't have fit in with the rest of it. As a side note your build inspired me to rent Night of the Living Dead and watch it again.
-
Re: Night of the Living Dead 40th Tribute
Quote:
Originally Posted by
mittelmeier
As a side note your build inspired me to rent Night of the Living Dead and watch it again.
Well, then I've succeeded in the point of a tribute. Thanks for stopping by!
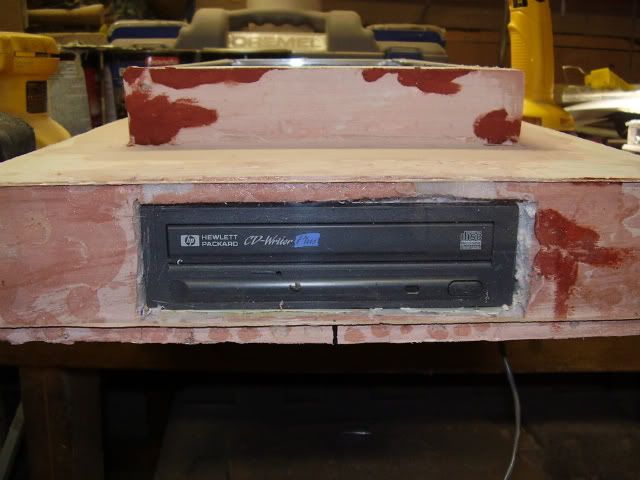
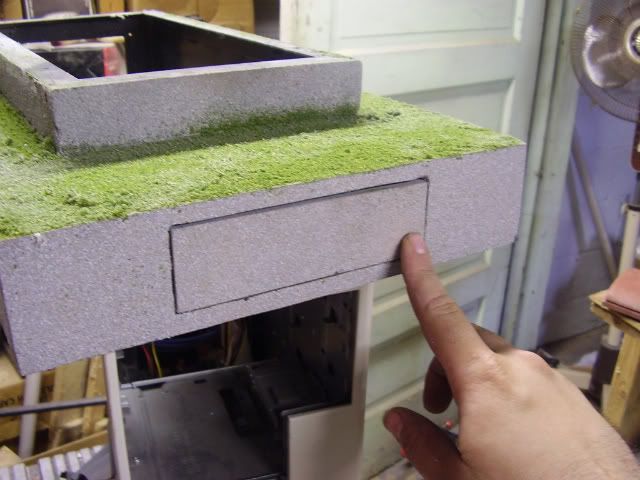
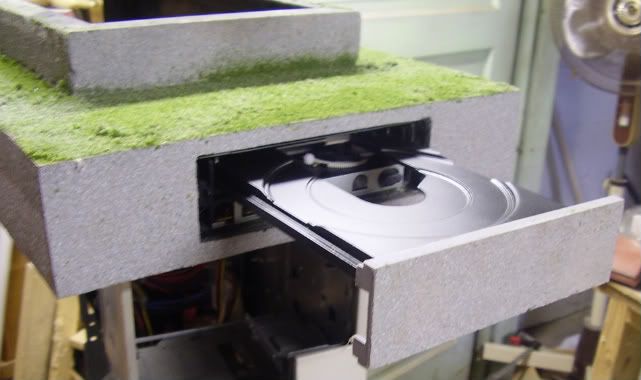
Today's update brings us a steathed optical drive. I love these things. On most cases, they are a very simple mod and they add a really cool look to the case. In this instance, it involved a lot more fabrication because I didn't have a ready-made 5.25 bay. I still think that it turned out well.
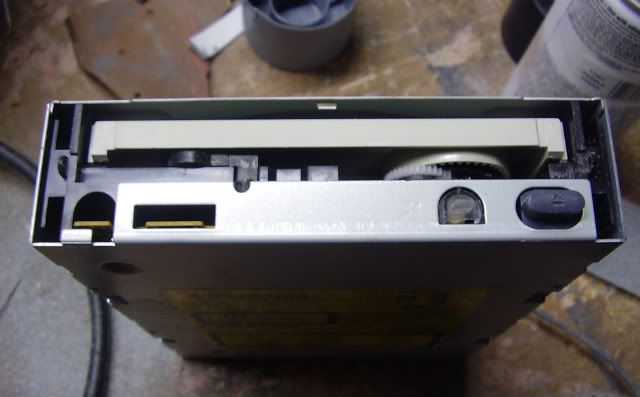
As we see in a test fit from a few days back, I'm using a spare HP CD-RW drive. I chose this because it was the best spare one that I had laying around, and it isn't going to be the primary drive. My DVD drive is going to be going in the main part of the case where one would normally find it. This one is going to mainly be a back up drive for when I am ripping CDs or what not.
The first step was to remove all of the stuff that I wasn't going to need off the front of the drive. This included the face and the flip-down tray face.
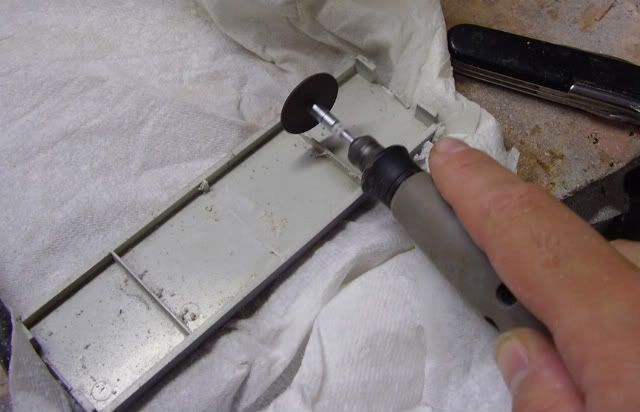
To make the new face, I just used a blank drive cover that you have seen in a number of other pics in this log. It has been painted the same stone texture as the base and the tombstones. The back had some ridges that needed to be cleaned off so that it would sit right.
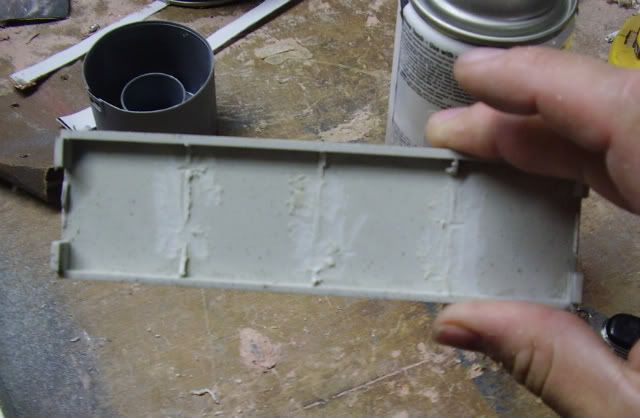
Once this was done, I used some scraps of plexi to make the spacers on the front of the tray. These off-set the face enough that it doesn't rest right on the open/close button. Another scrap of 1/8 plexi makes the touch spot perfectly spaced.
Since the tray itself was the ugly PC Beige, I pulled it out and primed/painted it.
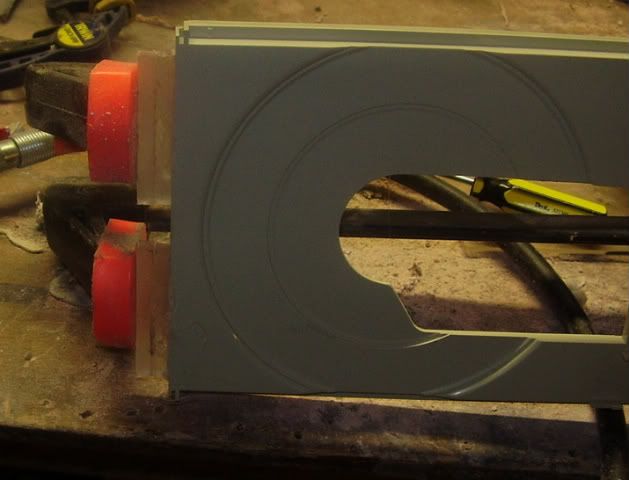
Here, the drive is fitted back in to the base and recessed. (Note: Yes, the base is currently upside down.)
Next was the simple matter of putting some plastic cement in the right spots and applying pressure.
The end result: A graveyard wall stealth drive.
Now, I'm off to the store for some more paint. I'll check back in later.
-
Re: Night of the Living Dead 40th Tribute
-
Re: Night of the Living Dead 40th Tribute
Quote:
Originally Posted by
DonT-FeaR
coool nice work
Thanks, buddy. Hang ten, and I'll have another update up. (I've been busy today.)
-
Re: Night of the Living Dead 40th Tribute
Back from getting paint. I have, once again, redone the top and........success. I may be picky, but I get results.
Now, isn't that nice?
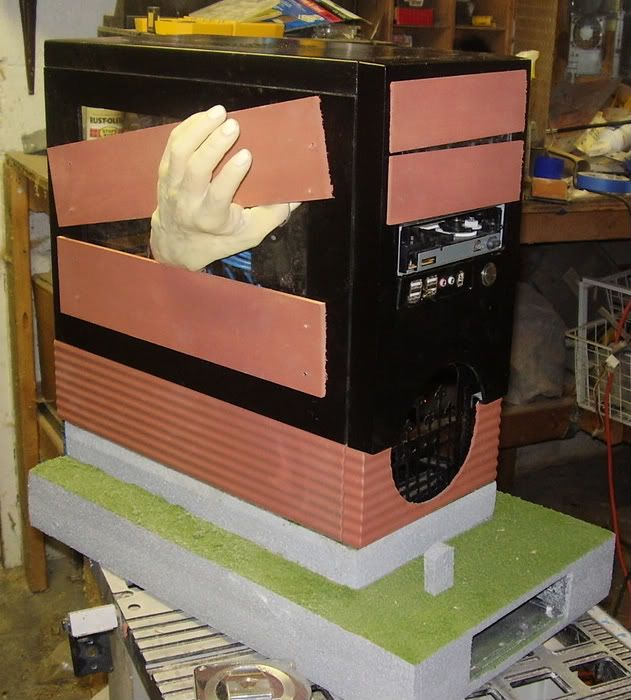
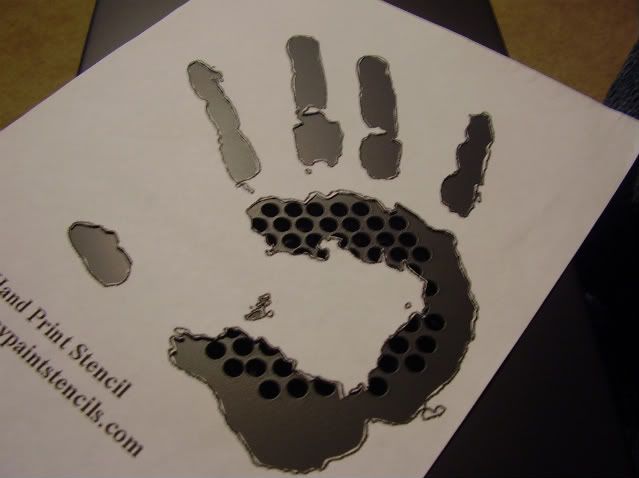
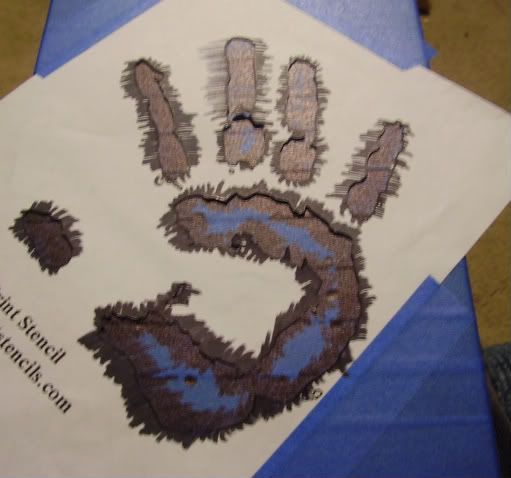
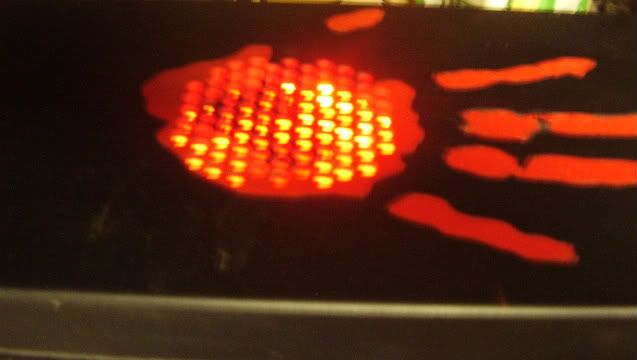
Okay, now the next step: A nice, bloody, zombie hand print. This will go over the vent holes (which will have a red LED fan beneath it) like so:
The way that I like to do stencils is to cover the painted object with tape and transfer. By doing this, I first of all save the stencil, but also guarantee that the stencil is fully adhered to the surface.
This may look messy, but it works well. I took a sharpie and went from the stencil to the tape. This keeps the stencil from shifting and gives a solid pattern. It works much better than tracing around the inside.
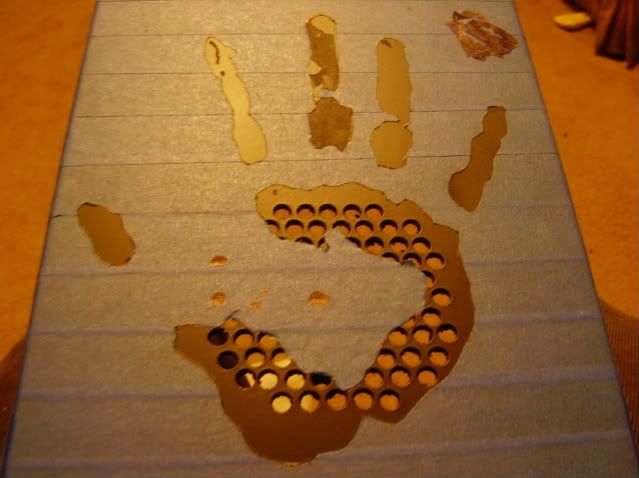
After it is transferred, some careful cutting gets you in business.
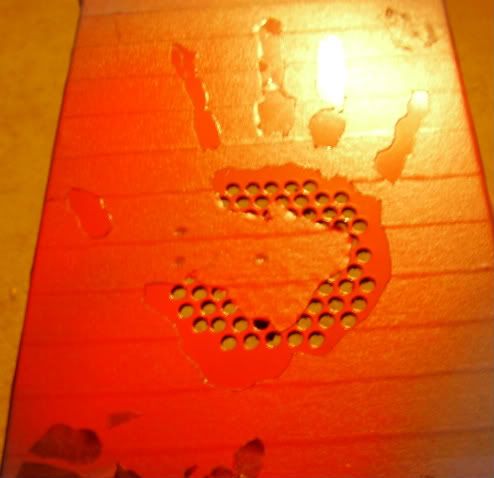
Now I am free to give it a shot of enamel.
Two notes on the paint: One, I could have chosen something closer to the real color of blood – but again, I'm going for the cartoonish here. Two, I used enamel so that it will have more of a wet shine on the matte black finish.
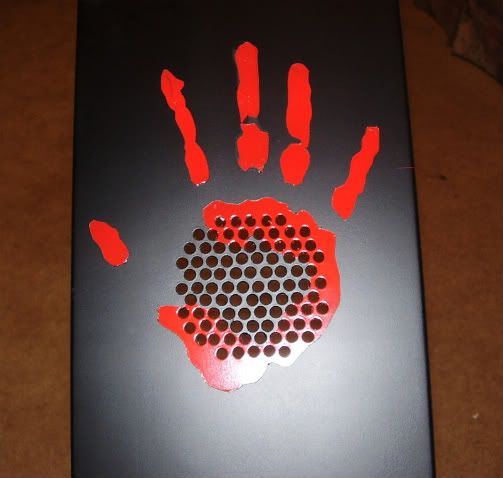
After drying, here is what I have:
-
Re: Night of the Living Dead 40th Tribute
That's a sweet paint job.
-
Re: Night of the Living Dead 40th Tribute
-
Re: Night of the Living Dead 40th Tribute
Nice touch with the hand print on the top of the case. Looks great.
-
Re: Night of the Living Dead 40th Tribute
dude that looooooks freeking sweet!
one of the first horror films i ever watched! still one of my fav's
-
Re: Night of the Living Dead 40th Tribute
Quote:
Originally Posted by
XcOM
still one of my fav's
Obviously, I'm a bit of a fan as well.
Current situation update: I currently am finishing up the graveyard fence (getting it glued, painted and installed.) I have a few more white LEDs and some red EL wire on order. I don't have a lot of room behind the mobo tray, and I'm still trying to get that panel lit. That's really the last major thing I have left to do. After that, it's touch-up and final assembly. Which is good, because I have just over a week left.
-
Re: Night of the Living Dead 40th Tribute
a week before what???
good to hear i will like this on when its done
-
Re: Night of the Living Dead 40th Tribute
The 40th anniversary is Oct 1, next Thursday. I know, it's a totally self-imposed deadline, but I'd like to have it done by then.
-
Re: Night of the Living Dead 40th Tribute
ah ok got ya :)
good luck and gods speed..
well flash es speed anyway
-
Re: Night of the Living Dead 40th Tribute
Back again!
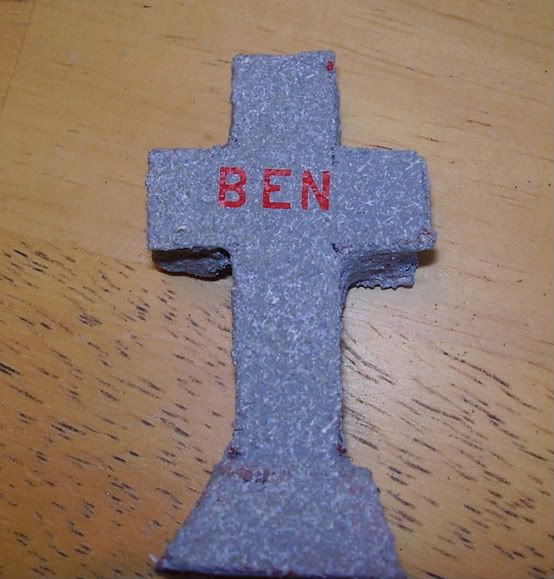
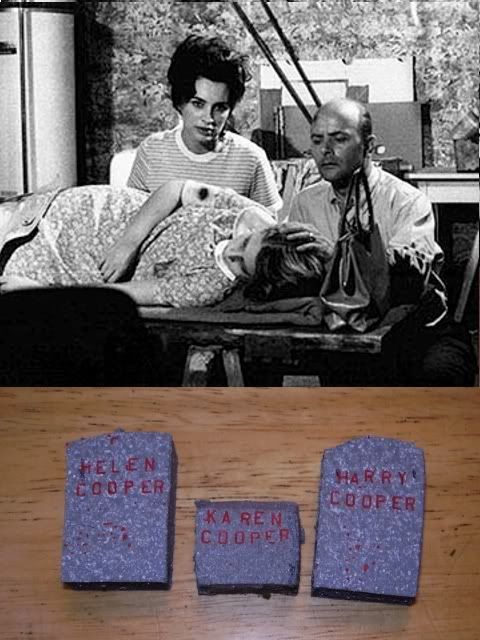
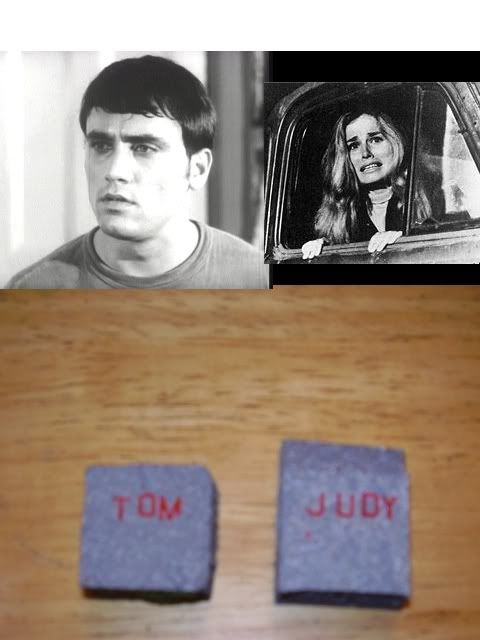
I finished up the main tombstones for the graveyard. I might make a few more blank ones if I feel that I need to fill some space, but these are the important ones. Since the lettering I used doesnt come in different fonts, I tried to print them slightly askew and with extra spots of red to give them a horror-font feel. Without further adieu, I present the family to you:
I may add one for Johnny, but Im not sure. Hes important to the plot, but not a very important character.
Ive also done some more work on the side panels.
Much like the top, I wasnt very happy with the paint on the side panel, so I sanded it down a bit and then went over it with some window cleaner. (Sanding with 1500 grit sandpaper really gives it a soft touch, but it leaves a lot of dust behind that you cant easily see but will screw up the paint.)
It doesnt look much different in this picture, but trust me its a vast improvement. Go back and look at the before and afters of the top for comparison.
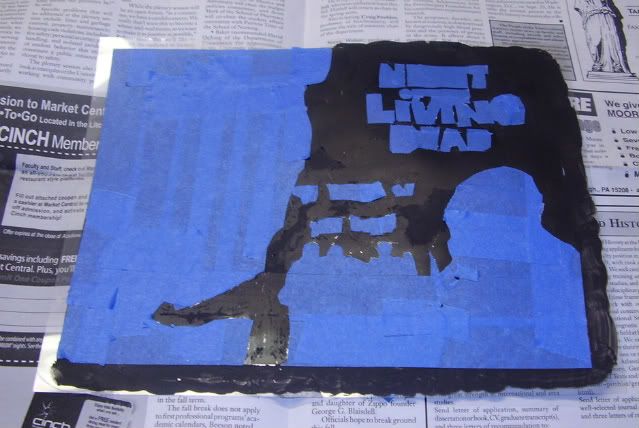
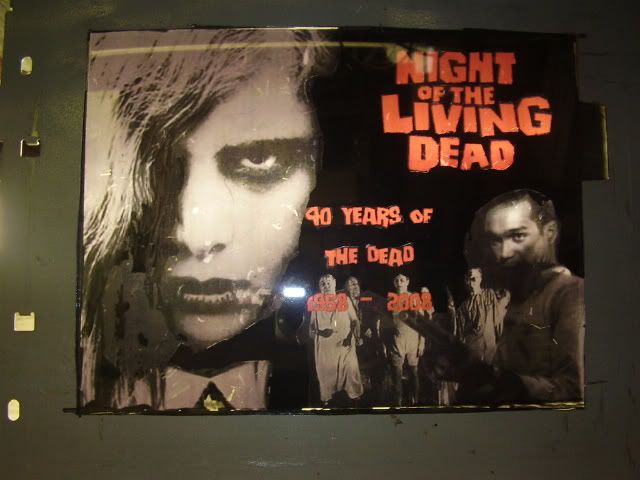
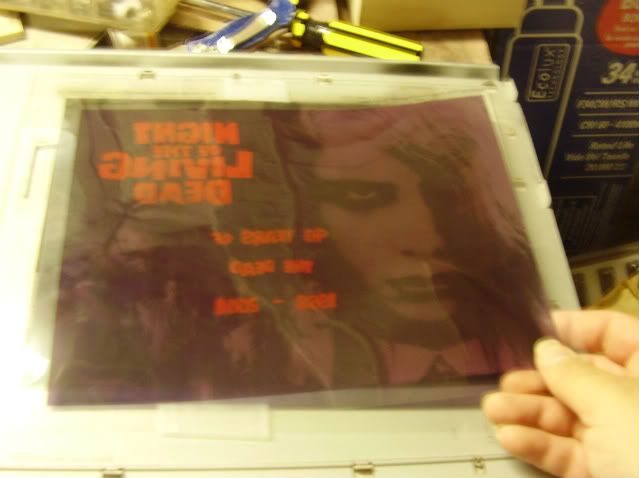
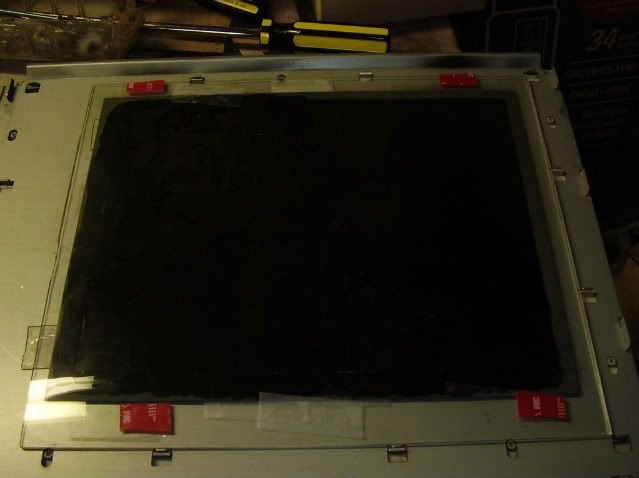
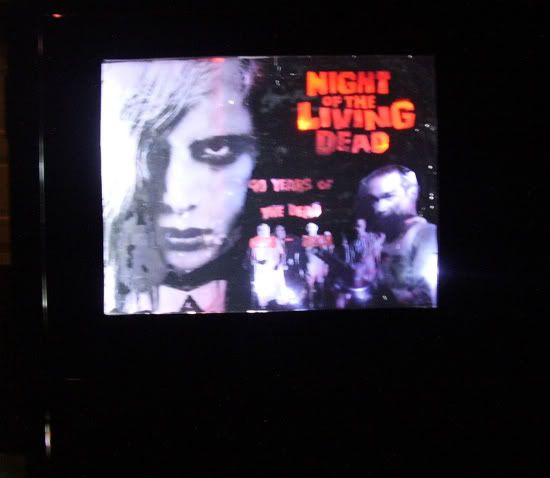
On the other side, I messed around with the picture window a bit more. As I touched base on before, even the black areas were letting through too much light, and I was going to need to do some painting on it to cover it up.
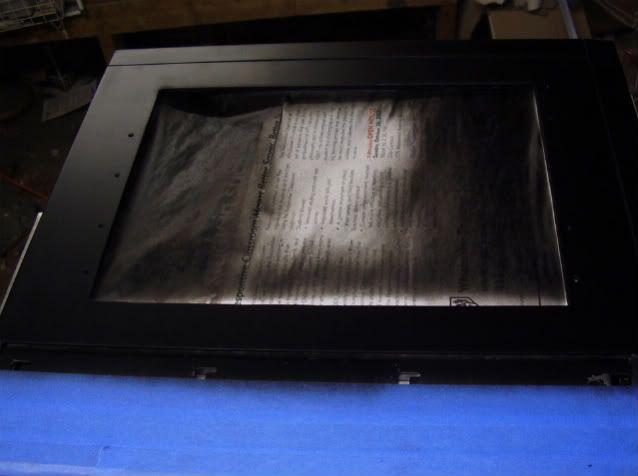
The picture is actually two transparencies one black and white, one in color. At first, I tried to hand-paint the B&W one, but my brush-strokes showed up ones there was light behind it. So, I went to plan B.
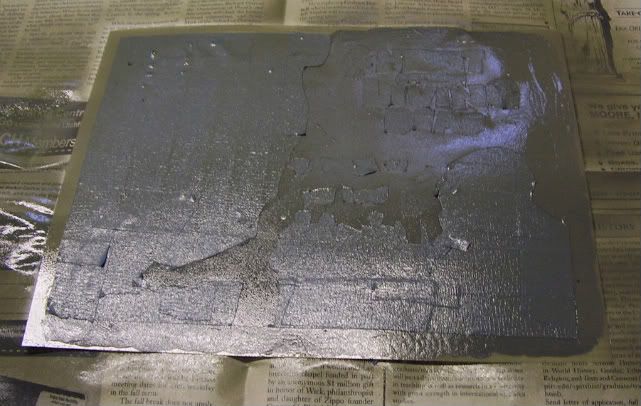
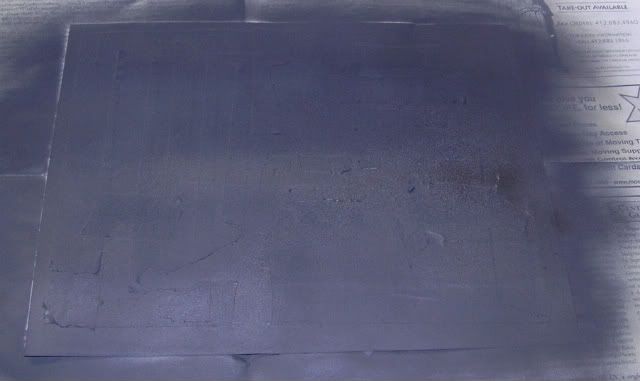
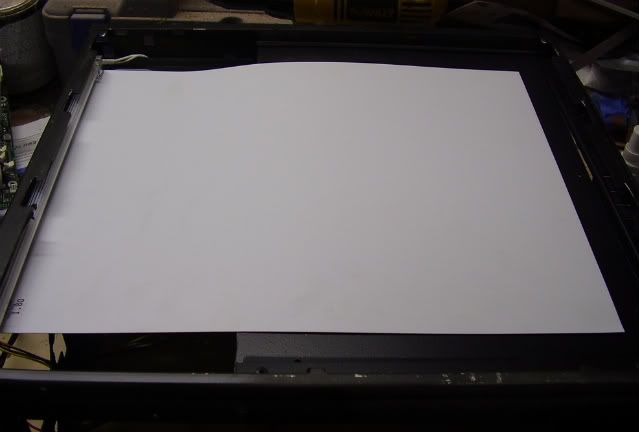
Using painters tape and my carpet blade (My Xacto knife has been missing since college, and I got pretty good with this blade instead) I masked off all the important let-light-through parts, then it was prime and paint time:
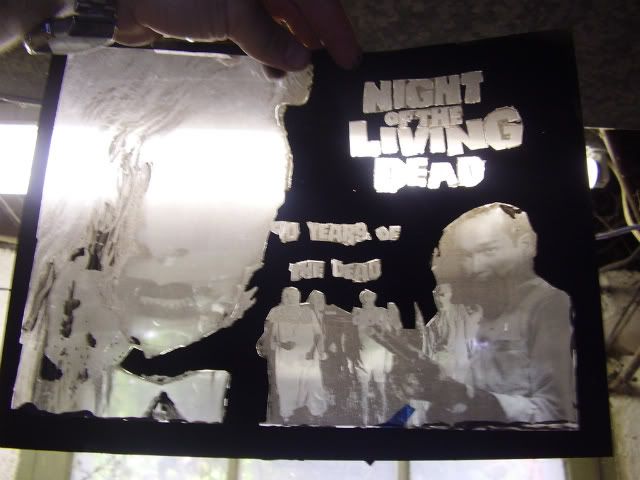
Here it is, held up to the light, afterwards:
As you can see, this is much better. Yes, I realize that some of the transparent areas look pretty beat up. I will be reprinting the color layer before final install. This one was the work copy.
So now, I just have to hope that the lights I ordered will finally get the job done on this.
-
Re: Night of the Living Dead 40th Tribute
-
Re: Night of the Living Dead 40th Tribute
Quote:
Originally Posted by
The_Crippler
So now, I just have to hope that the lights I ordered will finally get the job done on this.
Well...they didn't. The "red" wire that the site says looks like this:
...actually turned out to be a very dim pink. At least it was only eight bucks, or else I might be pretty damn pissed off. As is, I'm still very disappointed.
On the flip side, I think that I found a solution to my problem, and early tests confirm it. Tonight or tomorrow, I will put it together and get some pics up.
-
Re: Night of the Living Dead 40th Tribute
sweet
pitty bout the wire but only eight bucks :)
good luck
-
Re: Night of the Living Dead 40th Tribute
very nice. I'd suggest maybe making the lines between different paint colors (like the grey to the black) a little rougher so it looks more natural. +rep
-
Re: Night of the Living Dead 40th Tribute
I'm in the home stretch now!
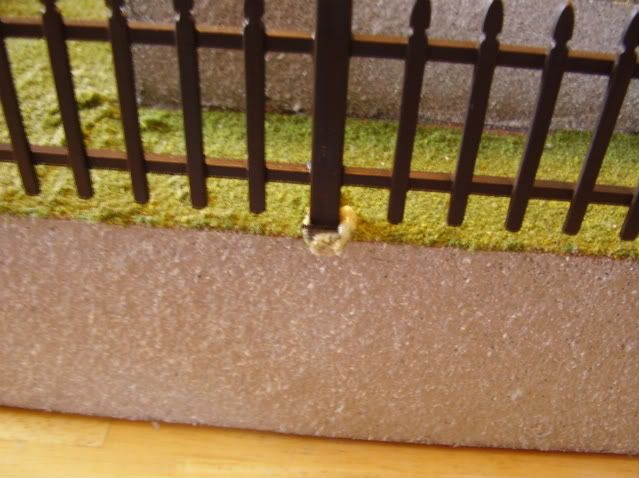
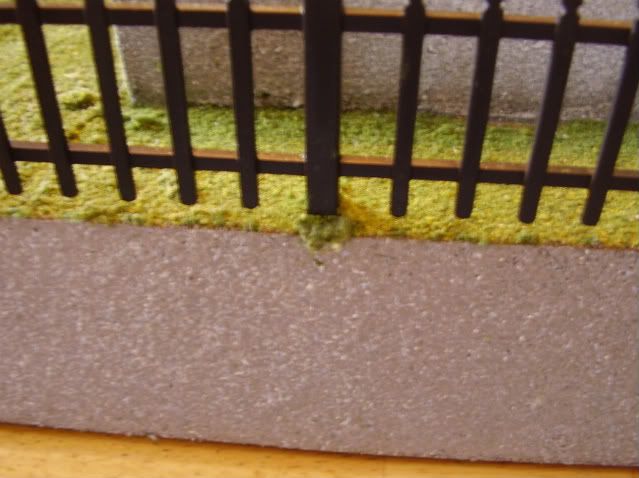
First part that I worked on today was some touch up work on the graveyard fence. When I glued it down, it left obvious dried glue globs, plus the base of the fence pieces was fairly visible without grass covering it:
The solution here was just some Elmer's glue and some grass covering sprinkled on.
Well, that was a quick little easy project. After that, it had to move on to bigger and better things...like finishing up the side panels. Much like the top, I was displeased with the quality of the paint job, so I needed to sand it down and redo it:
The first side didn't require much more than a light pass with the 1500 grit to smooth out the spots on it:
The other side, however, needed a lot more work to get down to a smooth, blemish-free surface:
A fresh coat with quality paint, and I was back in business:
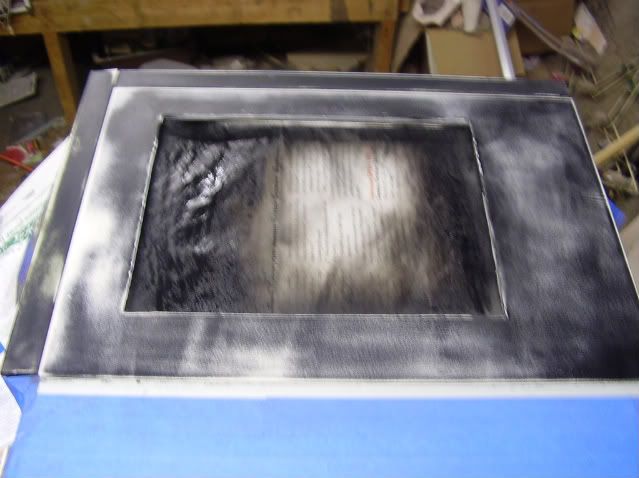
With those finished, and the paint dry, I moved on to finalizing the NotLD picture window side. While the paint was drying, I cleaned and polished the plexi pieces so that that they were ready to go when the panels were done. With the window back in, I set about laying in the freshly printed transparencies:
With some fresh super tape laid down, I sandwiched these sheets with another piece of plexi:
Next step: Lighting.
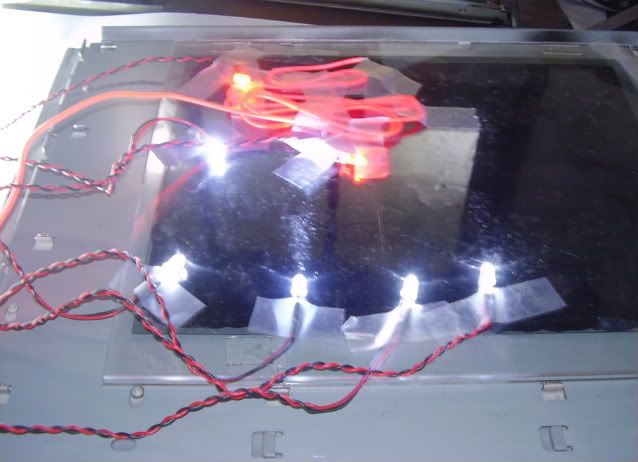
One of the main problems with lighting this panel is that I don't have room behind the mobo tray for CCFLs. One on the top and bottom would have been great, but I only have space for one in front by the drive bays. On the other hand, LEDs don't put out enough indirect light to be practical on their own. On the other, other hand that EL wire was freakin' useless.
The solution:
By laying in a thin sheet of styrene, it will act like the foil bowl in a flashlight and reflect indirect (and softer) light back at the window...
...in theory. :rolleyes:
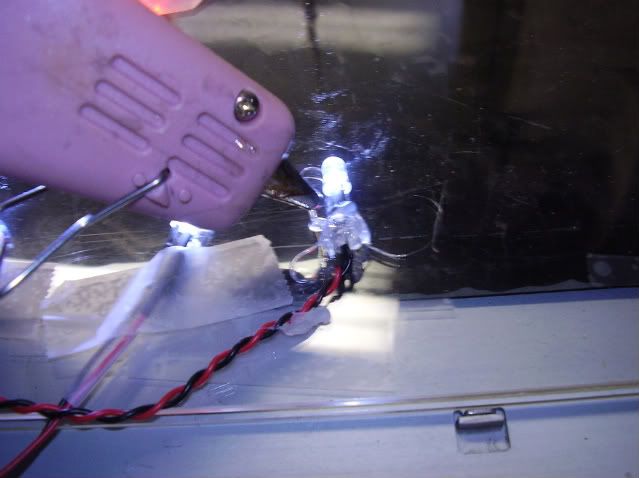
To keep with lights where I wanted them, I first taped them down to get a layout set.
Once laid out, I affixed them with hot-melt glue. (Between this and the Elmer's, I feel like I'm in arts and crafts.)
Now, you will note that the EL wire is on there, but that was only to give it a go. Once the glue around it dried, it blocked what little light that was illuminated. (NOTE: I know the glue gun is pink. It's my wife's.)
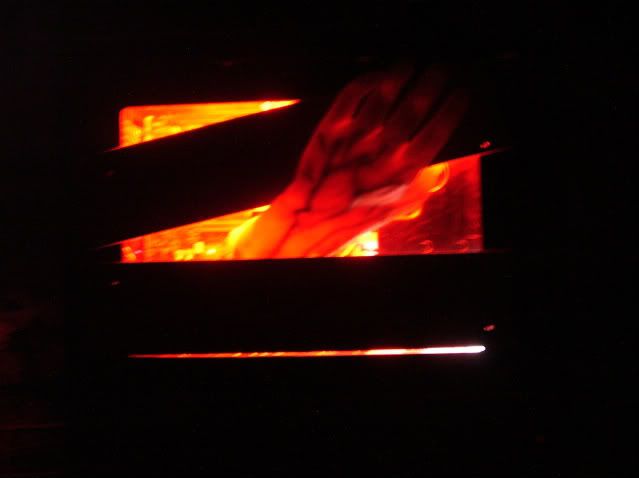
Now, the moment of truth: Did my idea of a reflector work?
Yes. It. Did. Sweet.
I'll be back in a little while with another update where I test fit every on the case.
-
Re: Night of the Living Dead 40th Tribute
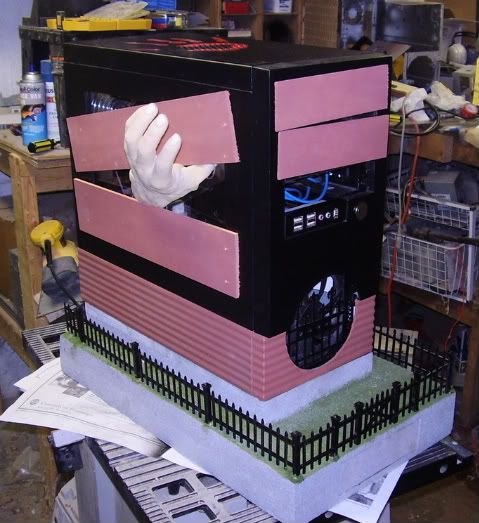
It's high time that I put this stuff all together, light it up and see how it looks - doncha think?
The bezel goes together rather nicely over the grill, which is screwed in with the front fan. The bottom "wood" piece just snaps on over that. Next, I flipped the whole thing over and screwed the base on. This is done with just a few machine screws up through the base-frame:
The LEDs are all connected together, and then taped up out of the way under and behind the drive bays.
Even so, I'm going to do some serious wire management when I fit all of the actual components in place in a few days.
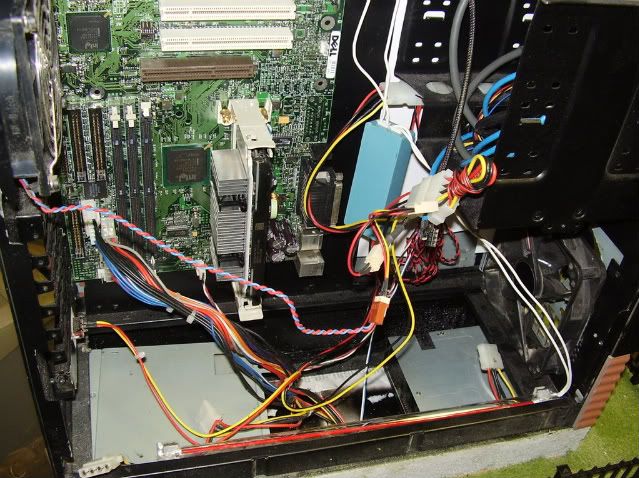
NOTE: Yes. That is a slot-type mobo hung upside down. This is my test board, and my test PSU doesn't have a long enough power cord to make it from the bottom of the case up to the connector.
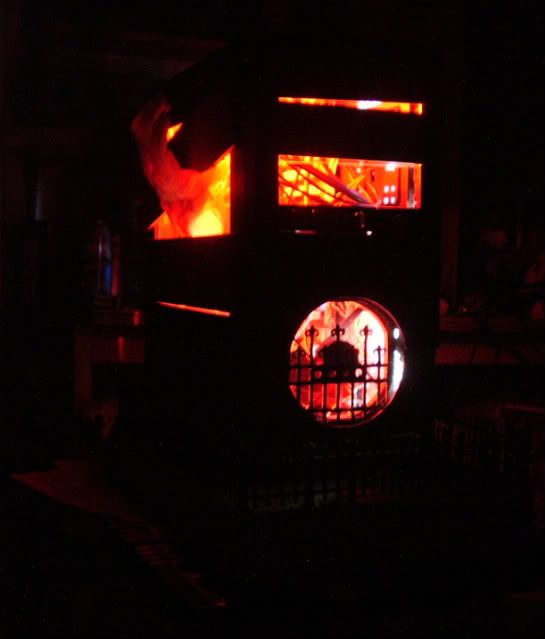
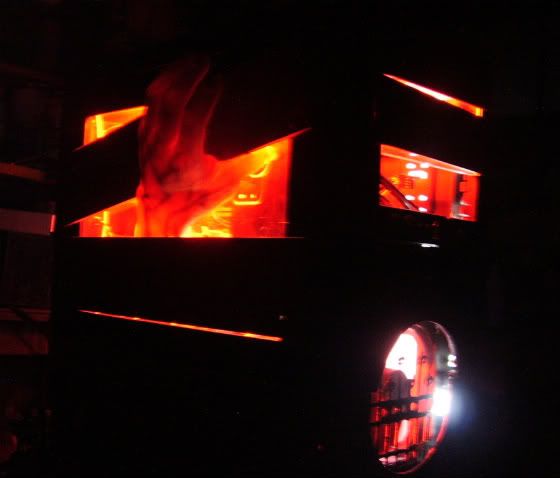
Closed up and redy to go:
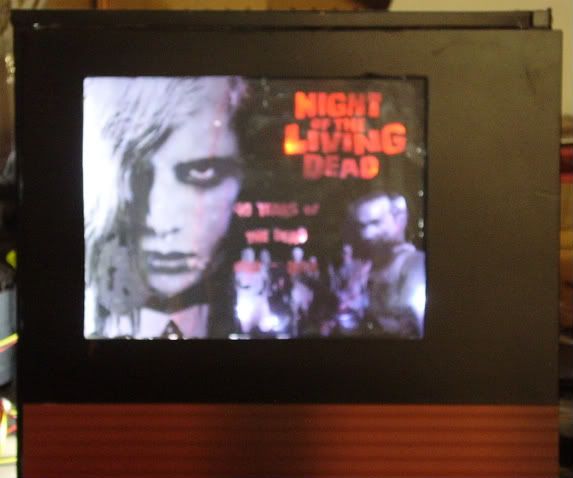
Next step it to fire it up, turn out the lights and see what we have:
Almost done. I pretty much just need to fashion the HDD cage, install the tombstones and swap in the final components. I see no reason why I shouldn't be ready for the 40th anniversary on the 1st!
(Probably shouldn't have said that...)
-
Re: Night of the Living Dead 40th Tribute
Wow, that looks mean all lit up!
The handprint's great, man - +rep for that, and the simple grass fix. :)
-
Re: Night of the Living Dead 40th Tribute
That's looking amazing. It's coming together nicely. Can't wait to see all the rest on there. +rep
-
Re: Night of the Living Dead 40th Tribute
Now that is looking awesome!! +rep
-
Re: Night of the Living Dead 40th Tribute
Think you could have fit any more molex plugs in there?
-
Re: Night of the Living Dead 40th Tribute
Quote:
Originally Posted by
nevermind1534
Think you could have fit any more molex plugs in there?
Yes.
-
Re: Night of the Living Dead 40th Tribute
Not much additional work today...just spot-checking here and there. One bit of update I painted and installed a hard drive cage:
Tomorrow, I need to stop and pick up some superglue to affix the hand to the side panel, and then I'll probably start swapping over the final pieces of hardware.
-
Re: Night of the Living Dead 40th Tribute
great!!! and on the deadline lol get it DEAD line :)