Login:
Pass:
Forgotten Pass?
Forums
Forum Home
Search
Today's Posts
Members List
Calendar


Search
Google
Search TBCS
Search the Web


Follow Us On


Go Back   TBCS Community Forums > Mod Walk > Graphic Art Gallery > GIMP/Other Techniques


Welcome to the TBCS Community Forums forums.

You are currently viewing our boards as a guest which gives you limited access to view most discussions and access our other features. By joining our free community you will have access to post topics, communicate privately with other members (PM), respond to polls, upload content and access many other special features. Registration is fast, simple and absolutely free so please, join our community today!

If you have any problems with the registration process or your account login, please contact contact us.
Closed Thread
 
Thread Tools
  #1  
Old 01-04-2008, 05:41 AM
Drum Thumper's Avatar
Drum Thumper Drum Thumper is offline
Posts: 4,452
Like a Lightning Bolt in Your Cheerios!
 
Drum Thumper Elite ModderDrum Thumper Elite ModderDrum Thumper Elite ModderDrum Thumper Elite ModderDrum Thumper Elite ModderDrum Thumper Elite ModderDrum Thumper Elite ModderDrum Thumper Elite ModderDrum Thumper Elite ModderDrum Thumper Elite ModderDrum Thumper Elite Modder
My System
Default Turn a photo into a pencil sketch

This is by far one of the easiest things I've learned how to do in GIMP. The hardest part by far is setting up the color levels (I'll demonstrate in a bit).

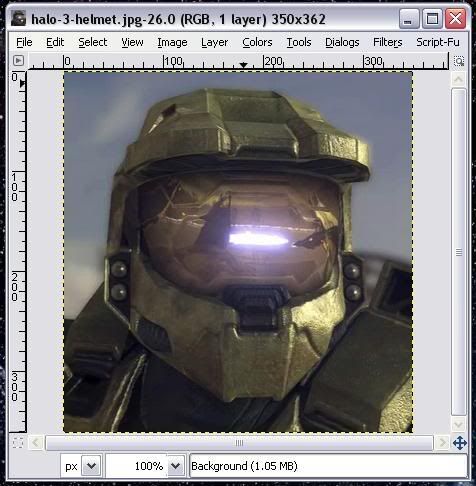
Now granted, I didn't use a true photo for this. In honor of the current Modder's Challenge, I have decided to use everyone's favorite Master Sargeant:


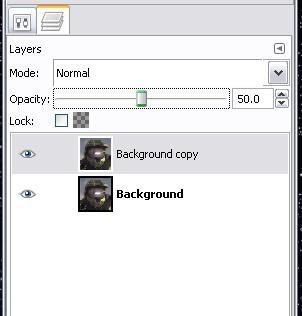
So first off, duplicate the background layer and set opacity of the copy to 50%:


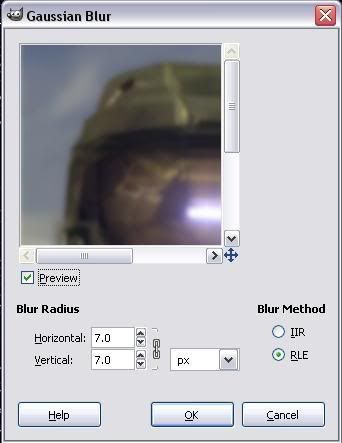
Then we're going to add a Gaussian Blur @ 7 px. A higher number will in theory give thicker lines, but that can be overkill. 7 seems to be the best all around number.


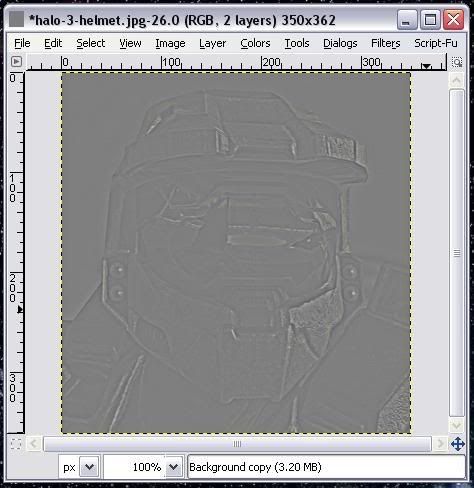
Then go to Colors:Invert and you picture has effectively been put through a high pass filter. In other words, the detail is still present, but the gradients (various shades of color) have been removed.


Pretty simple, isn't it? All right, enough reflection on your new found power, back to work!

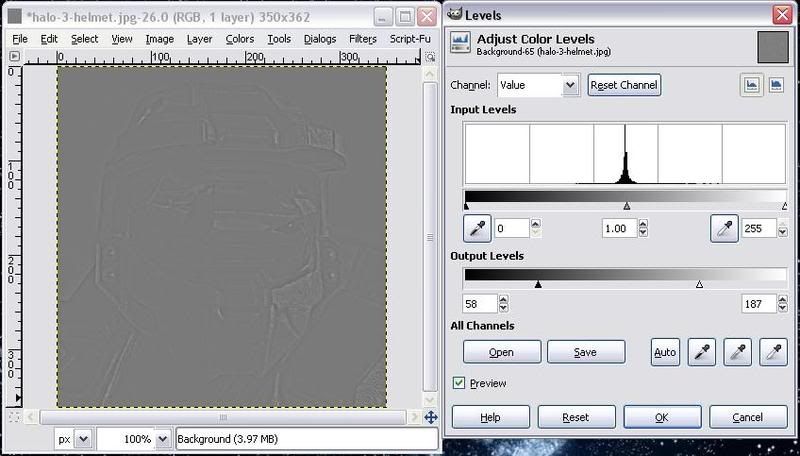
Merge your layers into one layer. Now, open up Colors:Levels and set the output values to 100 on the left and 155 on the right. Your Level dialog box should look like this:


Every picture is going to be different. Play around with the two numbers until you can see the outline of your picture. For this example, I set the left hand number to 58 and the right hand number to 187. Now my picture looks like this:


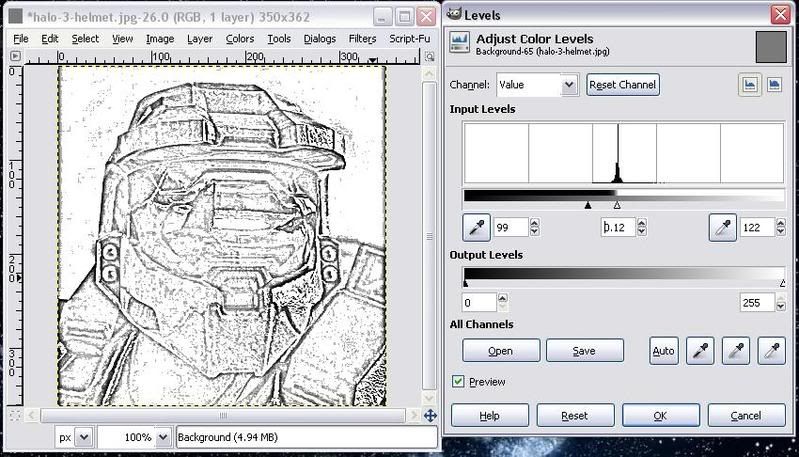
Click ok, and then select Colors/Desaturate. You'll have three choices, any one of them will suffice. Press Desaturate and then reopen the Colors:Layers dialog box.

Now we're going to play around with the input levels. There's three different values we can (and will) adjust to remove all the light gray from the picture, thus leaving behind the outline. Again, each picture will be different. It took me less than five minutes to go from this:
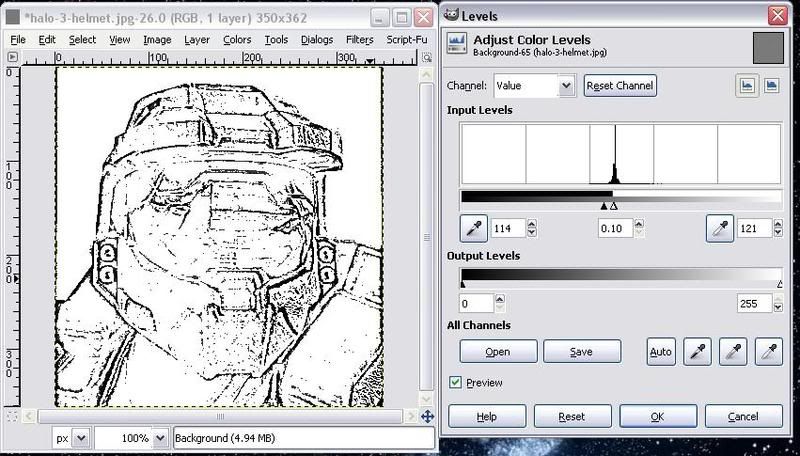


To this:


Further manipulation could be done, but hey, I happen to like the looks of this, so I'm going to hit OK and be done with it.

And here's a Before and After shot:


Until next time...
__________________
Quote:
Originally Posted by artoodeeto View Post
aw heck guys. We're modders. Let's just build our own, shall we?

DrumThumper.net || The Brewing Art ||
My Flickr Stream

Last edited by Drum Thumper : 01-04-2008 at 05:43 AM. Reason: Had to remove an inadvertant :D
Closed Thread


Thread Tools

Posting Rules
You may not post new threads
You may not post replies
You may not post attachments
You may not edit your posts

vB code is On
Smilies are On
[IMG] code is On
HTML code is Off
Forum Jump

Translate This Page

Powered by vBulletin® Version 3.6.8
Copyright ©2000 - 2013, Jelsoft Enterprises Ltd.
thebestcasescenario.com