MOAR!!! :D its wicked dude!

Printable View
MOAR!!! :D its wicked dude!
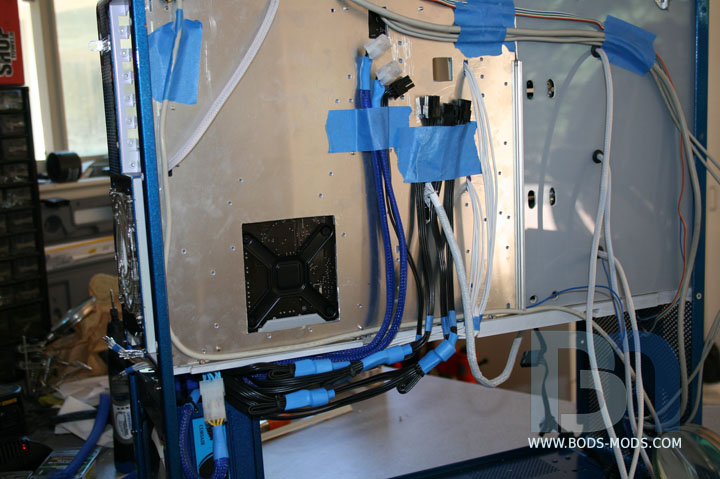
Yes, I'm still alive. After the LAN, I kinda went a bit backwards and disassembled the case again
to re-do some things that didn't quite work the first time. I'm spending a lot more time in the cabling department
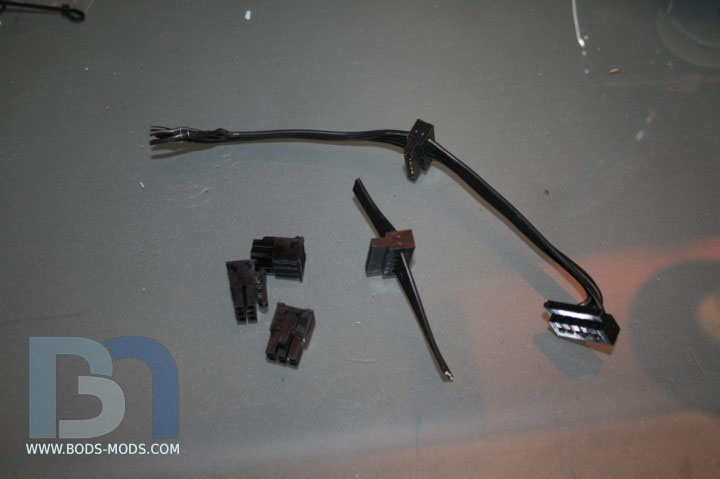
this time. I didn't like how the SATA cables came out so I'm completely remaking them using white wires.
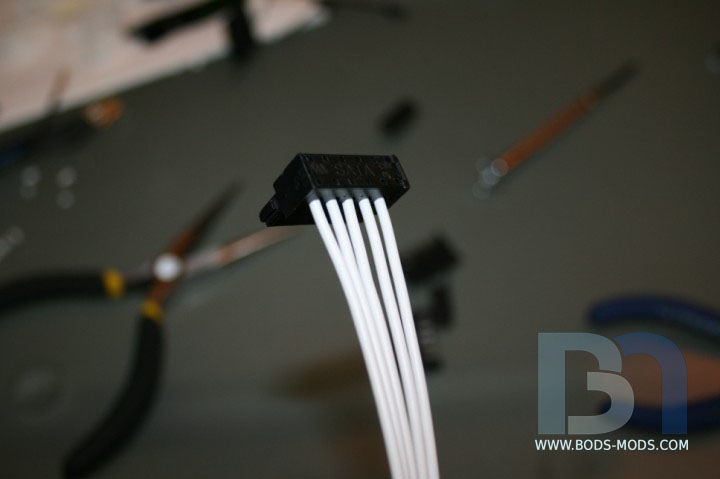
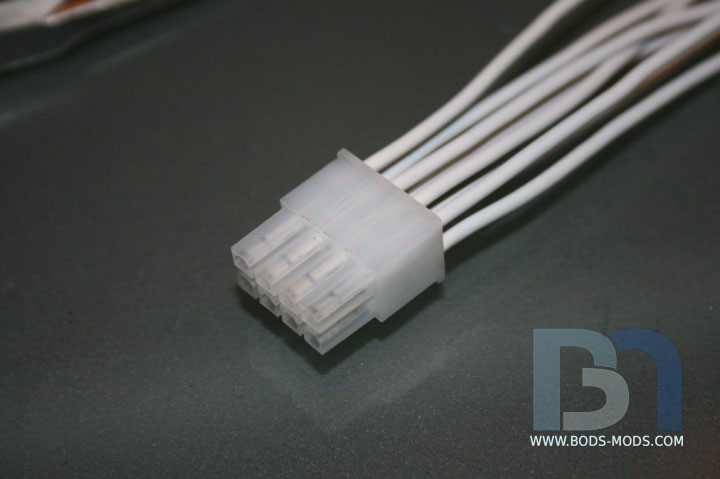
I'm also using these shorter pass-through connectors, but only one at the end of each cable.
These make it easy to swap out the wires. Just pry the back cover off.
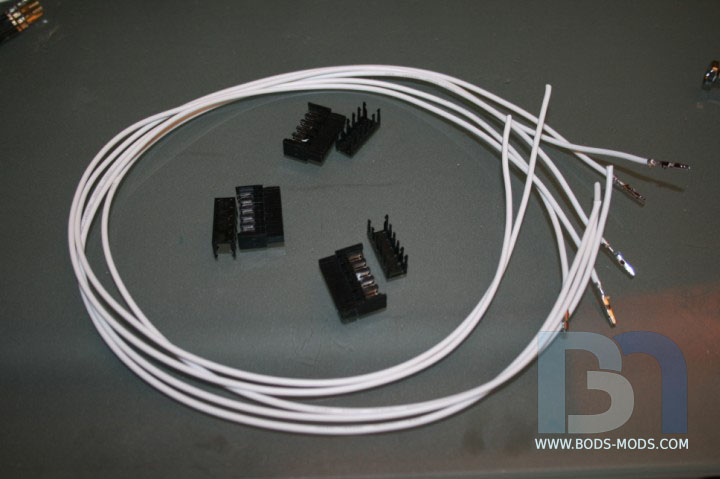
I cut the white wires to length and soldered the pins on.
Then pressed each wire into their slots and put the cover back on.
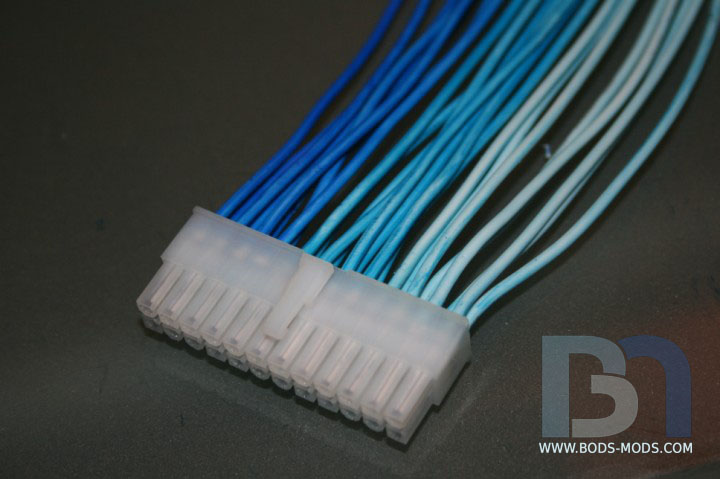
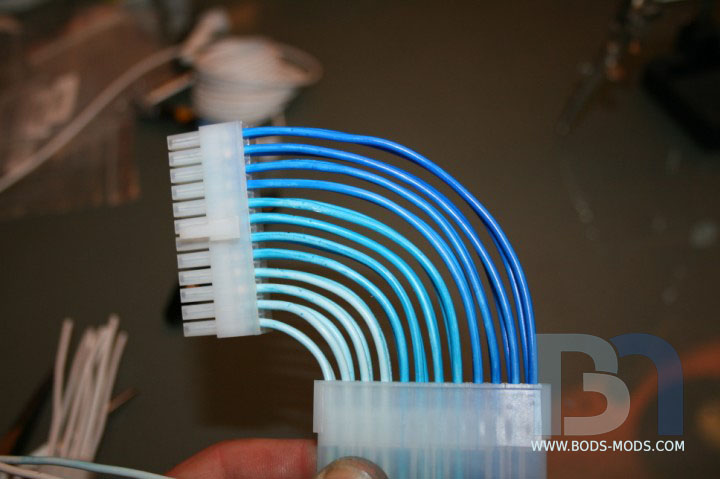
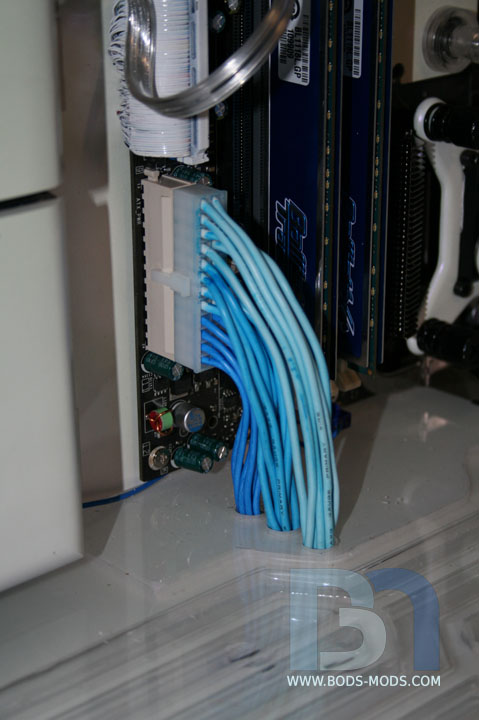
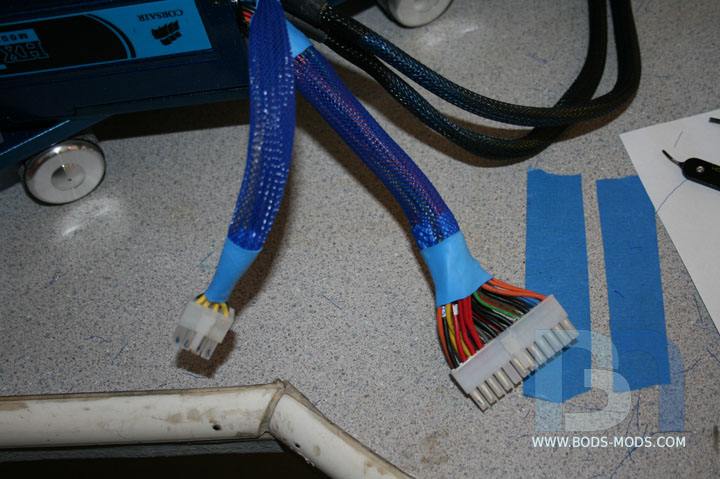
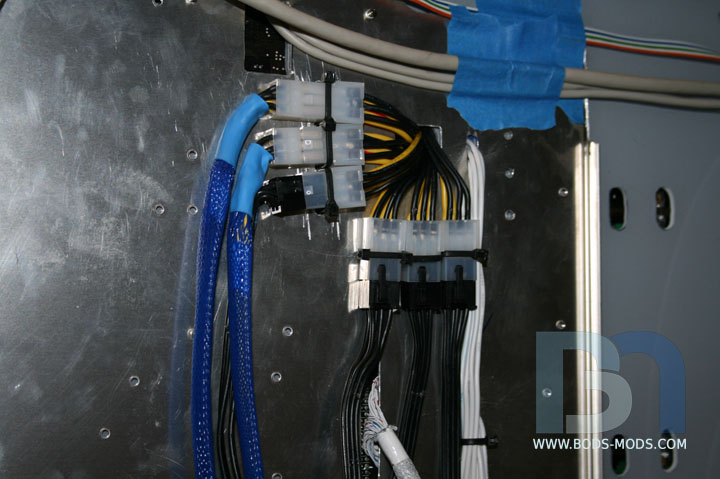
For the ATX cables, I wanted a different effect than sleeving. Something that would match the case theme, and pass through
the floor. So I'm making an extension with all white wires that I'm coloring blue, to match all three shades of the coolant.
Using the female side of the ATX connector, I adjusted the wires til they created a smooth 90° curve.
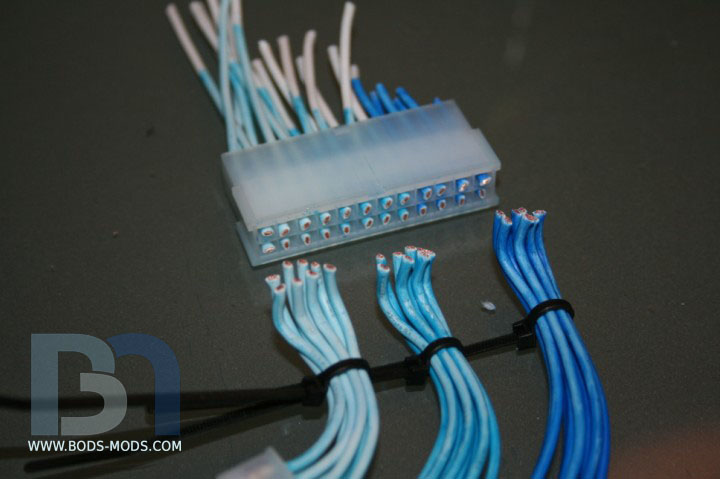
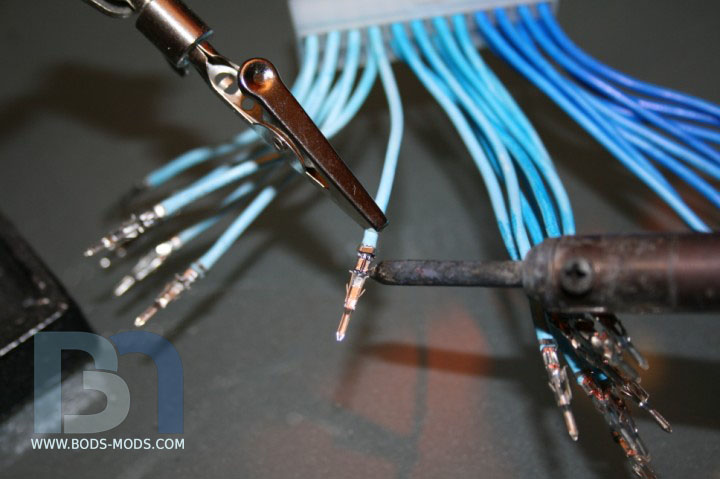
Then after allowing for additional length needed to pass through the floor, I temporarily tied them together to make my cuts.
Once they were all cut to length, I soldered the pins on.
But before I put the connector on, I'll need to feed the wires through the floor, and I can't do that until I finish
up some other things first. 'Til next time!
wicked cable work mate!
Very nice work on the cables, I love the ATX connector, very cool, reminds me of Sniipe Dogg's latest mod on Bit-Tech.
dig it. can't wait to see the cables installed.
Thanks guys!
Yes, his ATX cables are very nice. I was originally going to do the same thing! So I'm glad I decided to do mine a bit differently.Quote:
Originally Posted by The boy 4rm oz
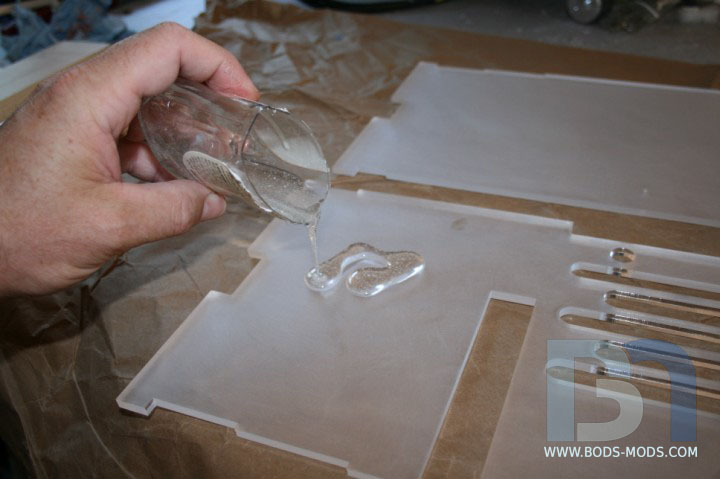
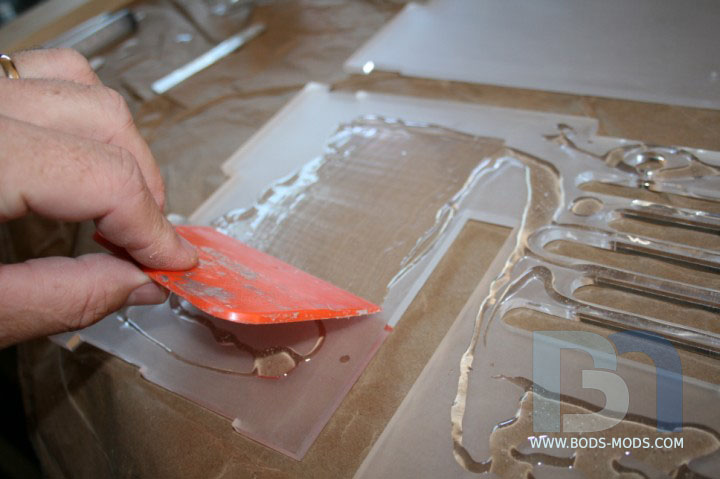
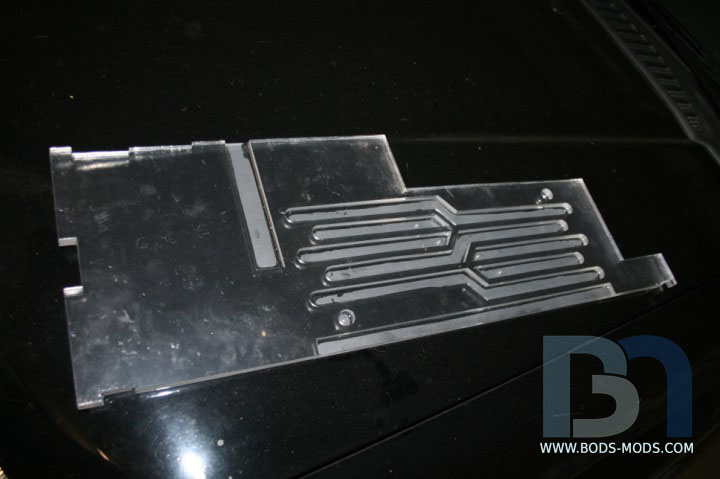
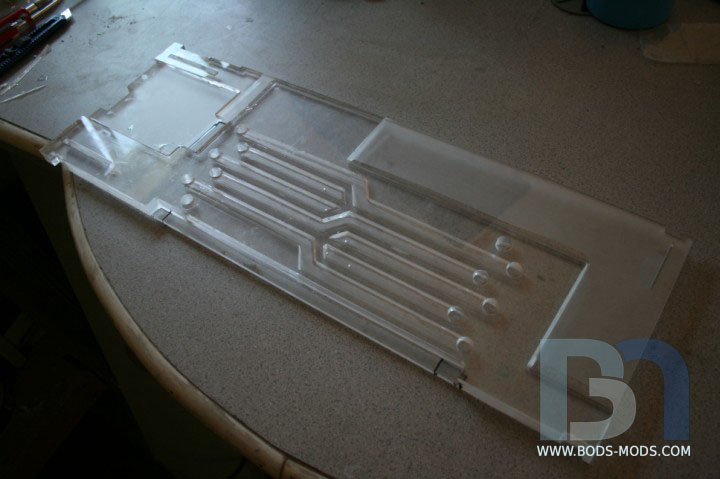
Wanted to show some in-progress shots of the new floor. This time I used a 2-part epoxy and got a completely bubble-free result. Check it out:
After mixing in a small container, I poured it onto the first piece. In order to promote adhesion, I lightly sanded
the surfaces with my orbital sander.
Spreading out the epoxy with a squeegie
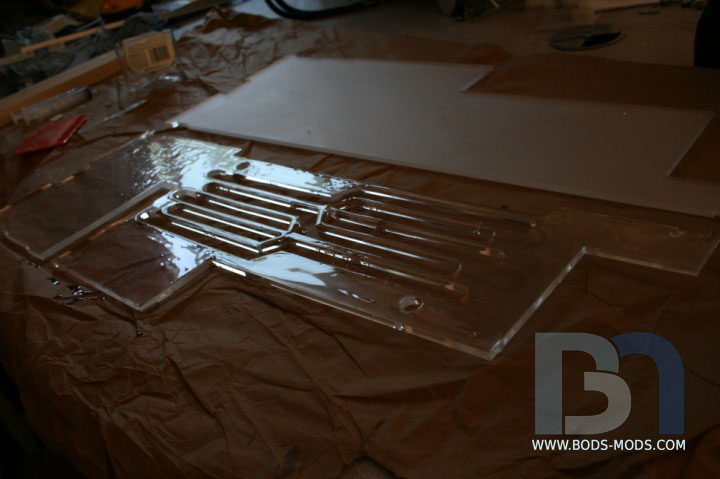
Full coverage! I let it sit for a few minutes to let the epoxy flow out (this particular epoxy had a 45minute work time)
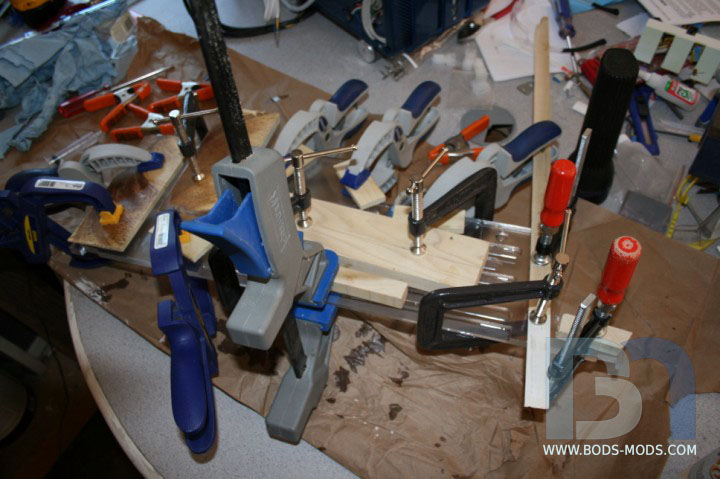
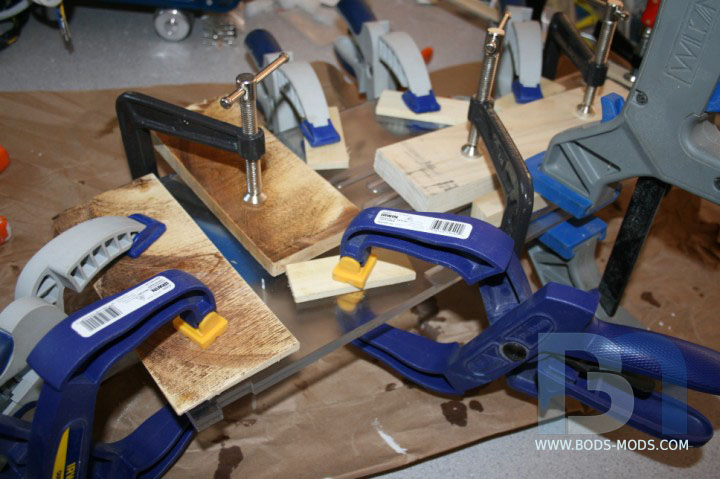
Out came the clamps. I found that I couldn't use my smaller spring clamps because they were too strong, leaving a dry
spot at the pressure point. So I opted for the lighter plastic clamps with some wood scraps to even out the clamping force.
Bottom and center piece glued:
And the final part. Completely clear with no bubbles. :D
After the gluing, I cleaned it up a lot, removing drips and smoothing out the edges. I drilled cabling and mounting
screw holes, cut notches here and there, getting a perfect fit. All that's left is paint and polish (to get rid of any fingerprints
on the top) and I can finally get back to installation.
Very Nice.
nice work!
Yep, looks great my friend, I really can't wait to see this completely together.
thumbs up from me :P
wauw, great idea with the cable's, nice job on the epoxy job as wel :)
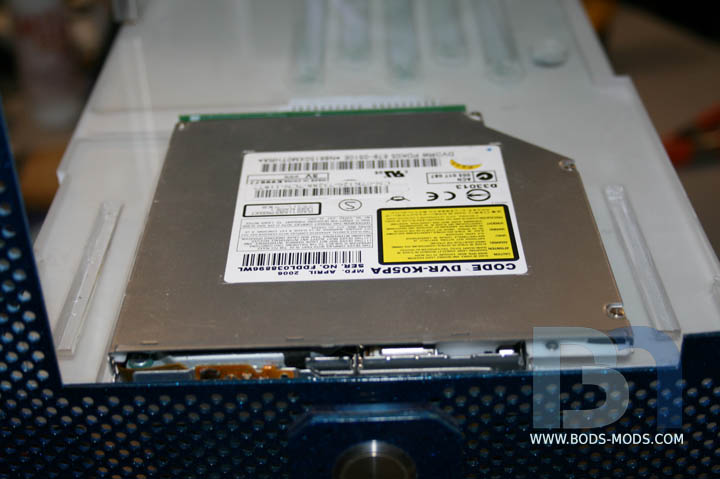
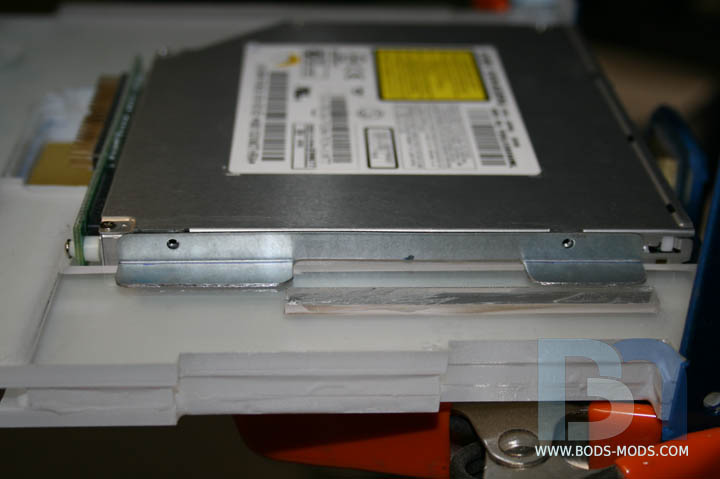
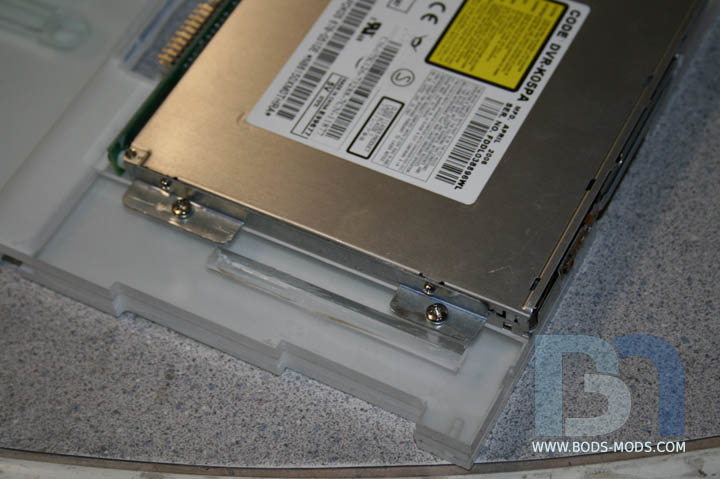
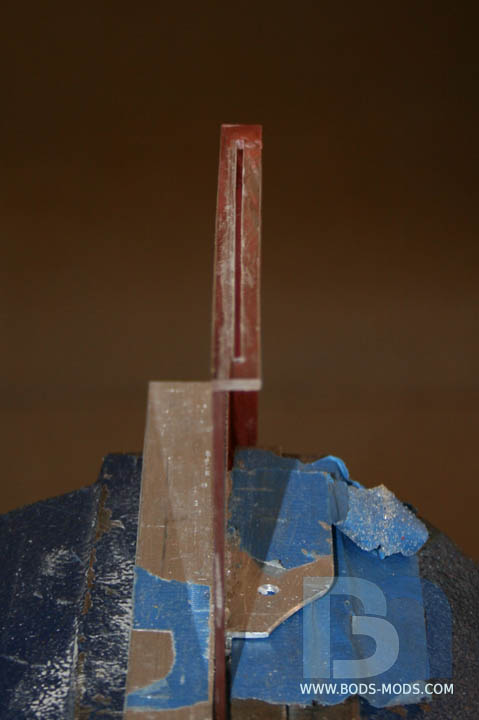
A smallish update: DVD drive mounting and cover
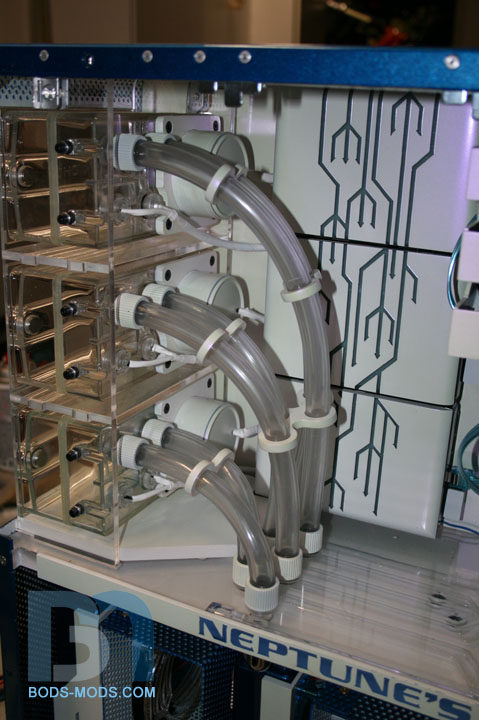
Here's how I mounted the optical drive: It sits in a recessed area of the floor, just underneath the bottom T3 reservoir.
The drive I'm using is the Pioneer K05 slimline slot-loading drive. It's a DVD player and recorder.
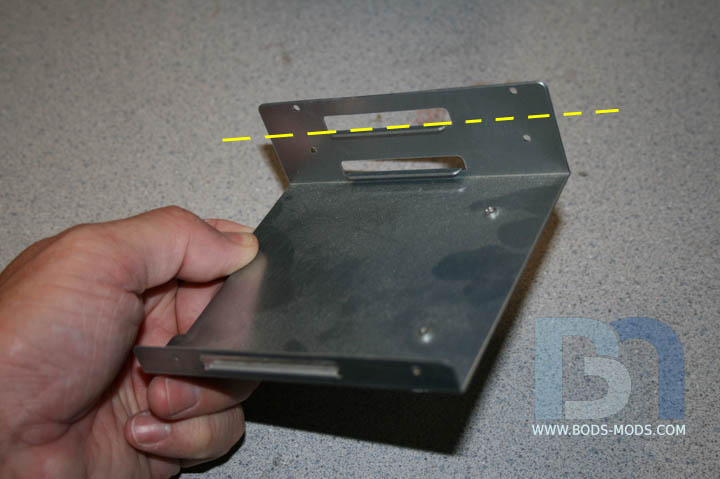
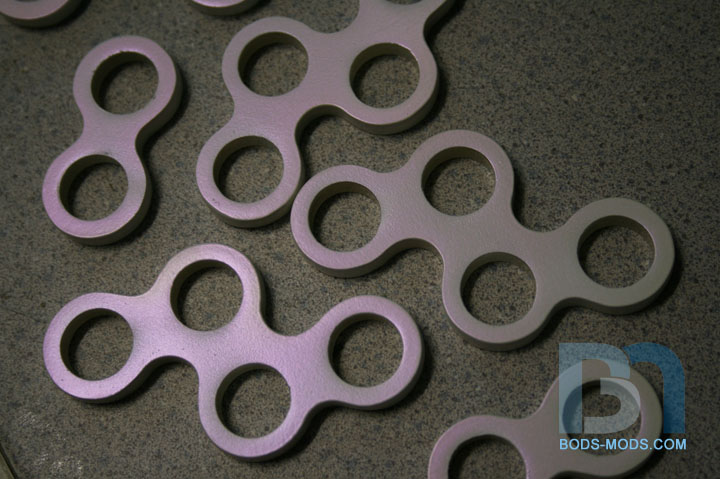
To mount the drive, I am utilizing this dual drive 5 1/4" bay mounting plate. Just the part above the dotted line.
Bent the tabs at the appropriate height...
... marked the holes, drilled and tapped into the floor.
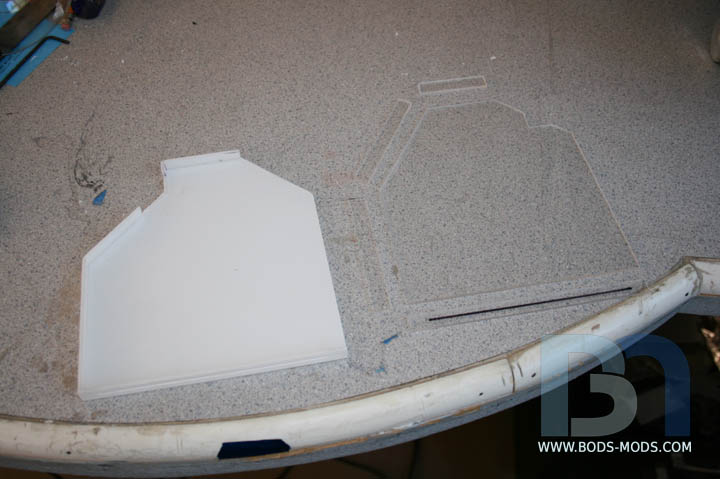
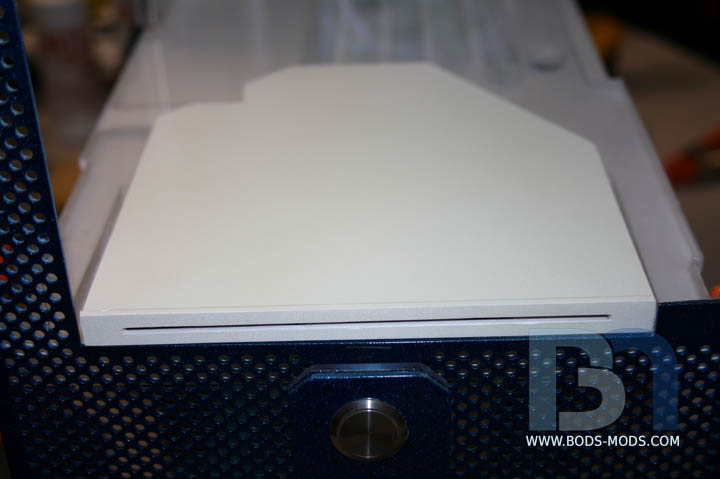
Since the slot-loading optical drive is situated beneath the bottom T3 and will be visible, I needed to make a cover for it.
I did a quick cover for the lan, but it wasn't perfect. So I used it as a template to make a new one, with some
changes. This shot shows all the pieces before gluing.
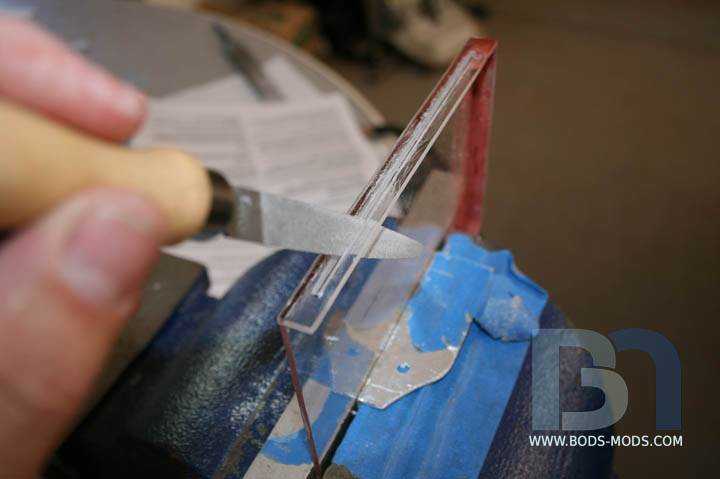
Once glued, I proceeded to carefully cut the slot in front. I used the thinnest file I had to slowly widen the slot.
A shot from the end shows it's pretty straight and even. Time to stop filing!
Sanded, primed, sanded, painted, pearled, and positioned over the drive.
A bit of double-sided tape will keep it from moving around (it won't need anything more, since it will be basically locked in place under the res).
Very simple yet effective cover mate, looks very nice.
very very cool!
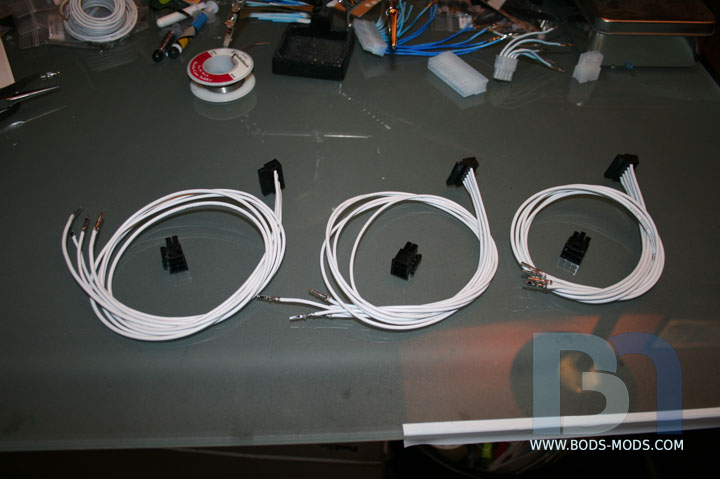
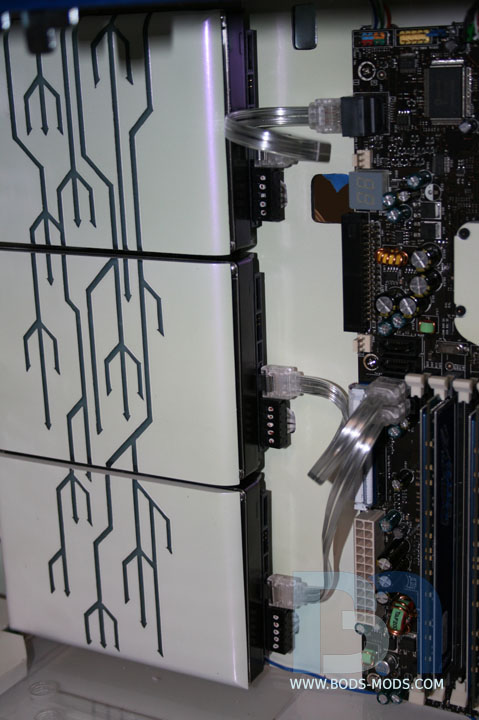
Some more cabling...
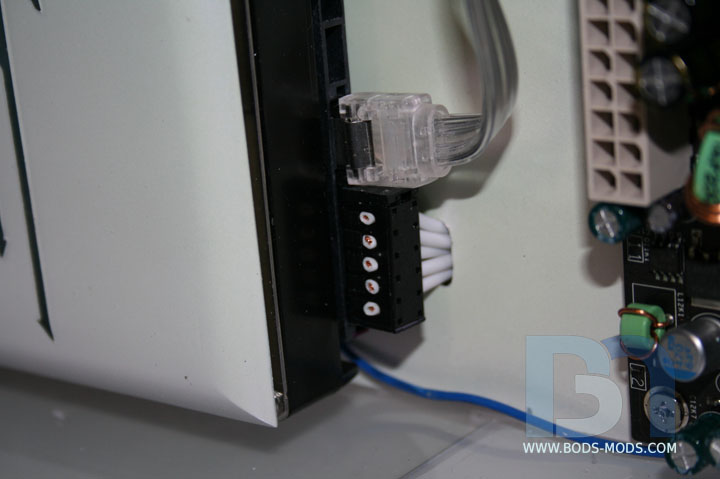
Here are all three SATA cables I strung up with white wires and L connectors.
I cut holes in the back cover, ran them through and plugged them in.
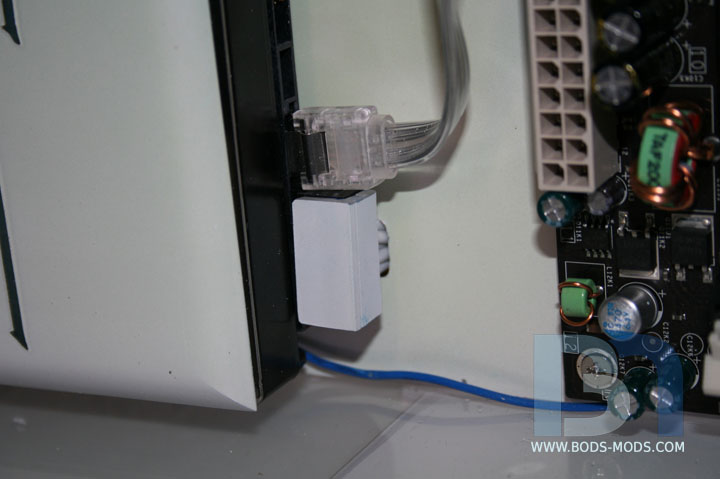
A close up shot. But I don't like how the cut wires show through the connector.
So I whipped up some quick covers for them...
and glued them on.
Ahhh, much better! :D
Those covers make it really nead. keep it going I really like where you are heading.
they say: the devil is in the details.
But watching you I would say:Modding is the Details.:up:
Nice work on the SATA power cables, now do the same for the data cables ;).
i think boddaker is the devil as he brings the detail!
nice work mate
wow, it just cant get wqorst so he just makes it better! :O WOOW! great man, go on :D
lol thanks Drumthumper! :D
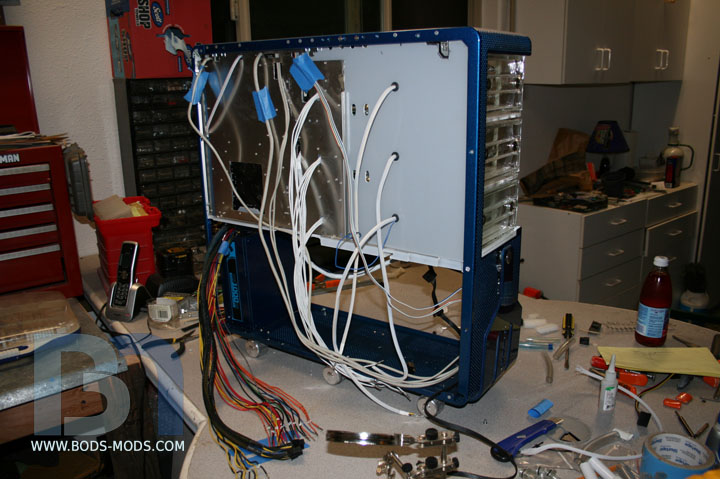
Welcome to my cabling nightmare! :twisted:
I've been cabling for the past two weeks and I'm now officially SICK of cabling! lol
Here's what it looked like a few days ago, as I was just starting the arduous task of shortening the ATX cables.
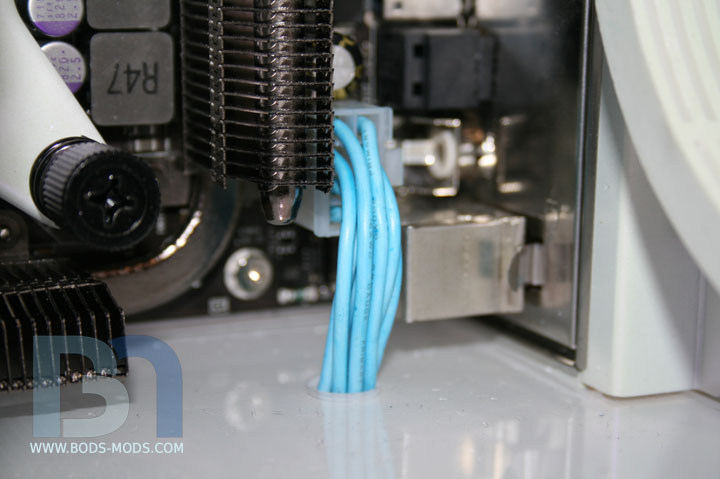
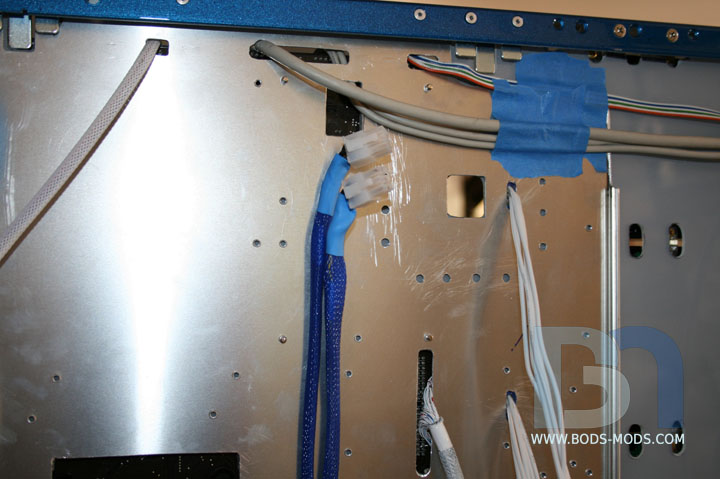
Not sure if I showed this before, but it's the 8pin cable extension I made using white wires.
After coloring and installed through the floor.
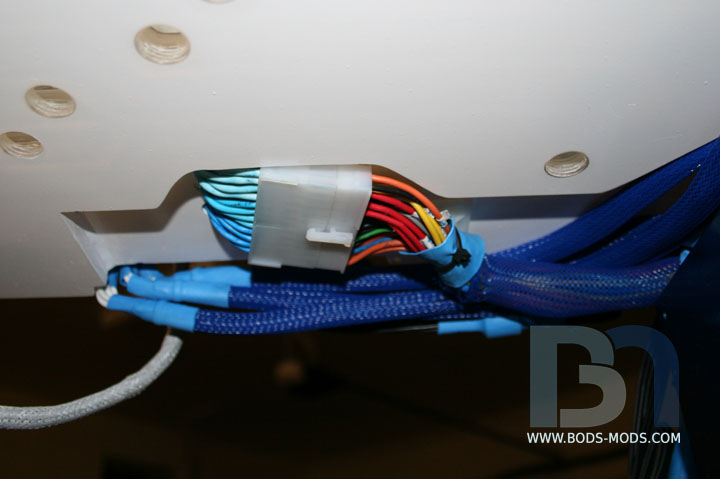
Getting back to the ATX cable, I stuffed each color group through separate holes in the floor. Not as clean as I
would have liked, but it will have to suffice. I had originally intended on sleeving them with clear tubing to mimic
the watercooling. But it just didn't look right. I need some kind of triple boot to cover the end of the hose at the
connector. But that's for another update, I'm done messing with it for now!
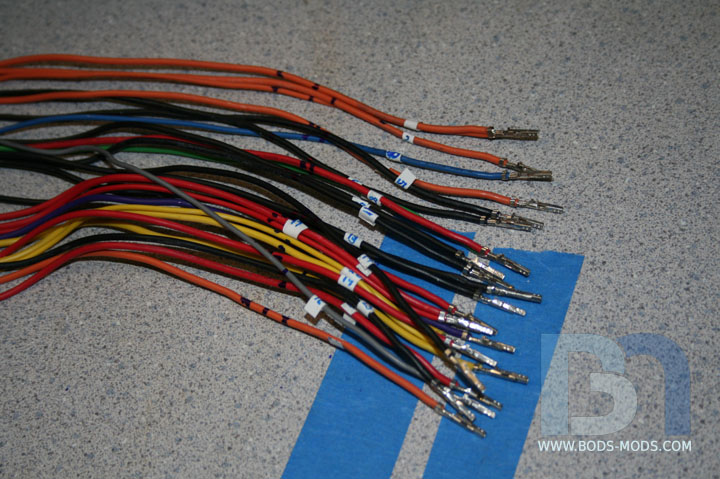
So after the wires were through the floor, I could put the other connector end on. Then I could measure and shorten the
cables from the psu.
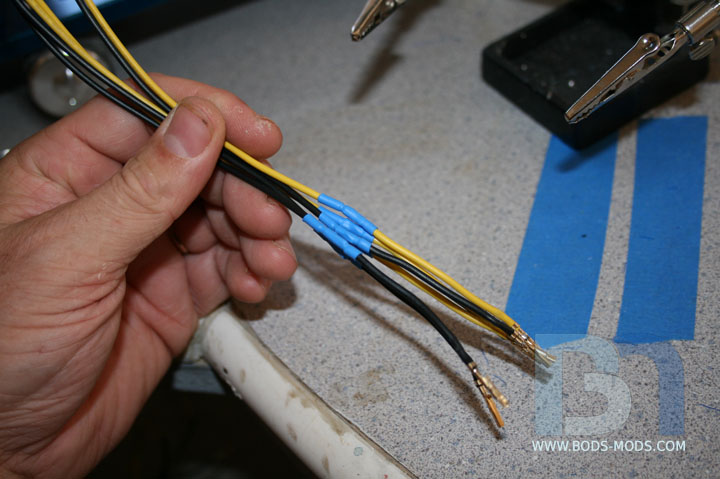
Instead of cutting and putting new pins on each wire, I opted to just cut out a section of wire out of the middle and solder
them back together. I put the connector back on after sleeving it. I did the 8-pin cable as well.
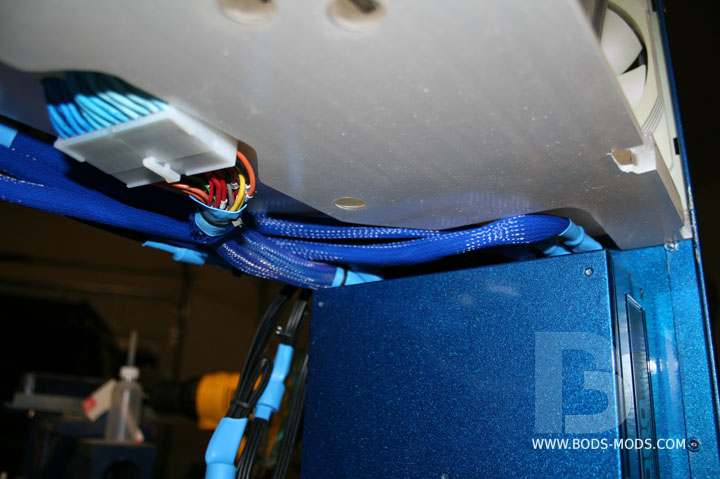
Here's a shot from the underside to show the connection. You can also see the recess in the floor to accommodate all the cabling.
The cable recess from a slightly different angle. You can see the PCI-e cables as well.
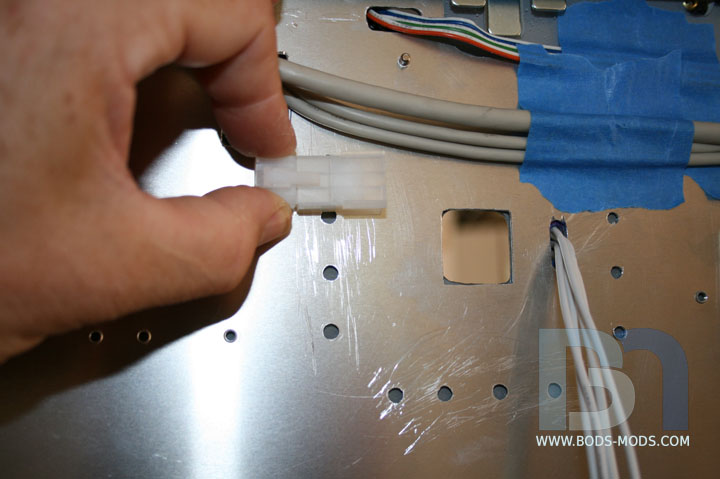
Speaking of PCI-e cables, here's a shot of the future location of the connection point between the psu and
extension cables. That large square cutout is where the extension cables will be coming through from the cards. I
drilled holes in the motherboard tray for the zip ties that will hold each connector in place.
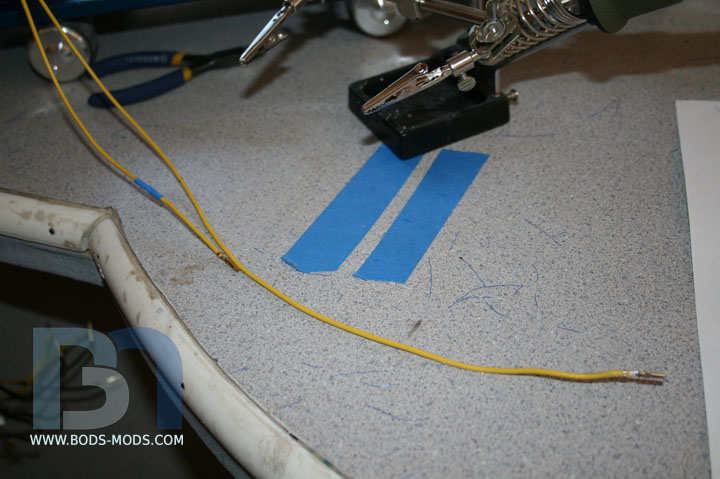
Now I can shorten each PCI-e cable to reach the connection point.
Here's a before-and-after shot to show the difference in length. Again, I cut a section out of the middle and soldered
them back together. One down, 35 to go!
One group of six complete.
Got the two hard-wired PCI-e cables from the psu done. The other 4 are modular.
I temporarily folded the modular cables over to the correct length and tried a test fit. Well it turns out I won't need to
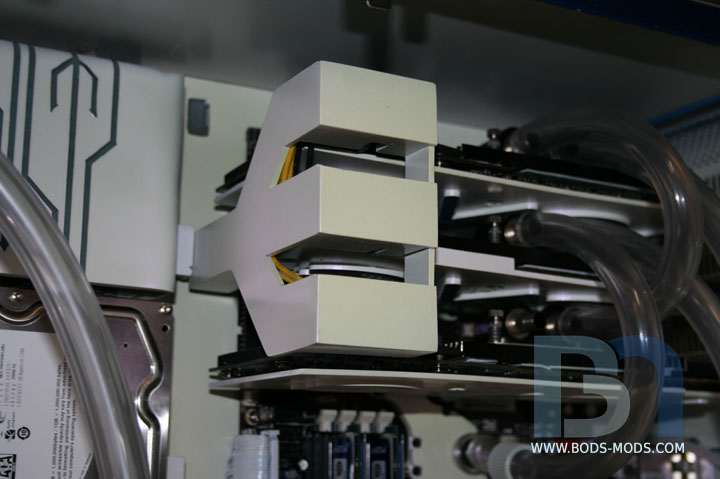
shorten them, I'll need to lengthen them. After placing the rad/fan/mesh box assembly in last night, there is
no more room on top, so I'll have to route them down under the mesh box and back up.
I finally got all the extension cables cut to length, pinned, soldered, and connected last night.
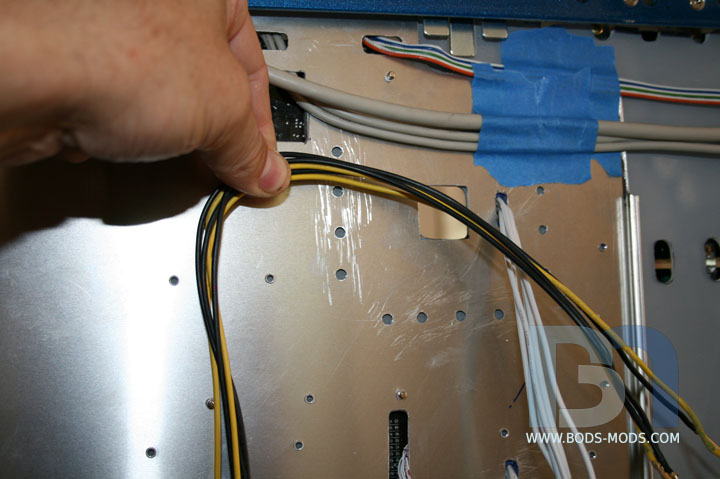
Here's a shot with the cover on in front. Looks like I'll need to do something about those yellow wires that are still visible.
A couple well-placed zip ties should take care of those unruly wires!
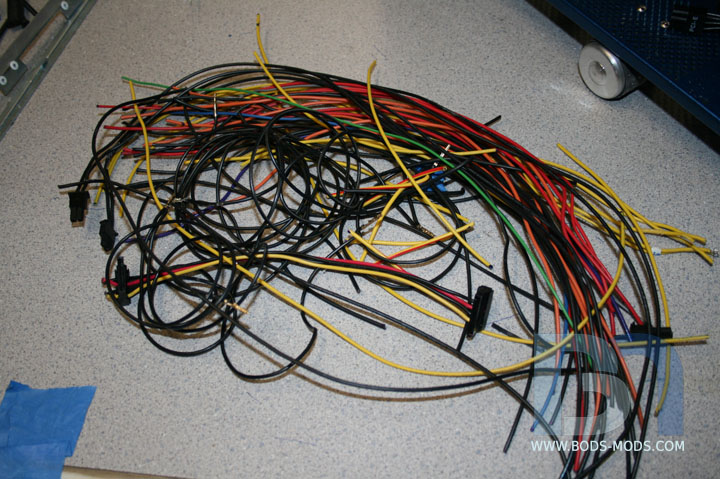
As a parting shot, I thought it appropriate to show just how much of the cabling I removed.
"I've lost the fat man and I'm runnin' lean!" -Kramer
amazing :bowdown:
What he said.:alien:Quote:
Originally Posted by SXRguyinMA
Mate that seriously looks cool, you definitely removed a lot of cable mess. I really like the recess in the floor for the cables, great idea. Shame that the 24pin power connector looks a bit "off", I do like the idea you tried of passing the wires through tubing, it would looks awesome with compression fittings and all lol. Perhaps you could make something similar to the GPU power connector covers? But then I guess you will have to do the same for the 8pin connector and that just wouldn't look right.
Awesome job so far! Intense coming in and reading through 31pages, but still a great read. I can't wait to try a mod of my own soon.
bod.. ur making us look bad.. just stop k mate :(
jokes..!!1 thats wicked keep going
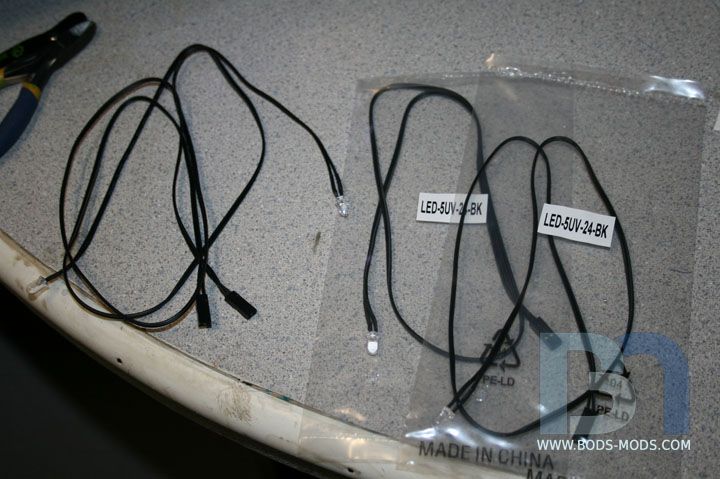
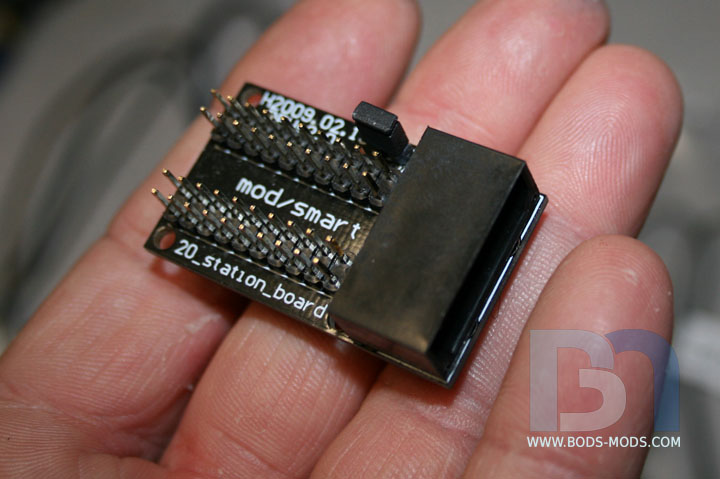
Moving on to the leds. Moddersmart sent me some of these killer led pigtails. They're just ready-made led strings that plug into...
... this 20-station board. Has a standard 4-pin molex hookup and has the resistors incorporated into the pcb. No fuss, no muss! :D
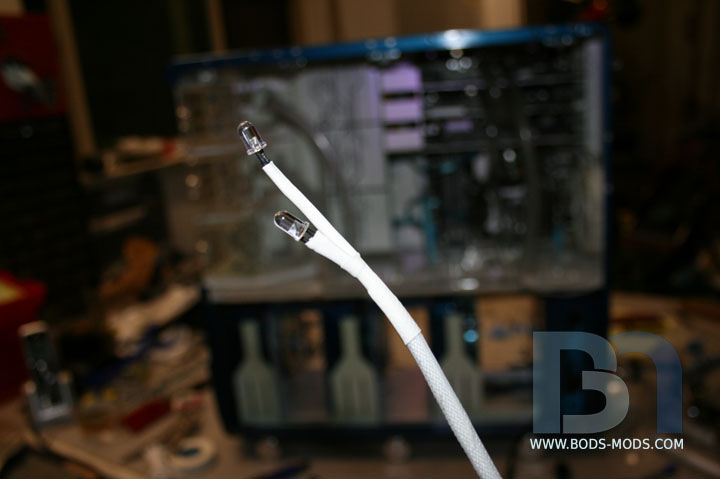
I strung two UV leds together and sleeved them,
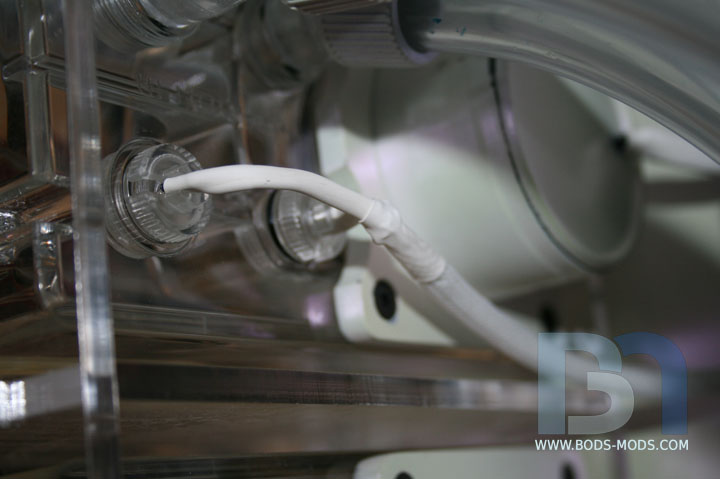
So they would fit into the led holders that came with the T3 res.
Two more sets like this one, then I can move on to some accent lighting.
8)
thats a pretty sweet setup with the leds!
:stupid: nice setup
That's a really cool LED setup, you got a link mate, I am very interested in getting some :D.
I would provide a link, but they are not available yet, due to no stock. As soon as they get more in and make them available through their site, I'll post a link for ya. :)Quote:
Originally Posted by The boy 4rm oz
Cheers mate, I really wanna get some :D.
looks wicked mate
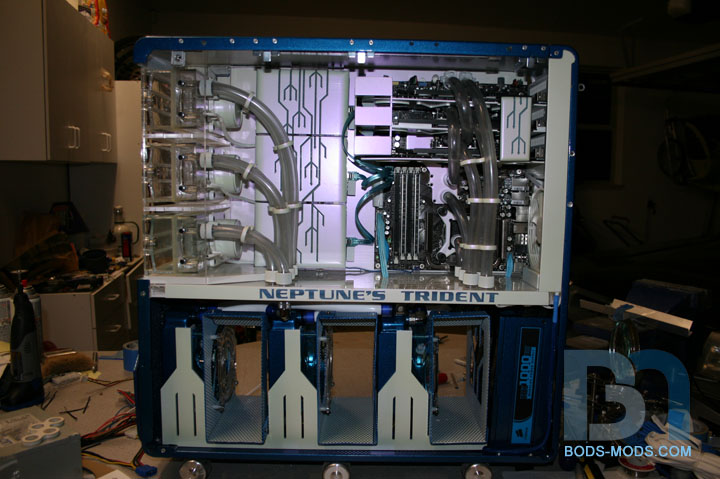
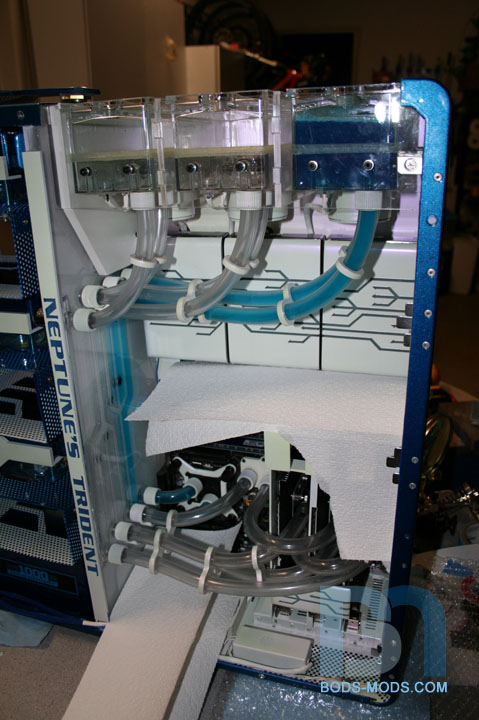
Almost done! :D On the home stretch now. Got the last couple of items painted, and the loops filled. woot!
Before I could finalize the tubing, I had to paint the tubing guides. So I did that while I was doing some last minute cabling.
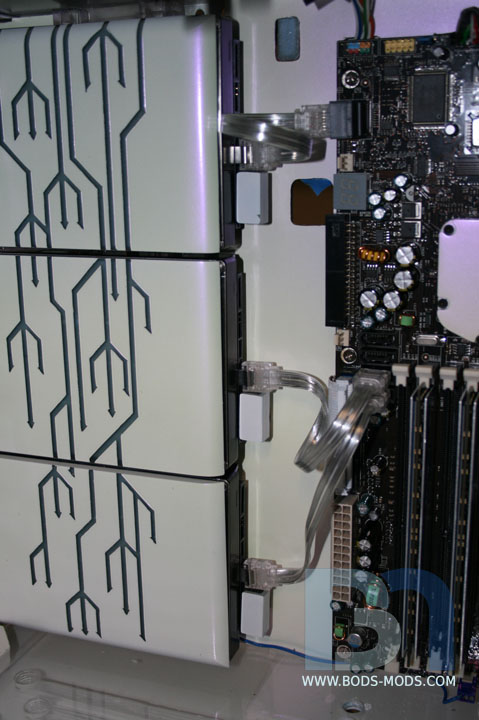
Here's a wide shot of everything so far with the guides on. I swapped out those silver sata cables for some UV blue ones.
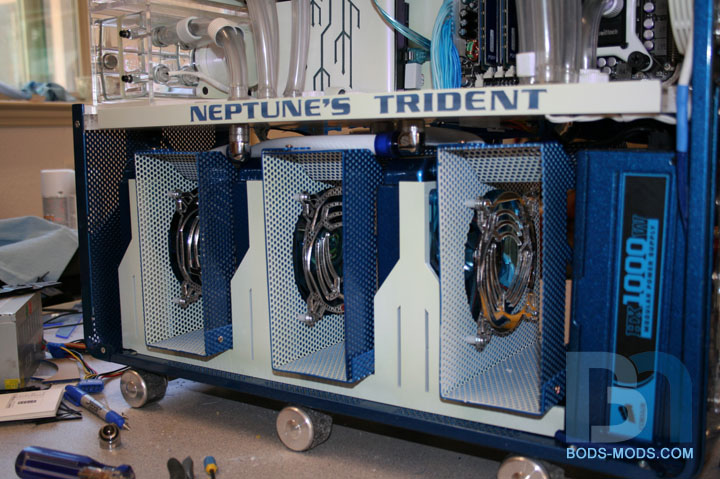
Here's a close up shot of the lower rad compartment. Don't even ask me how I managed to hook it all up lol!
(no, really. I don't remember. :P)
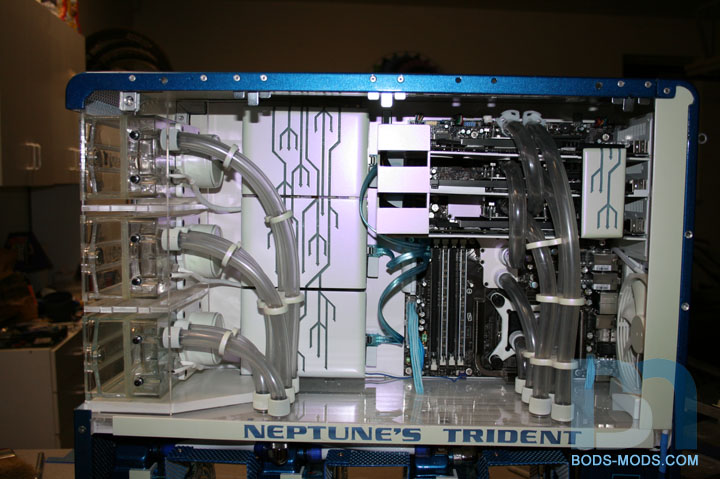
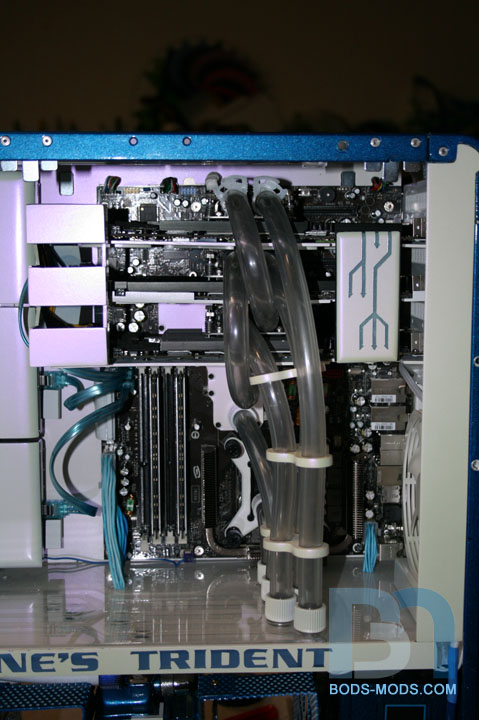
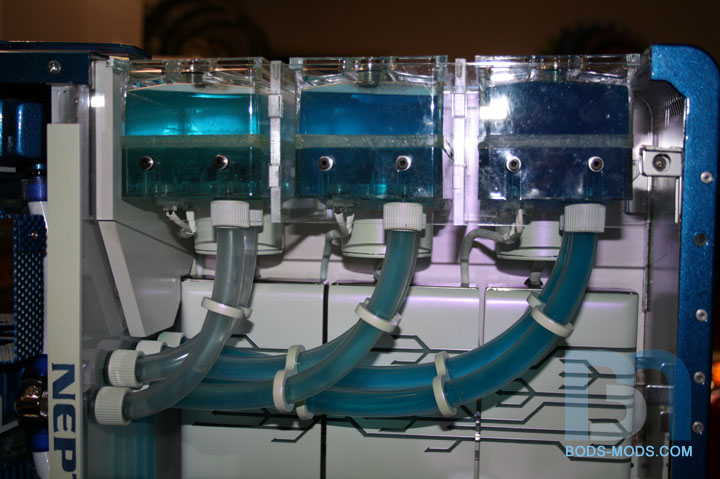
Upper main compartment with guides:
Close up shot of the T3 side:
Close up shot of the component side:
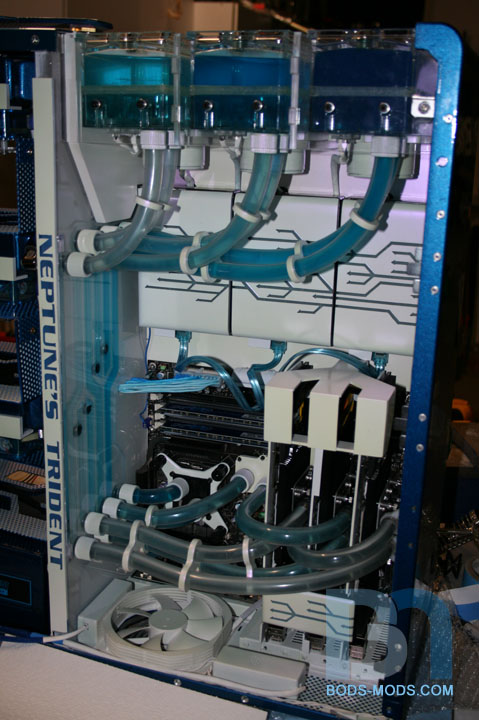
Finally I get to fill the system! I carefully turned the case onto its back and started filling. First the CPU loop:
Next is the NB/SB & middle video card loop:
Lastly, the loop for the two remaining video cards:
All three T3's filled and ready to go! I used a spare psu to cycle the pumps, bleed all the air out, and check for leaks under pressure.
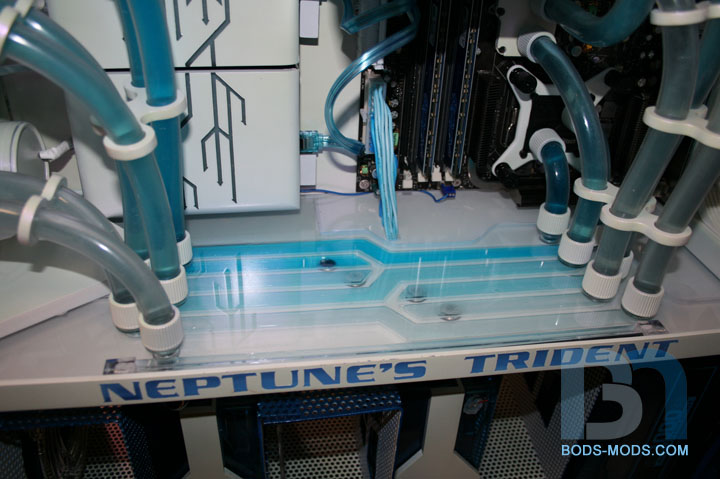
Money shot of the floor with all three shades of coolant flowing through it:
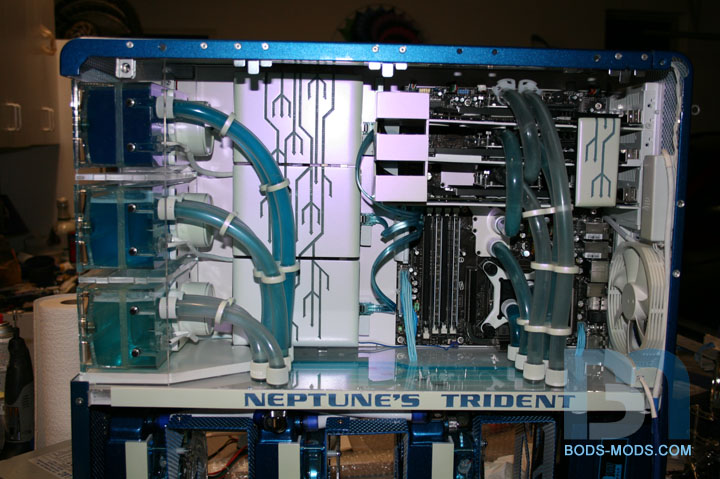
And finally an overall shot:
I did have a few leaks I needed to address, but nothing catastrophic (which is actually amazing considering how many
fittings I'm using lol). I just have a few final items to address, then I can call this thing D-O-N-E.
8)
Whoooooo..... you got me speechless.
Still I would like to know your temps on the dual gfx loop.
Thumps up plus rep deff.......
:stupid: looks incredible!! :bowdown:
Just absolutely unreal. I really don't know what to say, it's almost TOO amazing, keep up the god-like work
Absolutely speechless! Every time I think you've done the impossible, you keep one up yourself. Amazing!
Read through this whole thread the other day and just wanted to say that the floor is absolutely spectacular. I really think it is the centerpiece of this whole case, I've never seen anything like it. It's even more stunning now that you have it filled with coolant.
Great work!