crimson used something similar in the doom3 build but he had a neon, but i'll keep my coments 'till you give us the clues, i may not see what you want us to see


crimson used something similar in the doom3 build but he had a neon, but i'll keep my coments 'till you give us the clues, i may not see what you want us to see
LOUD AND PROUD !

close, now that I go back through his worklog.
but the difference will be shown soon!
pics were with protective film and in the dark on purpose.
i noticed throughout your work, which is excellent btw was thinking of doing a mini case as my follow up project your is looking awesome so far, that there is a alot of wiring an electricital things going can you poin tme to any books or sites where i can find out how to do those kinds of things i be very much interested in learning hwo to do that kind of thing for future projects. thx keep up the good work
also i remeber you mentioning a program called solid works i looked it up but what exactly doe sit do?


Wow! lookin' great!
Wait, why isn't this in the "Featured Worklogs" area?
My Reviews
Logitech G25 // Razer Barracuda AC-1 // Gateway FHD2400 // Logitech G9 & ID Grip // Xbox 360 HD-DVD
Scythe KAMA-Meter // Sceptre X20WC
uhh, don't know, but I still appreciate all the feedback.
on electrical stuff for Lanthrum:
I just read guides, use LED calculators, and started trimming my own wires about 4 years ago with my Gluttony case of the Seven Sins. That just before the modular PSUs came out, I made my own.
Soldering just takes some practice, and I still need some more.
solidworks is a CAD program that does 3D modeling, but it costs $$...so I use Sketchup and import files from the Sketchup Components Collection (google it...jazzle.co.uk or something).
I do lots of experiments before hand with paint, colors, scraps of plastic, etc. to see how it will look or glow. But somethings like cutting the Qmicra case up, you just have to start with a great deal of planning and caution.
holy nice! hehe. nice work bro! keep it up!
Proud to be a Pinoy Modder
i agrea this should be a featured worklogs
LOUD AND PROUD !
looking great! the concept is cool, the implementation is cool.. and the modding is cool
i have some Q:
1.why didn't u just detach the connector, cut the cable and reatach it? instead of cutting in the middle of the wire..
2.can you work faster
hmm...
in some places i can se horizontal marks, could be there from sanding?!.. and in some, the line is very continuous.. steady hand with a dremel?.. all i can say is this is a very nice etch.. and the method is cool
the marks are the film still on the face of the workpiece, the etch is on the back.
Some connectors (like the ones on the X2 PSU) are hard to come by for matching the plugs. I have motherboard pin types (.1") and fan header types, and molex types, and 90 degree molex connectors, but the SATA connectors and 12V ATX are a little harder to come by.
That cable section won't be seen, I chose the middle of the cable specifically due to location on the interior. You would need a steerable fiber optic scope to see that when I finish.
When I finish the new etching, I will show the entire technique...the dremel just uses a very very tiny ball shaped tip. And lots of patience.
PS-3 weeks till completion (PDXLAN) so, yes, work will speed up! And thanks for the stars!
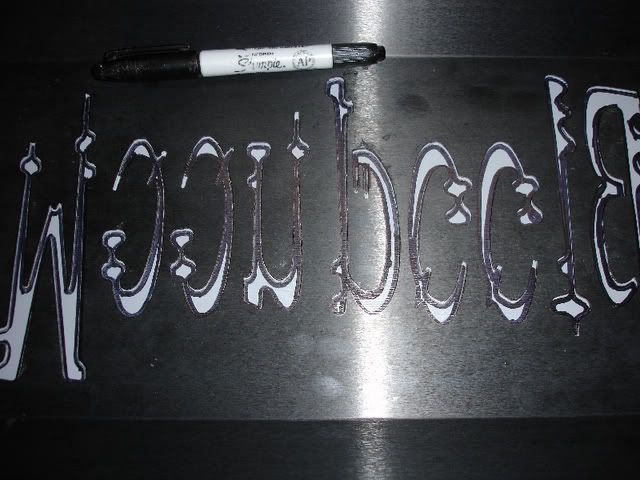
Here you go:
I didn't save the "WordArt" file that I squished and shaped the letters with originally, but I wanted to trace along my letters precisely.
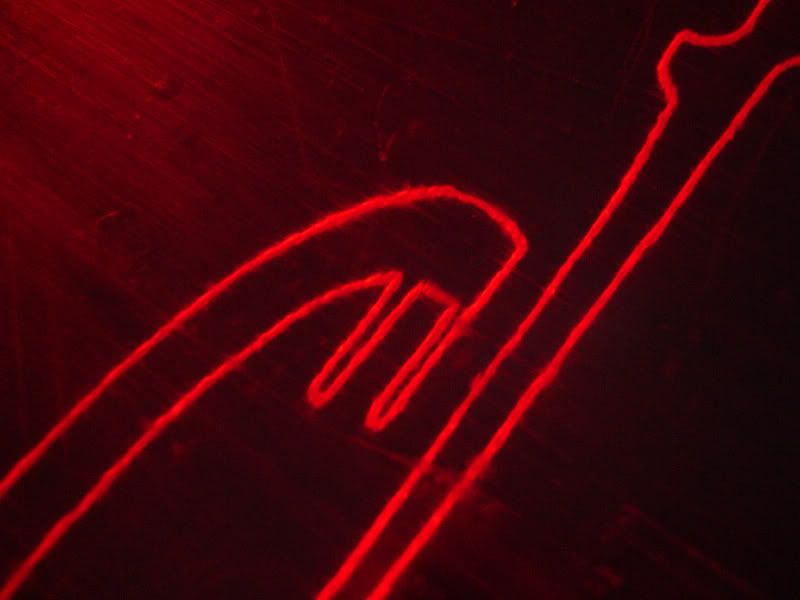
Onto Mirror plexi, in reverse, on the silver side. Etching the "outside" surface doesn't reflect the LEDs nearly as well, so I knew I needed to etch the inside.
This is all driven by the fact that I only have 3/8" depth under the letters to the top of the PSU and DVD drive to build my lightbox, hence the previous construction with the mirror 1/8" and the LEDs.
Why I didn't think of this before, I have no idea.
So...
I took my existing lettering, my fat sharpie, and turned it inside out:
That left me with:
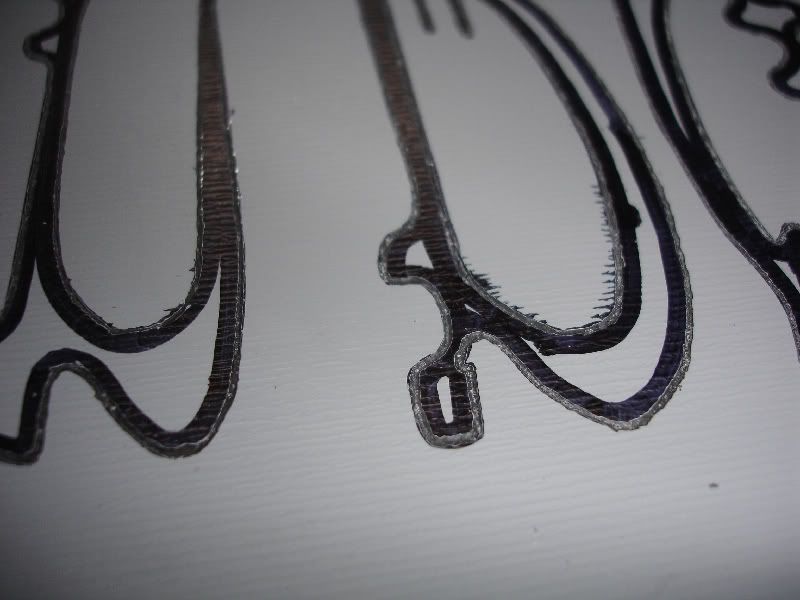
then I took my dremel with a very tiny tip:
And very carefully, traced the outside most edge of my sharpie path to outline the lettering:
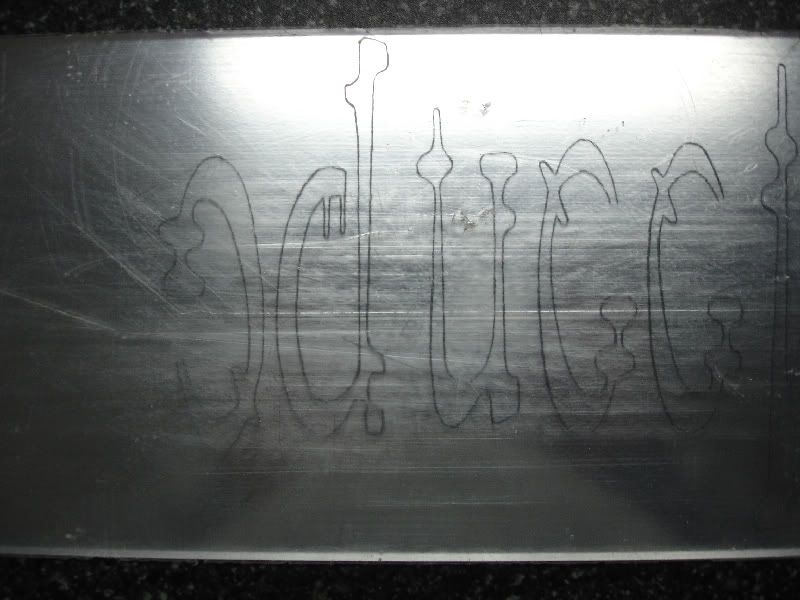
To get this:
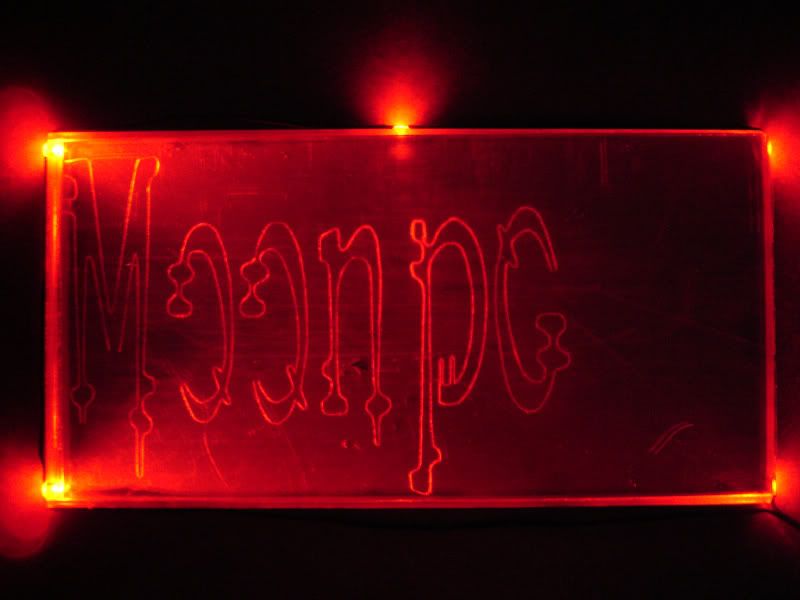
Still has the full protective film on the pretty side, I just etch the silver layer off the back side.
Mostly lit up by dropping into my previous lightbox:
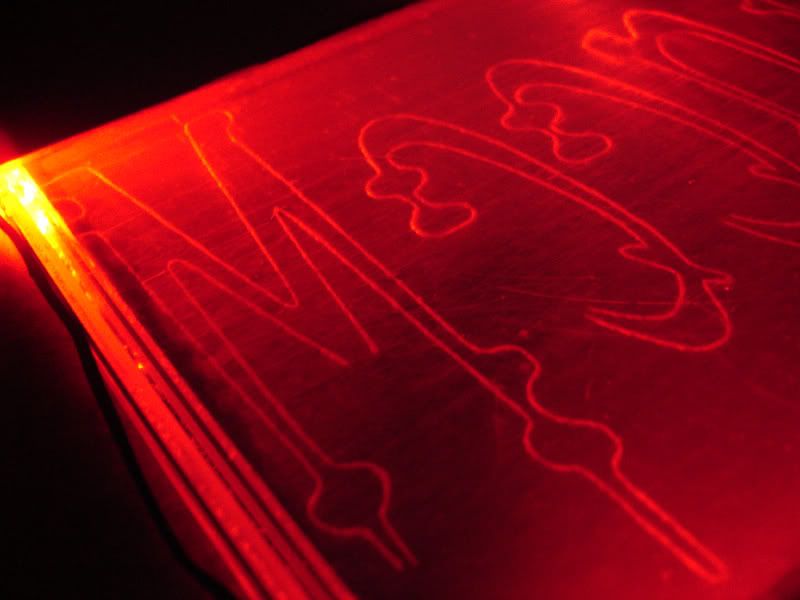
a little closer:
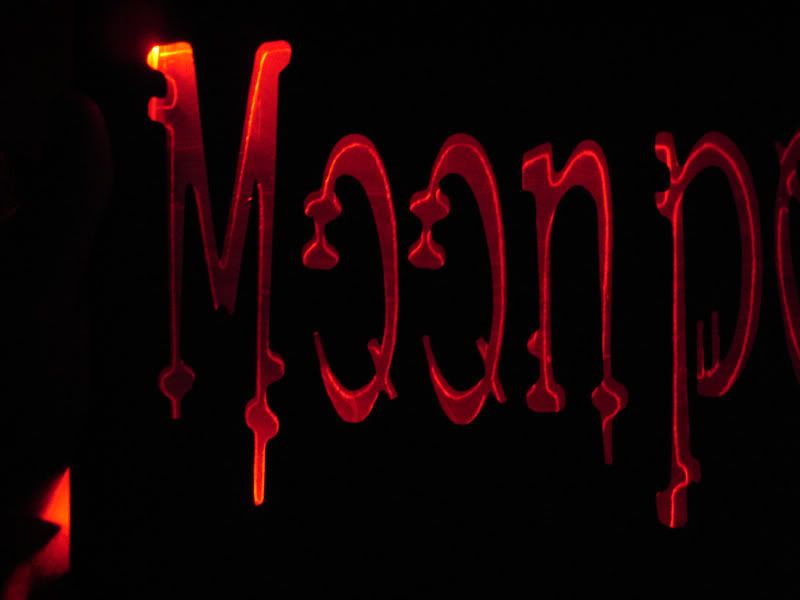
And placed behind my metal lettering to show the outline effect:
I will move the LEDs, cover the edges, and then stick it to the inside of the metal lettering for the final result.
I might fill in the etch to make the lettering more solid, or frost some of the front to make the lighting more even. Not sure yet.
BloodMoon: a Qmicra Watercooling mod
Asus P5LD2-VM--P4 950D (no Conroe mATX I could accept yet)
4X512 Corsair DDR2 675--XFX 7950GX2 (520 clocks)
2X250Gig Western Digital 16Meg Caviar SATA300s
DangerDen TDX--DangerDen 7950
BlackIce Pro II Radiator
DDC12v pump--3/8" fittings
Qmicra case by PCDesign Labs
Matrix Orbital MX6--Plextor 716-SA DVD/RW
nice.. the effect is really cool and sharp.. (hmm.. i don't have such a fine tip..i should make one!
 Posting Permissions


 Reply With Quote