Page 3 of 6 FirstFirst 123456 LastLast
Results 21 to 30 of 59

Thread: Project: Mod in a Week // "Fallout Cause SP"

  1. #21
    ATX Mental Case
    Join Date
    Oct 2011
    Location
    Malaga, Spain
    Posts
    175

    Default Re: Project: Mod in a Week // "Fallout Cause SP"

    5th Day - Wednesday 30-11-11 - Update 2

    Cold cathodes and wirless keyboard/mouse arrived which Iīll be using (and in the case of k+m, modifying it) on this project.

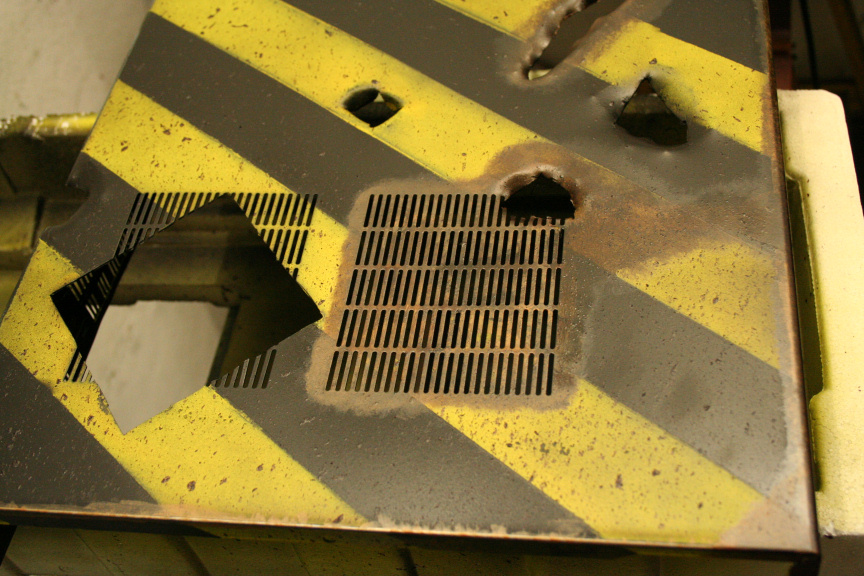
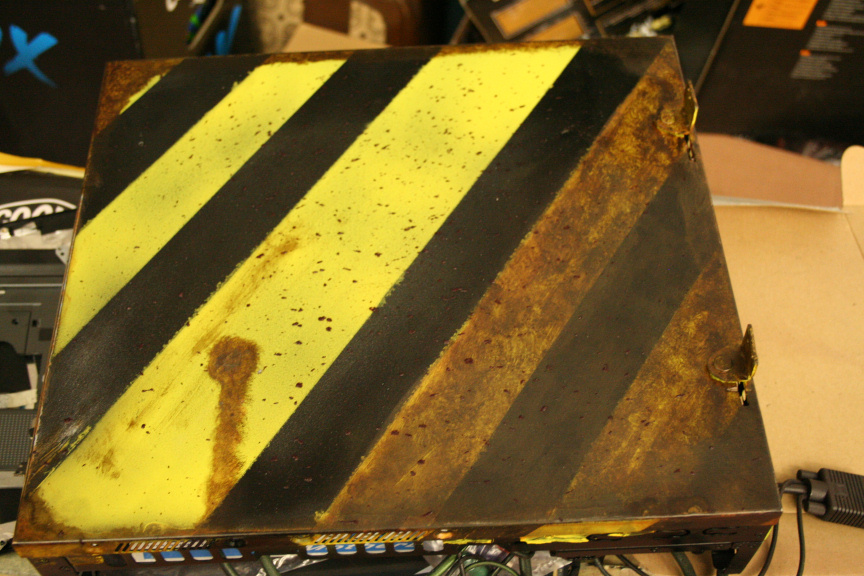
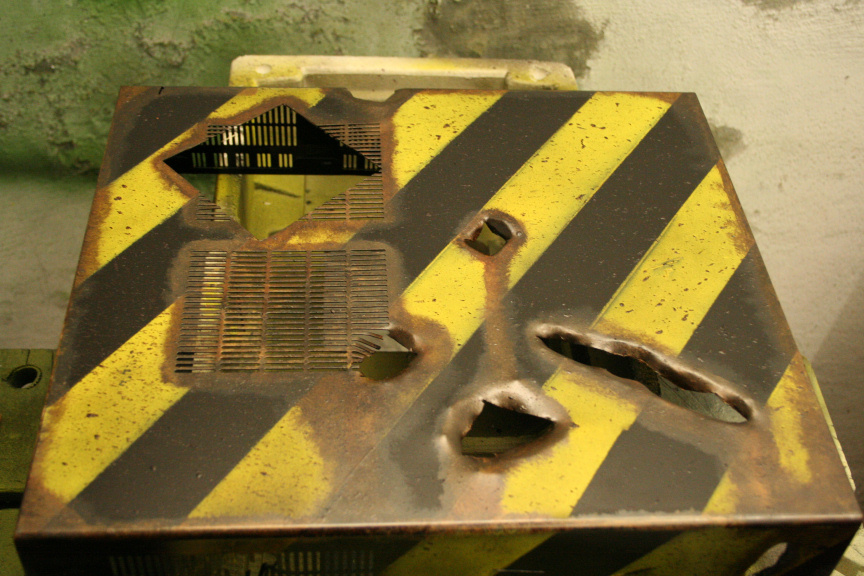
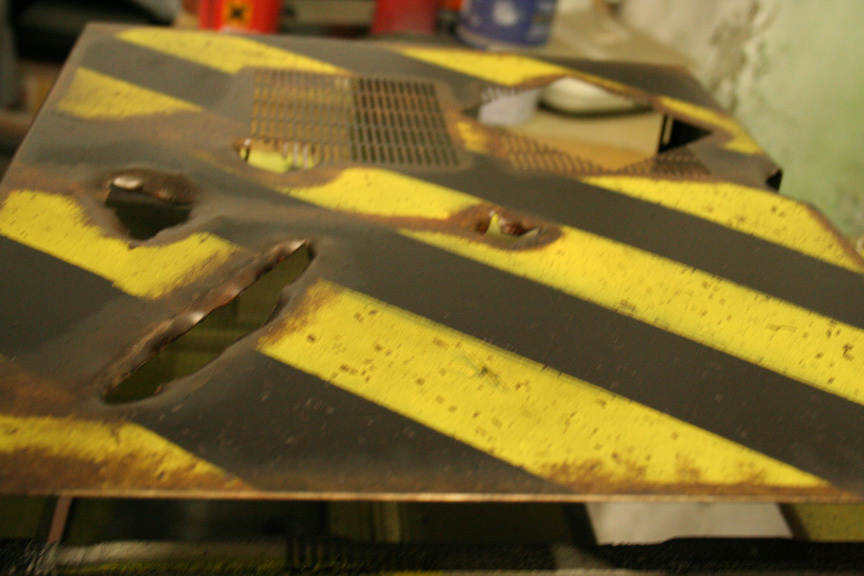
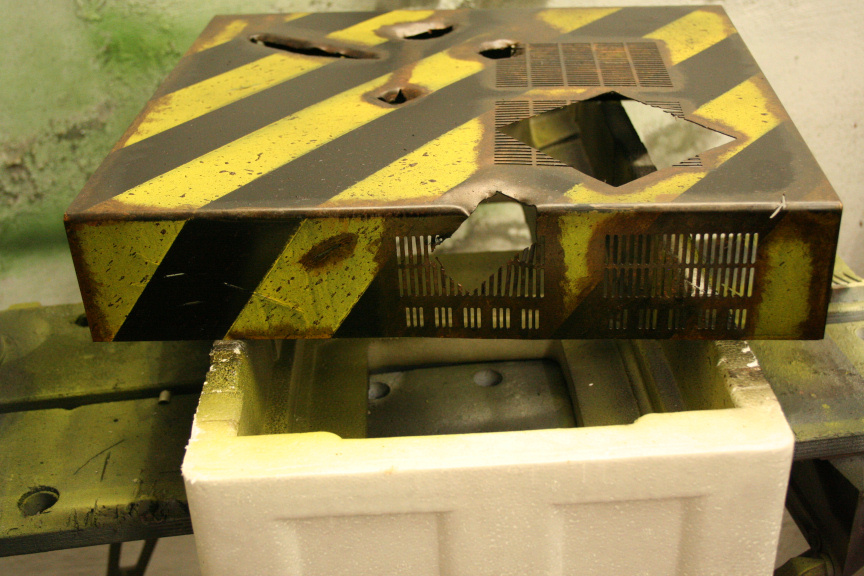
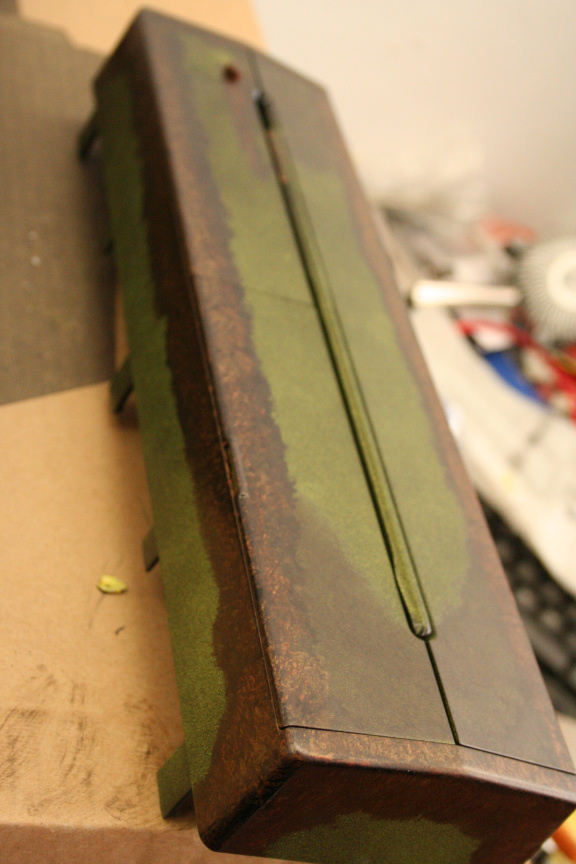
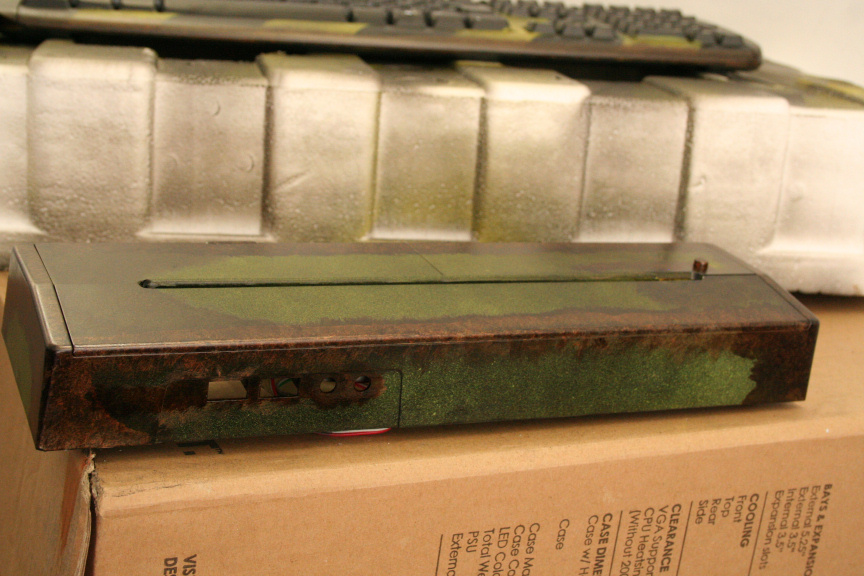
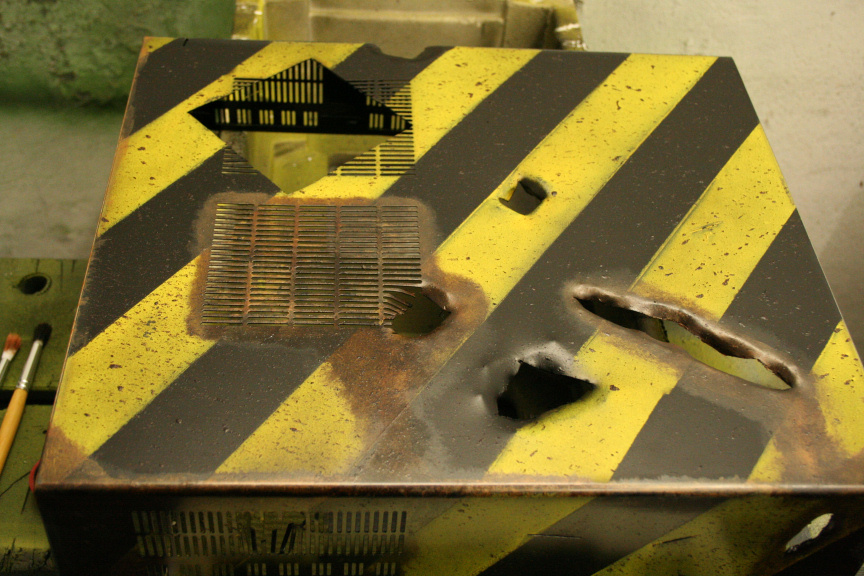
    I continued applying usage, abuse and rusting to the borders, openings and imperfections of the case:


    Now the back of the case, which you wont eventually see much off since the screen will be mounted on it but still:


    And finished with the front side:


    And the top:


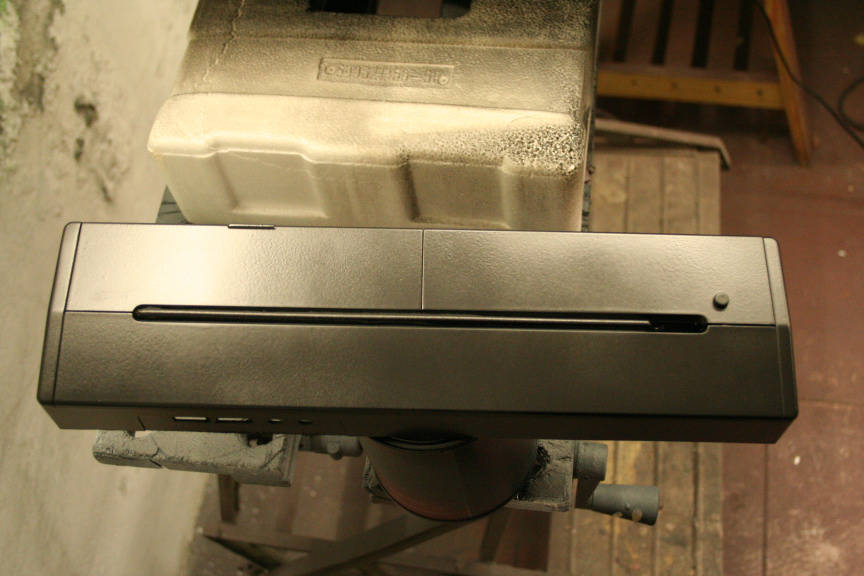
    Tomorrow I will deal with the front:


    Still havenīt decided what to do with it.

    Once that is out of the way I will assemble the case to have a complete look to it and see if I feel like changing something or if I have to do any touch ups and so on.

    I will also get started (and hopefully finish?) with the keyboard and mouse.

    The day after that, which is the final day I will assemble the whole thing and take some final picks.

    Thanks for reading!
  2. #22
    ATX Mental Case
    Join Date
    Oct 2011
    Location
    Malaga, Spain
    Posts
    175

    Default Re: Project: Mod in a Week // "Fallout Cause SP"

    6th Day - Thursday 01-12-11 - Update 1

    1st of the month, white rabbits!

    cough*cough*ahem... aniway!

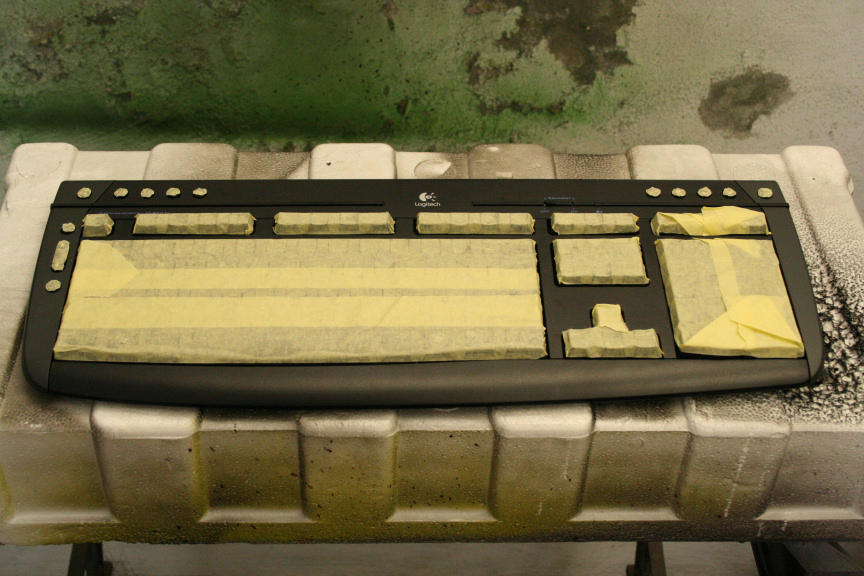
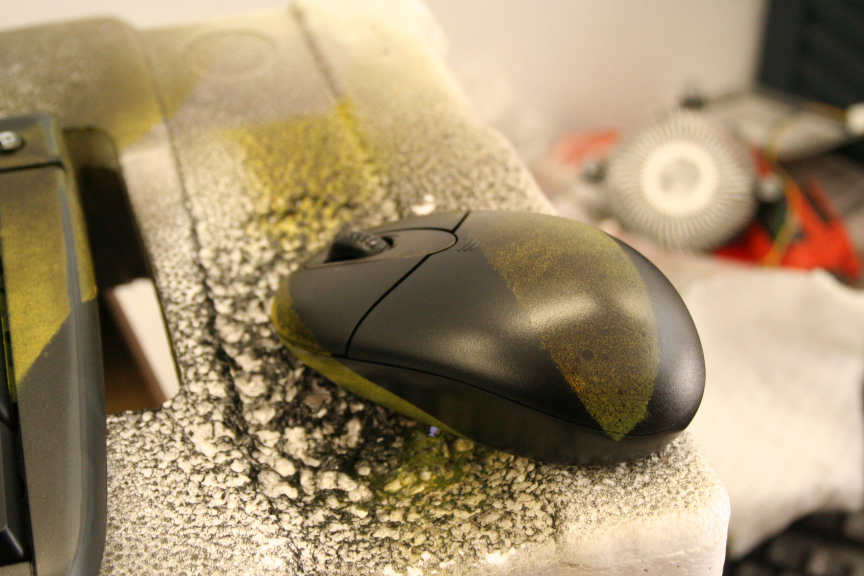
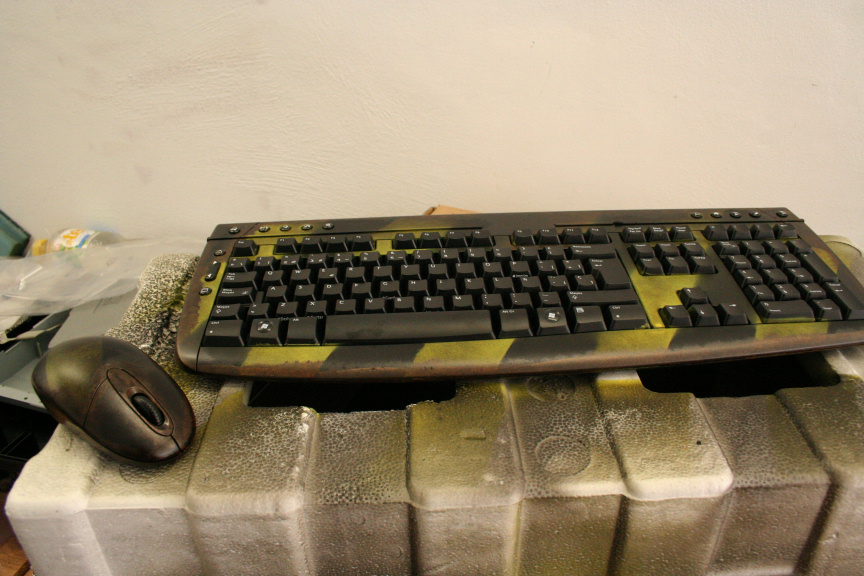
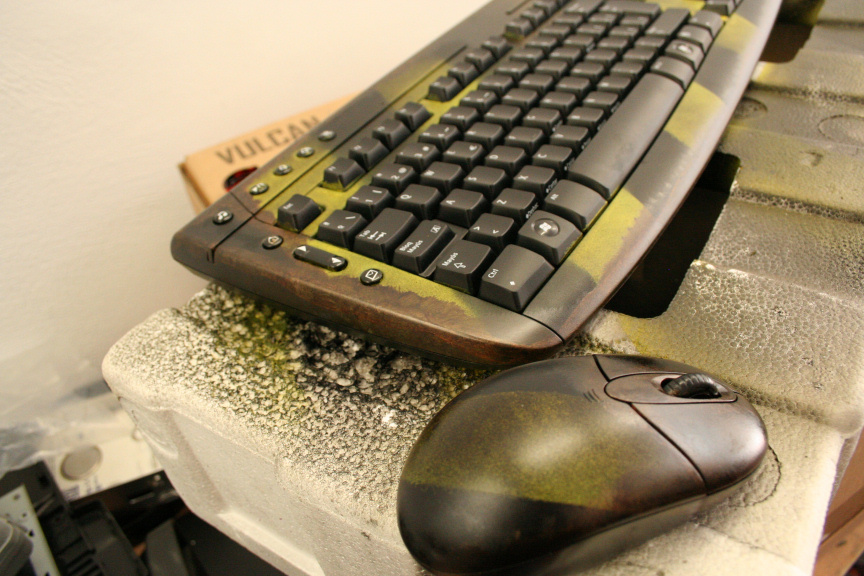
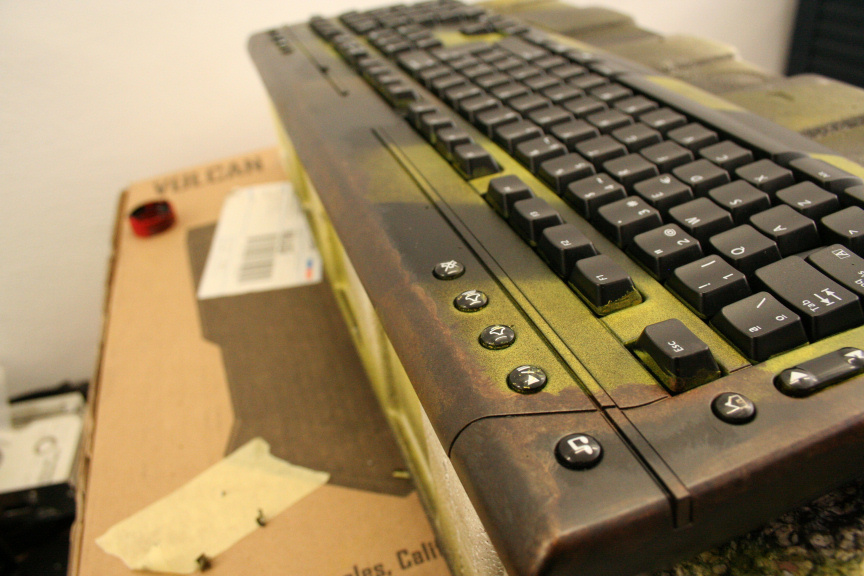
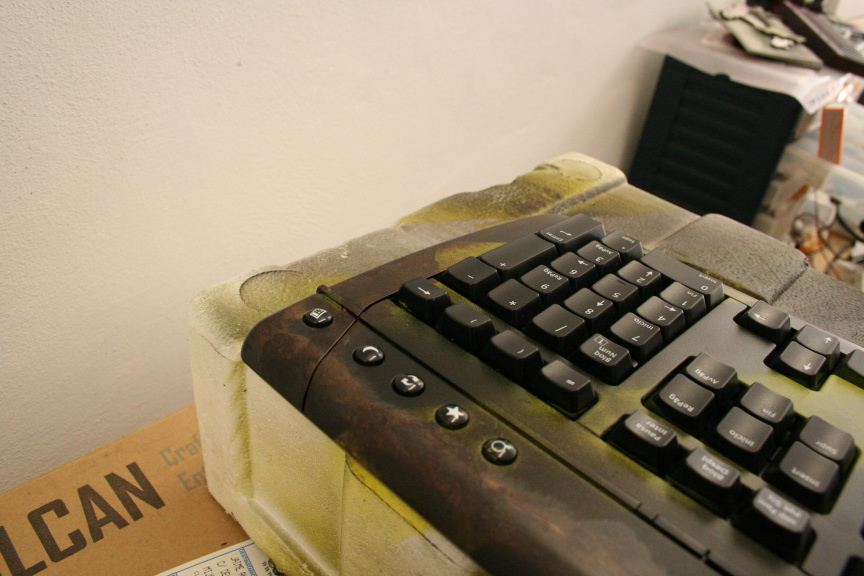
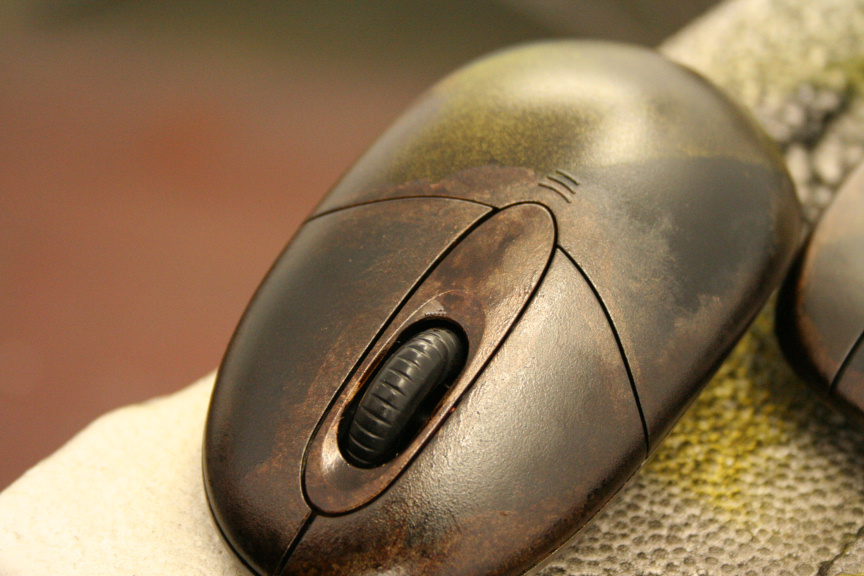
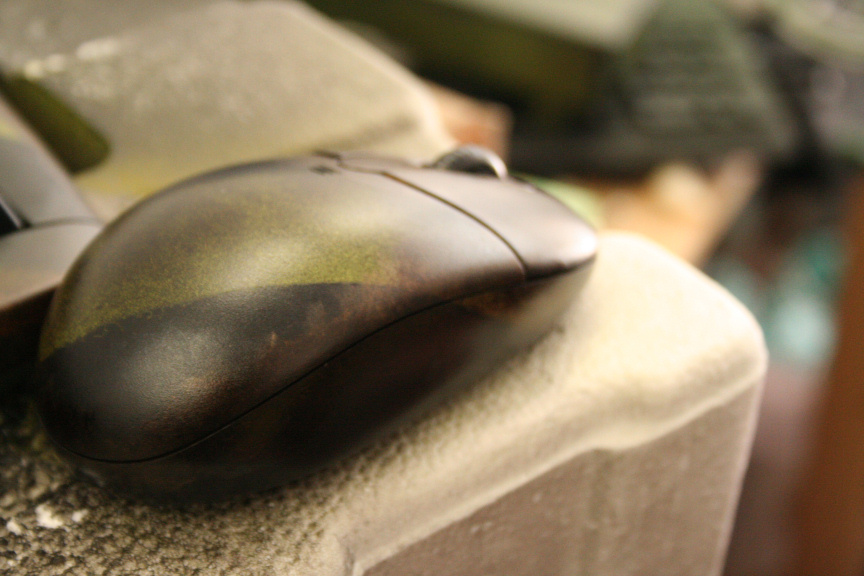
    As I mentioned yesterday, the wireless keyboard and mouse arrived. I couldīve gone for something fancier but to be honest I really like the standard logitech oem combo, itīs cheap, great quality, sturdy and lasts just about forever. So here we go, keyboard sanded down, masked and ready for painting:


    First layer done:


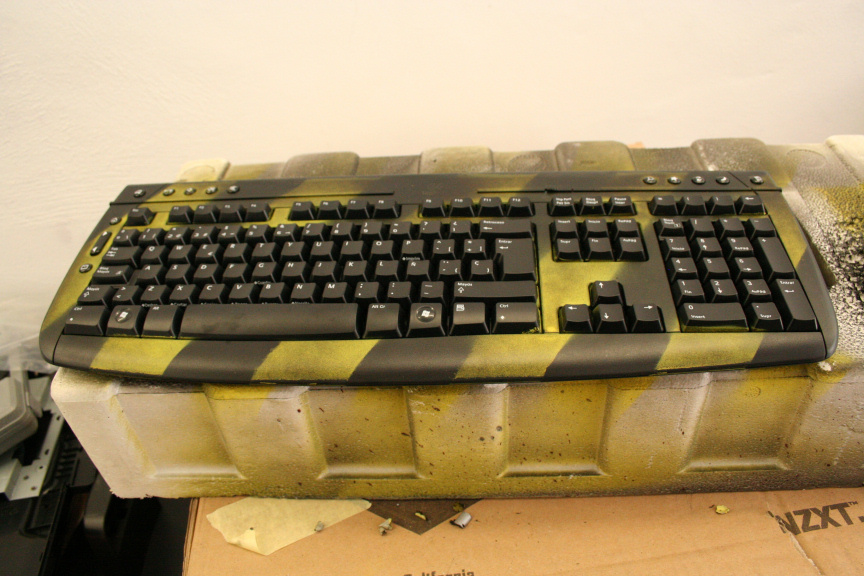
    And the same process as with the rest, darkening, particles, and... rust! Iīd never though Iīd say this, but, I really really really like the whole rusty look itīs turning out to have (originally I planned for only a bit).


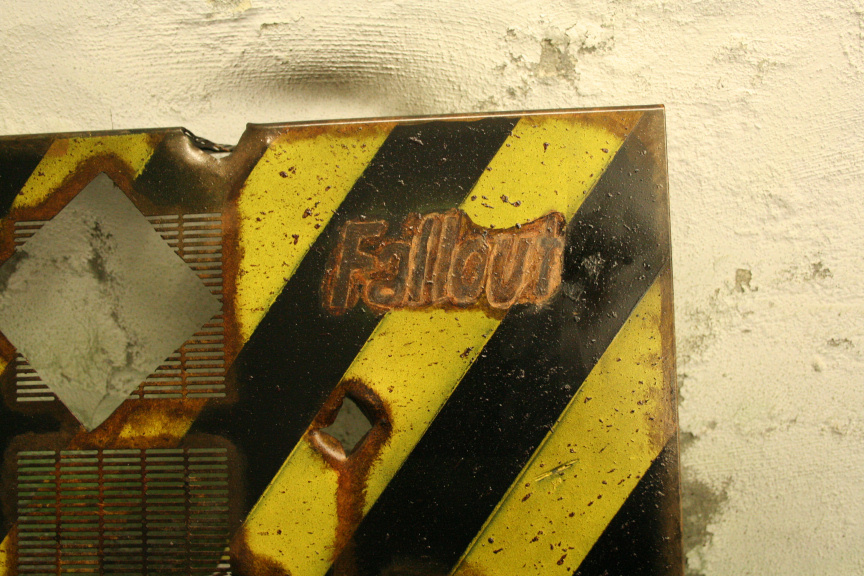
    And now Iīd like to thank everyone on every forum this is posted who helped me out with suggestions for the front of the case.

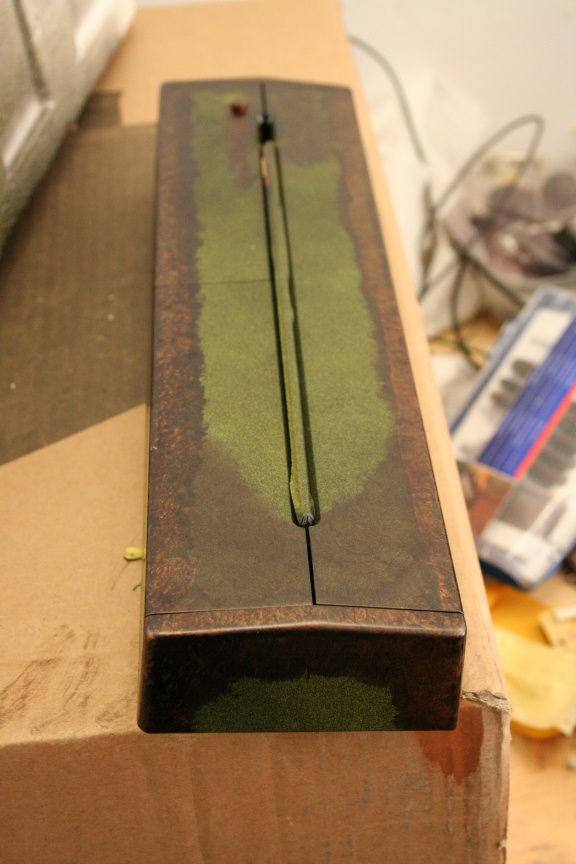
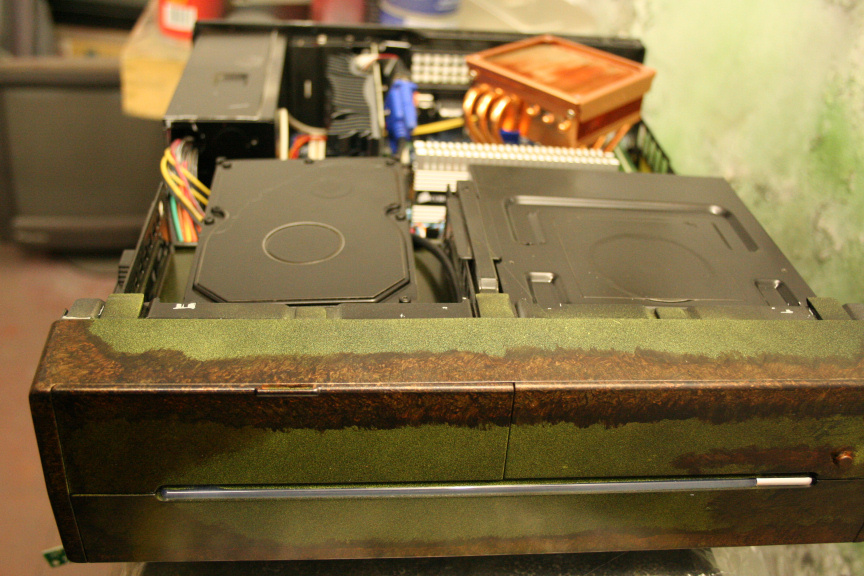
    I ended up mixing two suggestions, one was rusted out front and the other one was olive green light coat with a light coat of the yellow I used on the rest of the case on top, so here you have the result:


    More later today, thanks for reading!

  3. #23
    Its not cool till its watercooled. Fuganater's Avatar
    Join Date
    Oct 2007
    Location
    Kinshasa, DRC
    Posts
    2,843

    Default Re: Project: Mod in a Week // "Fallout Cause SP"

    Your keyboard looks amazing! I think my next mod is going to be somthing steampunk or post apoclyptic. I may have to hit you up for some advice.

  4. #24
    ATX Mental Case
    Join Date
    Oct 2011
    Location
    Malaga, Spain
    Posts
    175

    Default Re: Project: Mod in a Week // "Fallout Cause SP"

    thanks : ) and sure np just pm me if you need advice, if I know the answer I will try and help : )

  5. #25
    Over 75 Custom PC's in 20 years TheGreatSatan's Avatar
    Join Date
    Apr 2005
    Location
    Southern IL
    Posts
    6,633

    Default Re: Project: Mod in a Week // "Fallout Cause SP"

    I would've bondo'd around the vent surrounding the heatsink, but otherwise me likey
    WH1T3 0U7
    *******************************
    Modified Thermaltake View 37
    Intel 9900K, MSI Z390A, 128GB (32GB x4) GSkill Royal 3200MHz, RTX 3080 Vision, EVGA Nu Audio, 1TB Silicon Power SSD, EVGA 1300G2, ID cooling 360mm AiO, LG 3440 x 1440


  6. #26
    ATX Mental Case
    Join Date
    Oct 2011
    Location
    Malaga, Spain
    Posts
    175

    Default Re: Project: Mod in a Week // "Fallout Cause SP"

    what is bondo? cheers!

  7. #27
    ATX Mental Case
    Join Date
    Oct 2011
    Location
    Malaga, Spain
    Posts
    175

    Default Re: Project: Mod in a Week // "Fallout Cause SP"

    6th Day - Thursday 01-12-11 - Update 2

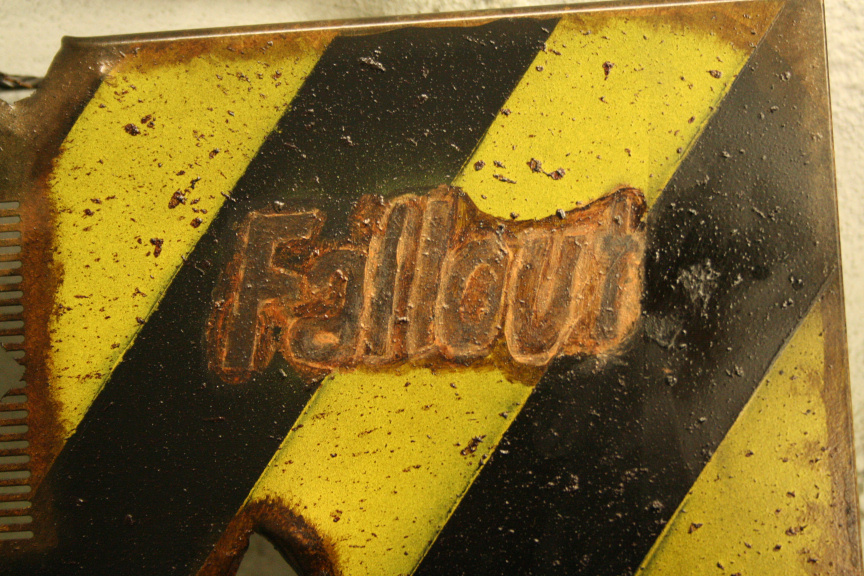
    This for me is quite simply, the cherry on top:


    Took me about 2 and half to 3 hours to get it just right, to get that look like itīs been stamped on the case rather than painted (in my oppinion aniway), hope you guys like it!

    Tomorrow starts the final day (ends mid-day saturday), and as of now, all the modifying and painting is finished so tomorrow I will be assembling it all togueter (ps: didnīt take pictures but the psu, dvd rw and hd have been painted black, itīs almost my signature thing to paint all possible components so... nothing fancy, just mainly so no ugly grey bits to see through the openings) and taking loads of pictures of the final look which will conclude succesfully the "Mod in a Week" challenge.

    Thanks for reading : )

  8. #28
    Why must hard drives fail together? TheMainMan's Avatar
    Join Date
    May 2008
    Location
    Canada
    Posts
    804

    Default Re: Project: Mod in a Week // "Fallout Cause SP"

    Quote Originally Posted by Luciel View Post
    what is bondo? cheers!
    It's car body filler. Bondo is a brand name in North America.


    Love the logo! Have you put the heatsink in since the panels have been painted? I feel like all that shiny copper might look out of place...
    TheMainMan

  9. #29
    ATX Mental Case
    Join Date
    Oct 2011
    Location
    Malaga, Spain
    Posts
    175

    Default Re: Project: Mod in a Week // "Fallout Cause SP"

    oh right fair enough, I did think of using epoxy which would give the effect you mean but didnt get round to going to the suplies shop and didnt seem that important so I passed on it.

    Thanks! and yes, yes I have and yes it does, will stain it when I mount it on so it doesnt look so out of place : )

  10. #30
    ATX Mental Case
    Join Date
    Oct 2011
    Location
    Malaga, Spain
    Posts
    175

    Default Re: Project: Mod in a Week // "Fallout Cause SP"

    7th Day - Friday 02-12-11

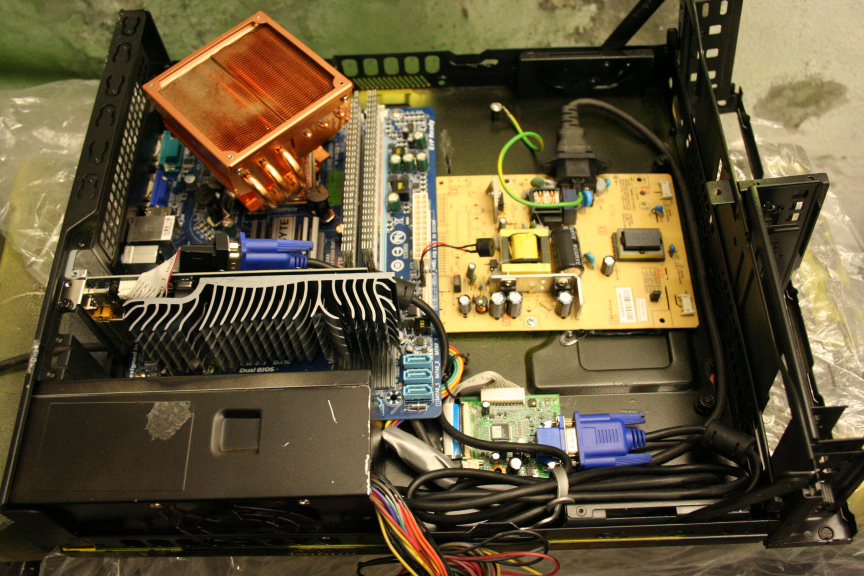
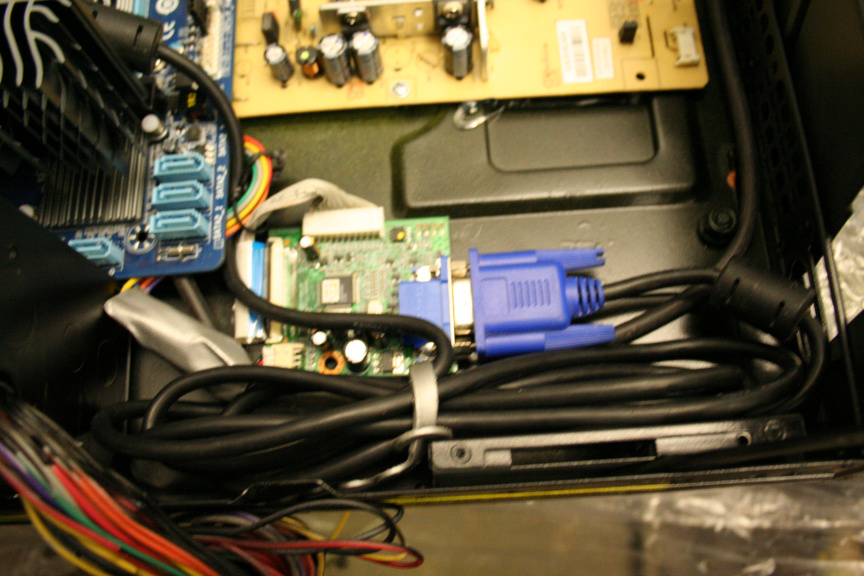
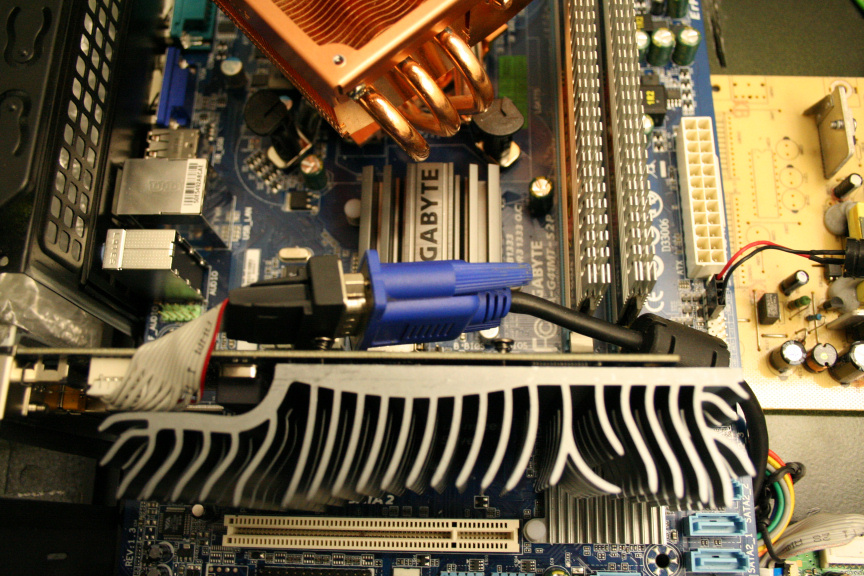
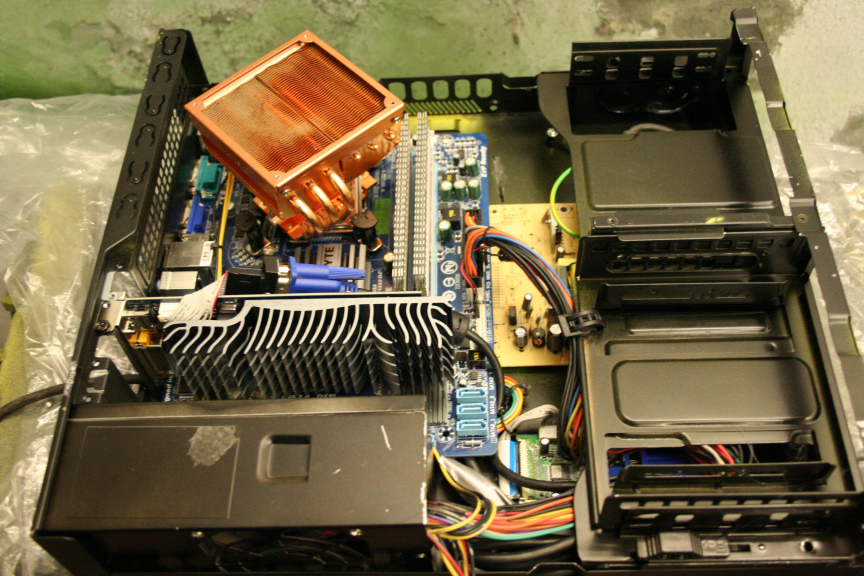
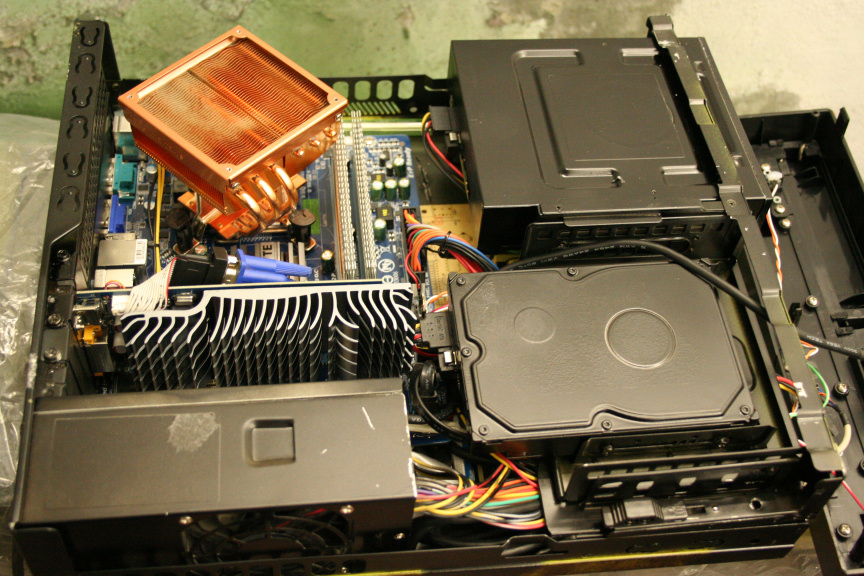
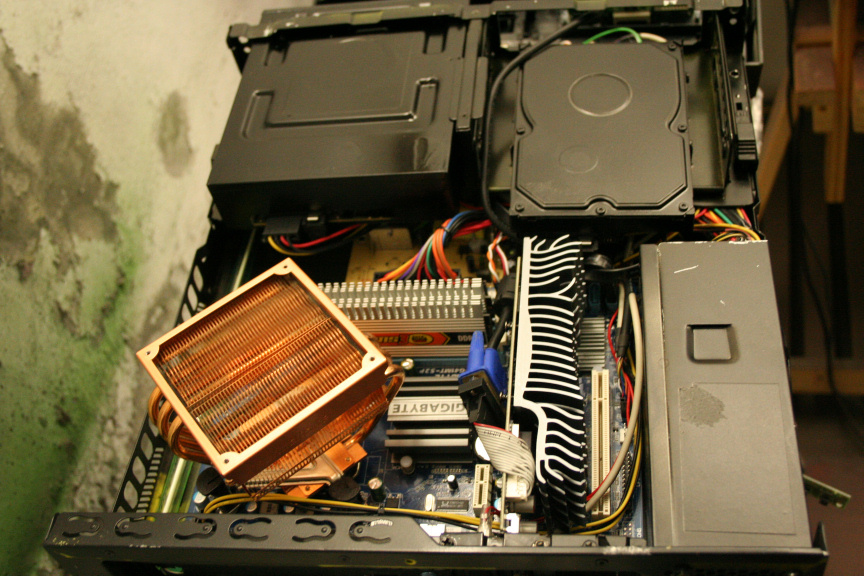
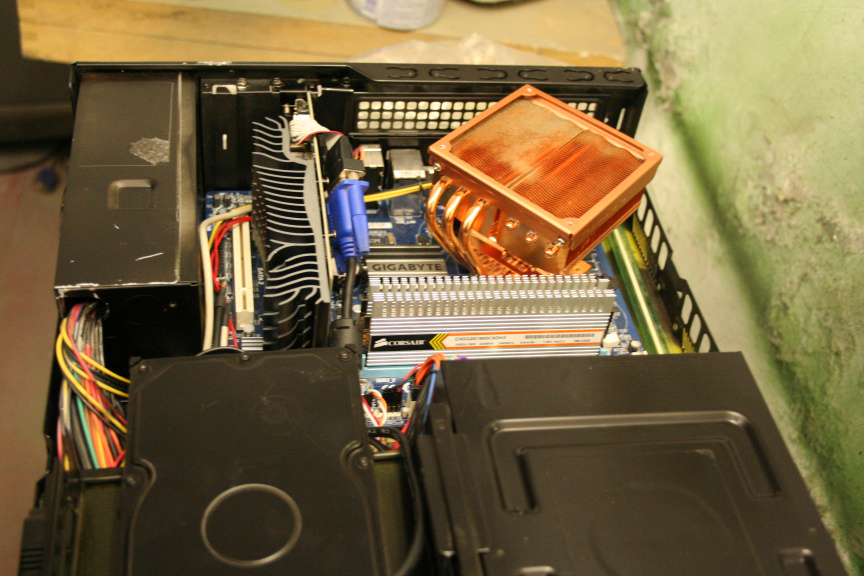
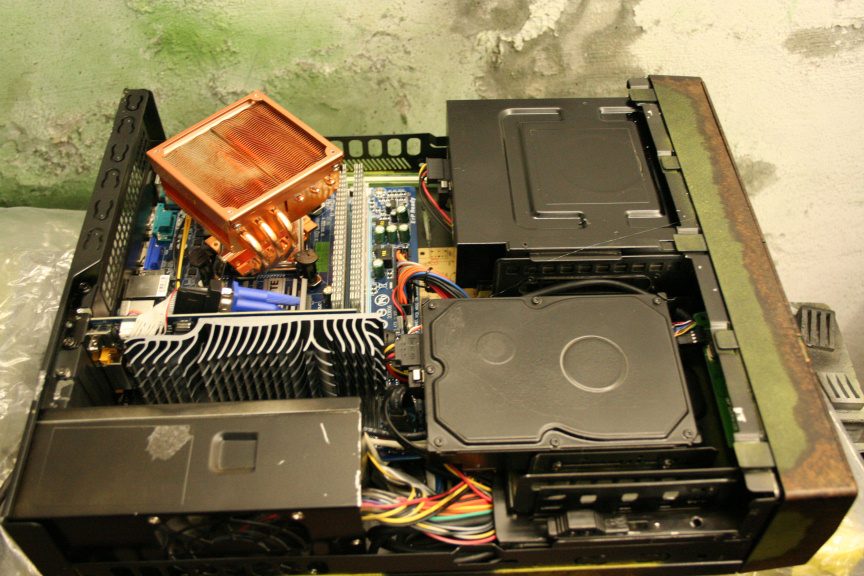
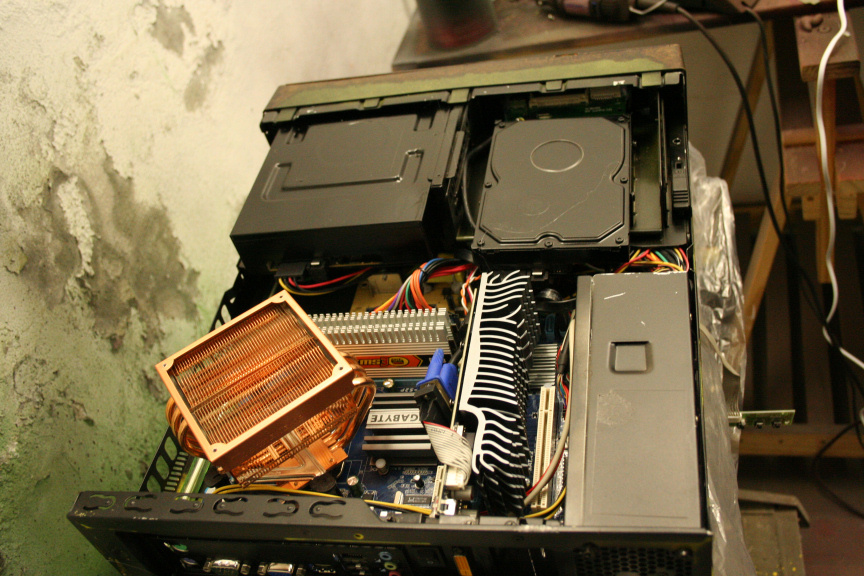
    Assembly took longer than I thought it would but almost there, the following pictures are the process, because I had to remove the HDD cage from bellow to install the monitorīs hardware and hide cables I had to dismantle the memory card reader to take out the pcb and cut the frontal plastic part that goes with it. Once done and used silicone glue to put them togueter and again to attach it to the case (as you will see in one of the pictures), this allowed me to install the hdd where that would normally go (i.e. enough space to do so now). The cathodes are barely visible but are at the top and on the right side. Also due to popular demand, I replaced the cpu cooler with another exactly the same one, modified the 775 adaptor so I could shift it half a centimetre to right so Iīd be able to rotate the cooler to a possition where the heatpipes are pointing up and down as opposed to the side so it doesnīt prevent me from installing both modules of ram:


    Now I just have to mount the screen, make sure it works and I can take some sweet final pictures, all done by tomorrow at around 6-7pm gmt+1 in order to meet the one week challenge.

    Thanks for reading!

Posting Permissions

  • You may not post new threads
  • You may not post replies
  • You may not post attachments
  • You may not edit your posts
  •