Page 17 of 30 FirstFirst ... 7121314151617181920212227 ... LastLast
Results 161 to 170 of 293

Thread: Monitor MOD

  1. #161
    iShot the Sheriff jdbnsn's Avatar
    Join Date
    Jan 2006
    Location
    Normal
    Posts
    8,241

    Default Re: Monitor MOD

    It's a novel idea, but I don't know if it fits your theme all too well. I think if you get too much going on in the monitor scheme it may look overdone, what you have so far looks pretty damn cool to me, but that's just my opinion of course as it's your project and you doing a fantastic job so far.
    "At the midpoint on the journey of life, I found myself in a dark forest, for the clear path was lost..." -Dante Alighieri

  2. #162
    Go ahead, impress me Spacehonkey's Avatar
    Join Date
    Mar 2007
    Location
    SoCal
    Posts
    453

    Default Re: Monitor MOD

    Quote Originally Posted by jdbnsn View Post
    It's a novel idea, but I don't know if it fits your theme all too well. I think if you get too much going on in the monitor scheme it may look overdone, what you have so far looks pretty damn cool to me, but that's just my opinion of course as it's your project and you doing a fantastic job so far.
    I totally agree with you. I'm going to stick with my orginal plan and use the acrylic panel with LEDs but I was thinking about making another panel using the 2 way mirror for comparsion after I've completed the mod.
    *****COMMON SENSE AIN'T COMMON*****
    *********************************************

  3. #163
    Go ahead, impress me Spacehonkey's Avatar
    Join Date
    Mar 2007
    Location
    SoCal
    Posts
    453

    Default Re: Monitor MOD

    I got off work a little early today so I thought I would try and finish up the acrylic panel portion of the mod. Remember this is the first time I've ever done most of this kind of stuff so any pointers would be appreciated.

    Well I went down to the hobby shop located here on base. They only deal with wood so I just said what the hell and used there tools anyways. The smaller band saw used for precise cuts was down so I had to use the only other one they had, it was huge, but after a quick little lesson on how to use it I was off and running. I made all the cuts I could with the band saw then I moved onto the jigsaw. Yes I said jigsaw 
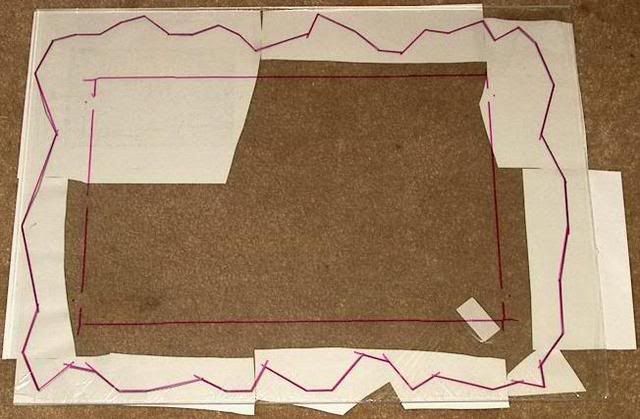
, I know one of the worst things you could use when trying to cut acrylic panels but I had no other choice. Well I finished up the rest of the cuts and then I made two small holes with the drill press for the LEDs. I then paid the man for the use of the tools, which was only $3.25 for the whole day, awesome price 
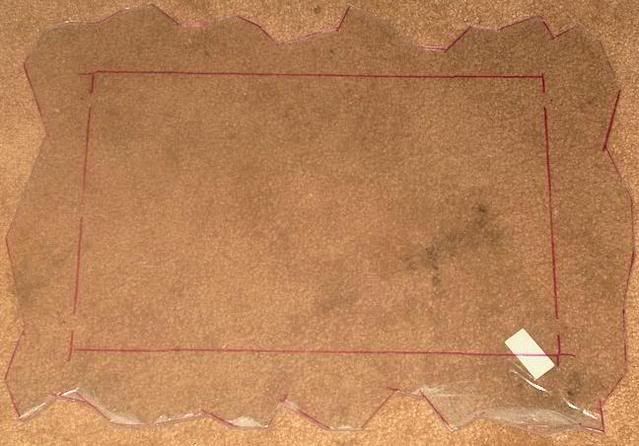
. I decided to do the finishing touches back at the house since the wife was calling me asking me where I was, I snuck out of the house while her and the kids were sleeping , she thought I went to Lowe's, Home Depot or Radio Shack to spend the rest of our money some crazy new idea I had.
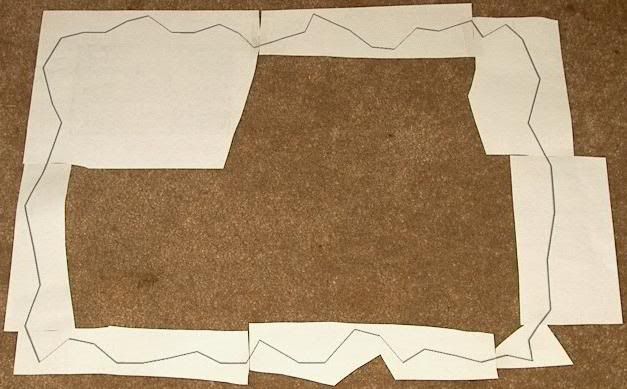
    Well back a the house I broke out the files, sandpaper, dremel and propane soldering iron/blow torch. I first started smoothing the rough cuts with the files then moved onto the final sanding with 150 and 350 grade sandpaper by hand and used the dremel in the tight spots. I finished the whole thing with a flame polish with the mini blow torch. I did practice a little on some of the scrap pieces I cut off earlier in the day just to learn the best distance to hold the flame from the edge and how long you can hold the flame on the acrylic before it starts to bubble and burn. Here are some pix of the whole process.

    This is the original design I made in SketchUp blown up to actual size.


    I used a sharpie on the acrylic panel to trace the outline of where I needed to make my cuts.


    This is the cut panel after the trip to the hobby shop but before I sanded it down.


    Here is a close up of the rough cut the band saw and the jigsaw left.


    This is after I sanded the edges and completed it with a fire polish.


    I also tried out the LEDs on the panel and they work great. I took some pix of the edge lite up all red but since my camera sucks at taking pix in the dark they didn't come out clear but trust me it looks cool.

    Well that's about it for today. I might be able to work on the speaker brackets and grills next week. I'll post pix when there done.
    *****COMMON SENSE AIN'T COMMON*****
    *********************************************

  4. #164
    DerGanove Ichbin's Avatar
    Join Date
    May 2006
    Location
    In the World of Tommorow!
    Posts
    1,333

    Default Re: Monitor MOD

    yay you started it! looking sick mate!

  5. #165
    Banned Eclecticos's Avatar
    Join Date
    Apr 2007
    Location
    Florida
    Posts
    3,137

    Default Re: Monitor MOD

    Quote Originally Posted by Spacehonkey View Post
    I also tried out the LEDs on the panel and they work great. I took some pix of the edge lite up all red but since my camera sucks at taking pix in the dark they didn't come out clear
    I know exactly what you mean. I ended up having to put mine on the top of my file cabinet to hold it straight, otherwise its all blurry.

  6. #166
    Go ahead, impress me Spacehonkey's Avatar
    Join Date
    Mar 2007
    Location
    SoCal
    Posts
    453

    Default Re: Monitor MOD

    Thought I would post these pix up of some possible ideas for the backbone that Crimson Sky might like to use for reference if he hasn't already designed a swivel joint yet.

    *****COMMON SENSE AIN'T COMMON*****
    *********************************************

  7. #167
    Banned Eclecticos's Avatar
    Join Date
    Apr 2007
    Location
    Florida
    Posts
    3,137

    Default Re: Monitor MOD

    I found something out in my shop, When I saw it i thought of your mod.
    Its a height adjustment stand.

    Not sure if it exactly what you looking for.

  8. #168
    Go ahead, impress me Spacehonkey's Avatar
    Join Date
    Mar 2007
    Location
    SoCal
    Posts
    453

    Default Re: Monitor MOD

    Eclecticos - thx for the offer but I'm not sure if I'll be able to use that in this mod.
    *****COMMON SENSE AIN'T COMMON*****
    *********************************************

  9. #169
    Banned Eclecticos's Avatar
    Join Date
    Apr 2007
    Location
    Florida
    Posts
    3,137

    Default Re: Monitor MOD

    I just figured it would be a sturdy base. . you could attach the metal wings to the inside of the hips. The adjust arm could brace the backbone. Its not a smooth Height adjust. . moves up. . down . .locks in place.

    Just thought it may help.

    This is what I was looking at. Says Albion on it.
    Link


    I apologize if I disturbed your worklog. P r o c e e d

  10. #170
    Go ahead, impress me Spacehonkey's Avatar
    Join Date
    Mar 2007
    Location
    SoCal
    Posts
    453

    Default Re: Monitor MOD

    Quote Originally Posted by Eclecticos View Post
    Just thought it may help.

    I apologize if I disturbed your worklog. P r o c e e d
    You can disturbe my worklog all you want with helpful ideas like this. Like I said before if 2 heads are better than one just imagine what 200 heads could come up with. With the additional pix you provided on your last post I see that it could be used for a very useful stand but I think I want the pelvic bone base to be completly stationary and to have only the joints that are built into the backbone to be movable. Plus I plan on using bondo to fill in the open space in the pelvic bone along with covering up the stand. And I don't want to sound ungrateful because I am but I just think your stand could be better suited for another mod somewhere down the road and thanks again for the offer.
    *****COMMON SENSE AIN'T COMMON*****
    *********************************************

Posting Permissions

  • You may not post new threads
  • You may not post replies
  • You may not post attachments
  • You may not edit your posts
  •