ok I should have my parts back from the waterjet guy sometime tomorrow. (crosses fingers)
if I do I'll post up some yummy pics as son as I get it all


ok I should have my parts back from the waterjet guy sometime tomorrow. (crosses fingers)
if I do I'll post up some yummy pics as son as I get it all
Arctic Cat * Maximum Security * Cribbage Board * Rockin Case * Armor Redux
Tempest SXR * Power House * Red Comet * ICHIWZ * Acrylic Headphone Hook
Continuing sponsorship support from PCBoard.ca
alright I got word that after a few mechanical breakdowns my stuff is done!! I'll be picking it up later on this afternoon. Pics to follow
Arctic Cat * Maximum Security * Cribbage Board * Rockin Case * Armor Redux
Tempest SXR * Power House * Red Comet * ICHIWZ * Acrylic Headphone Hook
Continuing sponsorship support from PCBoard.ca


Schaweeeeeet! So hurry up with the pics already!
Charles (CJ) Gantt: Coil Gun // Biohazard // Circuits // 3D Printer // CoD MW2 Case // TBCS 4GHz Club
Sites: The Makers WorkBench // CJ Gantt Photography
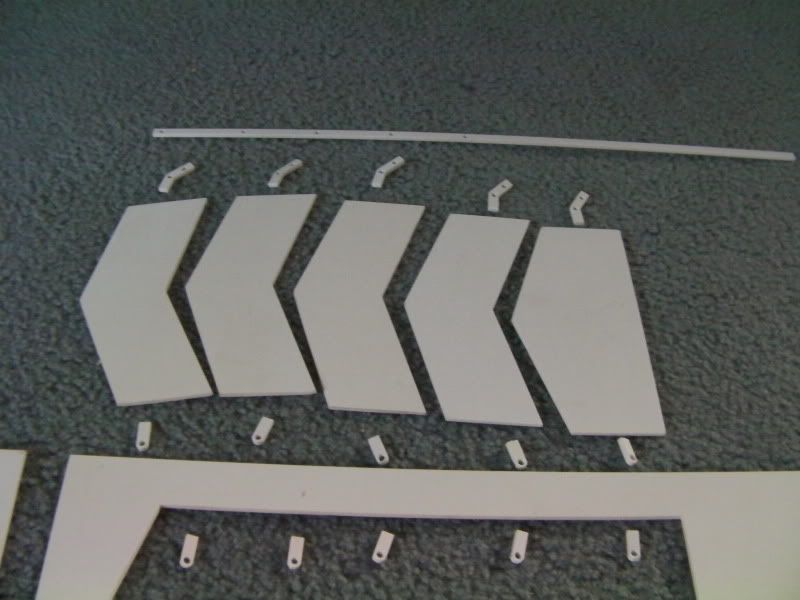
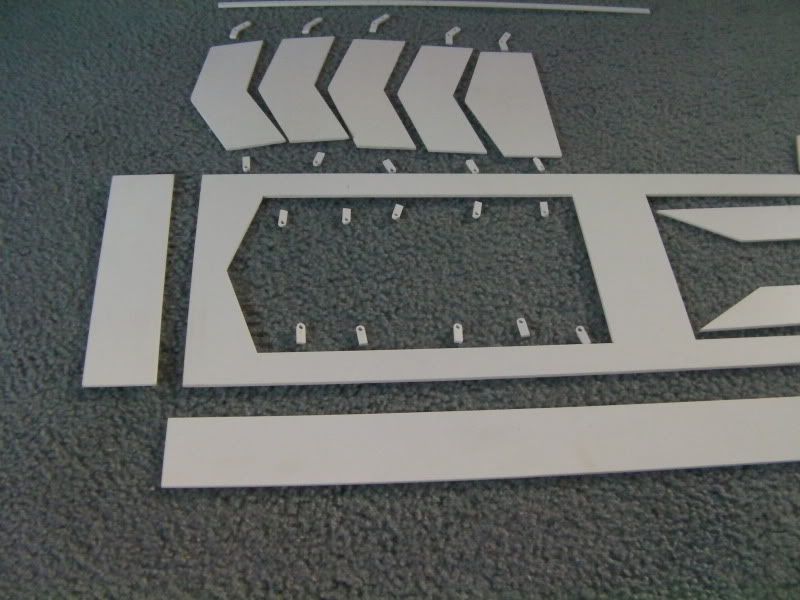
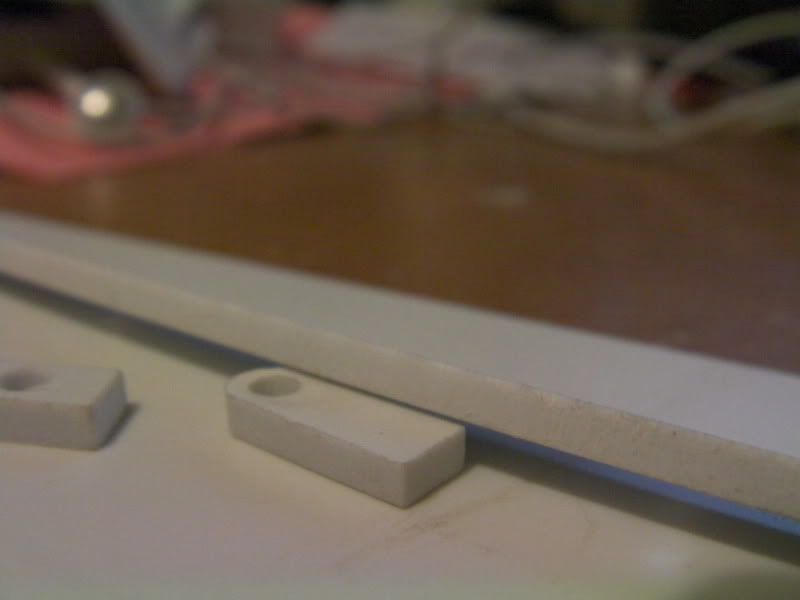
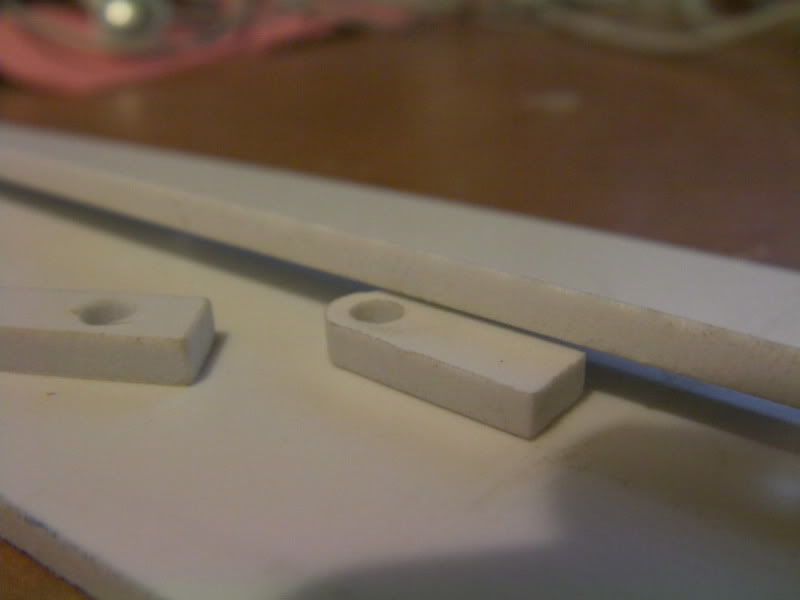
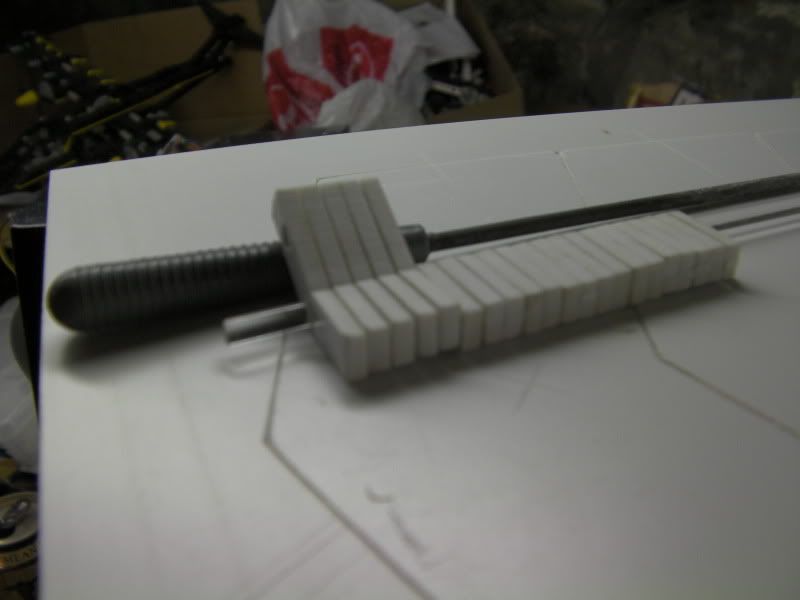
here ya go
He forgot to make 3 pieces though, which he said he'll do in the morning. So once again, a HUGE thanks to Tom over @ HydroCutter for doing this for me!!!
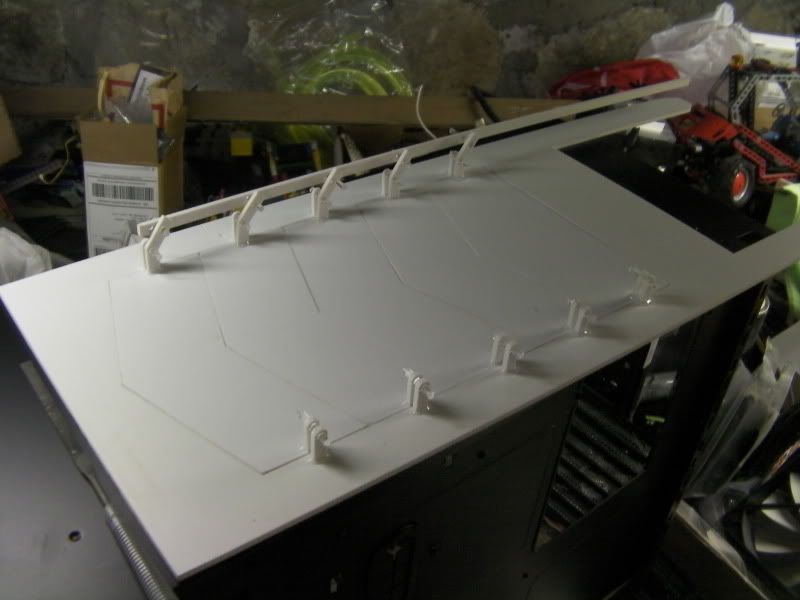
Everything fits a little tight, but that's perfect. The edges are almost perfect and will only require a little bit of sanding, but that will smooth them and make everything fit perfectly. Then once it's all glued together I'll bondo it up and sand it so it looks nice. I'll get some close-up pics of the edges tomorrow.
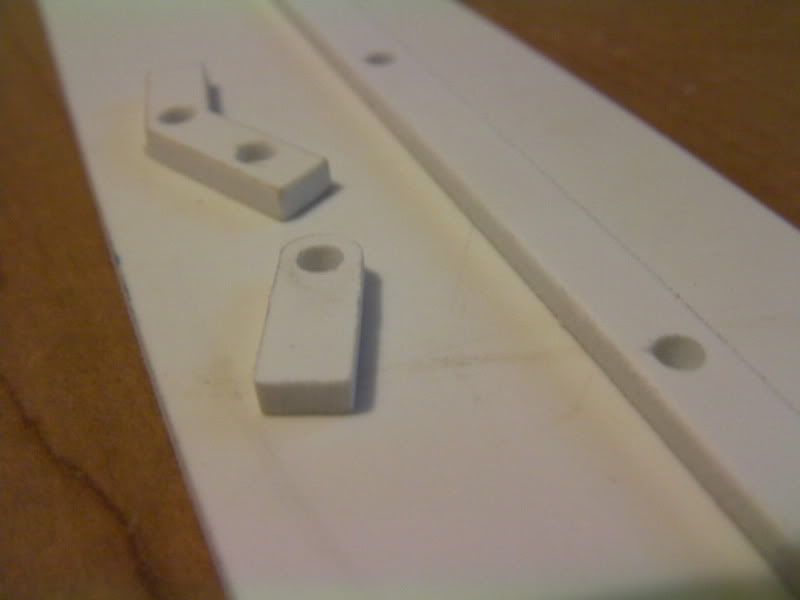
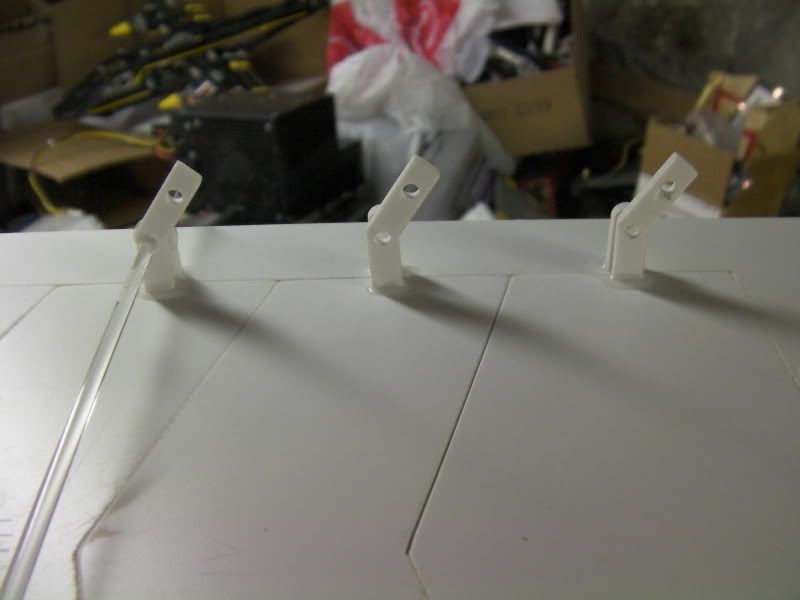
the holes in the mounting tabs are 1/8" and the space between the hole and the edge is 1/16". Not bad for 60,000 psi of water traveling over 1,700mph!
now I've got plenty of clear 1/8" acrylic rod left from rockin case, so I will use that for the hinges. hopefully this week I can get some work done on this and more work done on the LEDs as well
Arctic Cat * Maximum Security * Cribbage Board * Rockin Case * Armor Redux
Tempest SXR * Power House * Red Comet * ICHIWZ * Acrylic Headphone Hook
Continuing sponsorship support from PCBoard.ca

Awesome. I can't wait to see those louvers together and working.
TBCS 5TB Club :: coilgun :: bench PSU :: mightyMite :: Zeus :: E15 Magna EVThat we enjoy great advantages from the inventions of others, we should be glad of an opportunity to serve others by any invention of ours, and this we should do freely and generously.
--Benjamin Franklin
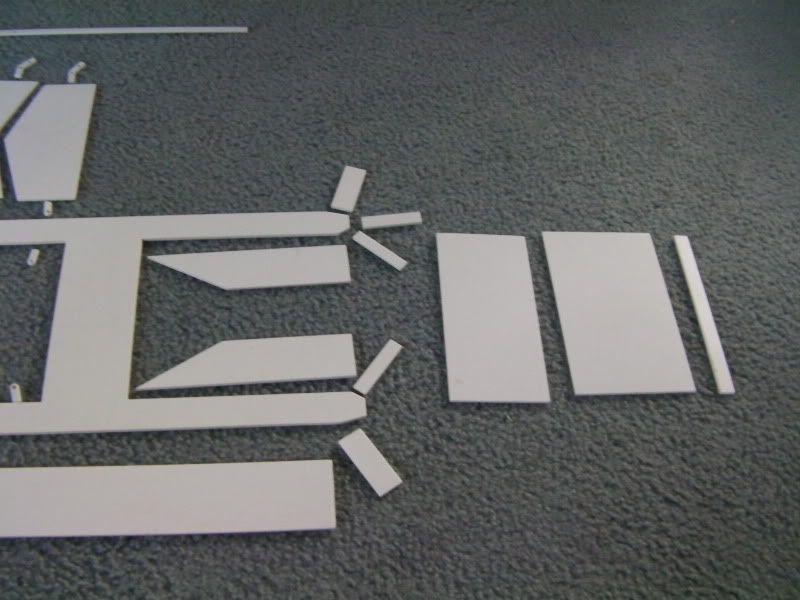
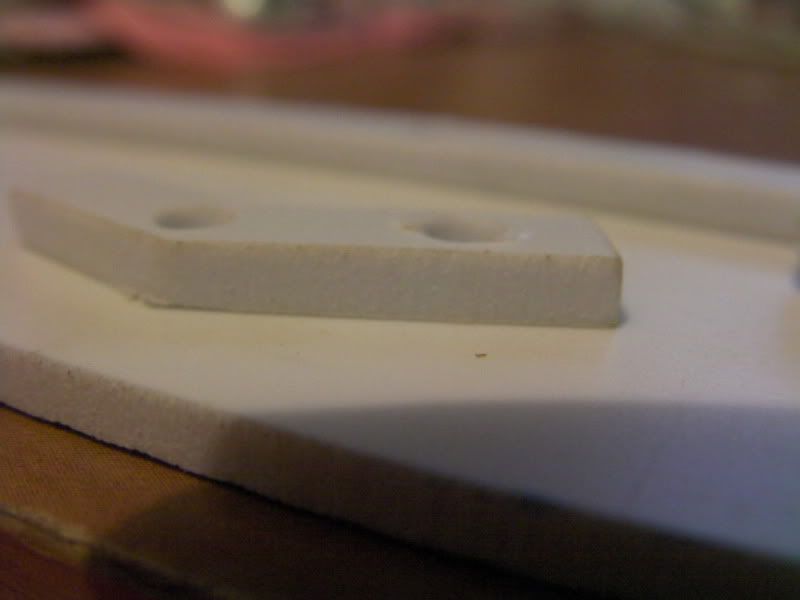
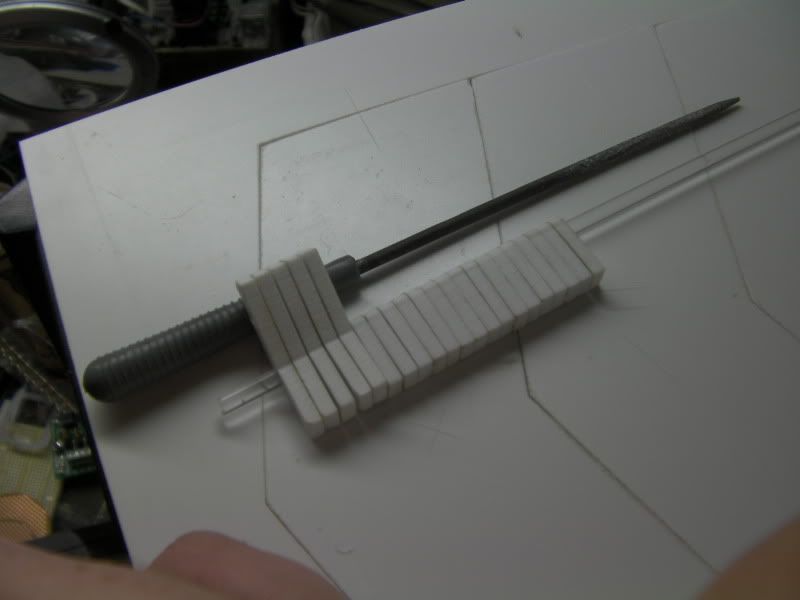
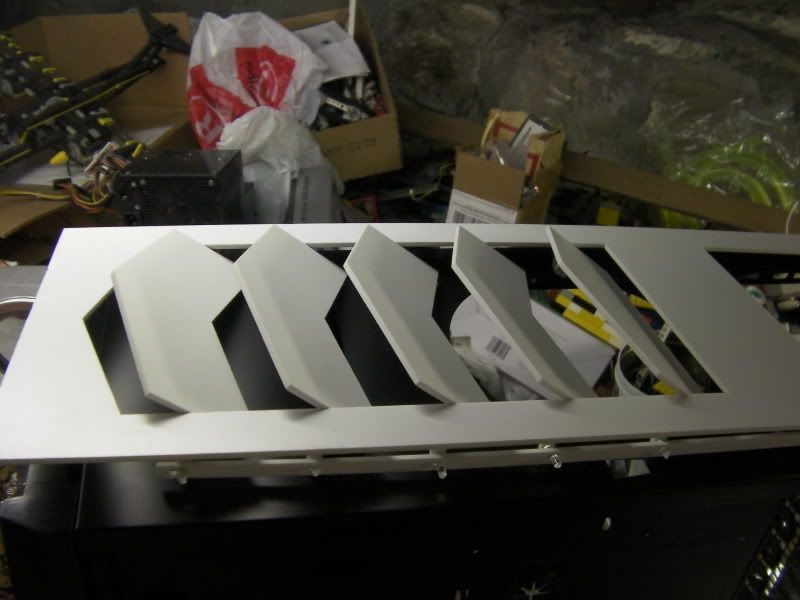
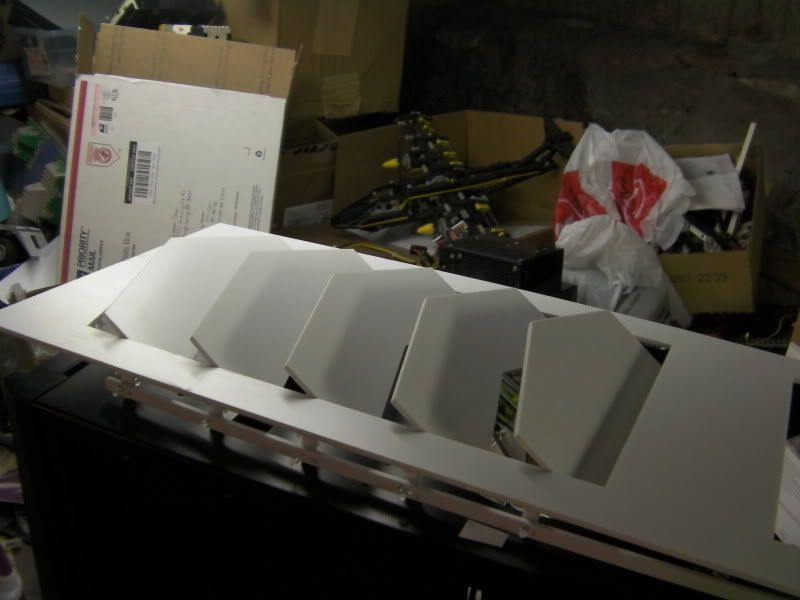
here's a few close-ups of the edges. they're pretty damn smooth for such a soft material. there's a slight bit of browning on some of the edges, but that was to be expected. it's not deformed at all and will be easily hidden with bondo and paint or sanded away altogether.
the pics came out ok, I need to get or make a nice photo box setup to get better lighting though
Arctic Cat * Maximum Security * Cribbage Board * Rockin Case * Armor Redux
Tempest SXR * Power House * Red Comet * ICHIWZ * Acrylic Headphone Hook
Continuing sponsorship support from PCBoard.ca
Awesome!! Those came out very nice. I cant wait to see them assembled and in action.
Charles (CJ) Gantt: Coil Gun // Biohazard // Circuits // 3D Printer // CoD MW2 Case // TBCS 4GHz Club
Sites: The Makers WorkBench // CJ Gantt Photography
Very nice! I've found that a florescent lamp with a sheet of white paper taped over it works as a good quick light box.
TBCS 5TB Club :: coilgun :: bench PSU :: mightyMite :: Zeus :: E15 Magna EVThat we enjoy great advantages from the inventions of others, we should be glad of an opportunity to serve others by any invention of ours, and this we should do freely and generously.
--Benjamin Franklin
thanks! I'll have to give that a shot! +repOriginally Posted by x88x

Arctic Cat * Maximum Security * Cribbage Board * Rockin Case * Armor Redux
Tempest SXR * Power House * Red Comet * ICHIWZ * Acrylic Headphone Hook
Continuing sponsorship support from PCBoard.ca
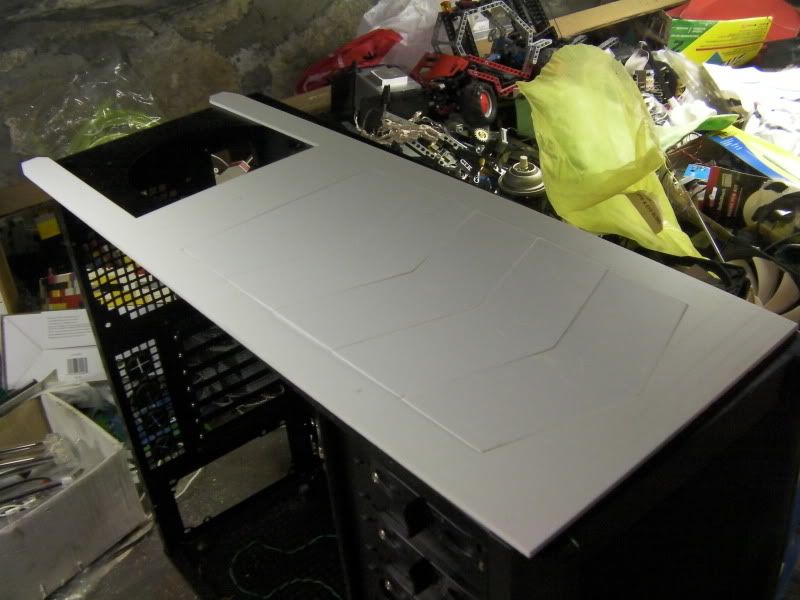
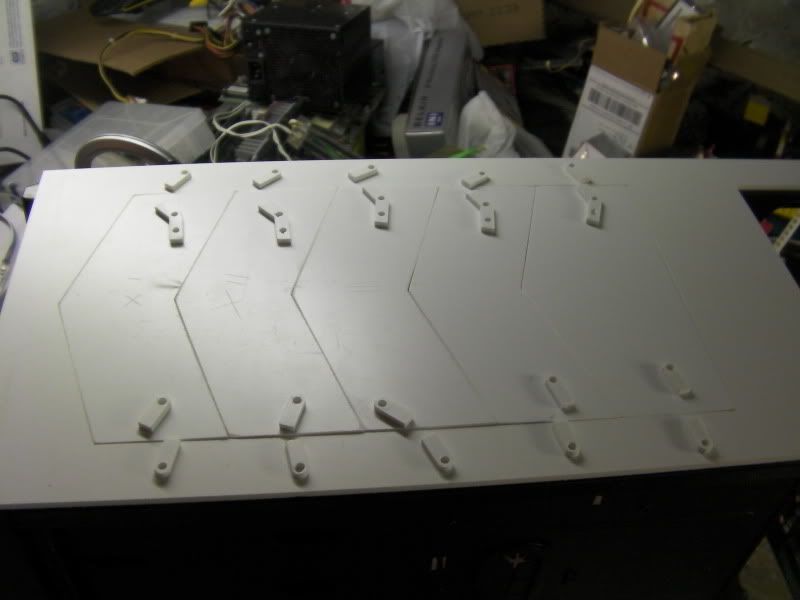
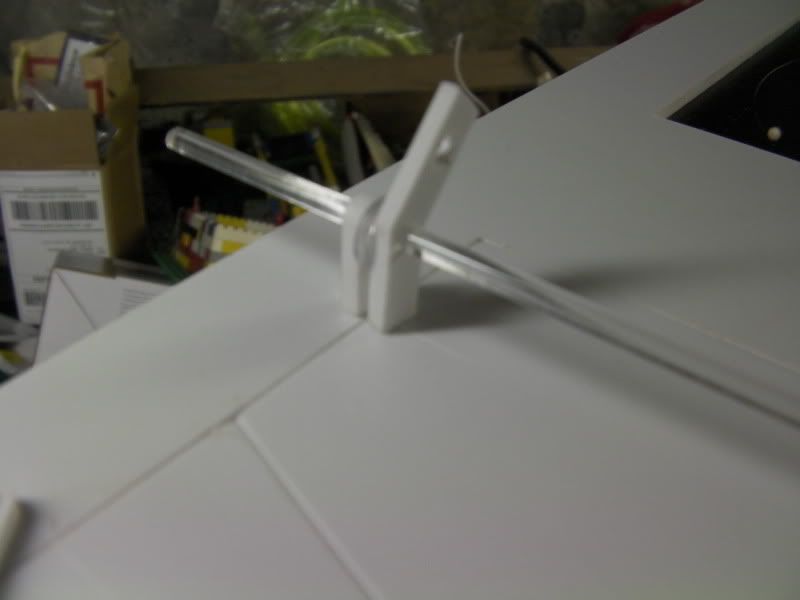
Update time!!!
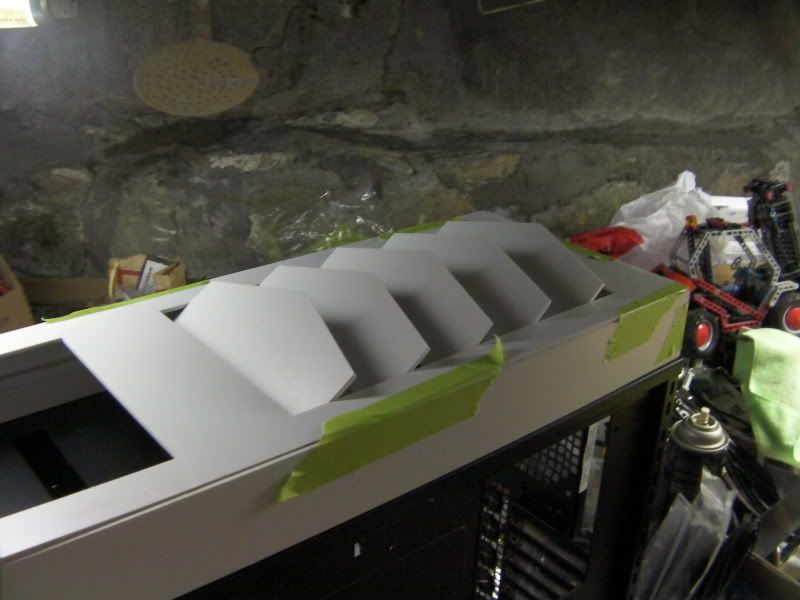
After about an hour of sanding on the fins i got them all to fit in perfectly
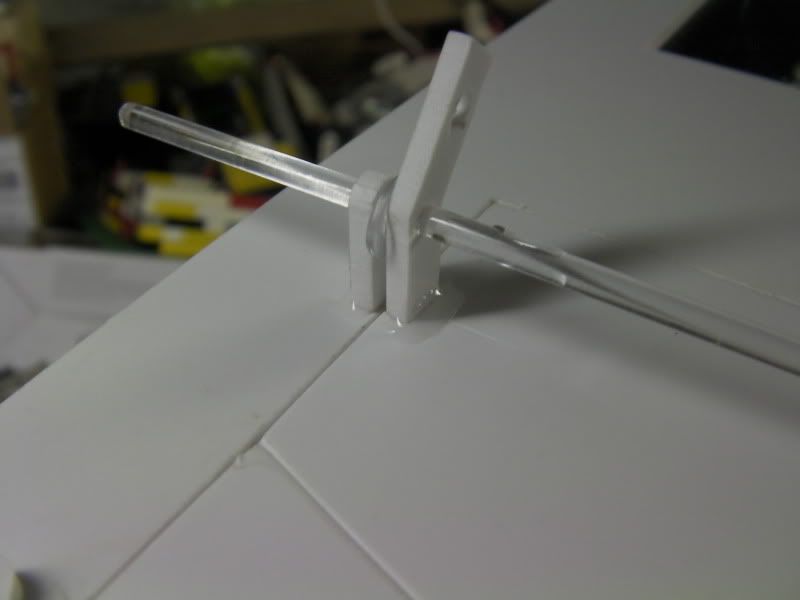
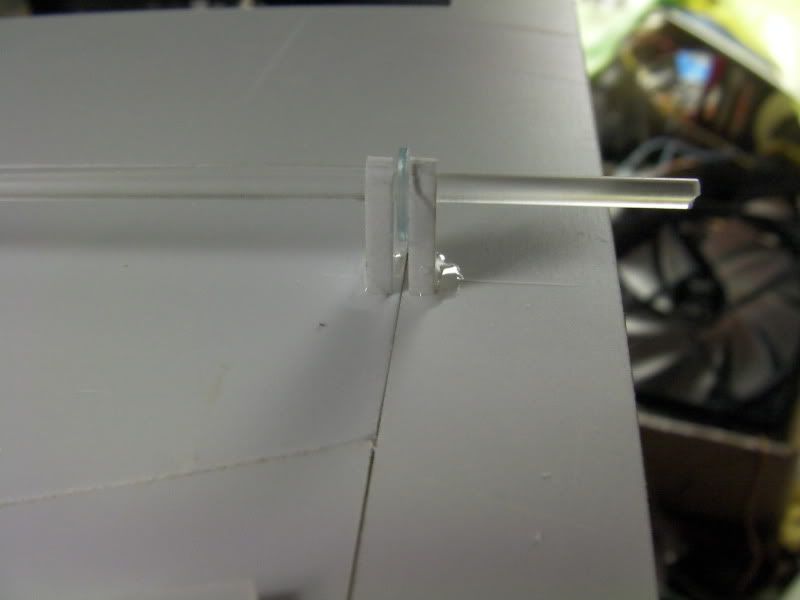
I then took all my hinge pieces and filed out the holes until the acrylic rod slid in easily, then stacked them all up to sand down the mating surfaces
after they were all sanded I laid them out in their places
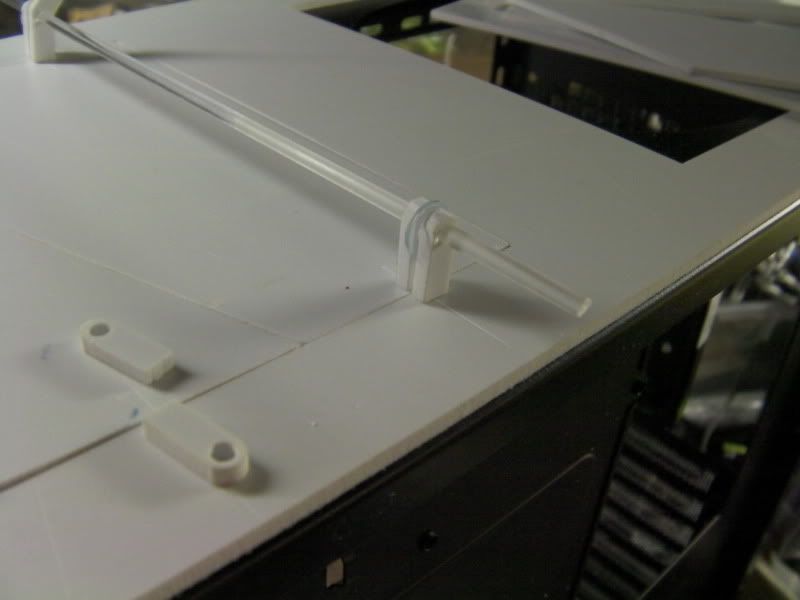
I ran a piece of rod through 4 of the mounts so it would keep them properly aligned. I measured 1" from each fin edge (the middle of each fin) and scribed a line to mark where each piece was to line up.
Then I used some ultra thick CA glue with a 10-25 sec. set time and glued the parts in their places
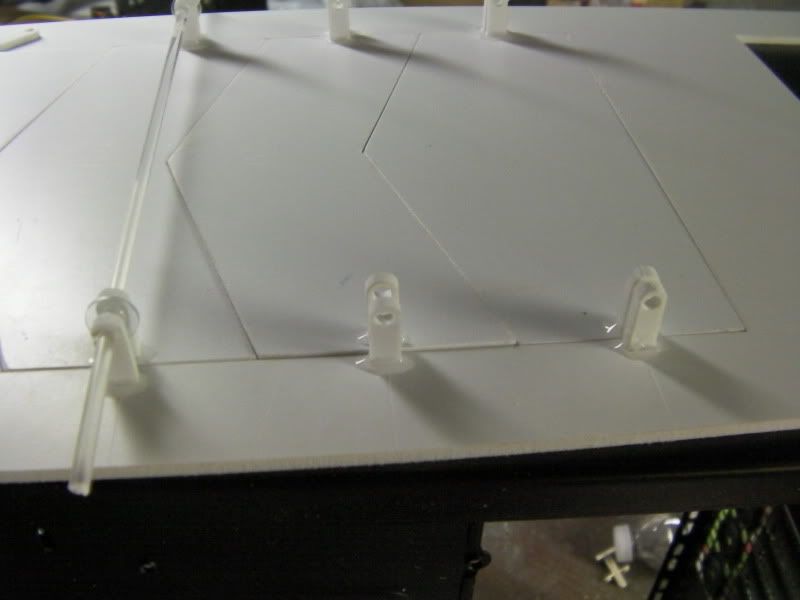
3 sets done
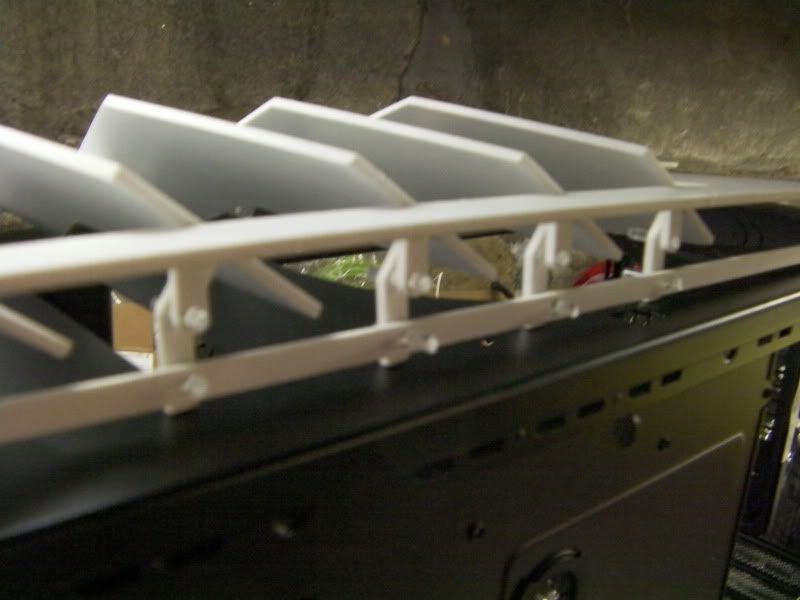
All 5 sets done. This took quite a while to get right, as I needed to nudge each part gently to get it to properly line up, then glue with one hand while holding everything steady with the other. I set the actuating rod in place to help line up the 5 actuating arms, and put 15 temporary pins in to hold everything together.
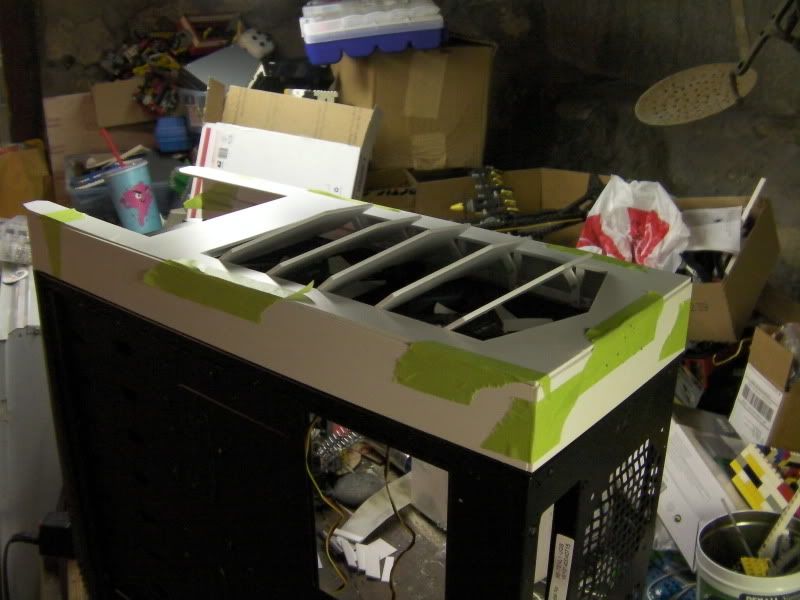
Opened
I used painter's tape to hold the 3 edges on so I could sit the unit on the case over the fans and check clearances.
Louvers closed
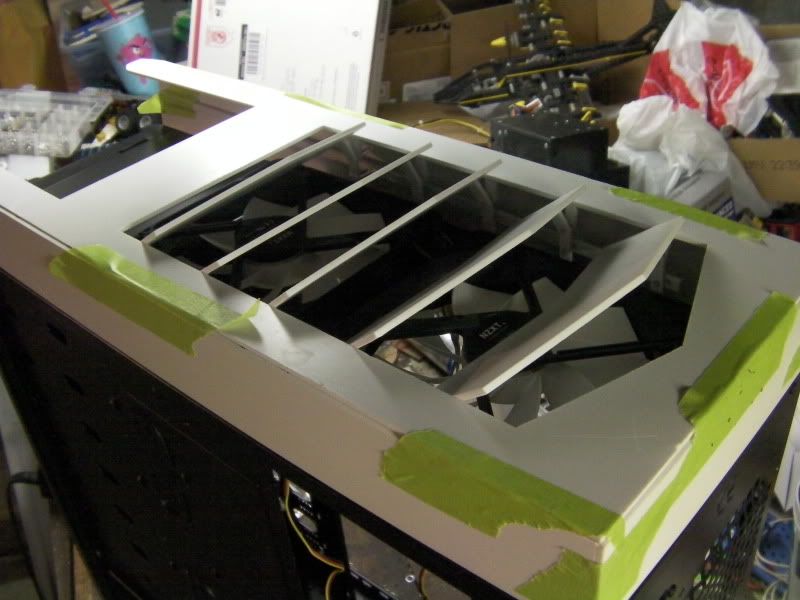
And opened
Now I've got a bunch of sanding and filing to do on the edges of the louvers so they all open and close smoothly. Currently in the closed position they catch on each other when trying to open, so I'll probably end up beveling the edges to loosen it all up. If it doesn't work well enough I'll probably have another set of mounts cut out and put the new mounts farther to the rear of the louvers to change the pivot point. We'll see what happens though. Hopefully within the next few days I can get them all sanded and check clearances.
I'm also going to cut some small ledges to glue to the bottom backside of the louvers, so when they're closed they'll sit perfectly flush
Arctic Cat * Maximum Security * Cribbage Board * Rockin Case * Armor Redux
Tempest SXR * Power House * Red Comet * ICHIWZ * Acrylic Headphone Hook
Continuing sponsorship support from PCBoard.ca
 Posting Permissions

 Reply With Quote