Mate this is fantastic, very cool mod. +rep


Mate this is fantastic, very cool mod. +rep
Project: Elegant-Li *NEW*
Project: Alpha FINISHED
Project: LEXA Revival FINISHED
Project: LEXA FINISHED Bit-Tech MOTM Nominee October 08

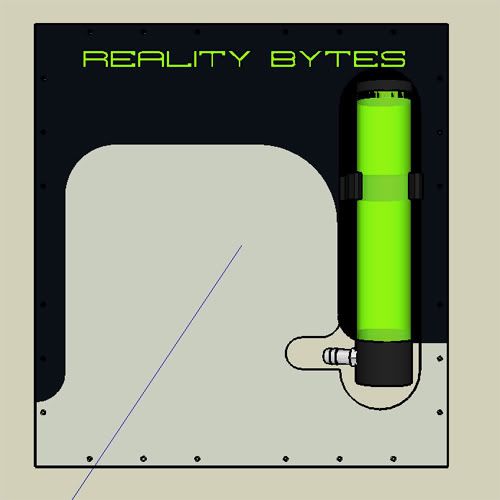
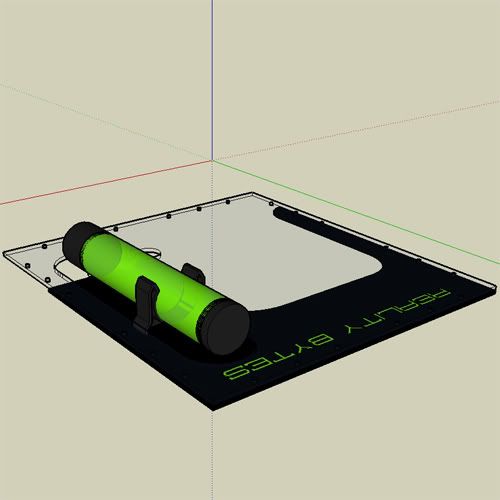
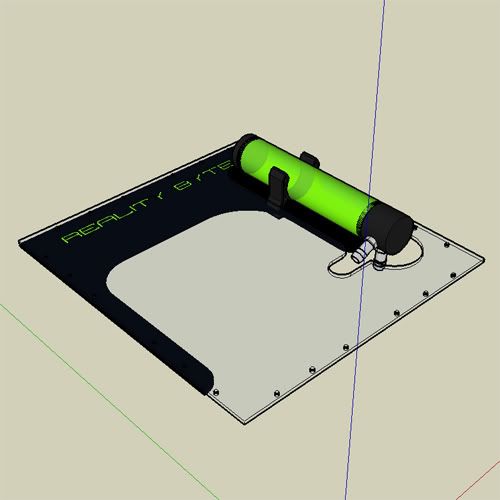
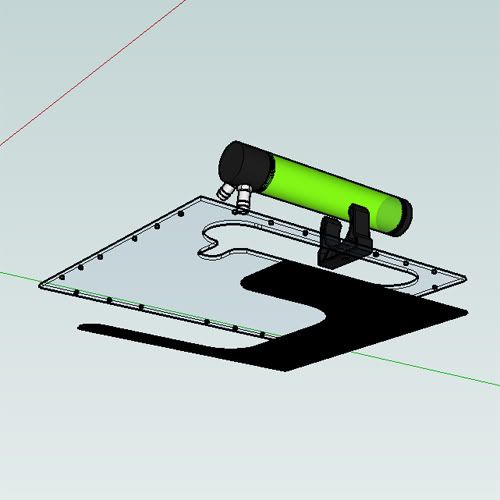
I have been planning the side panel today. The plan is to make it from a sheet of clear plexi the same size as the original side panel. I was going to go with a simple window mod, but this way all the areas of the inside I want to be visible will be.
However there are areas I don't want visible. The area the PSU and DVD drives are located. So I will be using black plexi to cover these areas.
I have used sketchup to make the plans before I buy the plexi. Some screenshots are below. I hope to get building in the next week or so.
Thanks For reading.
That looks great, hope it works out fot you.
Project: Elegant-Li *NEW*
Project: Alpha FINISHED
Project: LEXA Revival FINISHED
Project: LEXA FINISHED Bit-Tech MOTM Nominee October 08


still looking sweet, how did you fix the plexi to your gfx card, gives me an idea.
Mary had a little lamb. It bumped into a pylon. Ten thousand volts went up its arse and turned its wool to nylon!
@ XcOM - ATM its just resting ontop of the card held in place by the plastic clip on the mobos PCI-E slot. But I will be using M3 bolts/nuts to secure it through the 2 holes where the backplate is attached to the card and also the 2 holes at the opposite end which have nothing in them. To insulate the bolts/nuts/washers I will use the small cardboard washers that come with some cases to be used when mounting the mobo.
Hope that makes sense.
How did you cut your plexi, I was thinking of etching mine but it is hard to keep a straight line.
Project: Elegant-Li *NEW*
Project: Alpha FINISHED
Project: LEXA Revival FINISHED
Project: LEXA FINISHED Bit-Tech MOTM Nominee October 08
I used a jigsaw (fine tooth blade) to cut the straight lines and then used a dremel (sanding drums) to add the curves. To make sure the striaght edges are perfectly straight I used a block of wood, held in place with clamps, as a guide to run the jigsaw against.
I tried etching, using the dremel, but I too had the same problem. I think you need a very steady hand and alot of practive to get etching right.
As you can see from the previous posts in this project I have started the log halfway through the build, due to not intending on doing a log when I started out. I have been through the few pictures I did take in the early stages of the build so I can 'track back' on some parts of the build.
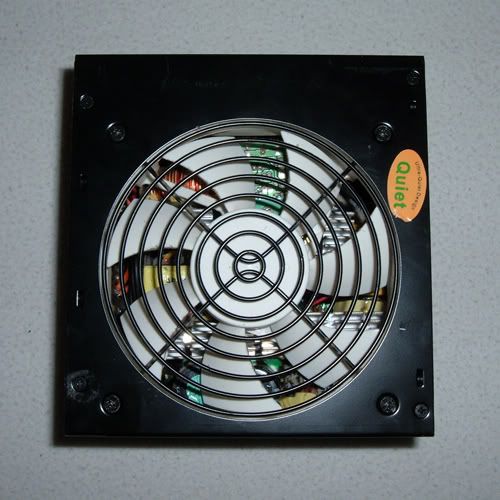
So here we go first off the PSU.
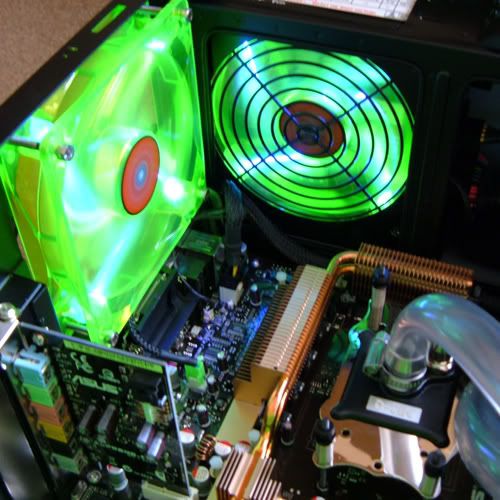
I started out with the stock PSU (Jeantech 600w Modular). Now the PSU was pretty much how I wanted it to look, all that needed changing was the 120mm fan. Here it is in all its stock 'white' glory, not quite in keeping with the green/black theme.
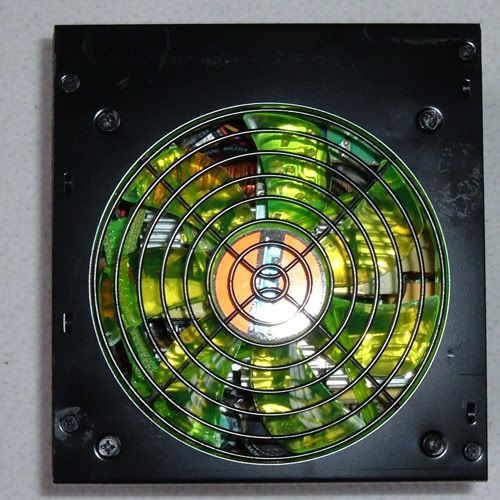
So I took it apart and switched the white fan with an AC Ryan 120mm UV Green Blackfire fan. Now these fans come with separate connectors for the fan power and the UV Leds. So I connected the UV Leds to a constant 12v supply to keep them nice and bright. The fan power is connected to the fan power wires from the PSU. I didn't connect the Leds to this supply as the PSU has a smart fan feature which lowers/increases the fan speed dependant on the PSU's temperature.
Here it is with the new Fan in place, much better I think you'll agree.
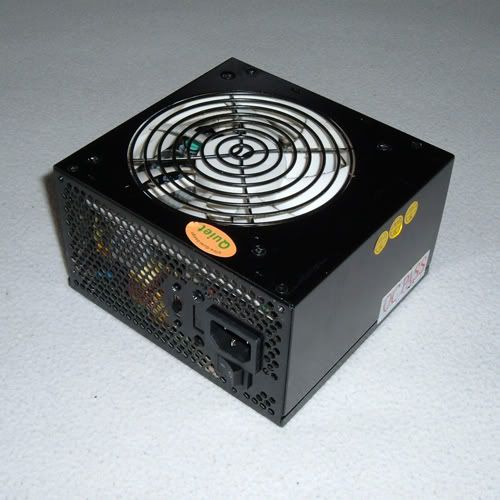
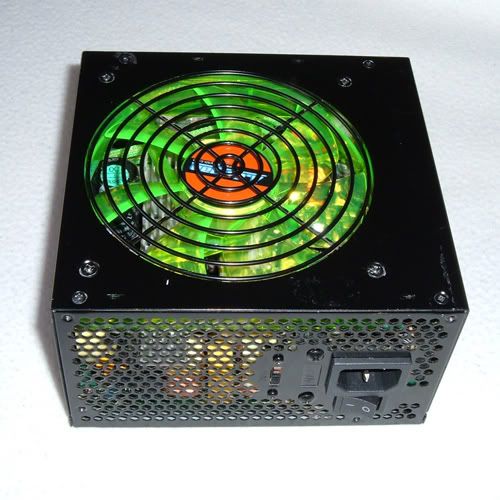
Here you can see the PSU mounted in the case with the Leds on full brightness whilst the fan itself remains at a low speed.
Thanks for reading, next is the memory cooler.

This mod is top-notch man. It's actually given me some ideas I might try out (don't worry though, I won't rip off your mod). That video card cover is so simple, yet so effective.. I wonder why I haven't thought of that before! Also, I really like the idea for the res. I've been trying to think of how to mount one, and that is a really good way! This thing is off to a great start man, +rep.
RIP Bucko
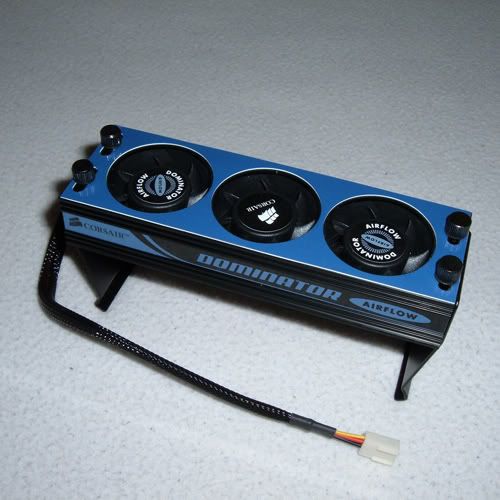
I decided on using an 'Air' memory cooler over a watercooled one due to space/flow limitations. I chose to use the cooler from Corsair as IMO its by far the best memory cooler to look at and looked to have some potential for modding.
Here it is stock just after being delivered.
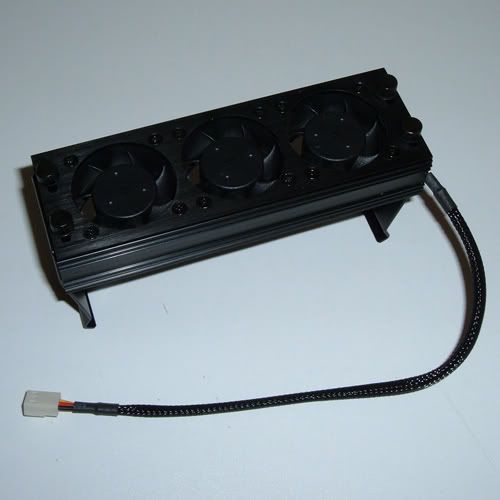
First on the list to do was to remove the Corsair 'branding', seemed senseless to have the Corsair logo in the case when I am using OCZ memory. So I removed the fans/wires and soaked the metal frame in hot soapy water for 30 minutes or so to loosen up the adhesive. Then once it was loose enough I peeled back the stickers on the top and sides. Dried it out and remounted the fans. Leaving it looking like this.
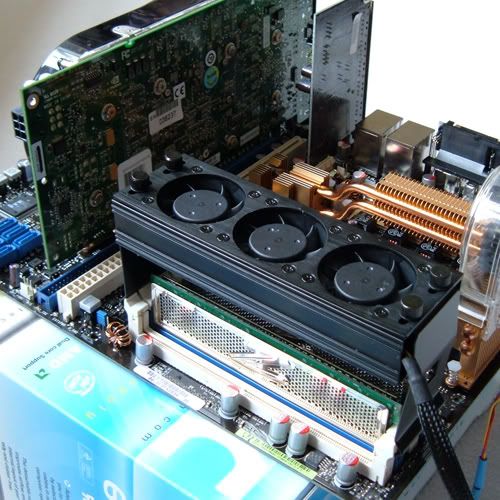
Now I did debate leaving it all black, a somewhat 'stealthy' look when mounted over the memory as seen below.
However once the case started to take shape and the green theme became ever more present, I decided that the cooler also needed some 'green' to help it fit in with the theme and also to make it visible in the case. Being all black it became too 'stealthy' and in certain lights was difficult to even make out. As I think this next picture shows quite well.
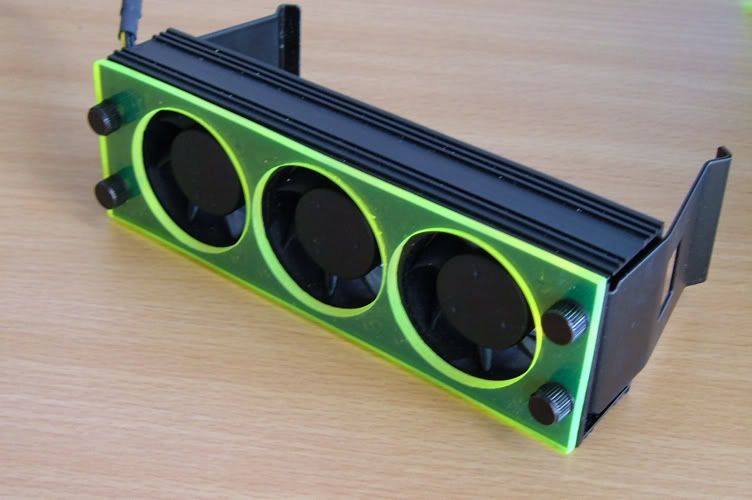
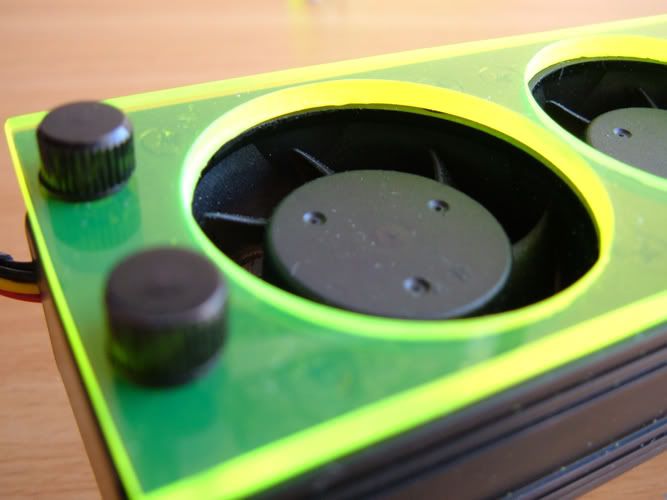
So I took an offcut of 3mm UV Green perspex I was using and cut it to the same size as the top of the cooler using a jigsaw and then a dremel (sanding drum) to tidy up the edges. Then using a hole saw I cut the three circular holes needed to allow air into the three fans. After a little sanding it was a simple case of mounting it to the top of the cooler using the, already present, four screws.
This is how it turned out, much more visible and in keeping with the theme of the case.
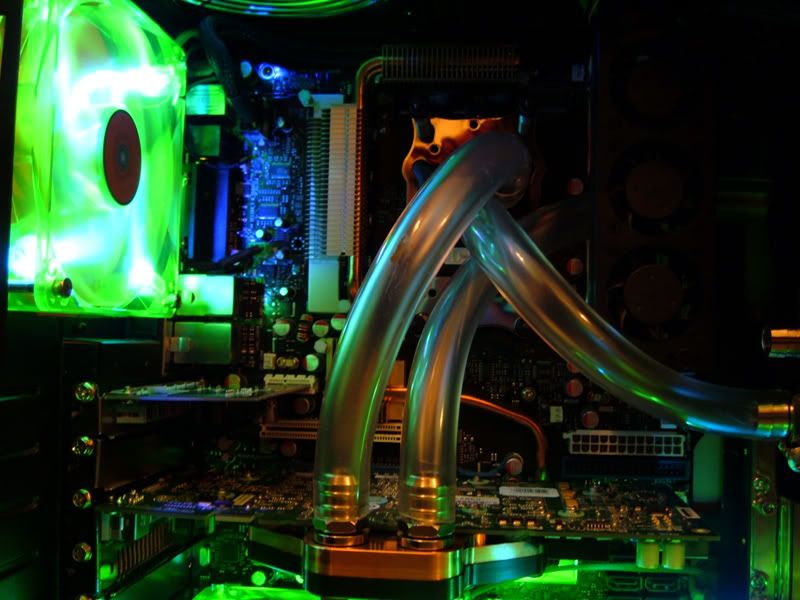
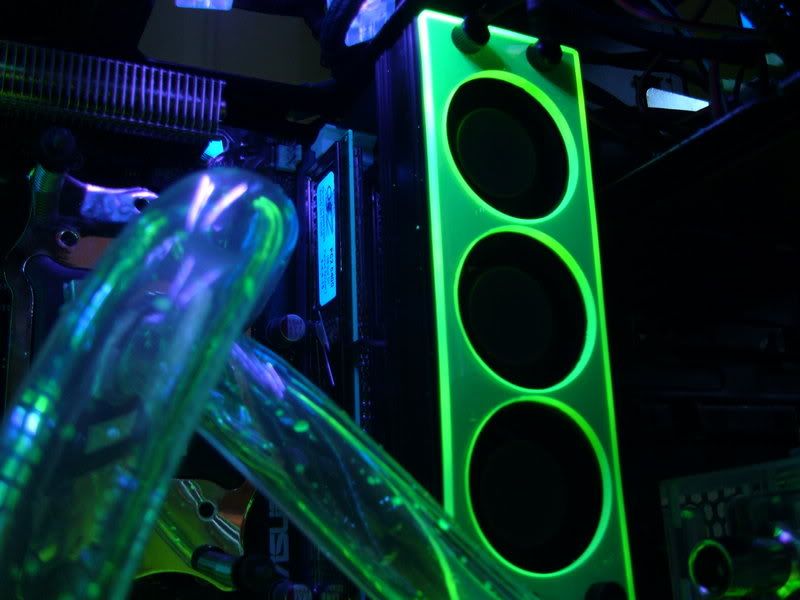
But it was at night that it really came into its own, being UV reactive and having had the edges sanded (dispersing the light more) I was really impressed with the effect it created. This giving me the idea to mount plexi on the sound and graphics cards. The picture below captures the effect quite well.
Again thanks for reading, next the GPU waterblock
 Posting Permissions

 Reply With Quote