Page 1 of 11 123456 ... LastLast
Results 1 to 10 of 109

Thread: PROJECT: Lobo

  1. #1
    If it isn't stock, it's modded! slaveofconvention's Avatar
    Join Date
    Aug 2005
    Location
    Sunderland, Tyne & Wear, UK
    Posts
    2,816

    Default PROJECT: Lobo

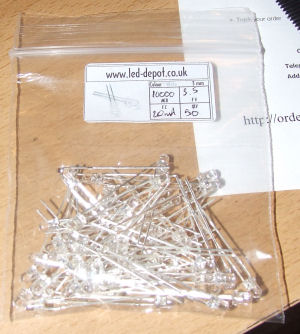
    I've been working on this for a couple of weeks now and have been posting a log on Modders-inc in accordance with tech-daddys wishes but figured it was time to share it here too. K-9-PC is on hold for about a week, maybe two for financial and space reasons - but it will resume very soon - for now though I'm doing this build with little more than I have lying around - I think the perspex and leds will be the only things I buy for this mod....
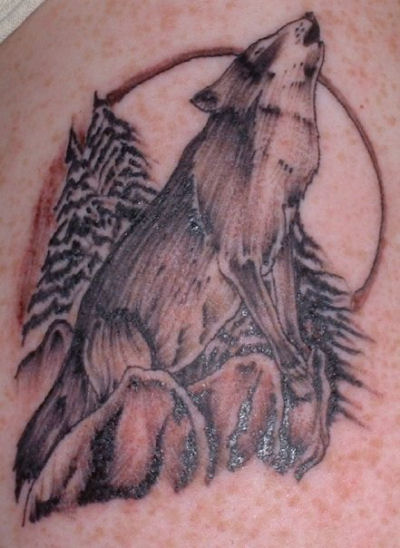
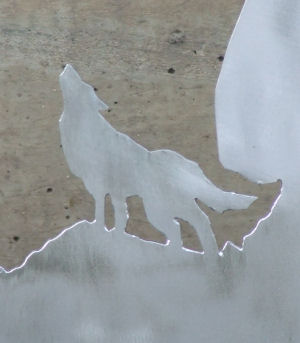

    The Lobo Wolves “Canis Lupus Nubilus” – derived their name from a word in the Blackfoot Indian language meaning “Buffalo Wolf”, which, when spoken aloud, sounded like the word “lobo”. They were also known as the Buffalo gray, or Loafer wolf, and followed the migration of the buffalo herds throughout the Rocky Mountains, from northern Canada to New Mexico. A large lobo wolf could weigh as much as 100 pounds and had a life span of about 20 years. They were described as the consummation of absolute savagery, and had seldom been tamed.
    - Source : Bradford Landmark Society

    I have always much admired Lupine, by Tech-daddy (which I watched step by step as it was built on another forum) and have long considered "cloning" it so I'd have one and after much thought I decided to go ahead and do it. I'm not a thief or a plagiarist, so my first stop was TD himself, asking his permission to copy his creation, albeit with a twist. TD was kind enough not only to agree to it, but to wish me the best.

    NOTE TO ALL: Before anyone starts calling me copycat, I am doing this with Tech-daddys 100% knowledge and approval (well he approves now - might change his mind if I make a mess of it LOL)

    I spent several days after that trying to come up with a name for the project - calling it Lupine, or LupineII just felt wrong - and as I had so many plans to make something different to, but partially inspired by Lupine, a tribute to felt like it would be selling the project short.

    So I went hunting on google for something, anything original and appropriate and after a few days of that, I gave up and asked the wife.... She turned and said "Lobo" instantly. When I asked her why, she explained about the Lobo wolves of Kane - where she lived until I imported her to the UK about 3 years ago - and so the name stuck - it has direct relevance to the Wolf itself, adds the personal touch as it relates to the wife's hometown, and also there's a little nod in there to TD too, as Lupine was a project originally started for his wife.

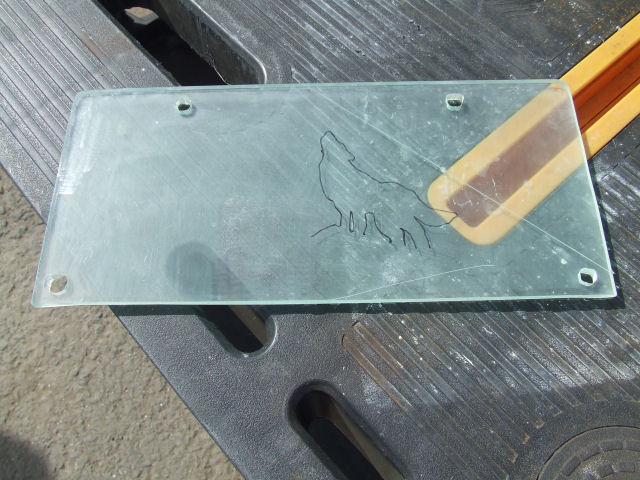
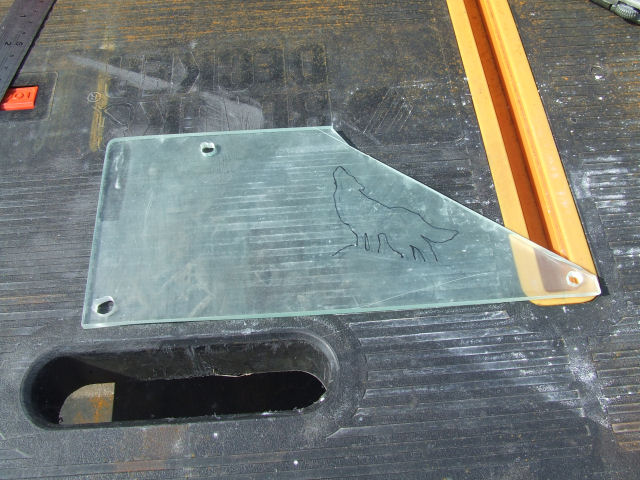
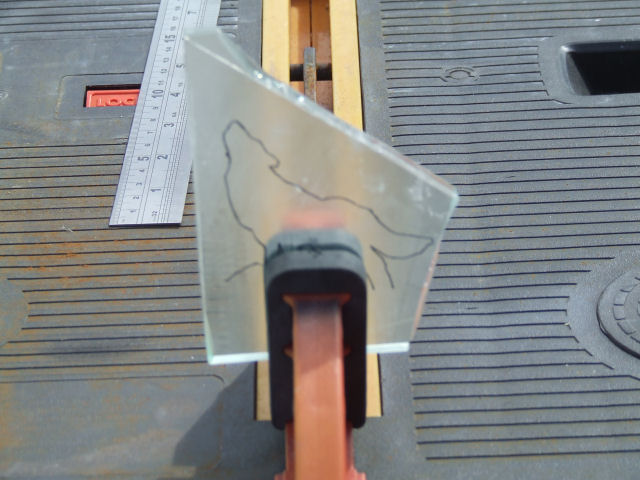
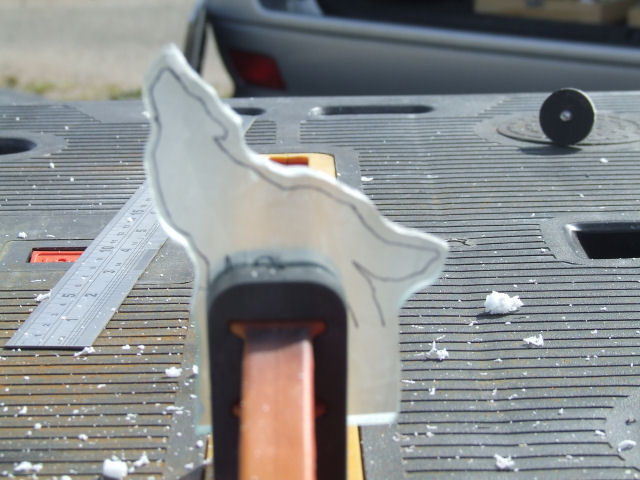
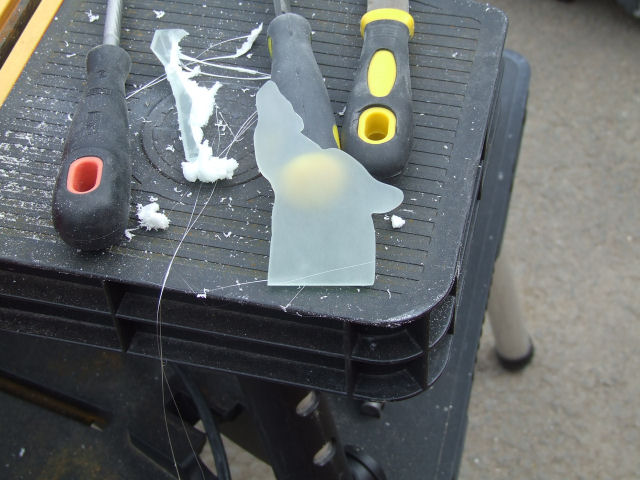
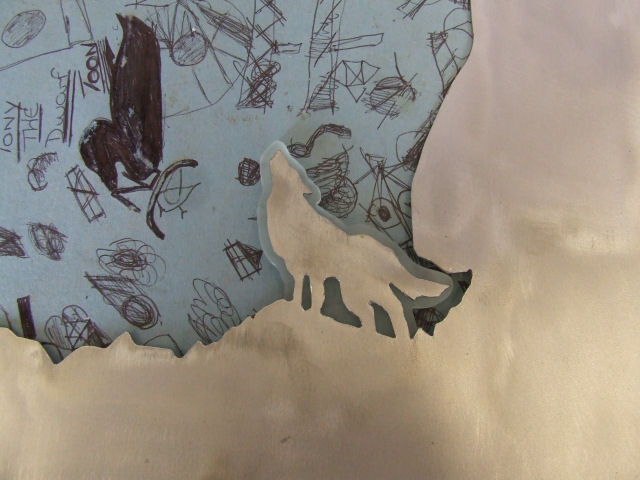
    Enough story - pics.....

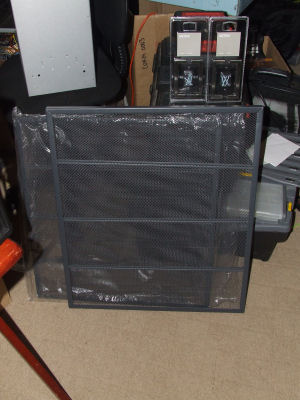
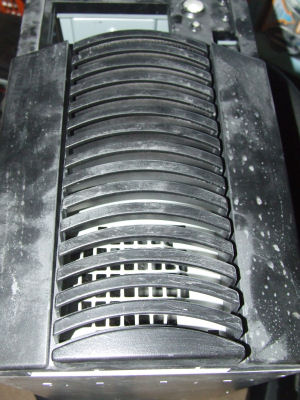
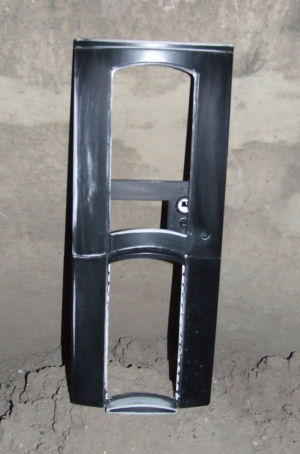
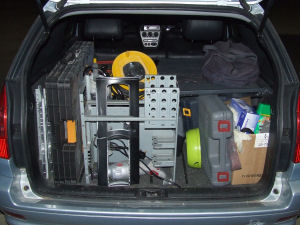
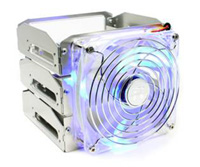
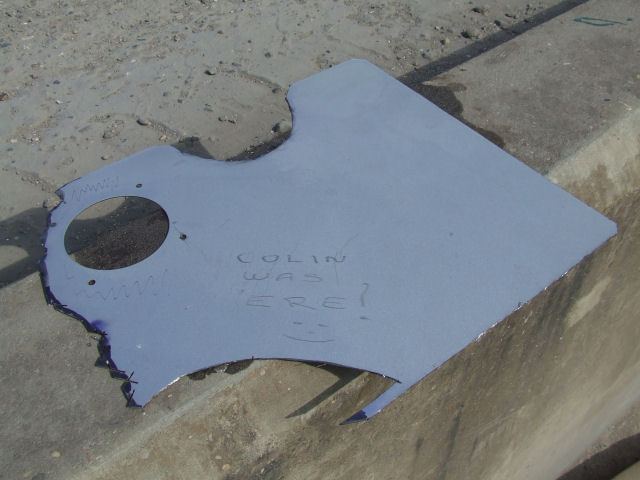
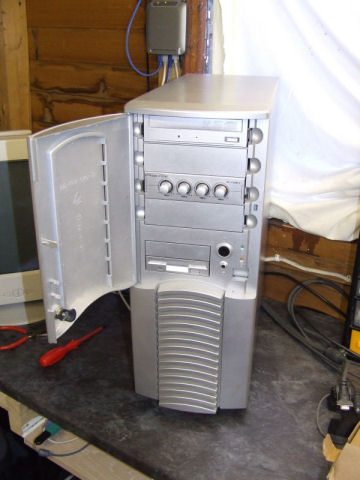
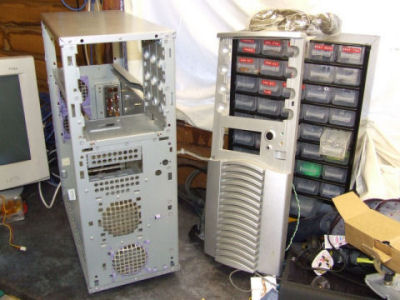
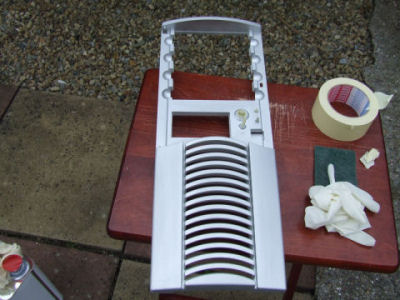
    This is the old PC I'm going to reinvent in this project. A Chieftec Dragon - remember those - they really were among, if not THE first of the true "enthusiast" cases...


    I actually started another project based on this but I've now shelved that permanently - and it was several years ago too so this has been sitting in a partially done state since way back then - it's time to get 'er done :p

    The following are OLD pics of the original work done back in May 2006, some, if not all of which will be re-done or refinished, but I didn't want it to look like I'd gone from the case and made huge jumps without explanation so....

    The following may be slightly out of chronological order but.... I'm sure you'll figure it out heh
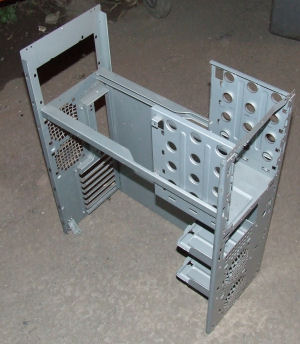
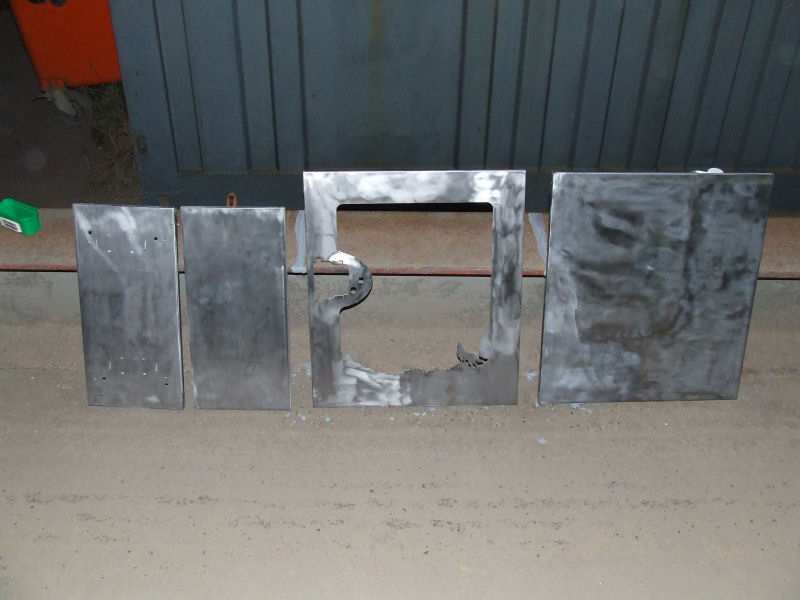
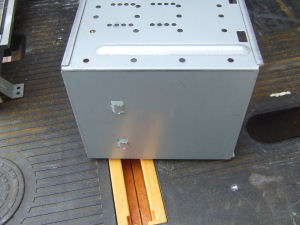
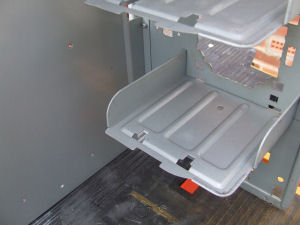
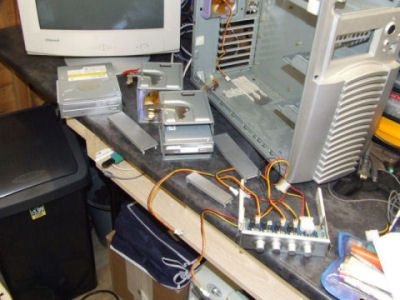
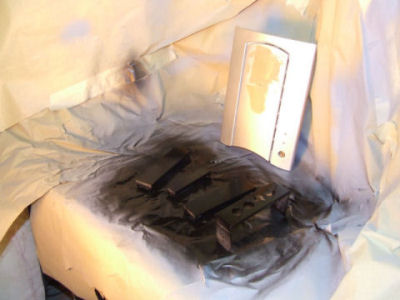
    Quick disassembly...


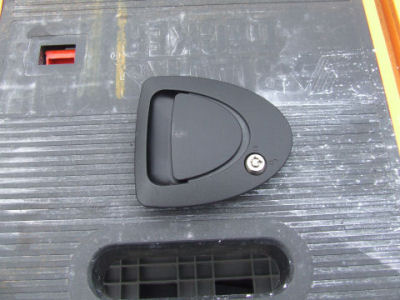
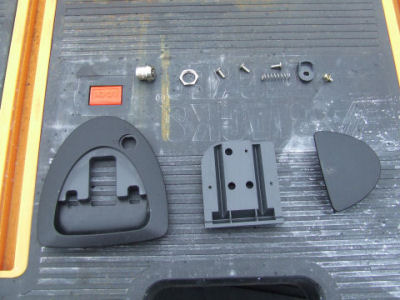
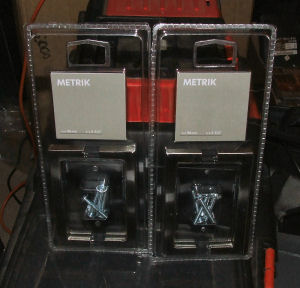
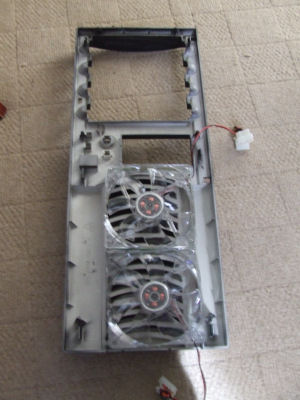
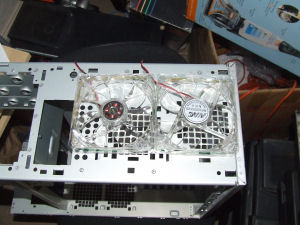
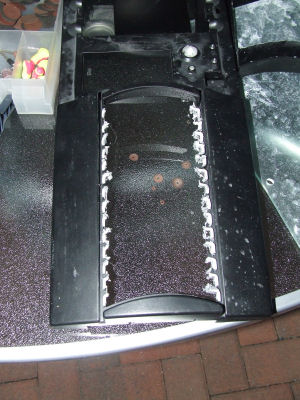
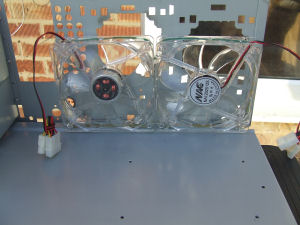
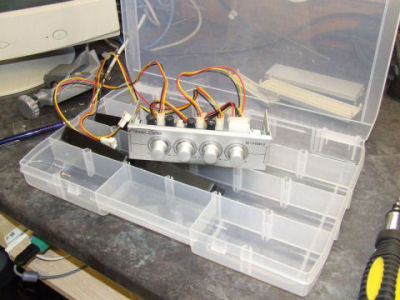
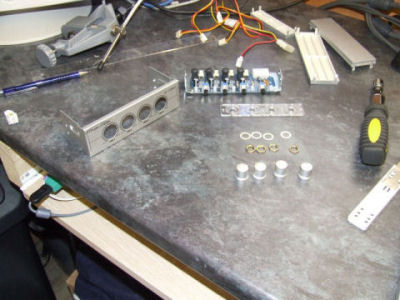
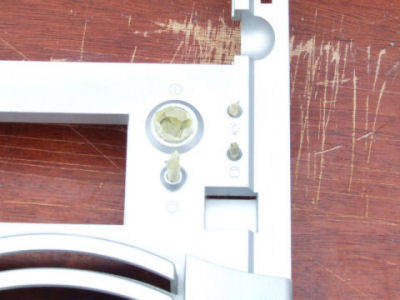
    Pull and strip the fan controller...


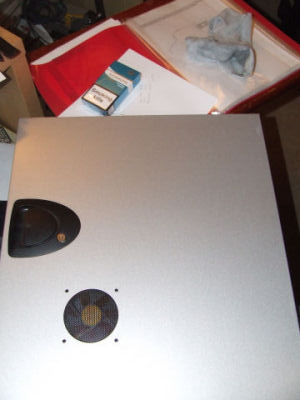
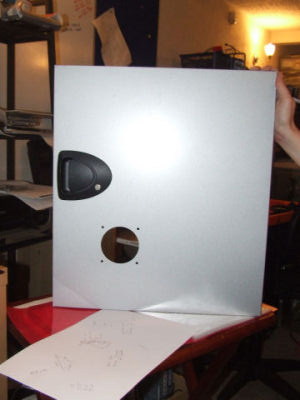
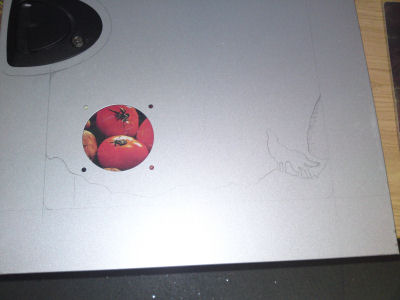
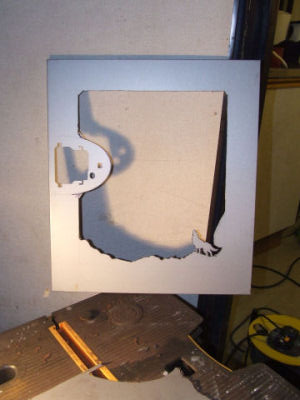
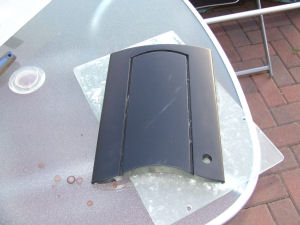
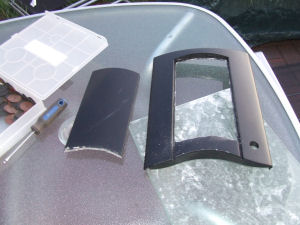
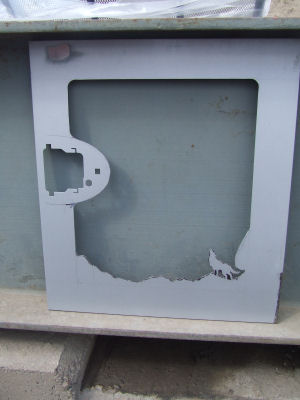
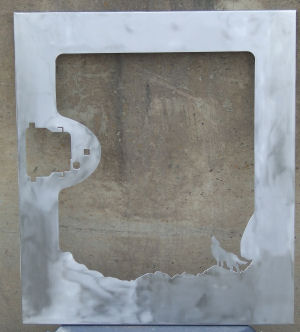
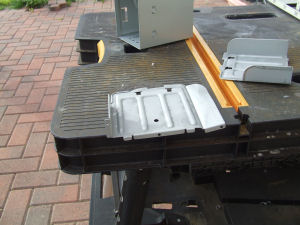
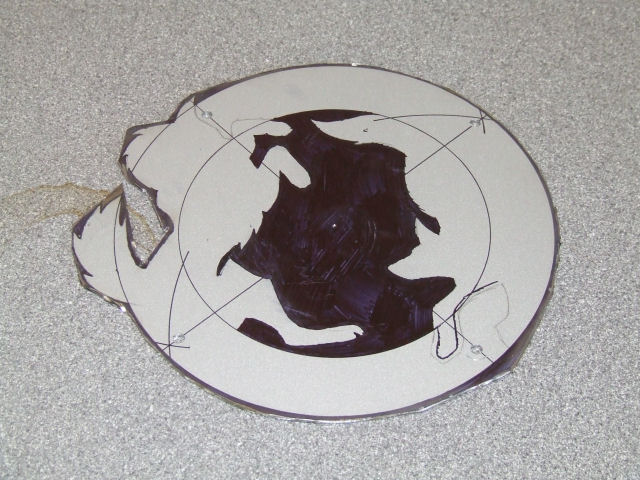
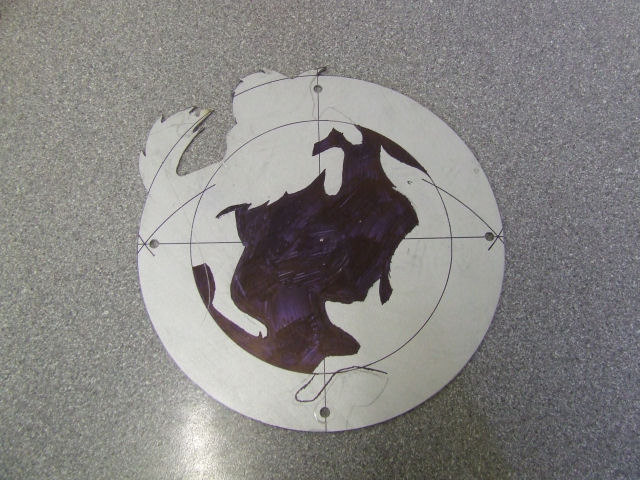
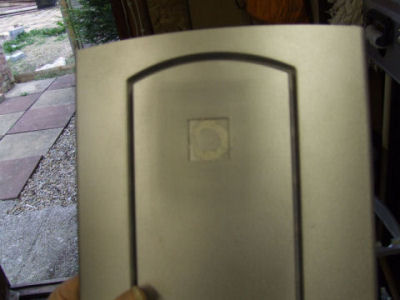
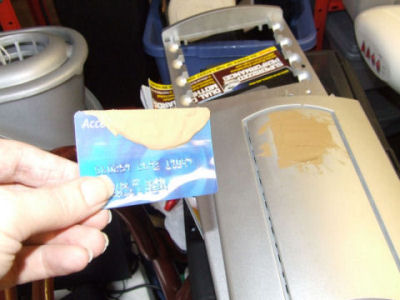
    Kill the badge hole on the door...


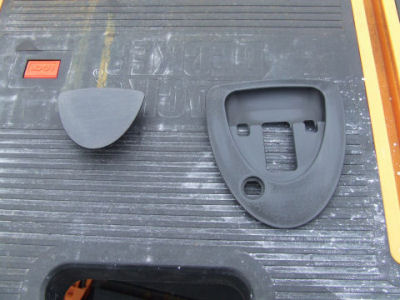
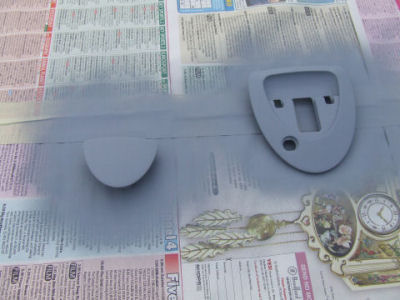
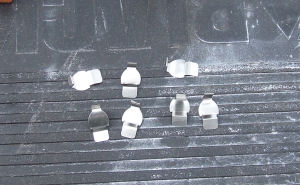
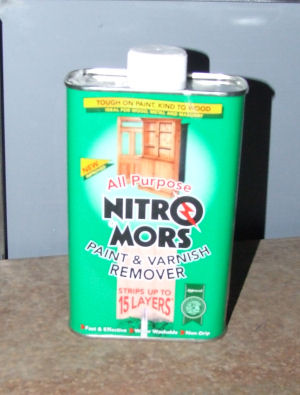
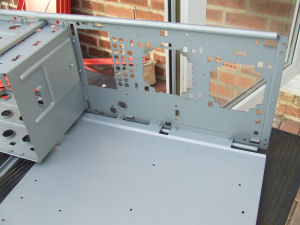
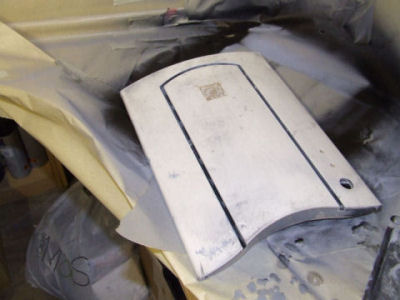
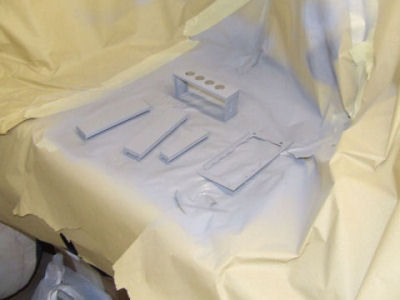
    Priming up the loose bits...


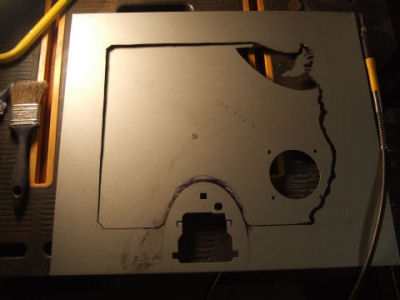
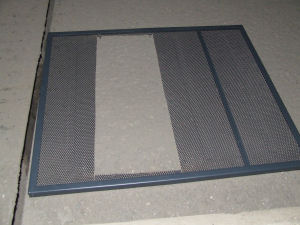
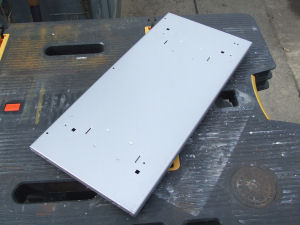
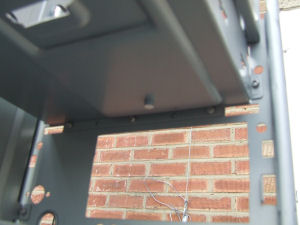
    Carefully masking the holes - I've had stuff NOT go back in after paint because of the thickness of the paint and don't want to do THAT again...


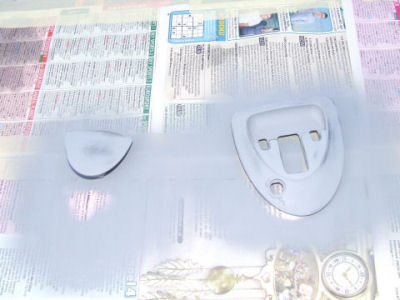
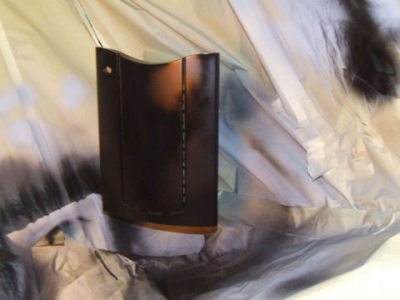
    Bit of colour of the loose parts...


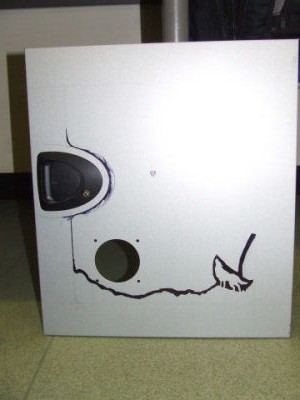
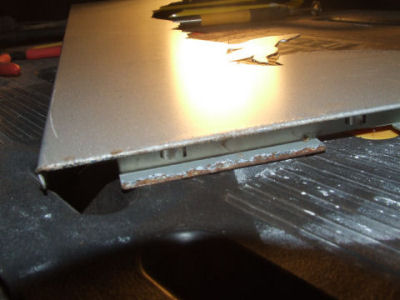
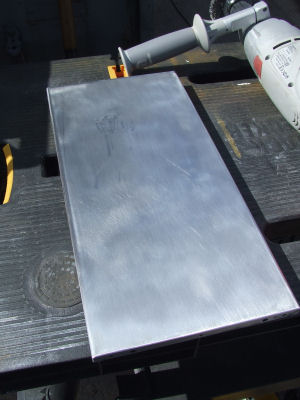
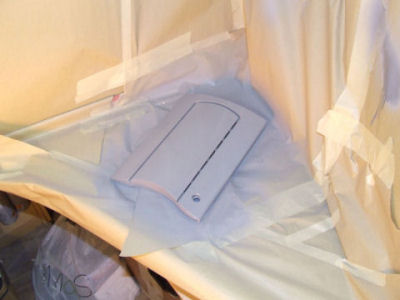
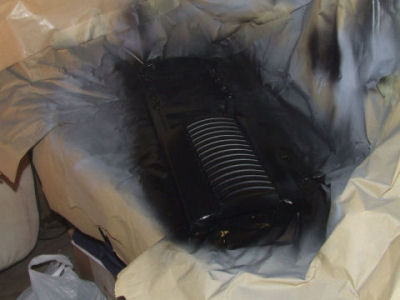
    Quick scotchbrite and layer of colour on the front (already painted silver so no real need to re-prime it)


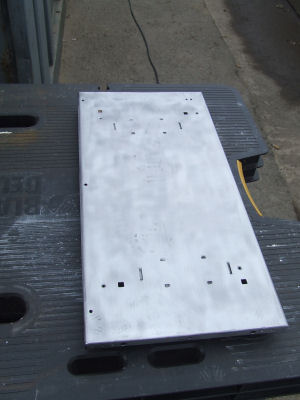
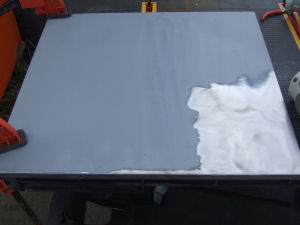
    And finally, a quick coat of primer on the inside of the side panel which was not orginally being cut...


    Apologies for the flurry of posts but it's easier than re-typing it all - hope you guys understand and I'll keep this log up to date as the build progresses...
    Last edited by slaveofconvention; 09-26-2009 at 09:09 AM.

    Current Projects: Lobo | Unimatrix | High Voltage | Antec 900 Revamp (Phase 2)
    Completed Projects: General Lee | Synergy Green | Liquid Yellow
    Planned Projects: K-9-PC | Limey

  2. #2
    If it isn't stock, it's modded! slaveofconvention's Avatar
    Join Date
    Aug 2005
    Location
    Sunderland, Tyne & Wear, UK
    Posts
    2,816

    Default Re: PROJECT: Lobo

    No more pics just yet - but I thought a little "to do" list of planned mod's would be a fairly good idea instead of just a bunch of 3 year old photos and a history lesson :p

    I intend to:

    1. Blatently copy Tech-Daddys window - it's my favourite part of Lupine and I can't think of any way to improve on it. The only real differences will be that I'm not going to have a laser etched wolf on mine, and the landscape/wolf will be slightly different - not because there's anything wrong with TD's - just because chances are we'll have used different graphics to build our outlines, and the cases are probably different sizes. I'm also considering having the wolf in the metal airbrushed in as a feature - will have to look into the cost of that as it is DEFINITELY way beyond my abilities....

    2. Major airflow improvements. The Dragon case is from way back when the 80mm fan was king and a 2Ghz processor was off the charts powerful (I got the case from a friend after an upgrade to something quieter - pretty sure that upgrade was from a 1700xp to an Athlon 64 system). I don't know yet what'll be going into this case, hardware wise but if I'm happy with the end result and think the cooling will take it, I may well transplant my main rig into it (Q6700, 8GB DDR2 800, Radeon 4870 etc) - if not, I have a spare parts pile that fills a garage so I'll throw something around the 3Ghz mark into it so it's a complete system.

    3. Vents on the front have GOT to go - I never liked them - thinking about replacing them with mesh maybe - same will probably apply to the middle of the upper front door to maintain the consistency.

    4. Possible illuminated opaque (frosted maybe) window on either the other side or the top of the case.

    5. I'm almost decided on the colour scheme - thinking a light gray/white combination in keeping with the lighter colouring of the Lobo wolves.

    6. Whatever else springs to mind/is suggested. I like to very loosely plan my mods - I'm not one for having a 100% plan in place start to finish most of the time. I like them to evolve.

    Current Projects: Lobo | Unimatrix | High Voltage | Antec 900 Revamp (Phase 2)
    Completed Projects: General Lee | Synergy Green | Liquid Yellow
    Planned Projects: K-9-PC | Limey

  3. #3
    If it isn't stock, it's modded! slaveofconvention's Avatar
    Join Date
    Aug 2005
    Location
    Sunderland, Tyne & Wear, UK
    Posts
    2,816

    Default Re: PROJECT: Lobo

    I've always been one for paying too much attention to the minor things - it's probably why a lot of what I start doesn't get finished unfortunately. This project, and another one I have in the works, K-9-PC are the start of the new me - I WILL finish them, and in a timely fashion - but I'm still going to pay attention to details.

    So.... the opening panel has a plain black textured plastic lockable quick-release handle. I want it smooth and colour co-ordinated.


    Pull out the 80mm fan and grille and consign them to one of the parts baskets in my work-room..


    And out with the handle...


    4 screws, one nut, and a little more force than I was truly comfortable with later...


    Quick sand with some 120 grit wet n dry (used dry)...


    A coat of el-cheapo aerosol primer...


    And another...


    And a final sand down...


    Now nice and smooth - they'll get another good sanding before being primed up properly with a high quality 2pack primer - for this project I'll be using Lechlers Green Ti Filler Primer. I only used the cheap aersol primer above to show me the high and low spots on the handle so I could get it really smooth. There are times when you're modding you need to save a little money with cheaper materials or tools - paint, in my opinion, is NOT a good one to choose....

    Just thought I'd stick this up too - my interest in wolves isn't a new thing - this is my first ever tattoo - I got it about 7 years ago I think...... On my upper right arm....


    Current Projects: Lobo | Unimatrix | High Voltage | Antec 900 Revamp (Phase 2)
    Completed Projects: General Lee | Synergy Green | Liquid Yellow
    Planned Projects: K-9-PC | Limey

  4. #4
    If it isn't stock, it's modded! slaveofconvention's Avatar
    Join Date
    Aug 2005
    Location
    Sunderland, Tyne & Wear, UK
    Posts
    2,816

    Default Re: PROJECT: Lobo

    This is the one part where you should all feel free to shout "COPYCAT" lol - it'll end up different, certainly, but for now, it'll appear to be a clone of Lupine's side panel....

    First things first, made up a design for the bottom edge of the window...


    Then I drew a rectangle around the whole panel, using, of all things, a carpet strip (brass thing you put under a doorway to hide the join between carpets in two different rooms) to keep the distance from the edge equal on all four sides. Then I got a little inventive. I used a dremel cutting disk to draw the curve around the handle - worked wonderfully - if anyone here ever needs to follow a curved line, this is the way to go - I just put the tip of the pencil into the hole in the disk, pushed the edge of the disk up to the handle and started to draw, putting slight pressure towards the handle and the pencil/wheel just followed the line giving me a perfect curve which will be exactly the same distance from the handle all the way around it. Then I cut out the template and traced the edges.


    Then I went over it in black marker pen - pencil marks disappear far too easily in cutting disk/steel dust lol. There were some smudges but the lines were more than clear enough and the smudges were all on the part that was getting cut away so no problems there...


    Then I started to cut - first I did a rough cut around the wolf himself - last thing i wanted was pressure on that part of the window as I cut further and further around the outline...


    Then started on the long straights...


    Until finally the first rough cut was finished and the centre piece fell free...


    That's when I noticed the first of the rust - thats what happens when you leave a steel case in a garden shed for 3 plus years ...


    But not a problem - stuck a wire wheel into the dremel and it took it all off in seconds...

    I can only apologise for some of the pics - I work a few shifts a week as a security guard and I took the side panel into work with me to work on between patrols - I have to do like, 10 mins work every hour - the other 50 mins are mine to do with as I please. This panel was being cut between about 7.30pm and 2am a couple of nights ago - as it got darker the quality of the pics fell - the halogen worklight either confused the camera so the flash didnt go off, or it didn't and the flash reflected off of the metallic silver paint currently on the panel. You can still see how I went, but expect better pics as the log progresses :p

    Current Projects: Lobo | Unimatrix | High Voltage | Antec 900 Revamp (Phase 2)
    Completed Projects: General Lee | Synergy Green | Liquid Yellow
    Planned Projects: K-9-PC | Limey

  5. #5
    If it isn't stock, it's modded! slaveofconvention's Avatar
    Join Date
    Aug 2005
    Location
    Sunderland, Tyne & Wear, UK
    Posts
    2,816

    Default Re: PROJECT: Lobo

    OK so, busy 24 hours - where the hell do I start lol.

    Bear with me, I just got in from a 12 hour shift, at least 9 of which was spent with some kind of power tool or file in my hand....

    Last night - went shopping - looking for some kind of mesh without paying fortunes for "proper" mesh - was thinking waste paper bins, maybe pizza trays - things like that. After 4 stops with no joy, I ended up in IKEA where I bought....

    A coffee table - box damaged and parts possibly missing (like I cared lol) for the grand sum of Ł2.50 (about $4)...


    And some handles (for K-9-PC - I'm currently only listing this project on a different forum but I'll shift it here when the sheet metal company gets their fingers out of their asses and gets me a damned price - can't do a thing till then anyway)


    And while I'm on the subject of buying stuff - before work this morning I stopped for this...


    and when I got home tonight, these had arrived...


    50x 3mm 3.5v 10,000mcd white LED's - decided I don't want lots of colour in this case...
    Credit to LED Depot in the UK - I only paid for these yesterday (I think) thursday at the earliest - nice quick despatch and good bulk prices - I never buy just what I need when it comes to LED's - I have trays of them in a whole range of colours/sizes now.

    I mentioned earlier that I want to replace the 80mm fans in the front of this with 120's - easier said than done, I assure you! It SHOULD fit, in theory...


    but not without some big changes so last night, I went into the garden and made a start on cutting that ugleeee vent out of the front of the plastic front panel and MAN what a nightmare - it was so thick, and the way it was constructed, it was taking about 6 different cuts with a dremel cut-off wheel to get EACH ONE out - took the best part of an hour just to get it from this...


    to this....


    and then at work today, I pushed on and got it tidied up a lot - ended up using a utility knife to carve out the debris as both the cutting wheel and sanding cylinder on the dremel clone just melted stuff and made more mess, and I couldn't get in with a file coarse enough to get the job done in less than a week!

    I also started cutting out the door centre...


    I decided not to cut the whole door centre out so it'd retain most of it's strength.

    and again tidied it up at work today. A little additional sanding and shaping and I ended up with this...


    This really is the worst kind of modding, because I really don't know 100% what I'm doing with this front panel - I just went at it with a couple of vague ideas. NOW I think I've decided to put mesh in both holes, with the two 120mm fans behind the bottom half and a piece of frosted perspex, illuminated with some of these white LED's in the top. This is assuming I can get the 120's in, there are structural issues with the case I have to take into account....


    See the two little bits sticking into the case, attached to the front panel under the 5.25" bays? Those are the mounts for the 3.5" bays and they CANNOT BE MOVED - the bays lock in both top and bottom so the position appears to be set. This means I can't just cut a hole in the front to make the 120mm fans fit - I'm basically hoping like hell there's enough clearance between that metal front and the back of the plastic for them to go there - if there is, I'll cut away as much metal as possible to improve airflow without taking out the drive bay mounts.

    More to come - my dinner is ready lol - I'll post a load more pics in the next hour(ish)

    for now though.... my wolf - I'm SO happy with this lol


    Current Projects: Lobo | Unimatrix | High Voltage | Antec 900 Revamp (Phase 2)
    Completed Projects: General Lee | Synergy Green | Liquid Yellow
    Planned Projects: K-9-PC | Limey

  6. #6
    If it isn't stock, it's modded! slaveofconvention's Avatar
    Join Date
    Aug 2005
    Location
    Sunderland, Tyne & Wear, UK
    Posts
    2,816

    Default Re: PROJECT: Lobo

    Right, where was I?

    The mesh coffee table - had a bit of a slice-up of that just to see how it'd be to cut, and what the mesh would be like once free from the frame...


    I thought it was really easy to cut but there was actually more resistance than I realised - it cut really quickly but I soon noticed the cutting wheel shrinking really quickly - a sign you're going to fast. So I did it again, and again, knowing I'd need some small disks for the detail work around the wolf, speaking of which....


    You can't really tell from the pic, but those lines are straight as an arrow and the corners are nice and smooth - I filed all of the edges and then sanded them with dry 180grit wet n dry to get a really smooth tidy finish on them - I swear you couldn't cut yourself anywhere in that window if you tried!

    When it came to carving out the details, especially around the wolf, I decided to try something a little different - one of the mandrels I have for cut-off wheels has an unusually long screw, so I put 3 disks in at once and used that to grind away little bits at a time - the additional width gave me a smoother cut and the disks reinforced each other so I didn't get a single shatter - a BIG improvement on the other night when I was smashing disks left, right and centre.

    Then I started scrubbing off paint. First thing I had to do is pull out about 20 of these little things...


    They're little anti-vibration spring-clips I think - they only go on the side with the wolf window which also happens to be the side with the handle - I'm guessing they cut down on vibrations IF you only use the catch and no screws to hold the panel in place.

    Then I started with the wire-wheel on the base...


    Which came out pretty nice, and relatively quick too - about 10 mins start to finish...


    Same with the top - a little quicker if anything...


    Then the un-cut side panel - which was a whole other story. I'd primed this panel up about 3 1/2 YEARS ago when I was kinda sorta half-heartedly doing a project with this case and the primer, over time had become pretty much bulletproof. After spending about twice as long as I'd spent on BOTH the top and bottom together, I'd only gotten this far...


    And to be honest I was worried about burning out the drill. Generally speaking, drills are designed for short bursts of activity - how long does it take to drill the average hole? This drill had been on, pretty much constantly for the best part of an hour and a half so I gave in and called someone to pick this up for me...


    After a couple of hours soaking into the primer (after the 20 mins the tin said, nothing had changed - the primer was that hard) I tried again and the rest came off much more easily, so I went ahead and VERY carefully did the wolf panel - last thing I wanted to do after the approx 15 hours I'd spent on it, was wreck it with the wire wheel.

    End result...


    And all the nice paint-free panels lined up in a row... (this is the only clickable image in this post - while I'm trying to keep to a 300px width - 300 just wouldn't have done this pic justice)


    After all that work the wire wheel was looking pretty shot...


    And the clamping bench I'm using as a work bench had a couple of war-wounds too...


    Finally - as it was getting seriously dark and I was about due to finish work for the day, I took on what may well have turned out to be the biggest challenge of the day - getting all my crap BACK into the car!!!


    That's the biggest problem with me doing my modding at work - I never REALLY know which tools/parts/accessories I'm going to need so I have to take a LOT of gear just in case - I'd hate to be in just the right mood to push on and get a load of work done and then find myself stuck for want of "just that one thing".

    Anyway - thanks for reading - final gratuitous shot of the wolf I'm probably WAY too proud of...


    For the record, I was worried that, once I cut out the gaps between his legs this part of the panel would be WAY too flimsy for comfort - as it happens, it's still really strong - says something about the quality and thickness of the steel these old tanks were made from... No wonder I've used probably 30-40 disks on this window alone!!!

    And I bid thee all goodnight - until tomorrow - I have another 12 hour shift to fill

    Current Projects: Lobo | Unimatrix | High Voltage | Antec 900 Revamp (Phase 2)
    Completed Projects: General Lee | Synergy Green | Liquid Yellow
    Planned Projects: K-9-PC | Limey

  7. #7
    If it isn't stock, it's modded! slaveofconvention's Avatar
    Join Date
    Aug 2005
    Location
    Sunderland, Tyne & Wear, UK
    Posts
    2,816

    Default Re: PROJECT: Lobo

    So that other 12 hour shift I was talking about - spent it cutting, bending, folding, and then throwing away piece after piece of mesh - total achievements for the day was cutting, sanding and badly frosting a single piece of perspex so no pics or progress to report.

    On another note - my plan to put a pair of 120mm fans in the front is also fubar - I've shaved as much plastic as I can off of the front panel cover and there's still at least a 2mm excess so they just will not fit, full stop. I'm going to try removing the bottom drive bay support, which will drop me down to a single internal 3.5" bay then find a way to mount a Thermaltake iCage in the front

    That'll give me back my 3 3.5" bays, and give me one of the two 120mm fans I wanted in the front. The whole case stands on feet with almost an inch of clearance from the floor, so I think I'm going to try putting the second 120mm in the base.

    The front panel now has a HUGE hole in it for a single 120mm fan lol - so I'm also going to have to look into ways of filling that. I think the mesh idea is now dead in the water so I'm thinking about a perspex panel instead. I've already pretty much decided that's what I'm going to do in the door, if I can get it to curve nicely - so having something similar in the bottom (with a hole for the fan, obviously) should keep the consistency going and tidy it up nicely.

    I've got my eye on this dark tinted perspex for the windows - the company will cut to size for me, and I'll then just fine-tune it - they've assured me the tint is all the way through, not just some kind of surface treatment so when they do the cuts, I'll ask them to send the off-cuts too so I can try frosting it to see how it'll look with a few of those white LED's fitted.

    Anyone have any experience with putting multiple LED's on the LED headers on the motherboard - will it provide enough current to run say, 3 or 4 - might be kinda cool to have the bottom half of the panel glow for the POWER led and the top half flicker with HD activity - maybe using a different coloured LED for the HD activity so it's more obvious.....

    Oh and I think I've decided to go with a darker paint colour - something like a highly metallic dark dark grey.... I'm fortunate in that I have access to a paint mixing scheme, and I have a compressor/paint gun setup at home so I can make it exactly what I want instead of being stuck looking at aersols and hoping to find something close enough...

    Now, these damned front fans - I'm not giving up on this lol - I want them in the front - I don't want to end up putting one in the floor of the case because that'll reduce the airflow which will, in turn, make me think twice about putting my main rig into this case...

    As for the drivebays - drilling out the rivets isn't really the problem - the 3.5" bays are in caddies of 3 - the top one holds 2 external, 1 internal and the bottom one holds 3 internal.


    The way the caddies lock into the bays is made up of two parts - the bottom tray which is there to hold the weight and a small pin in the top which is what the catch on the top of the caddy locks into.


    While I could quite easily move them back en masse into the case to give me a little space, those pins which lock them in place can't be removed so I'd end up with them not locked in - not an ideal situation.

    I took out one of the trays by removing the 3 rivets and giving it a bit of a wiggle, then placed the two 120mm fans in there to see if it'd fit...


    And nope - still a good overhang at the bottom of the case which just aint gonna work, so I took out the second tray and tried again...


    And presto - they fit - nicely too. Leaving just one pretty big problem. I'm not bothered about losing the bottom 3 hard disk bays - as I mentioned earlier, I have an iCage or two lying around which I can put in to replace them but, I still need that top caddy for the external 3.5" bays - I THINK I may have lost all of the damned bay covers over the last few years so I might well have to find a way to fill all 6 external bays - not too difficult as I'm already using a DVD burner and two different hard disk caddies in 5.25" bays in this PC - a fan controller can fill the 4th 5.25 - and I have a 3.5" card reader too, so I can just throw in a totally pointless floppy to fill the last one.

    So I need to find a way to re-fit that upper shelf in such a way that it'll still allow the 120mm fan - as I'm not concerned about losing the bottom of the 3 3.5" bays in the upper caddy (I'll have room for 3 HD's in the iCage) I thought about cutting the front inch out of the shelf then reattaching it around the fan - I can easily do this with one of the 3 original rivets and one of the two original metal clips - just not too sure how strong it'll end up with 3 or the 5 original anchor points removed. I tried bending the shelf straight to see if I could get it to reach around the fan


    But it still won't reach around the fan.

    On top of this there are a LOT of holes in that front panel for old fittings, vents, front panel connectors etc so it's going to be almost impossible to get the fans screwed in securely in exactly the right spots so I'm now considering cutting most of that front panel out and replacing it with a piece of new sheet steel - at least then I'll be able to cut the holes I want exactly where I want them instead of trying to find ways to use/avoid the existing ones.

    There is turning out to be a lot more fabrication than I expected on this - a lot more than I've ever done before - here's hoping I'm up to the challenge

    Current Projects: Lobo | Unimatrix | High Voltage | Antec 900 Revamp (Phase 2)
    Completed Projects: General Lee | Synergy Green | Liquid Yellow
    Planned Projects: K-9-PC | Limey

  8. #8
    If it isn't stock, it's modded! slaveofconvention's Avatar
    Join Date
    Aug 2005
    Location
    Sunderland, Tyne & Wear, UK
    Posts
    2,816

    Default Re: PROJECT: Lobo

    Ok, so I might be about to bite off massively more than I can chew here - but I'm seriously thinking about trying to make this as a fan grille for a 120mm top exhaust.... I'd probably back it with mesh for stability and safety....


    Argh - slight design problem - in that image, the ring needs to be thicker to allow it to 1) perfectly follow the circle of the fan blades on the inner diameter, and 2 be wide enough to allow for fan screws without having to have tabs. The problem I've just spotted (which should probably have been more obvious, is that roughly half of the wolves will be illuminated with the fan, while the other half will sit on the case and be whatever colour I end up painting the thing - not the look I was hoping for. If I make it small enough so the whole of the wolves are over the fan, i cut off about 60% of the airflow - if I move the wolves out so they're on the outside of the ring - the grille will be too wide for the case.... If i get some really thin perspex and make the wolves solid with frosted perspex, again I kill a lot of the airflow....

    As it stands, I think it'll look something like this - please excuse the down n dirty 3 minute photobodge....


    I got me some thinkin to do....

    ... and a day later lol - I'm tryin to combine some of the posts from M-I to avoid daft numbers of posts here to get you guys up to date ...

    I'm thinking lower airflow on this fan WON'T be a bad thing. The case is going to have 2x120mm intakes on the front, a 120mm exhaust in the rear and a 120mm exhaust in the top. The PSU also acts as an exhaust so I'll still have more than enough exhaust with the top fan blocked about 30%.

    The idea (for now lol) is to get a sheet of clear perspex and shape it so it follows the outside line perfectly, possibly with an angled bevel, and follows the inside just to the edges of the wolves. If I frost it, it should light up relatively evenly just with light from the fan - it'll raise the fan grille itself the thickness of the perspex which will give it a nice 3-d effect. If I use thick enough perspex - say 5-6mm, I could even light it with dedicated LEDs if the fan LEDs dont give off enough light to make it glow properly.... Or I could use the dark tinted perspex I'm already planning on buying to stay with the theme and give the light a greyish effect - stop it being too in-your-face....

    Erm... another fairly quick n dirty image editing session and this might give you SOME idea what I mean - if you can imagine the grey as metallic lol - and the solid white as the glow you get from illuminated frosted perspex....


    I'm still not sure about the dark grey - something in me is pulling me towards the tan colour - the closest thing I can think of would be the base colour used on Overhaulin's CNN hummer - I'm already pretty much decided that if I go with the dark grey, I'll polish the hell out of this grille, and if I go with the tan, then I'll make it black to give lots of contrast and a good breakup between the outer colour and the frosted acrylic....

    I also noticed with this mockup that it's possible the lobo lettering will be less clear because of the core of the fan, so I added some colour to it - not sure what colour in the final version but for now, the red stands out so you can see my point...

    Current Projects: Lobo | Unimatrix | High Voltage | Antec 900 Revamp (Phase 2)
    Completed Projects: General Lee | Synergy Green | Liquid Yellow
    Planned Projects: K-9-PC | Limey

  9. #9
    If it isn't stock, it's modded! slaveofconvention's Avatar
    Join Date
    Aug 2005
    Location
    Sunderland, Tyne & Wear, UK
    Posts
    2,816

    Default Re: PROJECT: Lobo

    From Yesterday:.....

    Little update today unfortunately. I had so many plans to get so much done and, well pffft. lol

    I mentioned before that one of the problems with modding at work is forgetting the one bit you need....

    Well I forgot - 6.....

    I managed to come to work, with the intention of getting on with this fan grille without....

    Flat file
    Round file
    Angle file
    Clamps for the clamping bench (x2)
    The case itself...

    So I decided to get on with it, with a little (hopefully) educated guesswork as I couldn't double-check the measurements.

    Remember this?...


    Well here's the piece of metal that came out of that panel...


    Started off by drawing up some guidelines for the overall size of the grille and the screw-holes...


    Then I drilled out the 4 holes and placed the paper template wolves in place around them...


    Sketched in the outlines of the wolves and used a black marker to colour in the initial cuts - the outer rim and the centre cut. I've already decided to drop the word Lobo from the grille because I don't think it'd have enough strength - it doesn't really matter how thin the metal is on the wolves as they're getting backed in perspex...


    And then the first outer cut - keeping it relatively close to the final image to reduce the amount of filing to do, but far enough so there's definitely some black all the way around...


    And unfortunately, that's as far as I got - I needed the clamps at this point to hold the metal still while I filed it - and I don't have the files either. I would also prefer to have it clamped in place before I start drilling in the middle for that cut so again, stuck for now...

    Tonight when I get in from work, I'm going to properly load the car instead of a mad 5-minute throw in the usual suspects....

    More tomorrow though - as long as the weather behaves itself...

    I don't know quite where the thought came from, but I now have to add pearl white to the list of possible colours for the overall case. I think it'd look really sharp - pearl white against the dark tinted plexi - but I'm not sure it really carries the wolf theme along. Tech daddy used purple because it was his wife's favourite colour but as I'm doing this just from the wolf angle, I'm kinda stuck on the colour. It isn't a huge deal yet - still lots of prep to do before any paint touches it. The interior is going to be all black, that much I have decided on....

    Current Projects: Lobo | Unimatrix | High Voltage | Antec 900 Revamp (Phase 2)
    Completed Projects: General Lee | Synergy Green | Liquid Yellow
    Planned Projects: K-9-PC | Limey

  10. #10
    If it isn't stock, it's modded! slaveofconvention's Avatar
    Join Date
    Aug 2005
    Location
    Sunderland, Tyne & Wear, UK
    Posts
    2,816

    Default Re: PROJECT: Lobo

    And today.... (almost up to date lol - sorry again for the flood of posts.....)

    So yesterday I made a comment ....

    More tomorrow though - as long as the weather behaves itself...
    Yeah well, should have kept my big mouth shut lol


    But, before the skies opened, I did get some stuff done, and hopefully it'll stop in time for me to do some more before it gets too dark...

    After yesterdays debacle, I felt the need to actually start and finish something today. I've been thinking about the wolf in the cutout and IF I go with the dark grey paint, and dark grey tint, it's not going to stand out very well. One solution which I decided to set up today, would be some kind of halo around it. I started with a spare piece of perspex with the outline of the wolf traced into it...


    Then tried my first ever score n snap perspex cutting attempt...


    Which worked, close enough anyway - you can see where the line didn't follow all the way to the very edge but fortunately the bit where it went off-line isn't going to cause a problem. So a couple more snaps and...


    A quick and dirty rough cut around the shape...


    Followed by a slightly more careful one with needle files and 180grit wet n dry...


    Then half an hour or so of gentle sanding with some dry, then wet, wet n dry...


    And a quick idea of where it goes...


    The idea is that I'll illuminate this piece of perspex with two 3mm white LEDs (I already drilled the holes for them) and stick it to the back of the tinted perspex so while the tinted sheet will be totally continuous across the window, this will hopefully glow through and give the wolf a clear, but not too sharp, outer glow.

    I also spent another couple of hours grinding, filing and sanding the outer cut of the fan grille...


    And another result I'm more than happy with. If this rain stops (well actually, it seems to be stopping now) and stays stopped, I'll do some drilling to make a start on the inner cut later, or possibly tomorrow - it's a 3 day weekend here in the UK, which means 3 12 hour shifts for me instead of the usual 2....

    Fingers crossed for the weather!!!!

    Current Projects: Lobo | Unimatrix | High Voltage | Antec 900 Revamp (Phase 2)
    Completed Projects: General Lee | Synergy Green | Liquid Yellow
    Planned Projects: K-9-PC | Limey

Posting Permissions

  • You may not post new threads
  • You may not post replies
  • You may not post attachments
  • You may not edit your posts
  •