Page 2 of 6 FirstFirst 123456 LastLast
Results 11 to 20 of 60

Thread: Retro project.

  1. #11
    SOB Fettler xmastree's Avatar
    Join Date
    Mar 2006
    Location
    Burnley, Lancs. UK
    Posts
    1,704

    Default Re: Retro project.

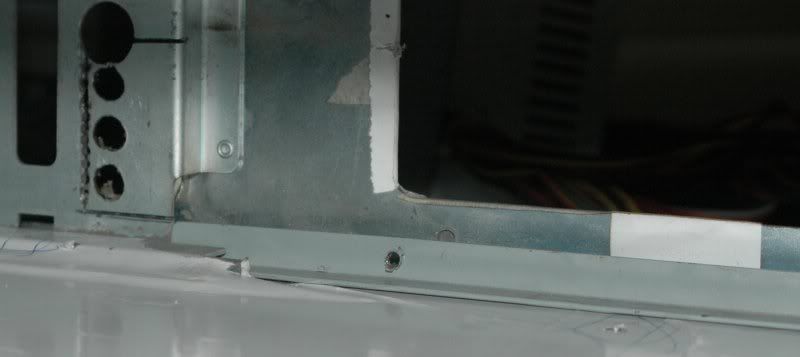
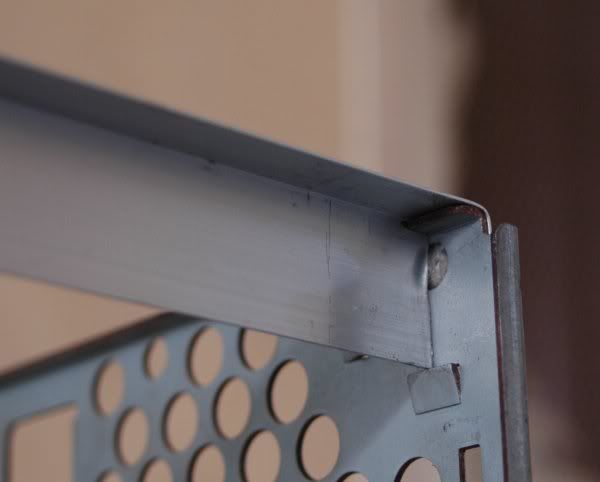
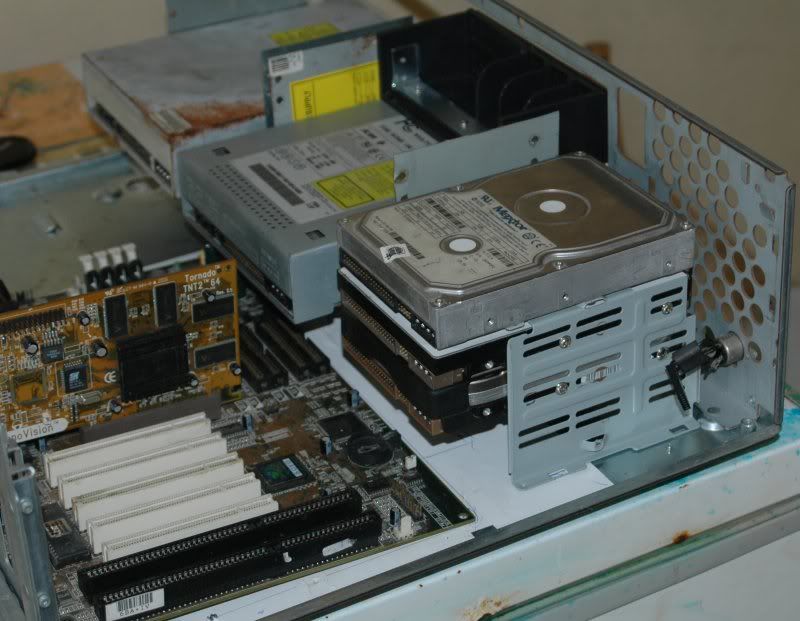
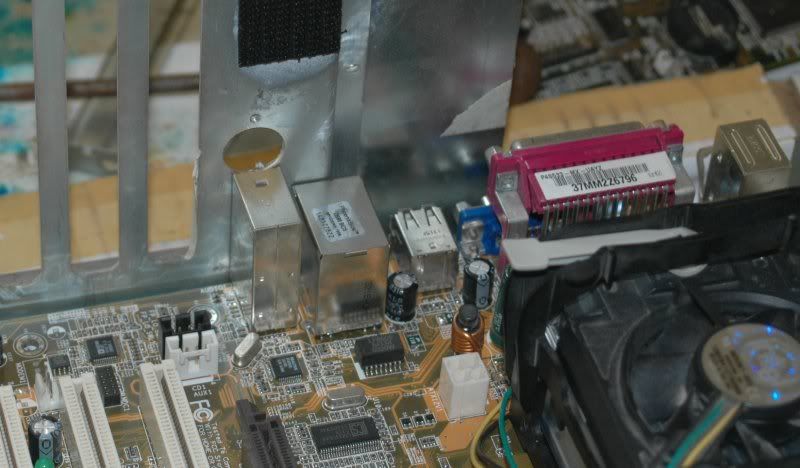
    Been busy, so I haven't done that much lately. Today I fitted the disk mountings,

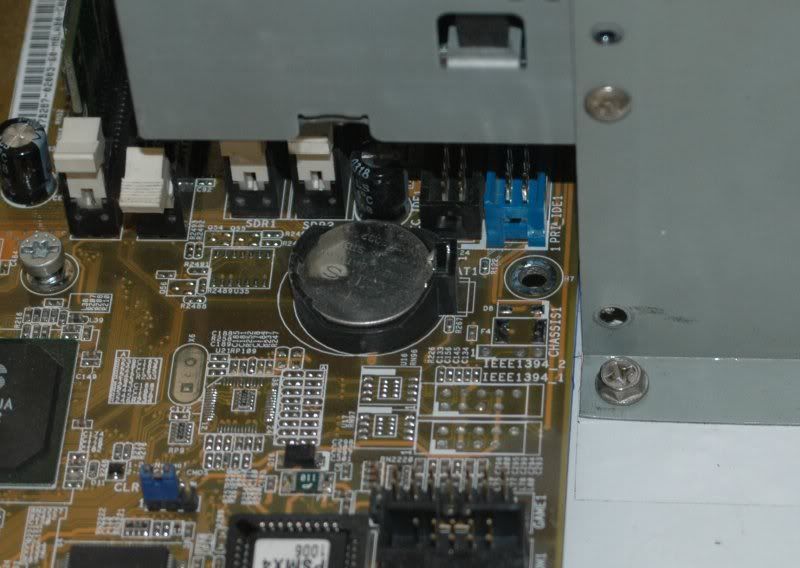
    which just clear the motherboard.

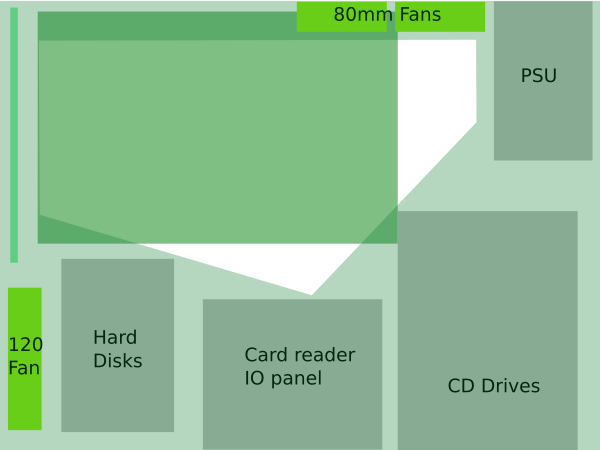
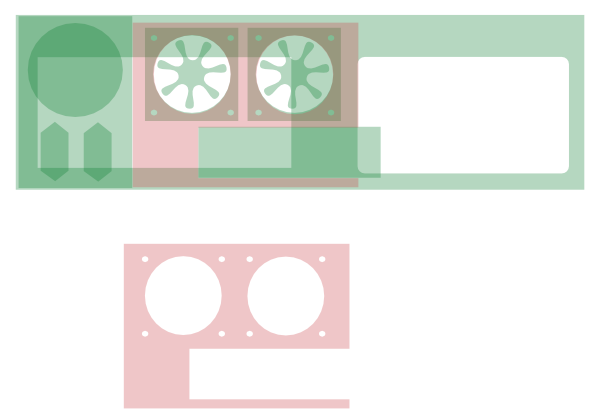
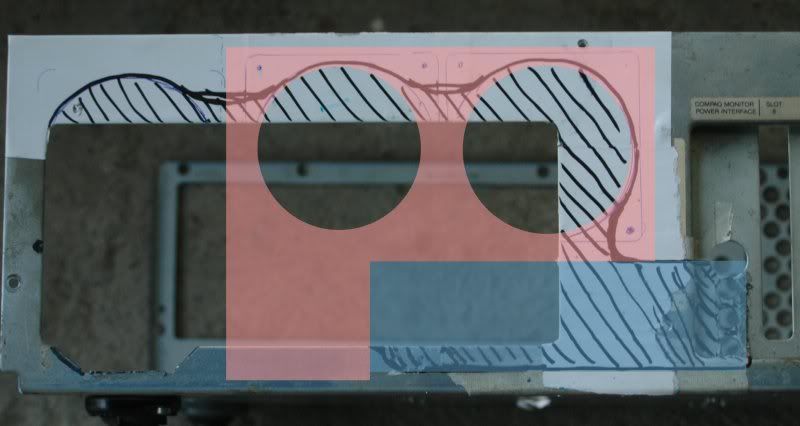
    That's not the one which will be going in there, I still have to get that. I suspect the eventual one will be longer and thinner, like the Soyo I've been using as a template (in the first picture). I used both boards to get an idea of the common mount points then drilled them. Those standoffs are quite tall, it might be better to drill and tap right through them, then screw them to the case rather than welding. Not sure yet, but that would give me more flexibility with the placing of them.

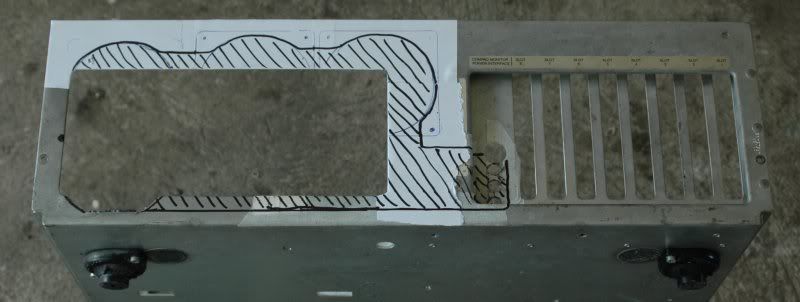
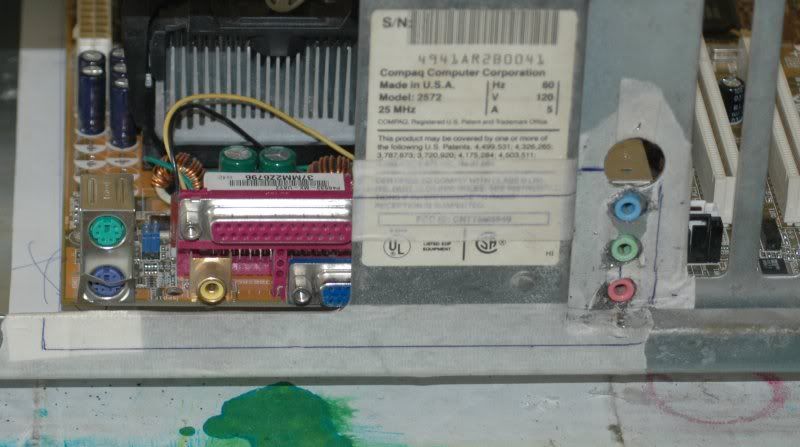
    I need some ideas what to do with the back panel... Anyone?


  2. #12
    Overclocked
    Join Date
    Apr 2006
    Posts
    474

    Default Re: Retro project.

    Damn, I had two or three old but OLD IBM cases (Way older than your Compaq) lying around, with two 5.25 that takes 2 normal slots for one drive. I could have managed to take 2 hard drives, one I/O panel like yours, and one or two DVD drives. I say good luck on your floppy DVD drive, Im sure it will take ALOT of hard working to do it but damn it will look nice!

    For your back panel, I say you cut the lil panel with the warranty on it, and find a way to hide the whole large hole then use the little alu panels for your slots.

    As for your drive that takes some place of the motherboard, couldnt you mount it on the right of the case? This way, you could have your IO slot in the middle, and your card readers centered. If you are thinking about using only 1 DVD drive, you could take a socket and mod it to make a fan fit in it, while keeping the case look, that way you will have an intake for your airflow and keeping a retro look for your case.

  3. #13
    Paradox Sausage DaveW's Avatar
    Join Date
    Nov 2005
    Location
    Scotland, UK (NOT England)
    Posts
    5,550

    Default Re: Retro project.

    Some of the pics don't seem to be working...and what heppened the CD drive at the far end with the big brown stain?

    I'd say just cut the warranty sticker off whole, and see if you can't move it later. Then i'm sure you can work something out with the back panel. The warranty sticker could be re-attached horzontally above the back panel ports? To fill in the rest of the space?

    -Dave
    Quote Originally Posted by jdbnsn
    Ideas are just knowledge soaked in alcohol.
    Quote Originally Posted by jdbnsn
    Did I just get in a Volvo? Volvo's don't have guns!

  4. #14
    SOB Fettler xmastree's Avatar
    Join Date
    Mar 2006
    Location
    Burnley, Lancs. UK
    Posts
    1,704

    Default Re: Retro project.

    That panel with the sticker is the chassis itself. If you look at this pic it's between the fan and that bit of black velcro.
    The lines on the masking tape are where the standard ATX plate would be, although further back, in line with the plate with the slots.

    As I'll have to cut it out, I might as well cut it at the top. That will give me more exhaust fan options. whilst I'm not usually to fussy about rear views, this part may well ve visible through the window I'll be putting in the top, so it needs to look good from the inside.

    I'm thinking about a stainless panel... Stainless is more readily available here. I'm no tinsmith (I even had someone cut those psu covers for the drive mounts. Cost me less than $1US) but I can make a template from card and take it to someone who is.

    The pics. I recently moved them in photobucket, and thought I had updated the links. maybe I forgot some.

    The big brown stain? that's rust. It's an old broken drive I was using just to get the size and placing.

    I haven't decided what drives will go where yet, those two were just in there as templates. I think the frontx panel and the card reader will be centre bottom and any CDs will be on the right as Nagoshi said.

    Edit: I started working on designs for the window. I don't want to be able to see the disks in all their ugliness, but the motherboard, video, heatsinks etc should look ok. So with that in mind, and given that I don't like square windows, I came up with this:


    It should be obvious what's what. That's a cathode on the left hand side (I guessed at the length), and the two rear 80mm fans will be illuminated. I figured for the cathode, I'll get some angle aluminium running the length of the case and mount it to that. It should be protected there, and the aluminium will act as a reflector, directing the light where I want it. That could also provide an anchor for the intake fan.

  5. #15
    SOB Fettler xmastree's Avatar
    Join Date
    Mar 2006
    Location
    Burnley, Lancs. UK
    Posts
    1,704

    Default Re: Retro project.

    Been looking at the back panel and scratching my head again...


    That pink bit is what I need to make if it's gonna look neat. I also have to fasten it to the existing metalwork.

  6. #16
    Rankenphile
    Guest

    Default Re: Retro project.

    cool. nice visual prototyping work.

  7. #17
    SOB Fettler xmastree's Avatar
    Join Date
    Mar 2006
    Location
    Burnley, Lancs. UK
    Posts
    1,704

    Default Re: Retro project.

    Thanks. I wish I had (and had time to learn) a decent CAD package, but as it is I just use inkscape (SVG editor) to make the designs in 2D.
    One nice thing about it, see that pink panel? I cloned it below, so that any changes I made to the upper one also appeared in the copy.

    The more I look at that though, the more I think I'd be better using some angle aluminium for the bottom edge of the port slot. It just looks too flimsy like that.

  8. #18
    SOB Fettler xmastree's Avatar
    Join Date
    Mar 2006
    Location
    Burnley, Lancs. UK
    Posts
    1,704

    Default One Tough Case.

    So, today I looked at the back some more, and figured I'd start cutting. There are still some question marks, but the location of the PSU is decided so I made the notch to clear the power plugs.
    Having cut down both sides, I realised that I wasn't going to have enough cutting discs... I drilled a series of holes along the botton edge and joined the dots with the dremel.
    That used one whole disc, just for that.

    So, I've marked out the rest of the cuts, and I think I'll take it somewhere and have a little man do the cutting for me.

    Before I do that though, I'm off out to look for some aluminium angle. I'm still undecided about that rear panel and the fans. If I can mess around with scraps, I might have some better ideas.


    Think three times, measure twice, cut once.

    Or was it:

    Measure with a ruler, mark with chalk, cut with an axe...

  9. #19
    SOB Fettler xmastree's Avatar
    Join Date
    Mar 2006
    Location
    Burnley, Lancs. UK
    Posts
    1,704

    Default Re: Retro project.

    Ok, I've decided what I'm going to do. I didn't get chance to go hunting for ally, so I looked through the bits of cut up cases I was going to use for the drive mounts. It's nice when you find something just the right size, isn't it?


    So, that strip will be fitted there to hold the bottom edge of the i/o plate, one end of which will be held by the existing panel, already cut to fit, and the top and other end will be held by the new plate I'll have made. Changed my mind about cutting all along the lower edge too, to make it more wavy.

    Like this:


    The new plate will be mounted on the original rear panel, using the fan mounting screws and suitable spacers. Another screw or two will locate the bottom edge. I cut the important bit myself, and consumed another (my last) cutting disc in the process. The rest, I'll leave to the little man.

    I think I'll use stainless for the plate as it's nice and shiny so it will reflect the fans' lights nicely. Question is, should I have fan grills cut right into it or just fit wire ones? As it's the back I think I'll go with plain old wire.

  10. #20
    SOB Fettler xmastree's Avatar
    Join Date
    Mar 2006
    Location
    Burnley, Lancs. UK
    Posts
    1,704

    Default Re: Retro project.

    Ngeee. Three days since I updated this, and not that much to show really, due to time constraints and spending most of yesterday in bed with some bug...

    So, all I've managed to do is find some ally which I will use for the bracket to mount the light, and maybe the intake fan on the left side. It's T section, real thin, but I managed to cut and bend is in such a way that it's capable of bending the rear panel it's attached to.

    Quick and dirty photo of how it mounts to the front panel. The rear is simpler as it doesn't have that bend at the top. I will fit screws to hold it in place.


    I'll polish the side of it where the light will be, so it reflects the light better.

Similar Threads

  1. Project Nighthawk: Skunkworks F117-A Worklog
    By Crimson Sky in forum Paul Capello's Worklogs
    Replies: 98
    Last Post: 02-17-2009, 05:26 PM
  2. Project: Cherry
    By gold_leader64 in forum Works in progress
    Replies: 1
    Last Post: 03-09-2007, 08:59 PM
  3. Project: KNS-01 19-AUG
    By Kumo in forum Works in progress
    Replies: 35
    Last Post: 11-14-2006, 05:29 PM

Posting Permissions

  • You may not post new threads
  • You may not post replies
  • You may not post attachments
  • You may not edit your posts
  •