Your machine's specs aren't that bad. I use about the same in my Dell XPS.
Looking good so far. I really need to do something to that XPS of mine probably will be just a large window. A corded dremel definately sounds like what you need.


 Re: Quick fan mount...yeah right.
Your machine's specs aren't that bad. I use about the same in my Dell XPS.
Looking good so far. I really need to do something to that XPS of mine probably will be just a large window. A corded dremel definately sounds like what you need.
Re: Quick fan mount...yeah right.
I have this gnawing feeling that your Dremel battery is pretty kaput?!
I agree that a good way forward may be to get a corded one then you have no mucking around when at the crucial moment of completion it wont all goe horribly flat!!
AMD X2 4600+
Asus A8N SLi Deluxe
2GB (2x1GB) CorsairTwinX XMS2 Pro
Leadtek 7800GT TDH
Dangerous Den RBX water cooling throughout
All tweaked with a 4lb lump hammer


 Re: Quick fan mount...yeah right.
So I answered the moulding question on my way to work yesterday, and went down to the hobby store to get some 90 degree angled plastic. A little cutting with the dremel and the x-acto and this is what it currently looks like:
Got a little more trimming to do to get everything more or less flush, and then I'll get a sheet that has prefabbed squares on it for the corners. After everything looks cool, it'll be painted. I saw a small airbrush at the hobby store for putting metal flake paint on model cars. Wasn't all that expensive either. Hmm...
Also, I'll be getting a new rotary tool next week. $50 bucks down at Home Depot, and it comes with all the trimmings, INCLUDING Ryobi's version of the flex-shaft.
Re: Quick fan mount...yeah right.
Definatly should start looking into a corded Dremmel. Sure, you loose a little mobility, but you gain greater reliability as well as more power.
mellojoe
The Rig with Images
AMD Thunderbird 1.4GHz on an Abit KT7A: [1507]
168-Pin PC133 SDRAM: [896MB]
Radeon 9500-Pro: [128MB]
Logitec z560 4.1 THX: [400W]
Lite-On DVD: [16X]
Antec TrueBlue: [480W]
...to name a few
 Re: Quick fan mount...yeah right.
Where in walmart did you find the plastic? I know they sell it at Lowes, but it tends to be a little pricey...
There is no 'ctrl' button on Chuck Norris's computer. Chuck Norris is always in control.
Re: Quick fan mount...yeah right.
Have a look at this thread in which he tells where he found it:Originally Posted by dfigravity

http://www.thebestcasescenario.com/f...ead.php?t=7270
Re: Quick fan mount...yeah right.
Well now, it's been a couple weeks since I last updated. Not much has happened, due to real life (read: Wedding and School) taking over. I have, however, with a little bit of Ichbin-style finesse (j/k) I have managed to get all the plastic crap off the skeleton.
Not only is this beast getting the window which is 99% done, but she's gonna get a paint job to go with it.
Enough chit chat, because as we all know:

It's a linux box, and like any linux box, it's gotta show its true colors:
The Intel sticker will be going the way of the dinosaur. The badge from the previous pic will be going in the corner right above it.
This has got to go. I'm currently thinking about front side USB.
Remember this guy?
He's about to get gutted. I need the LEDs.
Here's the top and bottom of the case. Remnants of a sticker on the topside. This is where the goo gone is going to come into play.
Ahh, the skeleton. Yes, the skeleton. (Plus rep to whoever can tell me what I'm paraphrasing!)
This concerns me. Kinda hard to make out, but it's some kind of spring/hook that the mobo is resting on. This machine doesn't seem to have a tray. Interesting...
EDIT: It dawned on me that I didn't say what the paint job was going to be. I've decided to combine two of my favorite things:
This color scheme:
And this paint style:
At first I was going to do a full fledged Van Halen inspired paintjob, but realized that with the window that I've chosen, it would look gaudy (among other things). I think the Denver Bronco colors are gonna look sweet with the window myself.
 Re: Quick fan mount...yeah right.
I have that SAME exact case. Got the old Micron back in 1996. I love those cases. You can take the drive cages completely out, put them back in, and basically do anything you want with them.
Coffee is love, coffee is life.
Re: Quick fan mount...yeah right.
Finally. It's mounted. And it don't look all that bad.
First off, I made a trip down to Ace Hardware. Spent $2.20 (by far the cheapest amount I've EVER spent there).
A selection of M4 nuts, bolts and washers.
One final mockup before digging out the Dremel and DeWalt:
Rough mockup of how I felt the layout should go. Note the trim laying under the window. It's going to be on the finished product:
A couple minutes of drilling through plastic and I got the first set of holes knocked out:
A little duct tape to temporarily hold the window in place:
Marked it up with the permanent marker, and drilled the holes. If anyone needs to do something similar, I cannot stress that going SLOW is the key here:
Which leads us to the final mockup:
Next step: Sanding and priming. After some more thought, I've dropped the Denver Bronco color scheme. This case is most decidedly 5150.
Feedback is welcome and appreciated as always.
Re: Quick fan mount...yeah right.
One quick update:
Primed. Will let it set and toss a few coats of white on them tomorrow and begin the tape job tomorrow night.
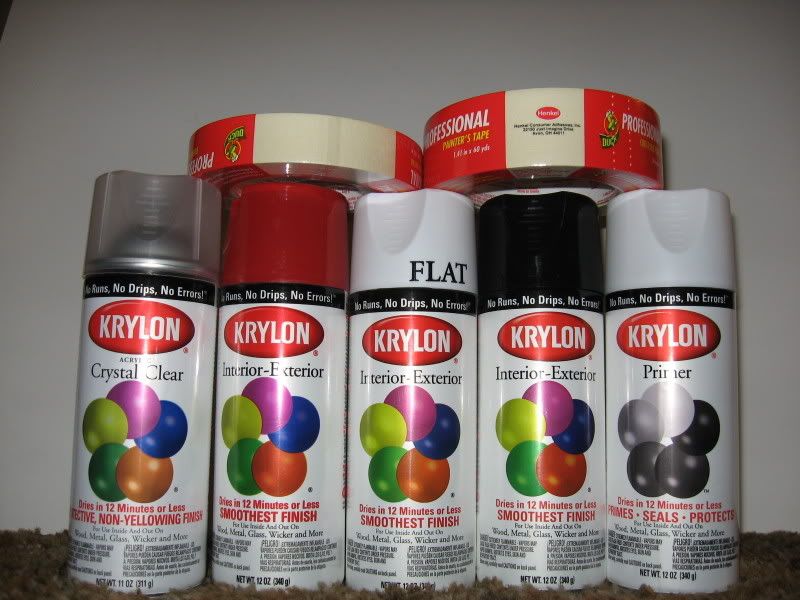
Also, I'll be priming the base and front panel tomorrow as well. Base will be getting straight black as the color and the front will be Banner Red Gloss according to the rattlecan.
Then I'll get to tear apart the CD-R drive and do the faceplate. That should be interesting.
 Posting Permissions

 Reply With Quote