I want moar!!!!


I want moar!!!!


holy cow how did I miss this? great mod idea! love C&C! good work on the fiberglass, really need to try that stuff out! +rep
Centurion 5 Mod <<--- ON HOLD FOR THE WINTEROriginally Posted by Omega

Very nice work. I am very impressed with how this is turning out.
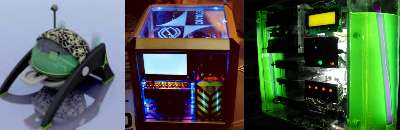
I am curious about that body kit front bumper in the background of some of your pics. I'm assuming it's fiberglass. I just want to know what it is for, looks like a Honda S2000 to me.

Wow is all i can say, good job man.
Can't wait to se this one finished, and the flamethrower is just crazy...me like alot

Update 2 - Devil's Tongue Flame Tank - 15 april 2008
I am so sorry it took this long, I had some problems with my internet provider which had to be resolved first (they took out my adsl for about 3 months).
I also was pretty occupied with my faforite sport:
But now I am back with another update.
I first want to thank for putting my mod in the modcast! thank you!
Now to the point, I promised a update on the tank, and here it is!
I did a lot of work on the shredder of the tank, I has a lot of custom component which had to be milled out of aluminium.
First I wanted to position the the spikes with the right spacing, so I marked it.
Now I bent a strip of aluminium around the tube so I have the correct angle of the spikes.
And with a permanent marker I marked the positions where the pins whould be drilled.
I then cut a strip of aluminium where the tubes could be mounted on.
I mounted the strip on the table so I could make it round.
the milling in progress.
Now you can see the difference between the strips.
This is how it looks, next to the tube.
And here with both strips rounded.
the strips need to hold a bearing, so i milled those holes too.
This foto shows the bearing mounted in the aluminium strip.
And here with both bearings mounted in the strips.
I also have a thicker strip of aluminium which eventually will be mounted to the tank and where the small strips can be attached to.
This thicker strip will house 2 bearings instead of one because the wheel driving system will be mounted in it.
You see the bearings mounted in this picture.
Now I am making a space for the smaller strip where it can be mounted on to.
Here the small strips are mounted on the larger one.
You can see the drive system mounted.
and once again with a example shaft.
I needed some special large gears so the tubes would rotate against each other.
milling, the block of aluminium with a special module.
as you can see it starts to look like a real gear.
I made two slices, one for each tube.
It will be mounted like this, the size is chosen just right for enough space to accomodate the spikes.
The same picture zoomed out.
The wheel needs a centerin hub where onto the rest could be mounted.
And centering a hole in the gear.
Here the hub and the gear attached to each other.
Here is a shot of both tubes mounted to each other.
And here I have it positioned to its future position.
The holes for the spikes need to be threaded so the spikes can be mounted firmly.
I make the spikes on my lathe, they are really sharp
the first one... (of 500)
You can see it take shape here...
and here with about a half tube finished, to indicate its destructiveness, when I lay this on my hand, I feel the spikes piercing my skin
I hope you enjoyed my new update and I hope to make a new one soon.

Finally an update! Things are looking good man keep up the good work & updates+rep i really like the spikes
- Computer-Geek

Wow, that spikes look really frightening! Have fun with the upcoming 250 ones
Great work on those shafts and gears and stuff. I wish I had access to those milling machines or even a lathe...
Looking forward to the next update!

All I can say is HOLY F'N SH$T MAN!!! +rep for sure.

*note to self....dont piss off cyclonite at a LAN ...HE WILL KILL YOU WITH A TANK*

Wow that is looking sweet, nice craftmanship there.
+Rep to you man
 Posting Permissions

 Reply With Quote